How to Create a MongoDB Database
Overview
CloudStick's visual database manager isn't limited to MySQL — it also lets you create and manage MongoDB databases directly from the dashboard, with no command line required. This is useful for applications that rely on MongoDB's document-oriented, schema-flexible data model rather than a traditional relational database.
This guide walks you through selecting your server, opening the Databases section, and using the Add New Database form to create a database with the Database Type set to MongoDB — including the collation, optional database user, privileges, and host settings.
MongoDB must be installed on the server before it appears as a selectable database type. If you haven't installed it yet, see How to Install MongoDB first.
Step 1: Select Your Server
Start from the main CloudStick dashboard, which lists every server connected to your account. Choose the server on which MongoDB is installed and where you want the new database to live.
Log in to your CloudStick dashboard.
Click the server card for the server you want to work with to open its server panel.
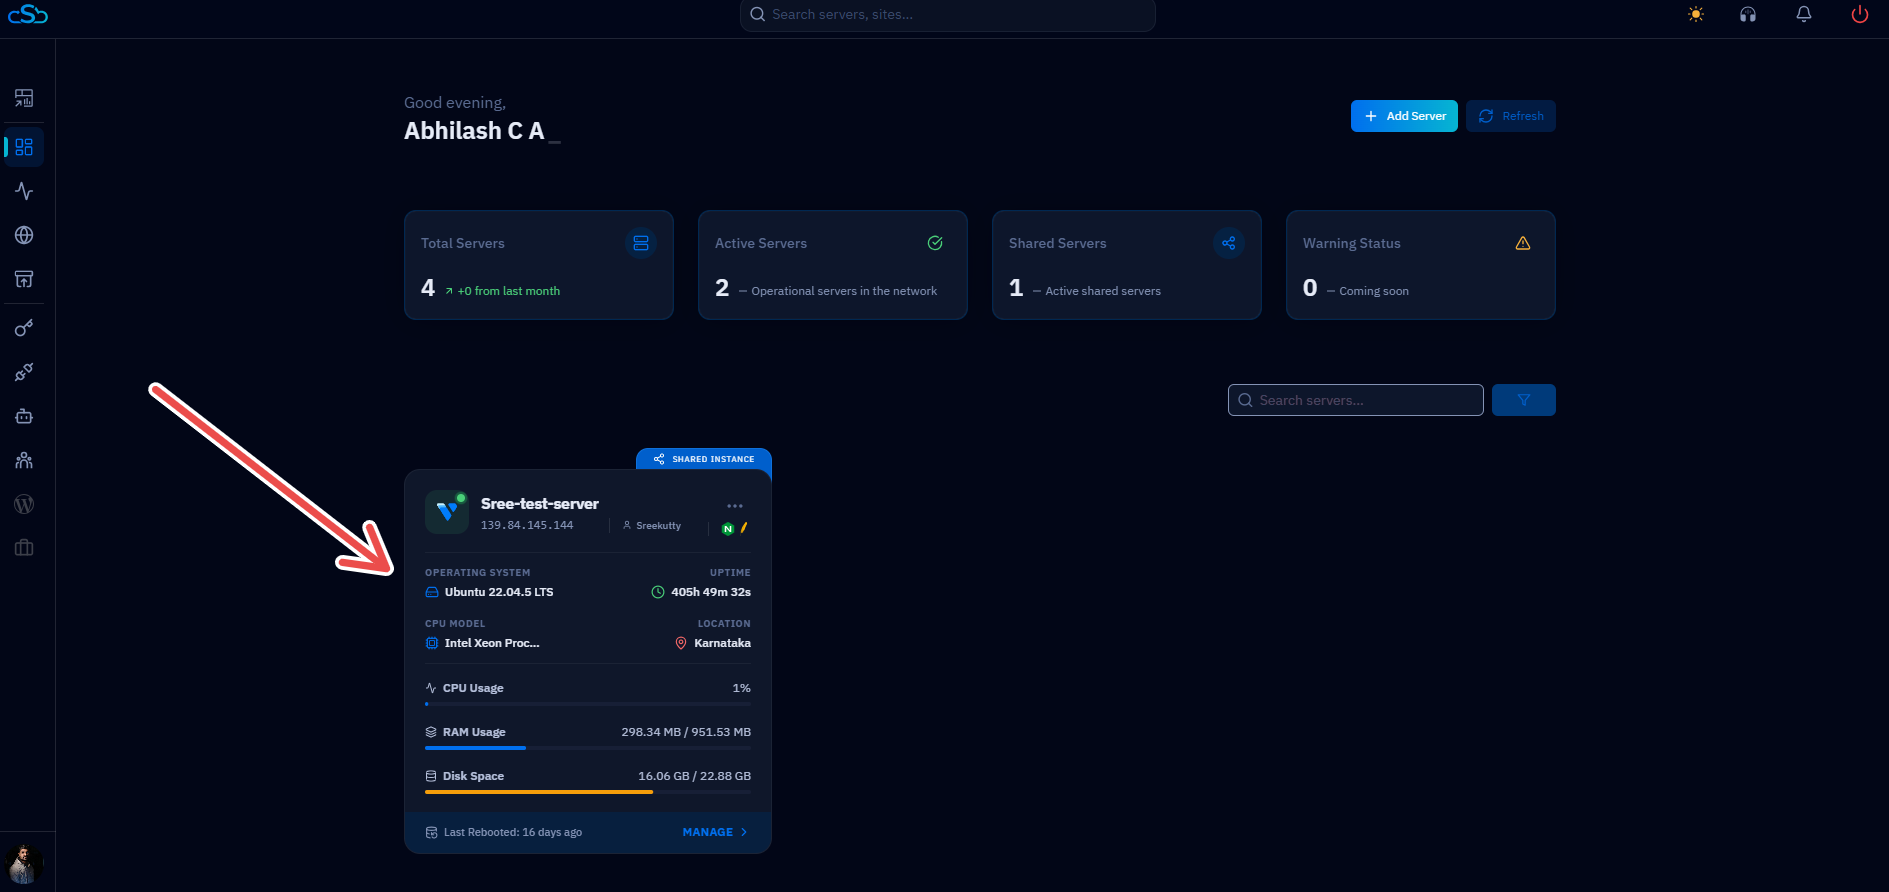
Fig. 01 — CloudStick dashboard listing connected servers. Click a server card to open its server panel.
Step 2: Open the Databases Section
Inside the server panel, the Databases section is accessible from the left-hand navigation. It lists every MySQL, PostgreSQL, and MongoDB database already created on this server.
In the left-hand navigation of the server panel, click the Databases icon.
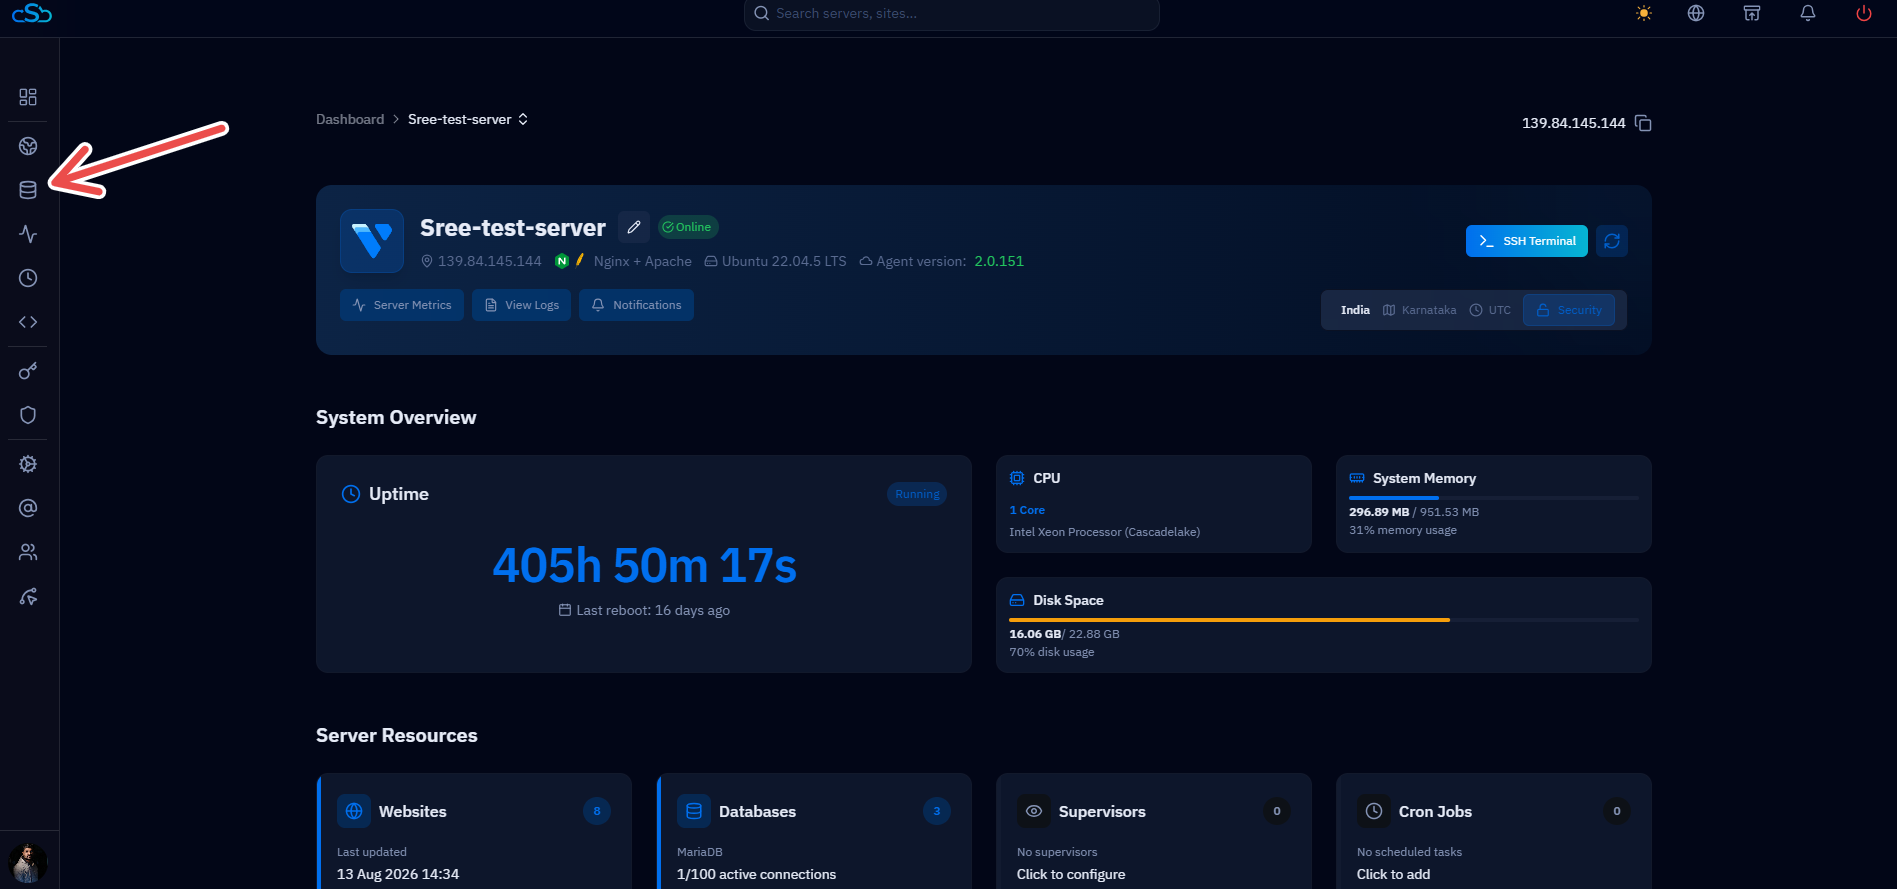
Fig. 02 — Server panel with the Databases icon highlighted in the left-hand navigation.
Step 3: Open the Create Database Form
The Databases section lists every database already on the server, along with quick links to phpMyAdmin, PostgreSQL, MongoDB, and Database Users across the top.
Click the blue + button in the top-right of the Databases section to open the Add New Database form.
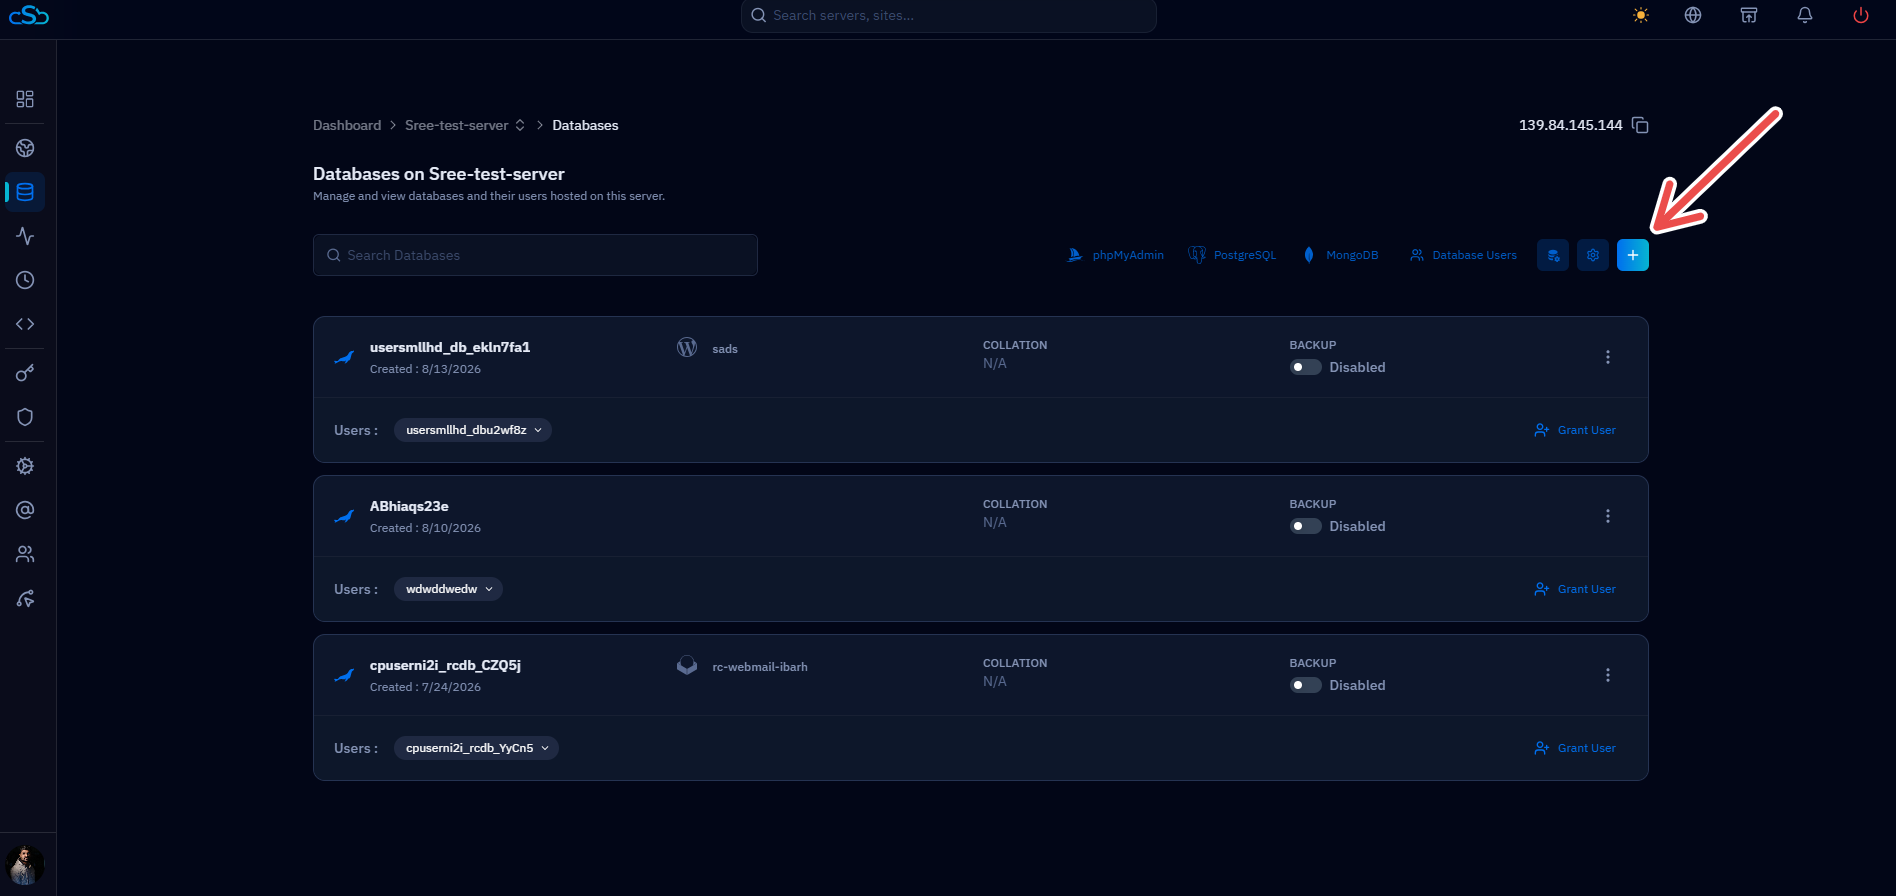
Fig. 03 — Databases section listing existing databases, with the + button that opens the Add New Database form.
Step 4: Configure and Create the MongoDB Database
The Add New Database form covers everything needed to provision a MongoDB database in one step: the database itself, an optional dedicated user, and the host it can be reached from.
Database Details
Database Name: Enter a descriptive name for your database, e.g. my_app_db. Use lowercase letters and underscores — no spaces.
Database Type: Select MongoDB from the dropdown instead of the default MySQL/MariaDB option.
Collation: Choose the collation for the database. Leave this at the default unless your application requires a specific locale or character set.
Database User Details (Optional)
If you leave these fields blank, the database will be accessible by the default root user instead. Creating a dedicated user per database is best practice, since it limits the blast radius if credentials are ever compromised.
Database User: Enter a username for the new database user, e.g. app_user.
Password: Enter a strong password. This is required if a Database User is set.
Privileges: Select the required privileges for the user. This is required if a Database User is set.
Host: Select Local Host to allow connections only from this server, or Remote Host to allow the database to be reached from elsewhere.
Only allow remote host connections when your application genuinely needs to reach this MongoDB database from outside the server — it widens the database's attack surface.
Once all fields are filled in, click Create Database at the bottom of the form.
CloudStick provisions the MongoDB database and user immediately, and it appears in your Databases list.
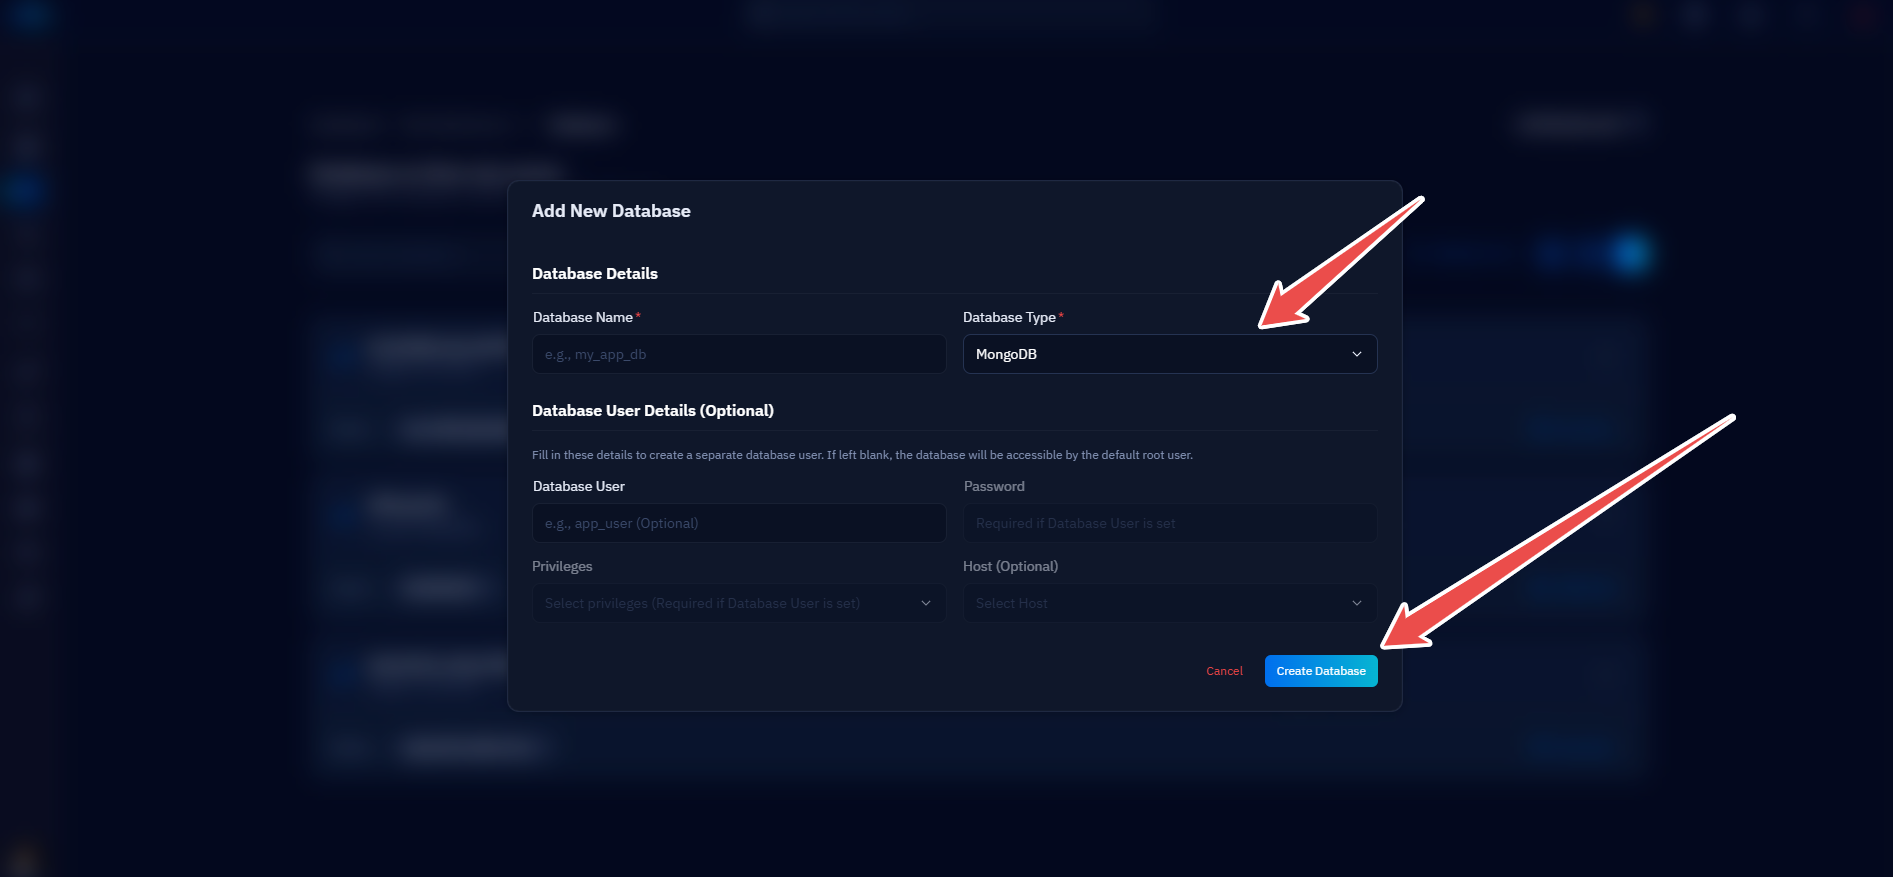
Fig. 04 — Add New Database form with Database Type set to MongoDB, ready to submit.