How to Install PostgreSQL
Overview
CloudStick's Database Engines panel lets you enable additional database engines beyond the default MariaDB installation — including PostgreSQL — directly from the dashboard. This is useful when an application you're deploying (such as a Django, Rails, or Node.js project) is built to run on PostgreSQL rather than MySQL/MariaDB, and you need it available on the server without touching a terminal.
This guide walks you through selecting your server, opening the Database Engines panel, choosing a PostgreSQL version, and enabling the installation with a single click.
Your server must already be connected and active in CloudStick before you can install PostgreSQL. If you have not yet connected a server, see How to Deploy Your Own Server first.
Step 1: Select Your Server
Start from the main CloudStick dashboard, which lists every server connected to your account. PostgreSQL is installed per-server, so pick the specific server you want it available on.
Log in to your CloudStick dashboard.
From the server list, click the server where you want to install PostgreSQL to open its server panel.
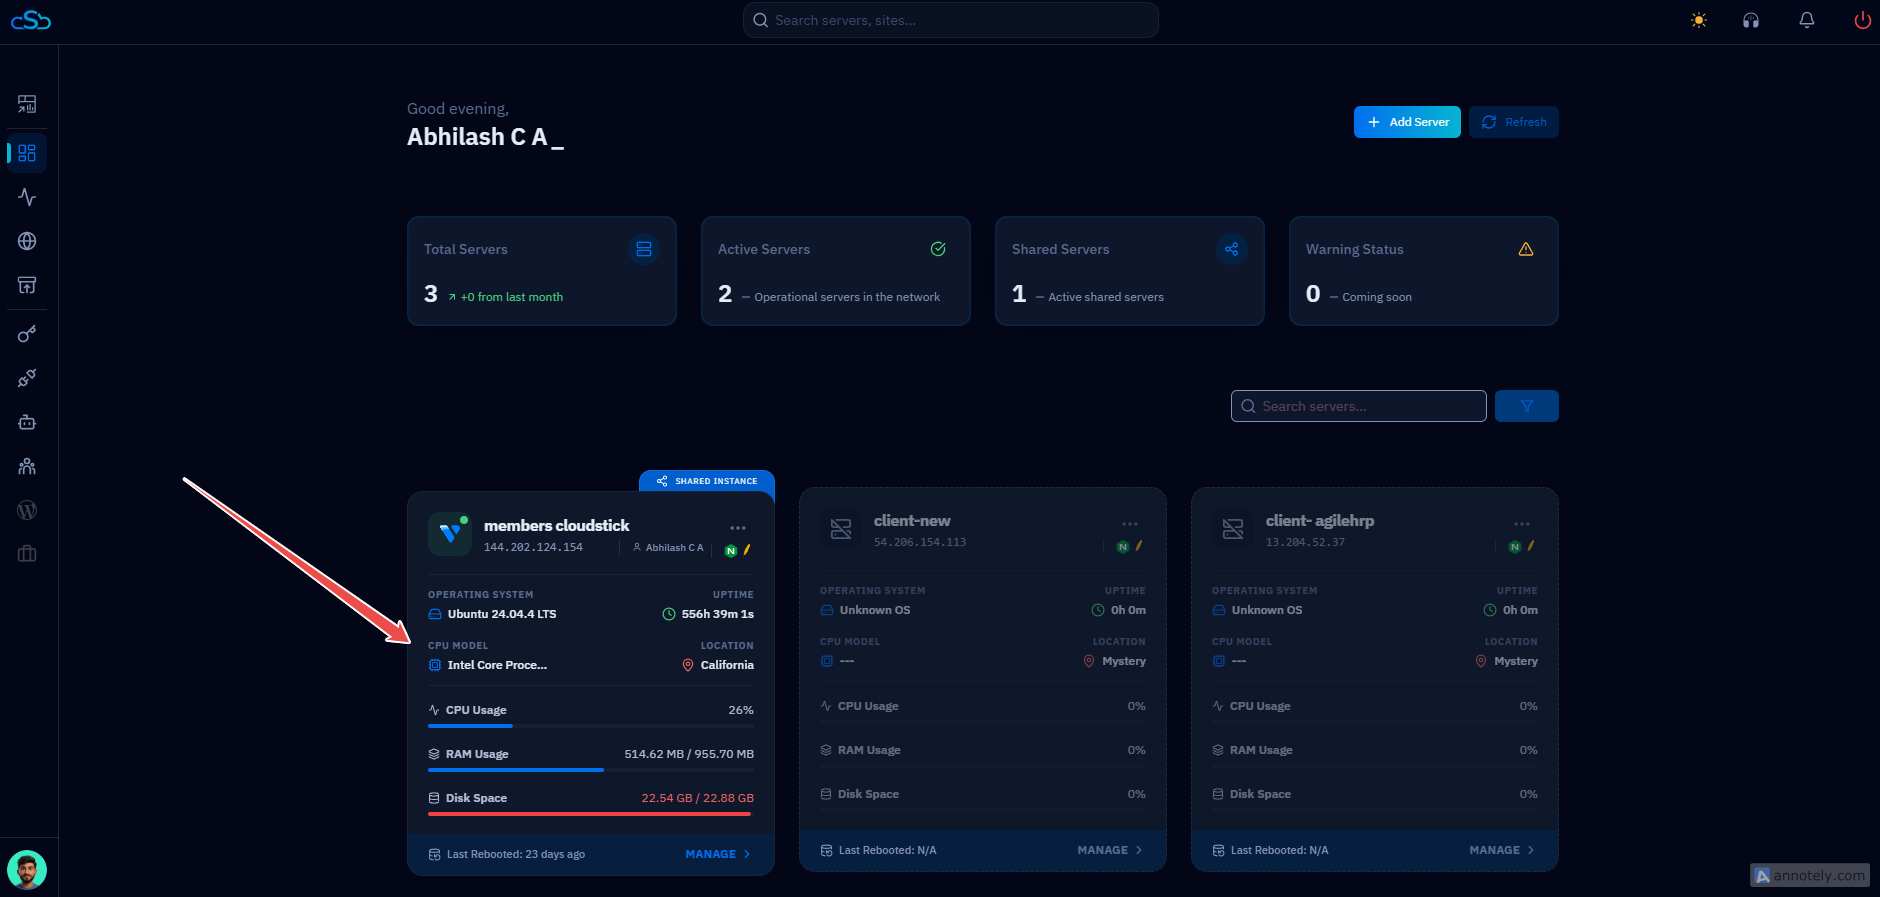
Fig. 01 — CloudStick dashboard showing connected servers. Click a server to open its server panel.
Step 2: Navigate to the Databases Section
Once inside the server panel, the Databases section is accessible from the left-hand navigation. This is where all database engines, existing databases, and database users are managed.
In the server panel's left-hand navigation, click the Databases icon.
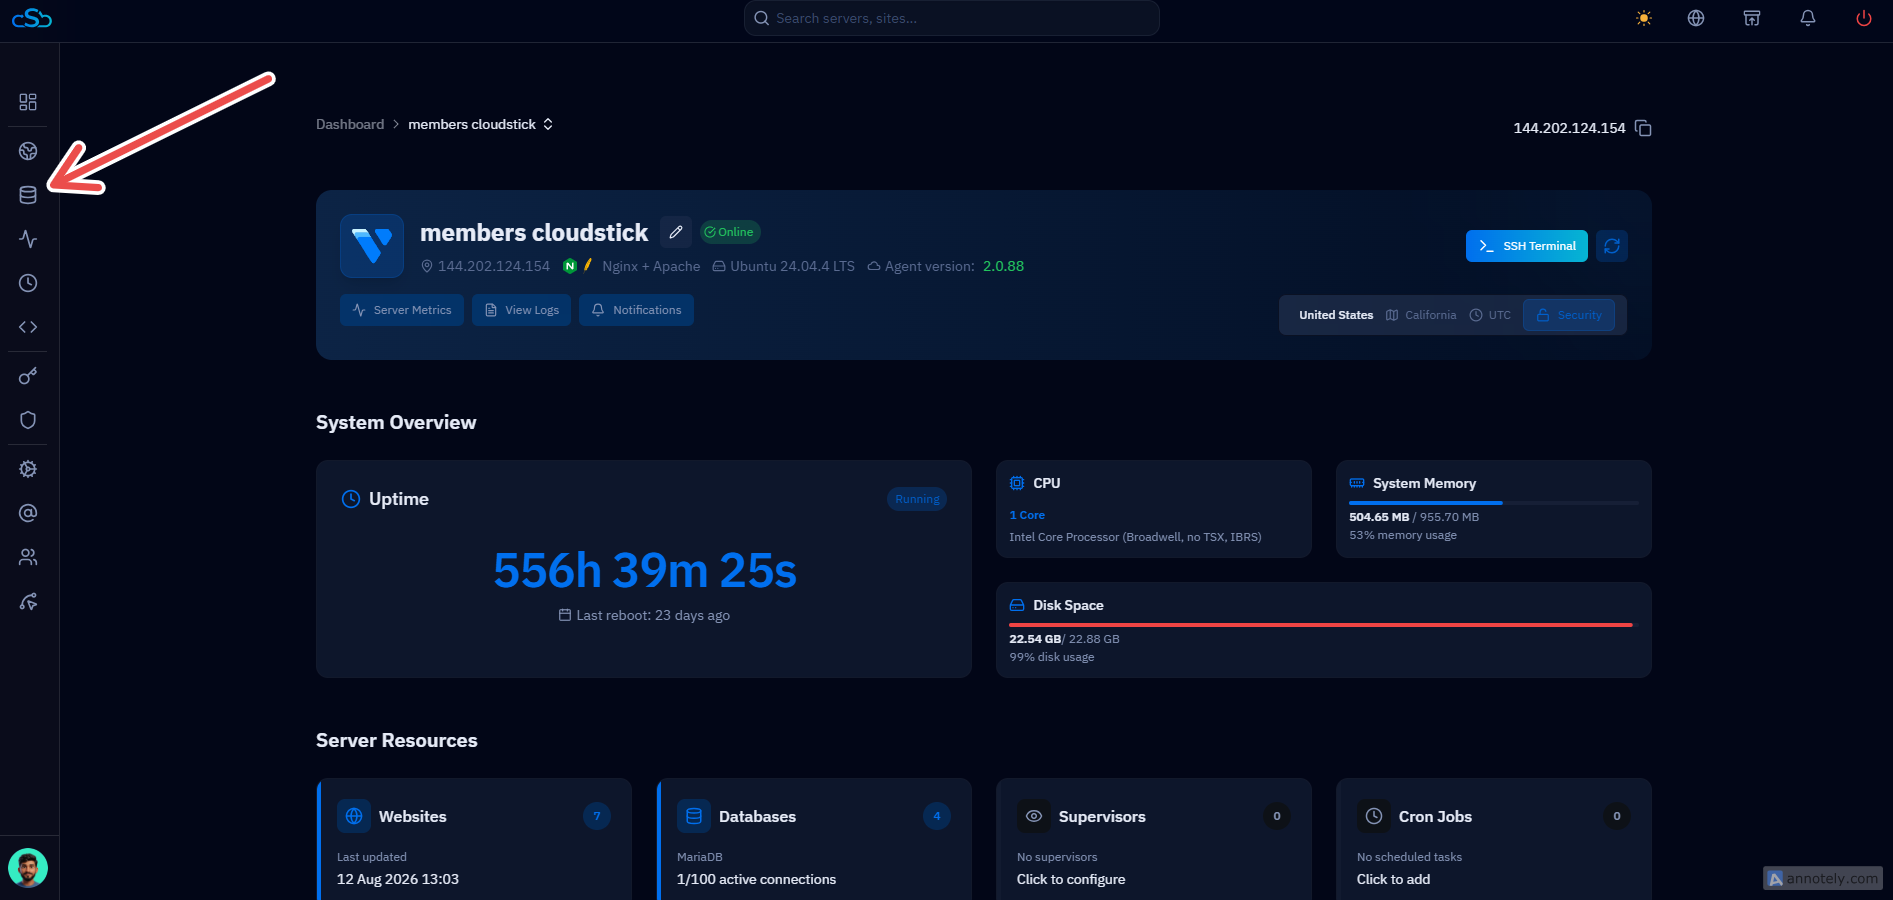
Fig. 02 — Server panel with the Databases icon highlighted in the left-hand navigation.
Step 3: Open Database Engines
The Databases page lists every database on the server, and its top-right toolbar includes shortcuts for phpMyAdmin, Database Users, and Database Engine. Opening Database Engine reveals which engines are already installed and which are available to enable.
On the Databases page, click the Database Engine icon in the top-right toolbar.
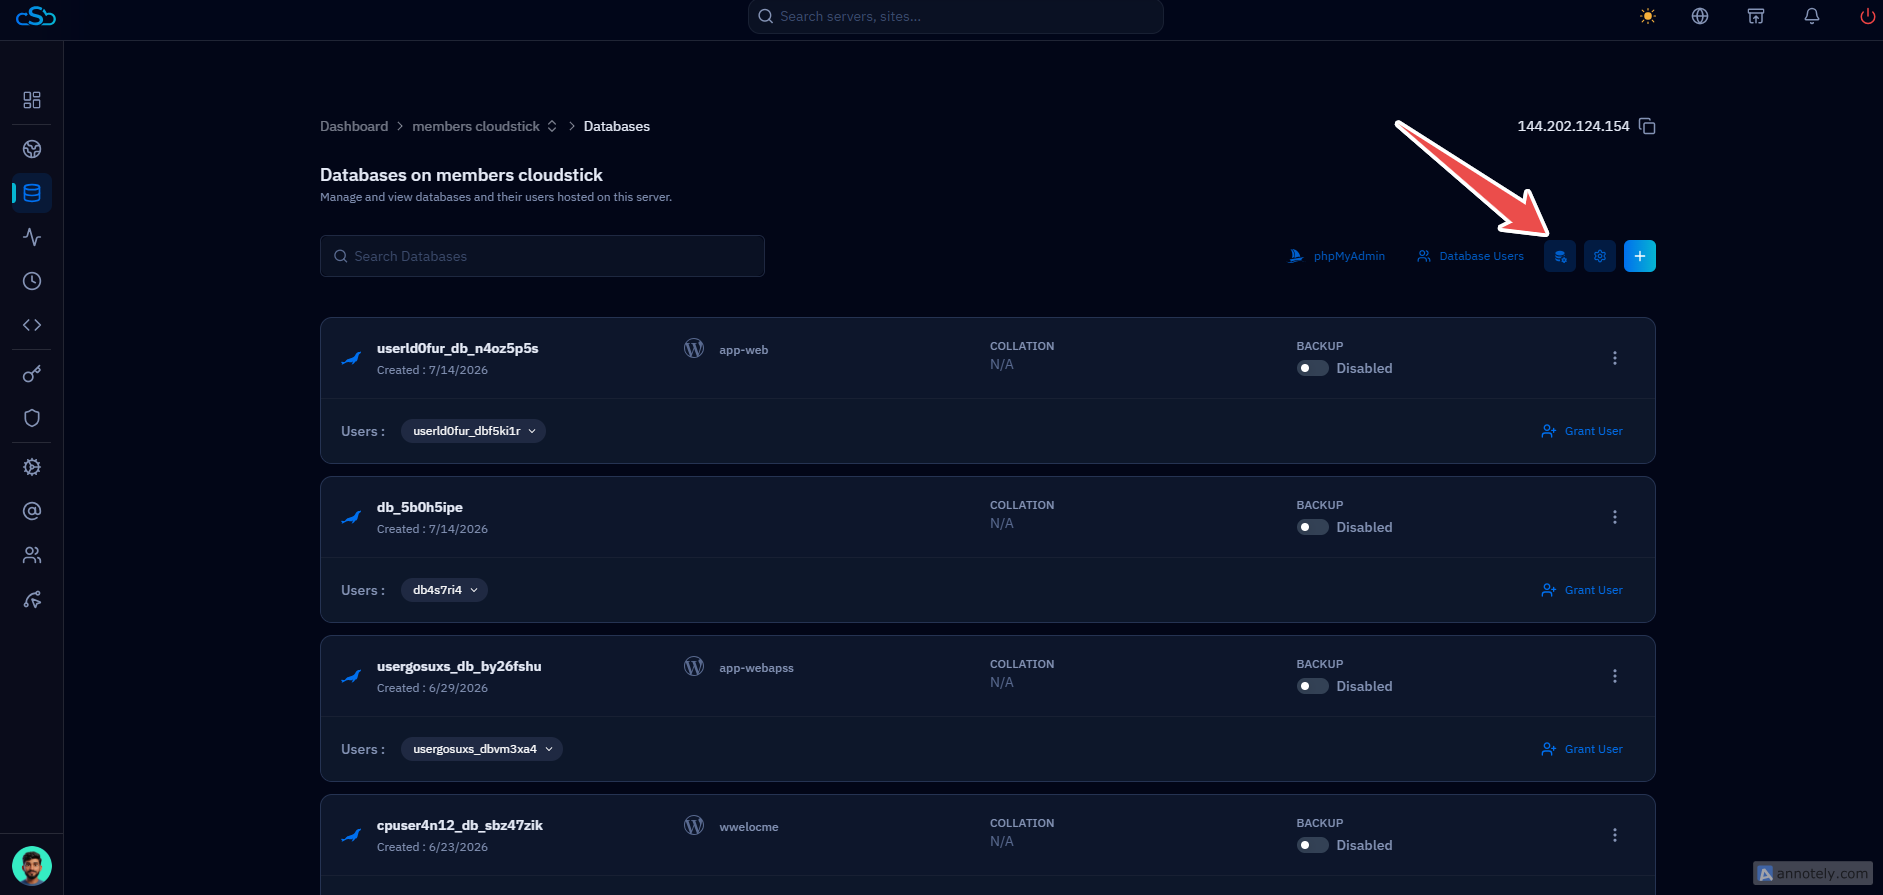
Fig. 03 — Databases page with the Database Engine icon highlighted in the top-right toolbar.
Step 4: Enable PostgreSQL
The Database Engines modal lists every engine CloudStick supports. MariaDB is always installed by default, while MySQL, PostgreSQL, and MongoDB can be enabled individually as your applications require them.
Locate PostgreSQL: Find the PostgreSQL row in the Database Engines list — it will be marked Not installed.
Choose a version: Use the version dropdown to select the PostgreSQL release you need, e.g. 16, 15, or 14.
Enable: Click the Enable button next to PostgreSQL to start the installation.
Enabling an engine does not create a database for you — it only installs the engine on the server. Create the actual database afterwards from the Databases section.
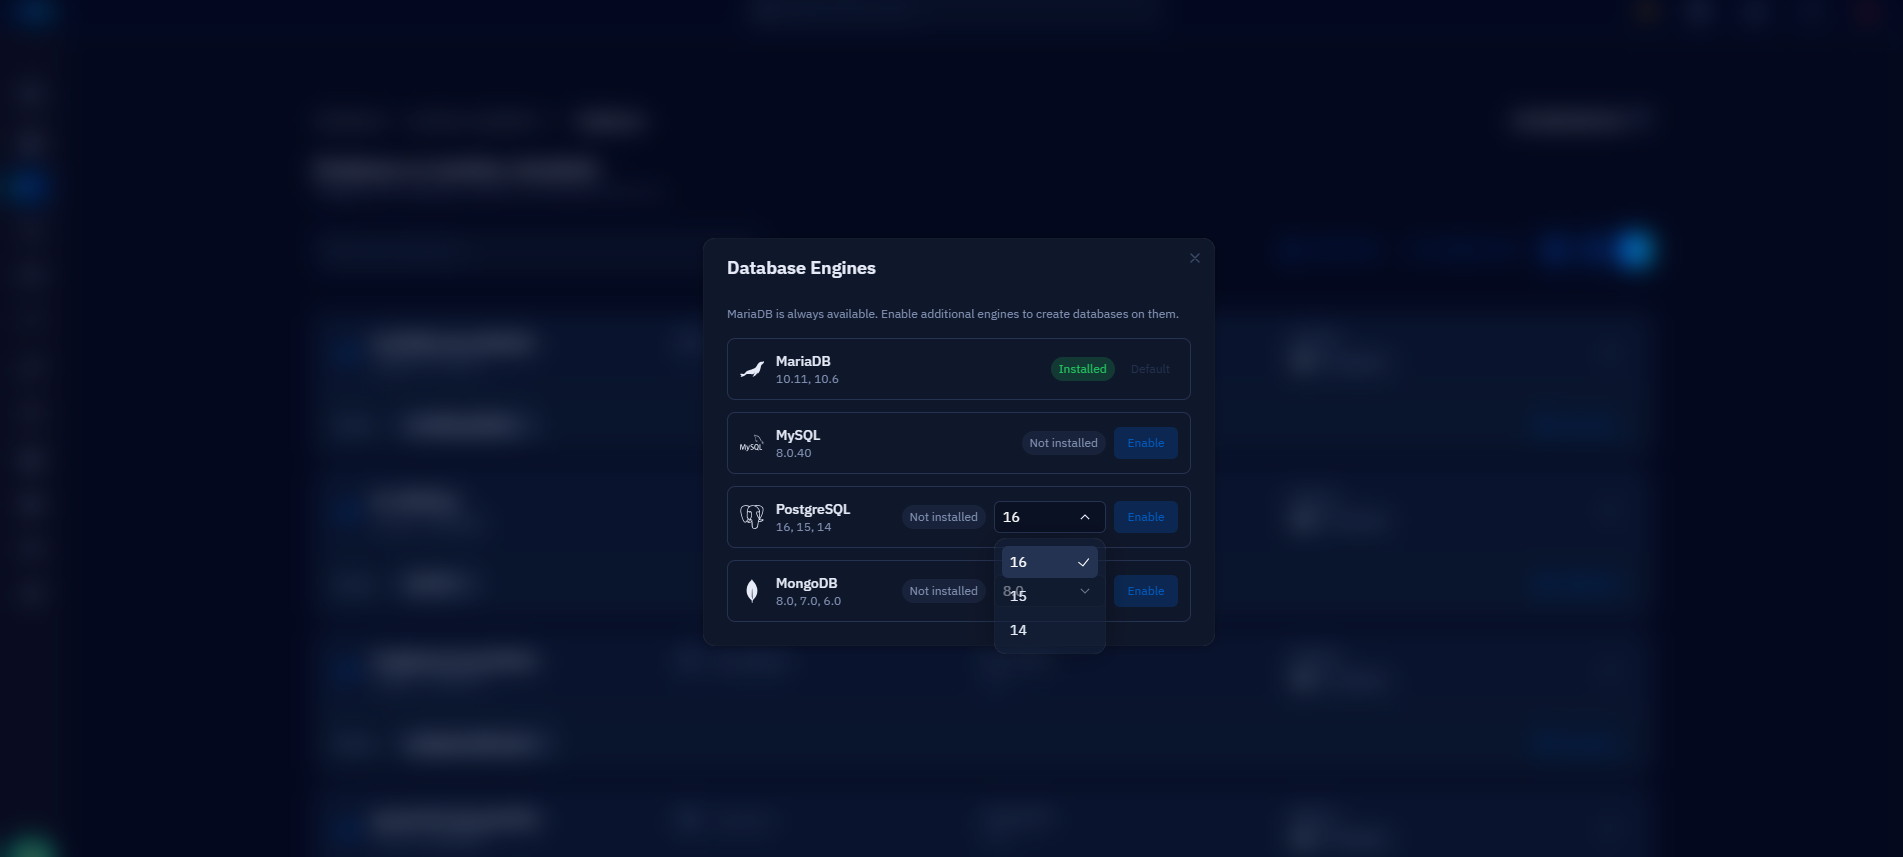
Fig. 04 — Database Engines modal with PostgreSQL version 16 selected, ready to enable.
Step 5: Confirm the Installation
CloudStick installs PostgreSQL on the selected server in the background. Once the installation finishes, a new PostgreSQL shortcut appears in the Databases page toolbar alongside phpMyAdmin, confirming the engine is ready to use.
Wait for CloudStick to finish installing PostgreSQL on your selected server.
Return to the Databases page — a PostgreSQL link will now appear in the top-right toolbar.
PostgreSQL is now available on this server. You can create PostgreSQL databases and users the same way you create MySQL/MariaDB ones from the Databases section.
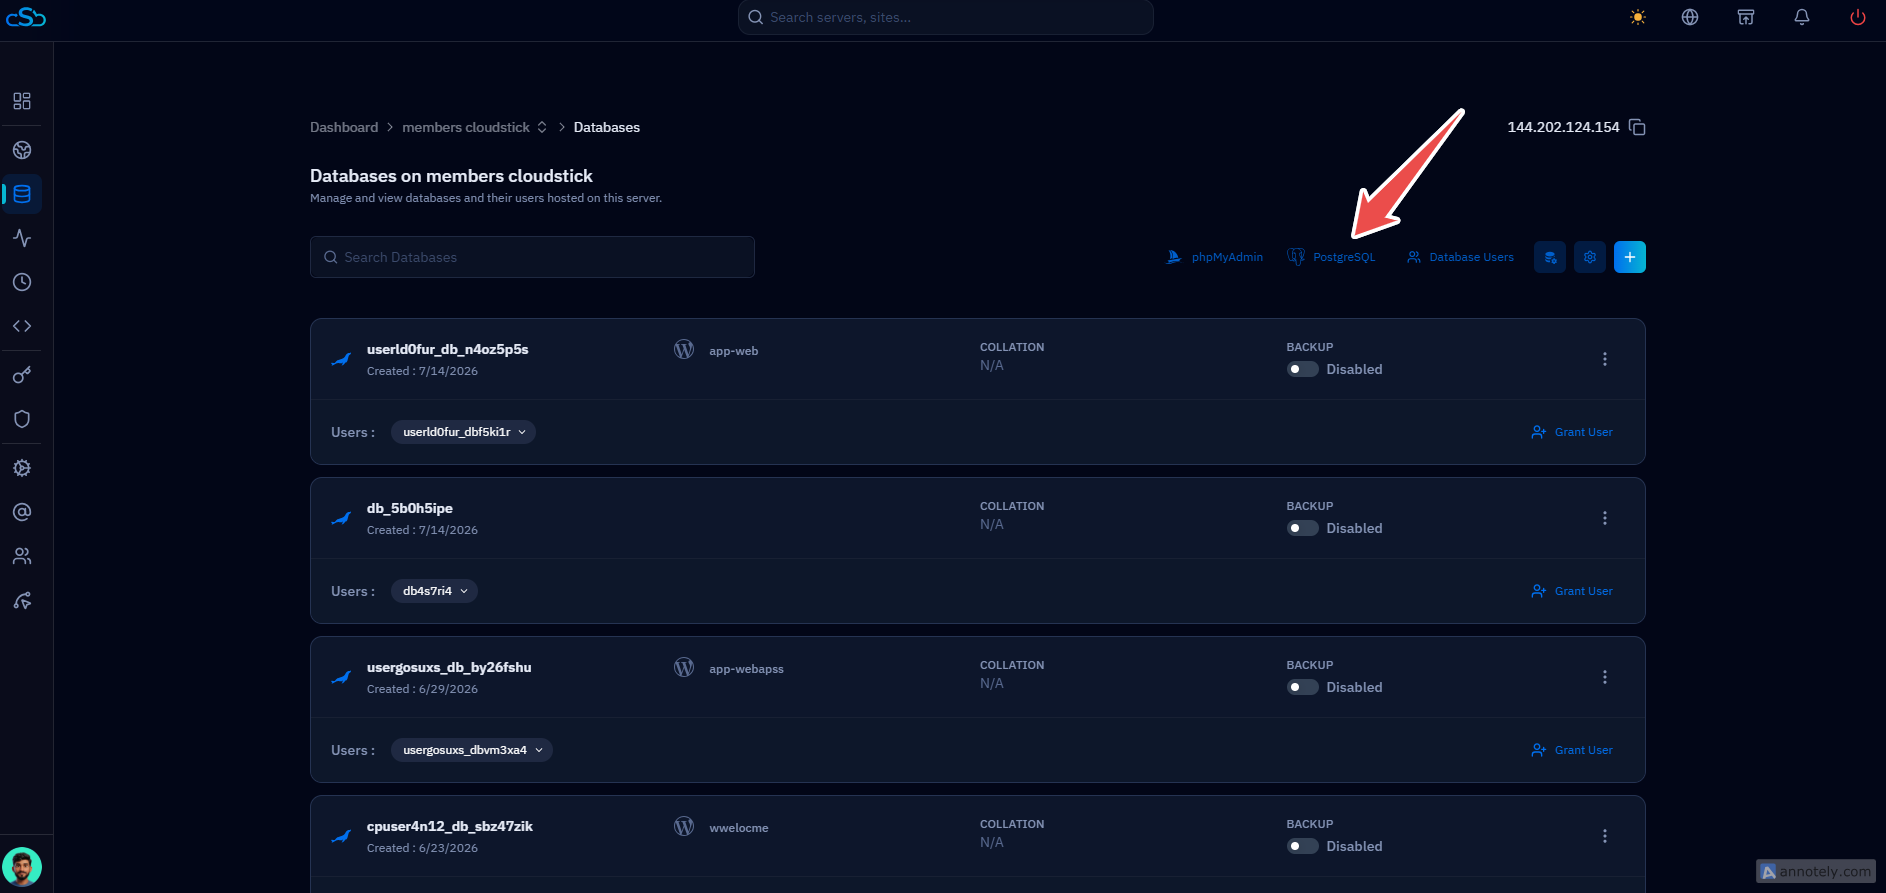
Fig. 05 — Databases page toolbar now showing a PostgreSQL shortcut, confirming the engine is installed.