How to Add Environment Variables to a Laravel Application in CloudStick
Overview
CloudStick includes a built-in Laravel Environment Manager that lets you view, add, and manage the environment variables for your Laravel application directly from the dashboard. This replaces the need to manually edit the .env file on your server via SSH or SFTP — everything is handled through a clean, visual interface.
Use this guide whenever you need to add a new configuration value to your Laravel app — such as a third-party API key, a database connection string, or a mail driver credential. Every Laravel application relies on a .env file to store environment-specific settings, and CloudStick's Environment Variables panel reads from and writes to that file through the dashboard. Any variable you add here will be available in your Laravel app via the env() helper or config() calls.
A Laravel application must already be deployed on your CloudStick server before following this guide. If you have an existing custom PHP application and want to enable the Laravel Environment Manager for it, you will need to convert it first — see How to Enable Laravel Environment Manager in an Existing Application.
Step 1: Navigate to Your Laravel Application
Start from the main CloudStick dashboard and drill down to the specific Laravel site where you want to manage environment variables.
1. Log in to your CloudStick Dashboard: Go to dash.cloudstick.io and sign in to your account.
2. Select your server: From the dashboard, click on the server where your Laravel application is hosted.
3. Go to Websites: Click on Websites from the left-hand server navigation menu.
4. Open your Laravel application: Click on the name of your Laravel application. You will land on the website summary page, which shows your domain, PHP version, root path, system user, and website status.
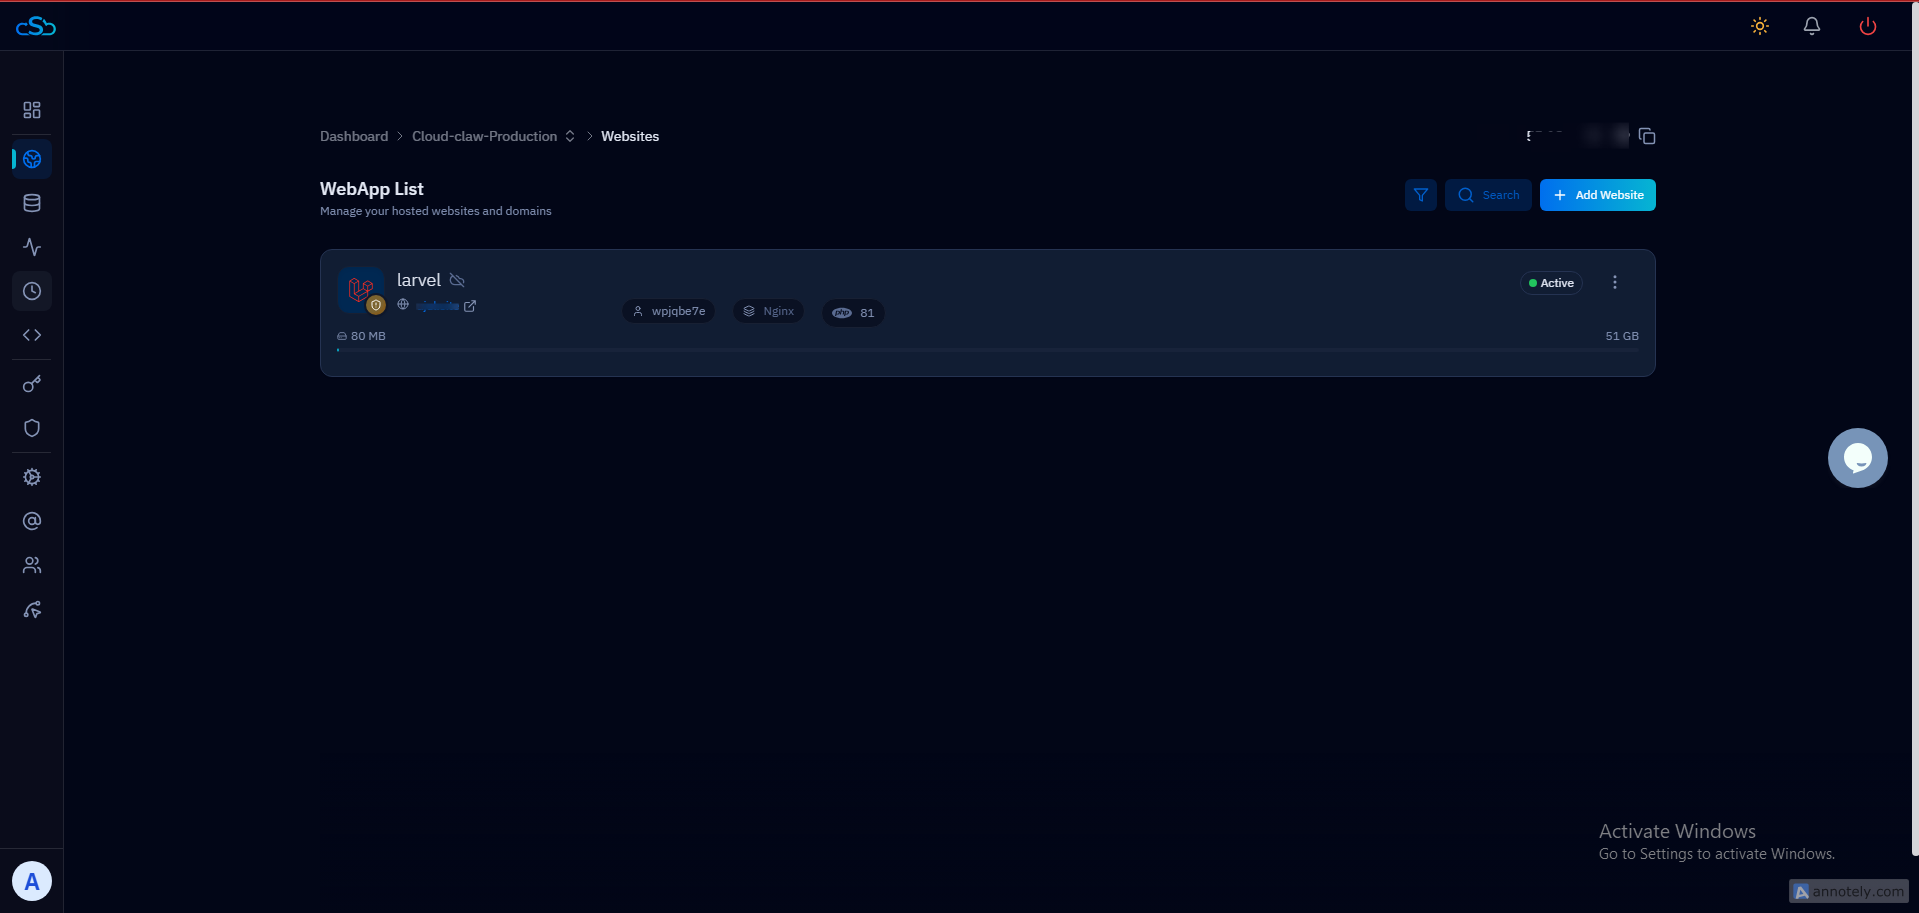
Fig. 01 — CloudStick dashboard showing the server list and Websites navigation.
Step 2: Open the Environment Variables Panel
Once inside your Laravel application, navigate to the dedicated environment variables section where all current .env values are displayed and managed.
1. Click Environment Variables: In the top navigation tabs of your website detail page, click on Environment Variables.
2. Review existing variables: You will see the Laravel Environment Variables section listing all current variables — such as APP_NAME, APP_ENV, and APP_KEY — alongside their values.
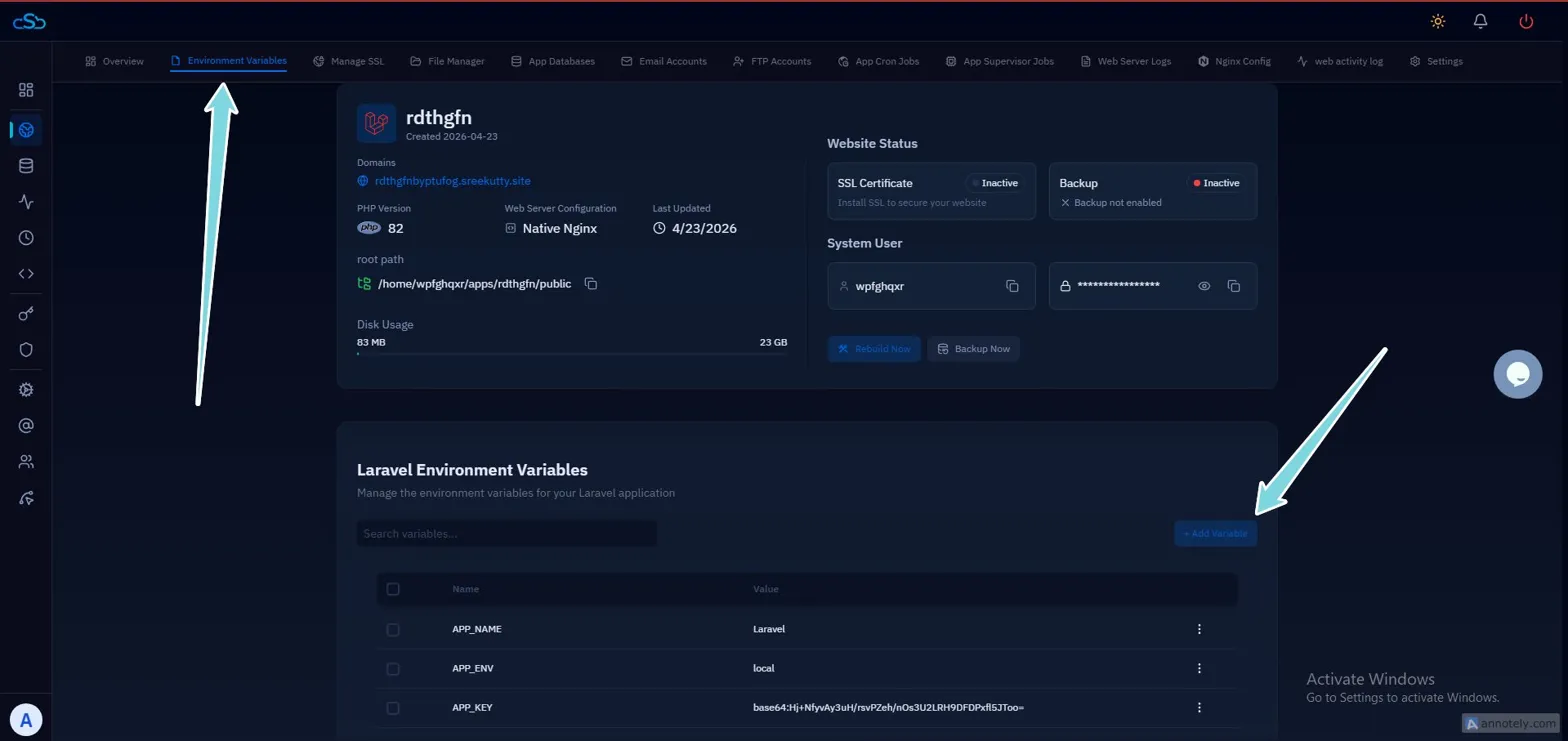
Fig. 02 — The Environment Variables panel showing the current list of .env variables for the Laravel application.
Step 3: Add Your Variables
CloudStick lets you add one variable at a time or multiple variables in a single save. Use the + Add Variable button to open the input form.
1. Open the Add Variable form
In the top right of the variables section, click the + Add Variable button.
You will be taken to the Add Laravel Environment Variables page.
2. Enter the variable name and value
You will see two fields for each variable row:
NAME: Enter the variable name in uppercase with underscores — for example, MAIL_HOST or STRIPE_SECRET_KEY. Laravel convention is ALL_CAPS_WITH_UNDERSCORES.
VALUE: Enter the corresponding value for that variable.
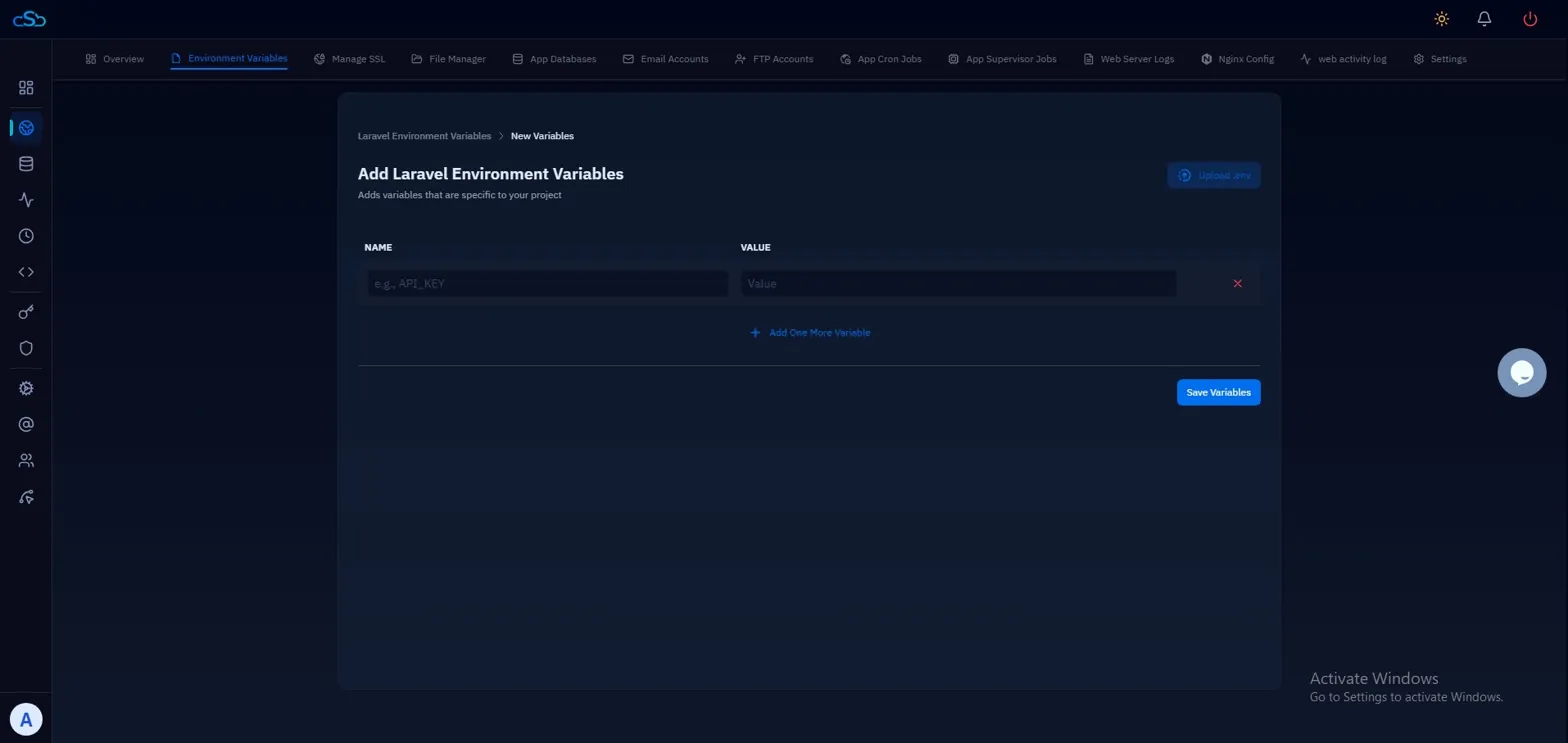
Fig. 03 — The Add Laravel Environment Variables form with NAME and VALUE fields.
3. Add more variables in the same session
If you have additional variables to add without saving between each one, click + Add One More Variable. A new row will appear — repeat for as many variables as needed before saving.
Variable names are case-sensitive. Using lowercase or mixed case will work, but it is inconsistent with how Laravel and most packages expect them. Sensitive values like API keys and passwords should only be entered here and never hardcoded in application files or committed to version control.
Step 4: Upload an Existing .env File (Optional)
If you already have a complete .env file prepared — for example, copied from your local development environment — you can upload it directly instead of entering variables one by one. This is especially useful when migrating a Laravel application to a new server.
1. Click Upload .env: In the top right corner of the Add Laravel Environment Variables page, click the Upload .env button.
2. Select your file: Choose the .env file from your local machine. CloudStick will parse the file and populate all variables from it.
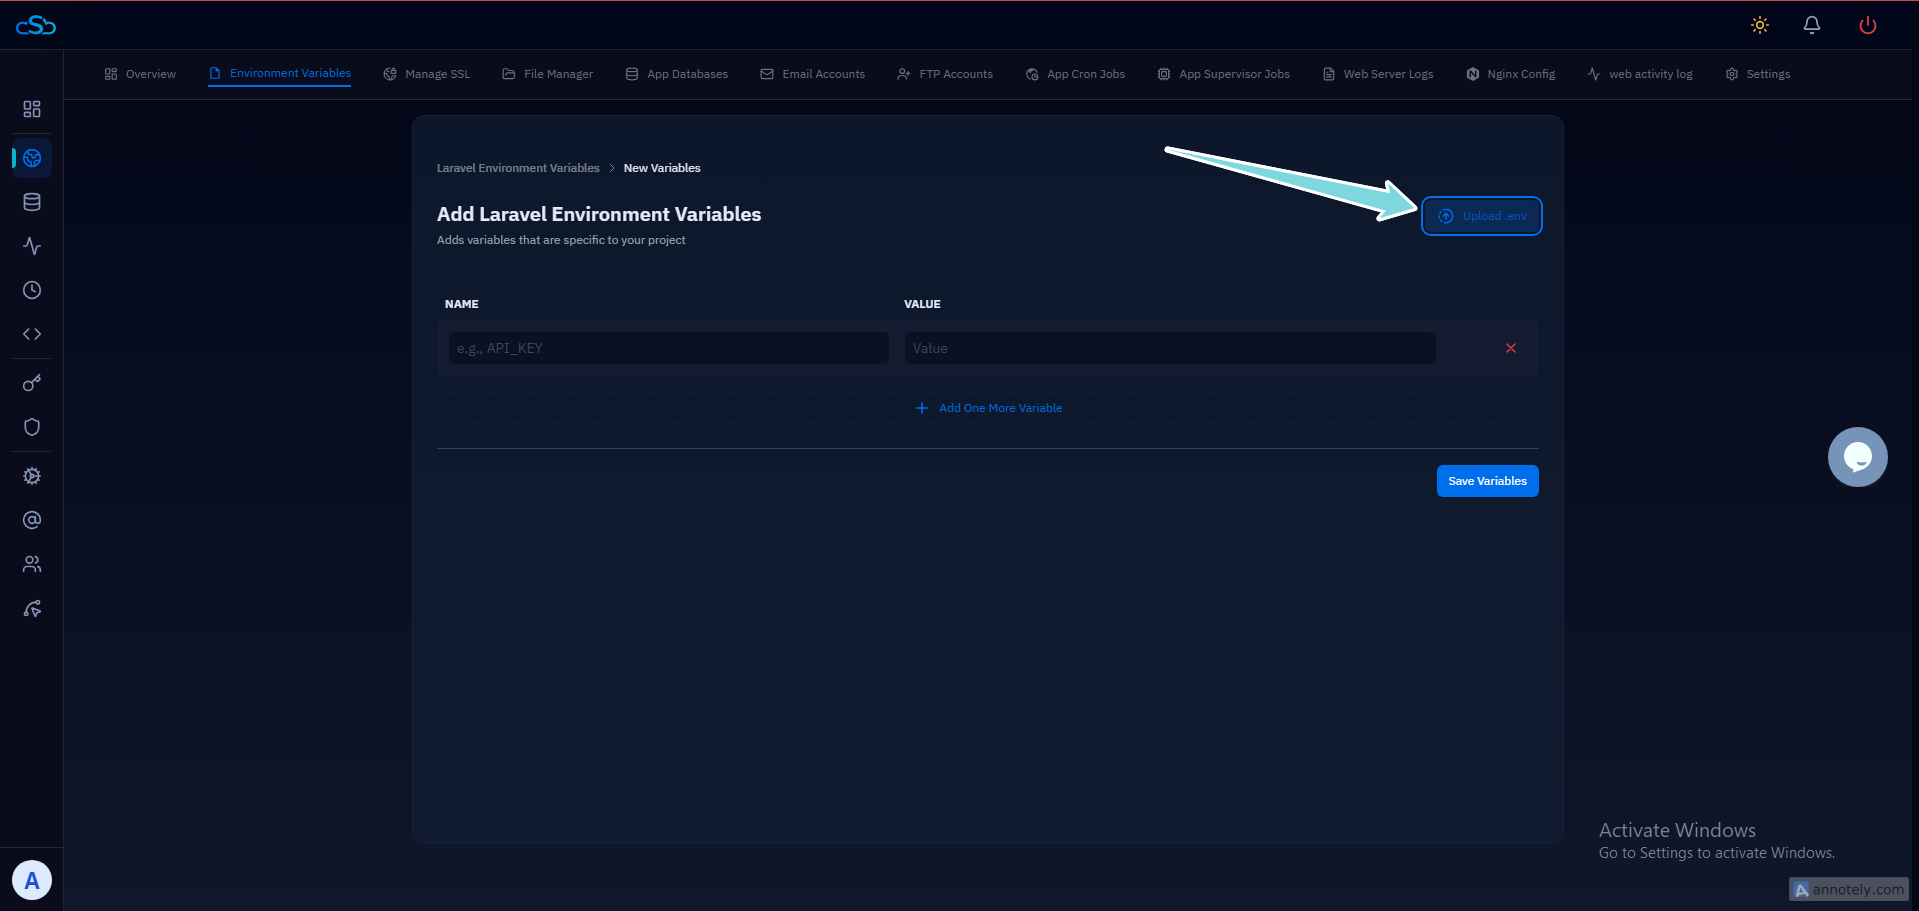
Fig. 04 — The Upload .env button for importing a complete environment file directly.
Step 5: Save and Verify
Once all variables are filled in — whether entered manually or uploaded — save them to write the changes to your application's .env file on the server.
1. Save the variables
Click the Save Variables button. CloudStick will write these to your application's .env file on the server.
You will be returned to the Environment Variables list. The new variables will appear in the table alongside their values.
2. Verify the result
After saving, confirm the new variables appear correctly in the Environment Variables list. Your Laravel application will pick up these changes on the next request — no server restart is required for .env changes in most standard configurations.
If your app caches its configuration using php artisan config:cache, new .env values will not take effect until the cache is cleared. You can do this via SSH by running php artisan config:clear. To edit or delete an existing variable, go back to the Environment Variables list and click the three-dot menu (⋮) on the right side of any variable row.