How to Deploy Laravel in CloudStick
Overview
Laravel is one of the most popular PHP frameworks for building modern web applications, and CloudStick lets you deploy a fresh Laravel installation directly from the dashboard — without manually configuring a web server, PHP settings, or directory structure. When you deploy Laravel through CloudStick, the platform provisions a new web application on your selected server, installs Laravel, sets up the database, and configures the correct PHP environment automatically.
This is the quickest way to get a new Laravel project running on a server you've already connected to CloudStick. You don't need to run composer create-project or configure Nginx by hand. Once deployment is complete, you'll be taken to the website summary page, where you can find your SFTP credentials, manage SSL, and access every other setting for the application.
Before you begin, make sure a server is already added and active in your CloudStick account, running Ubuntu 20.04, 22.04, or 24.04 LTS, and have a domain name ready to point to your server's IP address.
Step 1: Log In and Select Your Server
Laravel is deployed onto a specific server, so start by signing in and opening the server where you want the application to live.
Log in to your CloudStick Dashboard: Go to dash.cloudstick.io and sign in with your credentials. The dashboard lists all the servers connected to your account.
Select your server: Click the server card where you want to deploy the Laravel application to open its management panel.
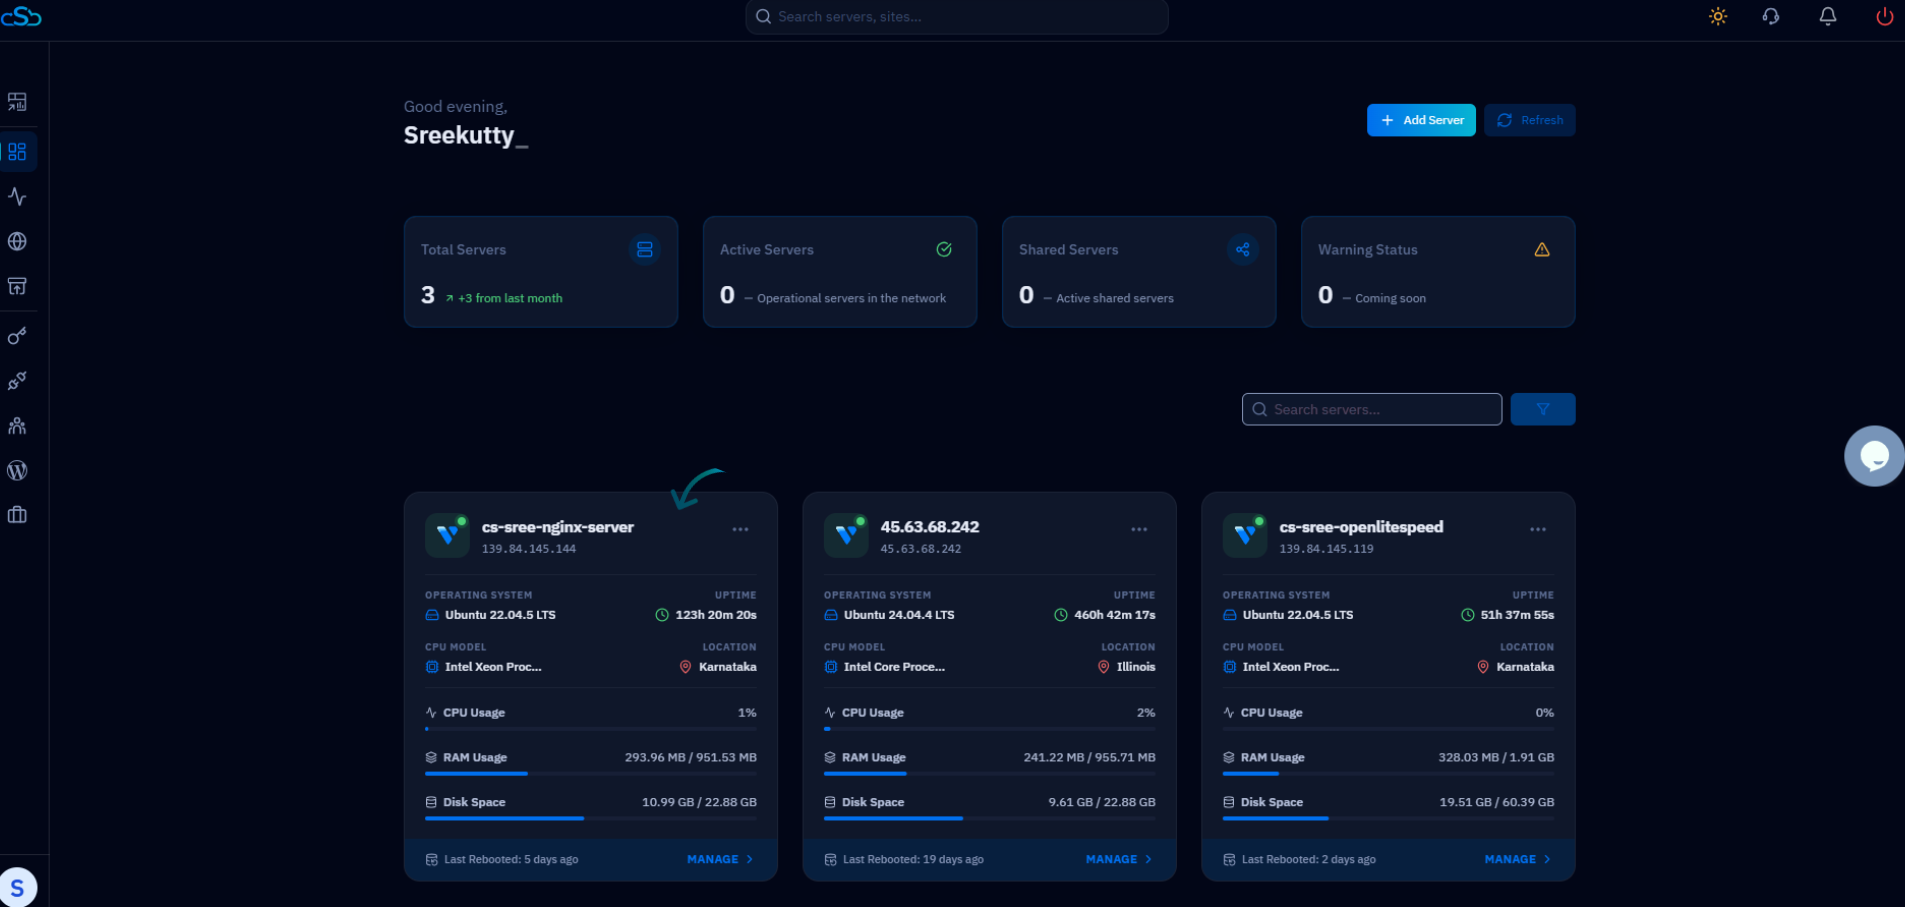
Fig. 01 — CloudStick dashboard showing the connected servers. Click the server where you want to deploy Laravel.
Step 2: Open the Websites Section
All web applications — including Laravel — are created and managed from the Websites section of the server panel.
Click on Websites: In the server panel, click Websites from the left-hand navigation, or open the Websites card under Server Resources. This shows all web applications currently hosted on the server.
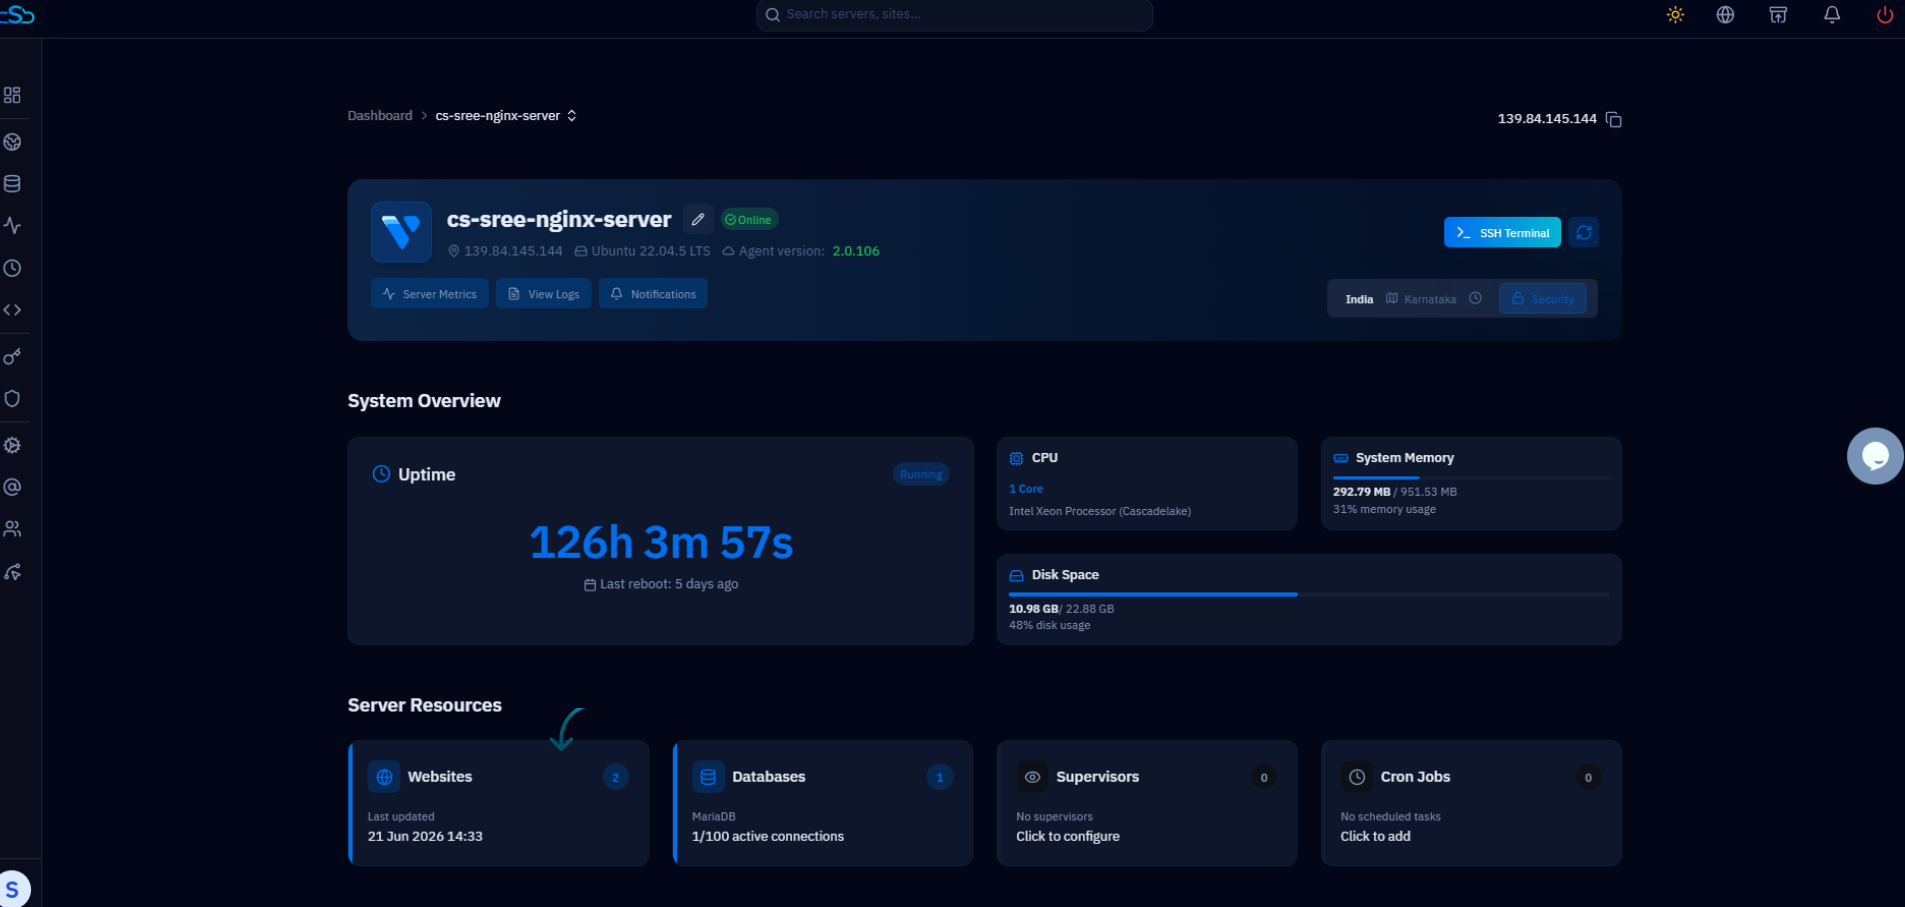
Fig. 02 — Server panel showing the Websites card under Server Resources. Click it to open the websites list.
Step 3: Click Add Website
You initiate a new deployment from the Websites list using the Add Website button.
Click + Add Website: On the Websites page, click the blue + Add Website button in the top-right corner. This opens the Create New Website panel where you choose from the available application stacks.
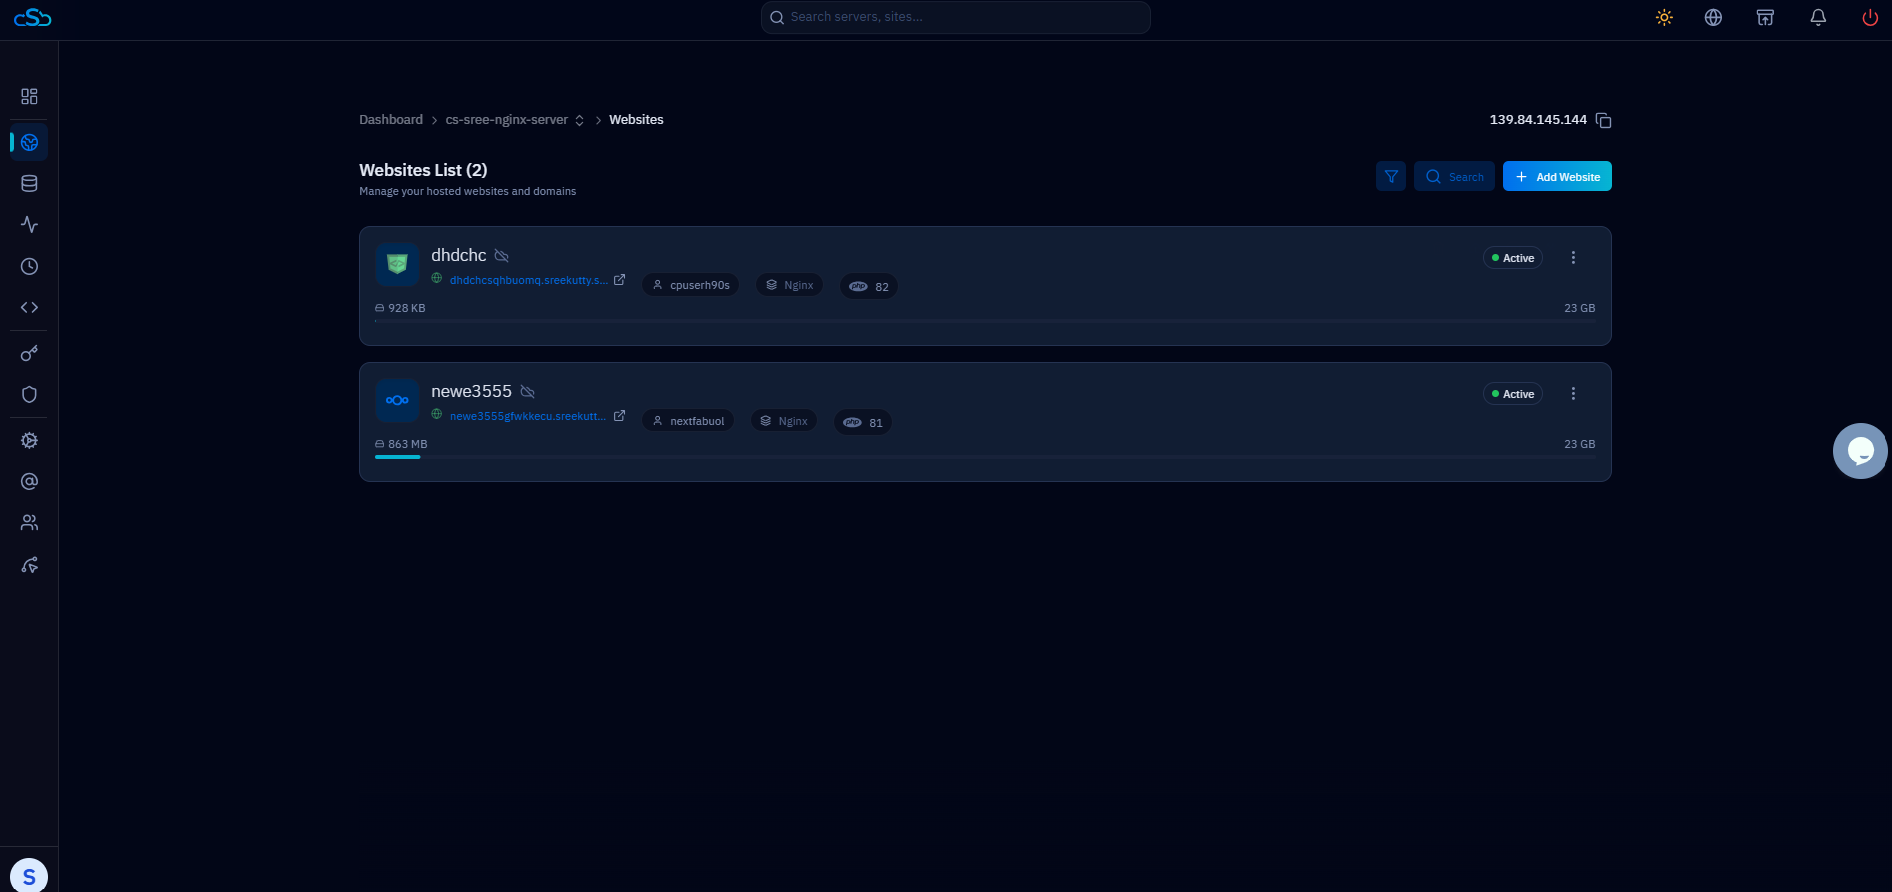
Fig. 03 — Websites list with the + Add Website button highlighted in the top-right corner.
Step 4: Select Laravel as the Application Type
CloudStick supports one-click deployment of several popular PHP applications. Choose Laravel from the application grid to load its configuration form.
Find Laravel in the grid: The Create New Website panel displays available stacks including White Label, WordPress, Custom PHP, Proxy App, phpMyAdmin, NextCloud, Laravel, MediaWiki, and WooCommerce.
Click Select on the Laravel card: Locate the Laravel card (labelled PHP framework for web applications) and click its Select → button to open the Laravel configuration form.
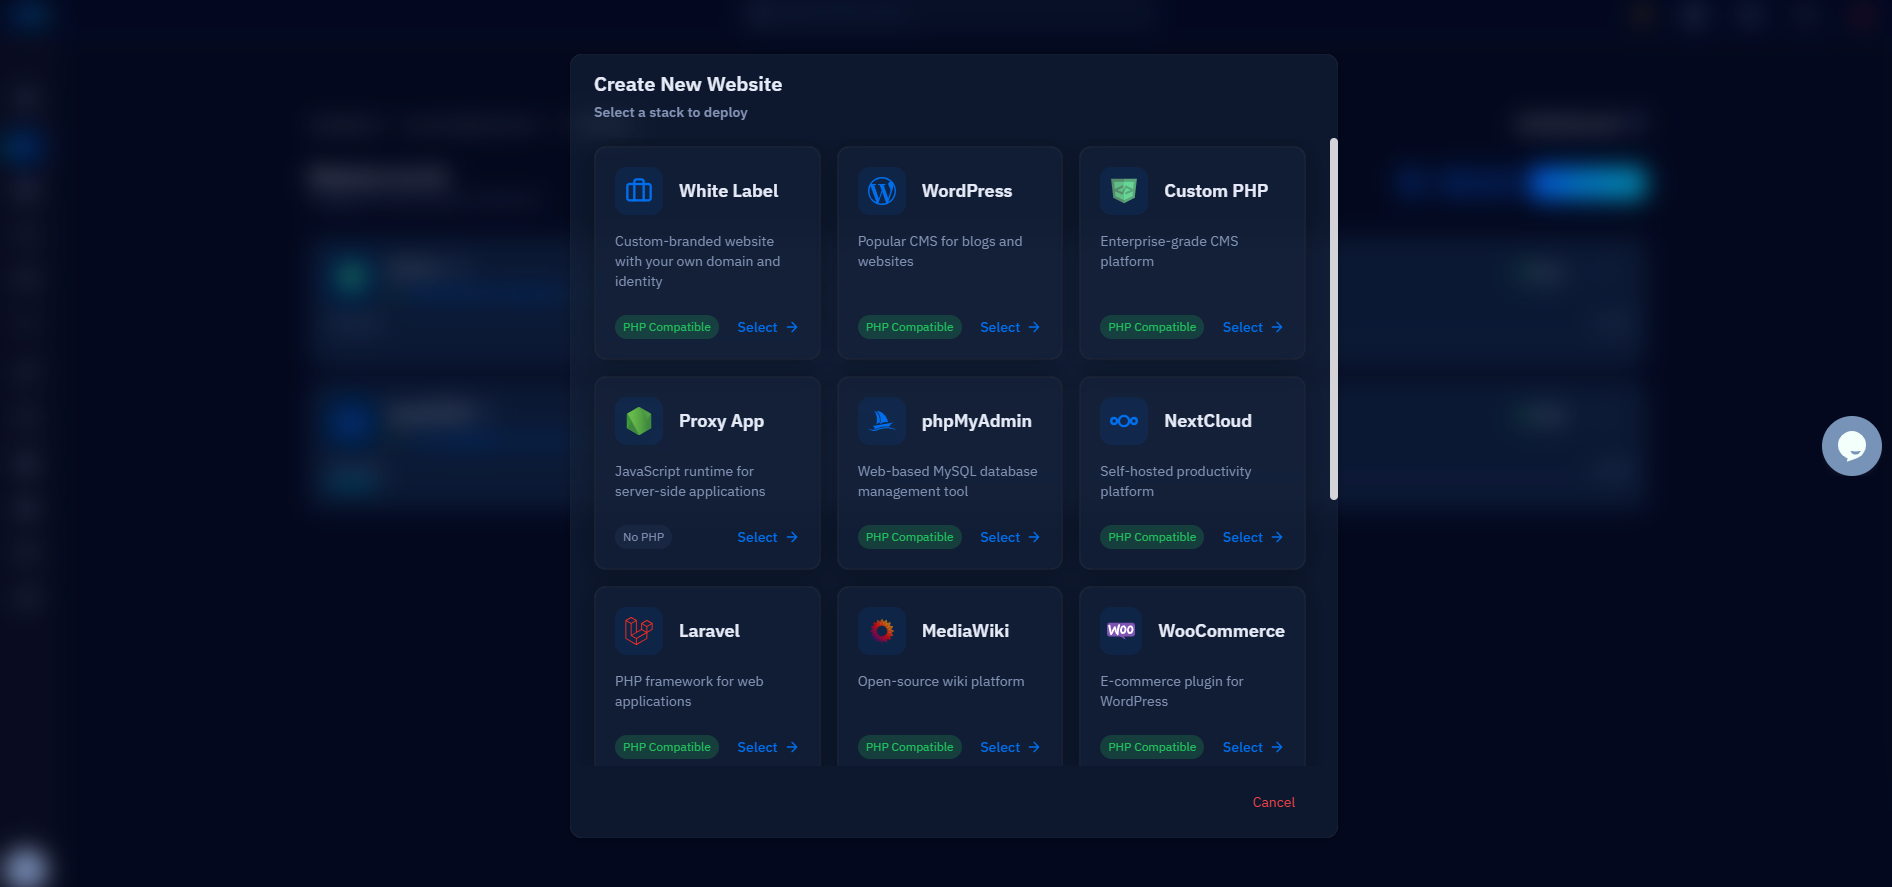
Fig. 04 — Create New Website panel showing the available application stacks. Click Select on the Laravel card.
Step 5: Fill in the Application Details
The Laravel configuration form collects everything CloudStick needs to provision your application. Complete each field carefully, as these values configure your live site.
Email Address: Enter the administrator email address for the Laravel application.
Web Application Name: Enter a unique name for the application (e.g. laravel-app). This name is used internally within CloudStick.
Domain Name: Choose Use My Own Domain and enter the domain that will serve the application, or pick Use Temporary Domain for a quick test deployment. Comma-separate multiple domains if needed.
Laravel Version: Select the Laravel version you want to install (e.g. Laravel 12.x, 11.x, 10.x, or 9.x).
PHP Version: Select the PHP version for the application. PHP 8.4 is recommended for the latest Laravel releases.
Cloudflare: If you have a connected Cloudflare account, select it so CloudStick can automatically configure DNS records. Leave this blank if you manage DNS manually.

Fig. 05 — Laravel configuration form showing Email Address, Web Application Name, Domain Type, Domain Name, Cloudflare, Laravel Version, and PHP Version fields.
Step 6: Configure Advanced Settings and Install
Expand the Advanced Settings section to review or customise the system user, database, and PHP configuration, then launch the installation.
System Credentials: A system user and password are auto-generated to own and manage the application files on the server. You can keep these or click Generate for new values.
Database Credentials: A database name, DB user, and DB password are generated automatically. Leave them as-is or enter custom values.
Header, FPM, and PHP Settings: Review optional hardening (Clickjacking, XSS, MIME sniffing protection) and PHP-FPM / PHP limits. The defaults are tuned for most Laravel applications.
Click Install Laravel: Once all fields are filled in, click the blue Install Laravel button in the bottom-right corner to begin deployment.
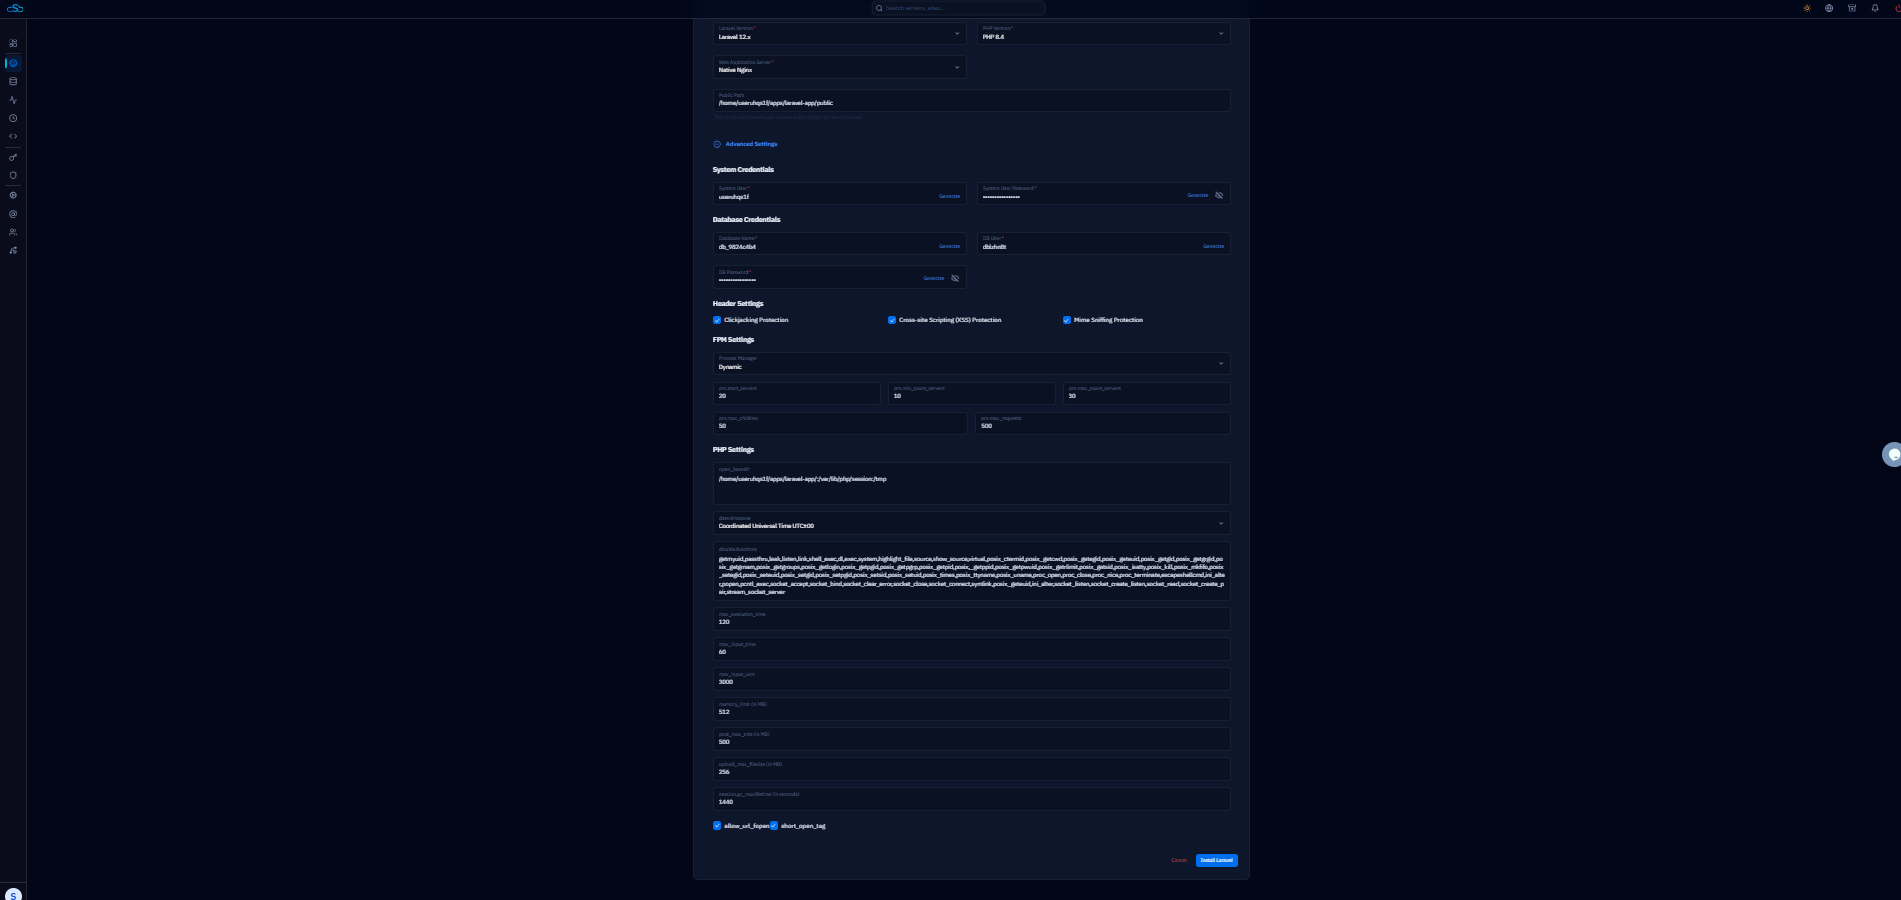
Fig. 06 — Advanced Settings section showing System Credentials, Database Credentials, Header, FPM, and PHP settings, with the Install Laravel button at the bottom right.
All system user and database credentials are auto-generated with secure values. You only need to change them if you have specific requirements.
Step 7: Monitor the Installation and View Website Details
After clicking Install Laravel, CloudStick runs the automated deployment. Watch the progress in real time and, once it finishes, jump straight to your website summary.
Watch the live log output: The installation screen shows a real-time terminal log as CloudStick configures the web server, creates the database, and installs Laravel. Do not navigate away during this step.
Installation Complete status: When the status bar shows Installation Complete and the log confirms Laravel created successfully and Website created successfully, the deployment is done.
Click See Website Details: In the Installation Successful dialog, review the website name, domain, system user, PHP version, and public path, then click the green See Website Details button to open the website summary page.
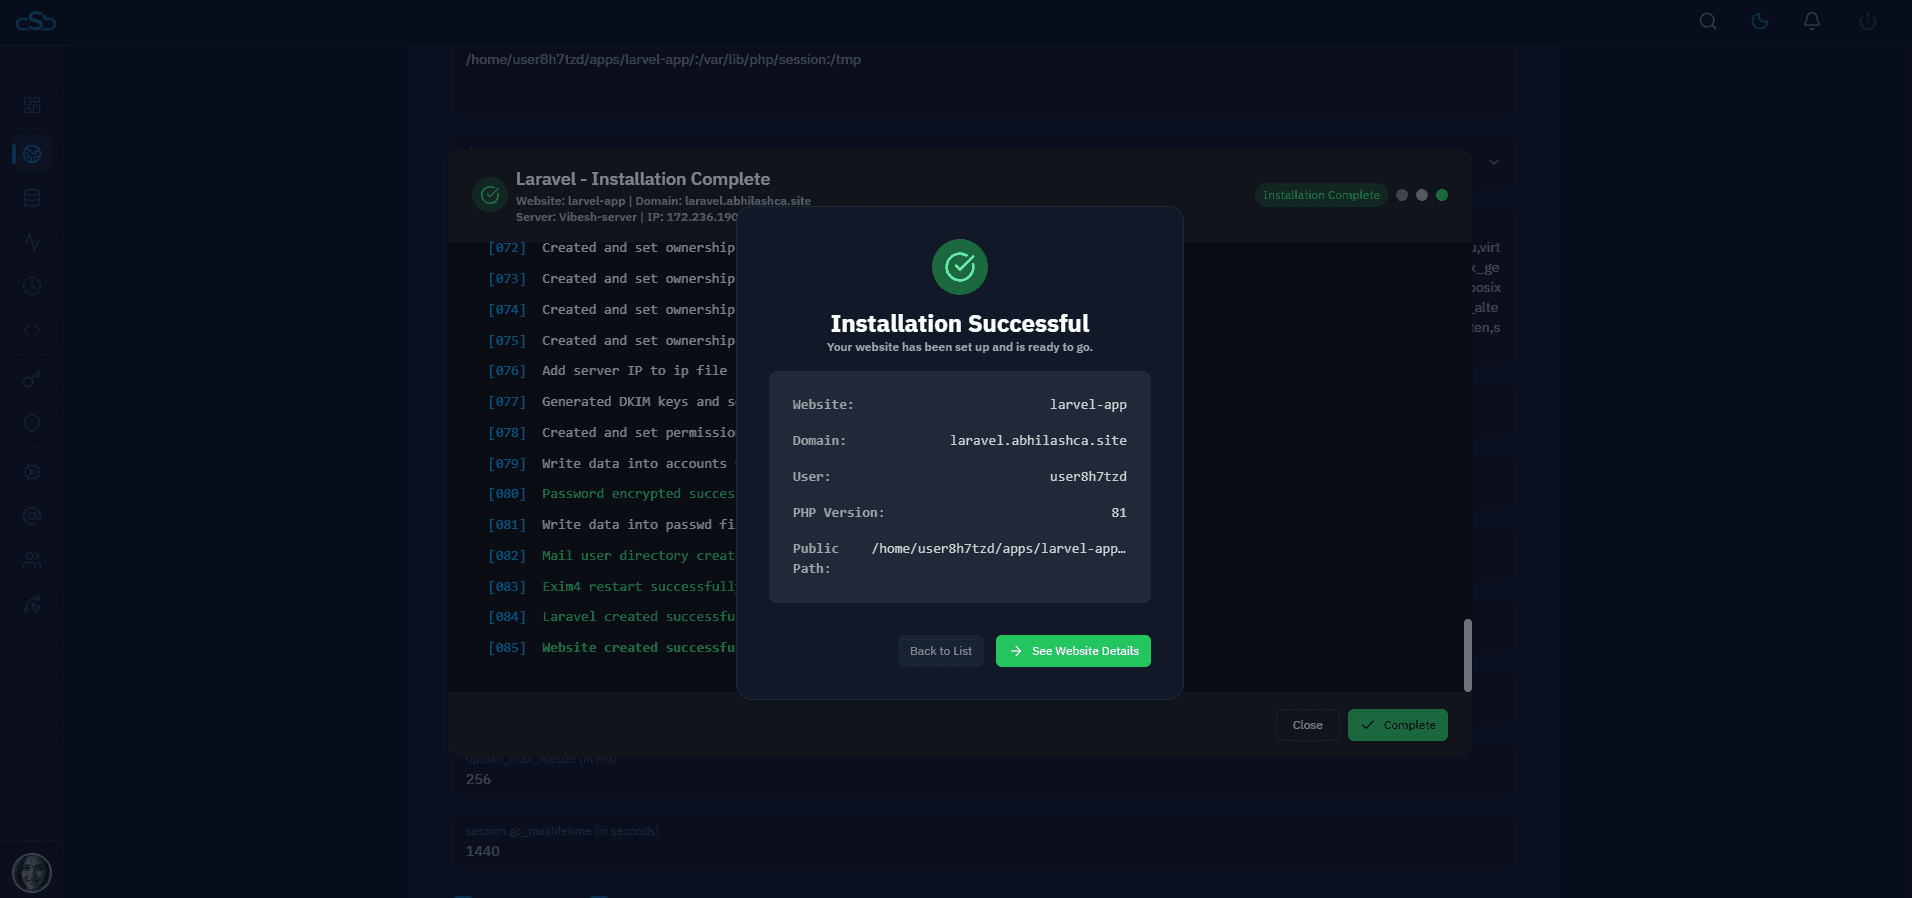
Fig. 07 — Installation Complete screen showing the live log output and the Installation Successful dialog with website name, domain, user, PHP version, and public path.
SSL is not installed automatically. After deployment, go to Manage SSL → Deploy to set up HTTPS for your domain. Your domain must point to the server's IP address before or shortly after deployment for SSL to issue correctly.
This creates a fresh Laravel installation. To migrate an existing project, upload your code via SFTP and update the .env file after deployment. To manage environment variables from the dashboard, see How to add environment variables to a Laravel application.