How to Add System Users
Overview
In CloudStick, every website and application runs under a system user — a dedicated SSH/FTP account on your server. Isolating applications under separate users is a security best practice: if one site is compromised, it cannot access the files of another. System users also give you granular control over who can deploy code, manage files, and access application logs on each server.
This guide walks you through creating a new system user from the CloudStick dashboard and covers the post-creation management options — including granting sudo access, changing passwords, updating disk quotas, and removing users when they are no longer needed.
You must have an active server connected to your CloudStick account before you can add system users. All system user operations happen at the server level, not the account level.
Step 1: Navigate to System Users
From your CloudStick dashboard, open the server you want to manage and locate the System Users section in the left-hand navigation.
1. Log in to CloudStick: Go to app.cloudstick.io and sign in. Your dashboard will show all connected servers.
2. Select your server: Click on the server where you want to add a user. This opens the server management panel.
3. Click System Users: In the left-hand navigation menu, click the System Users icon (the person/group icon). The tooltip will confirm the label as you hover.
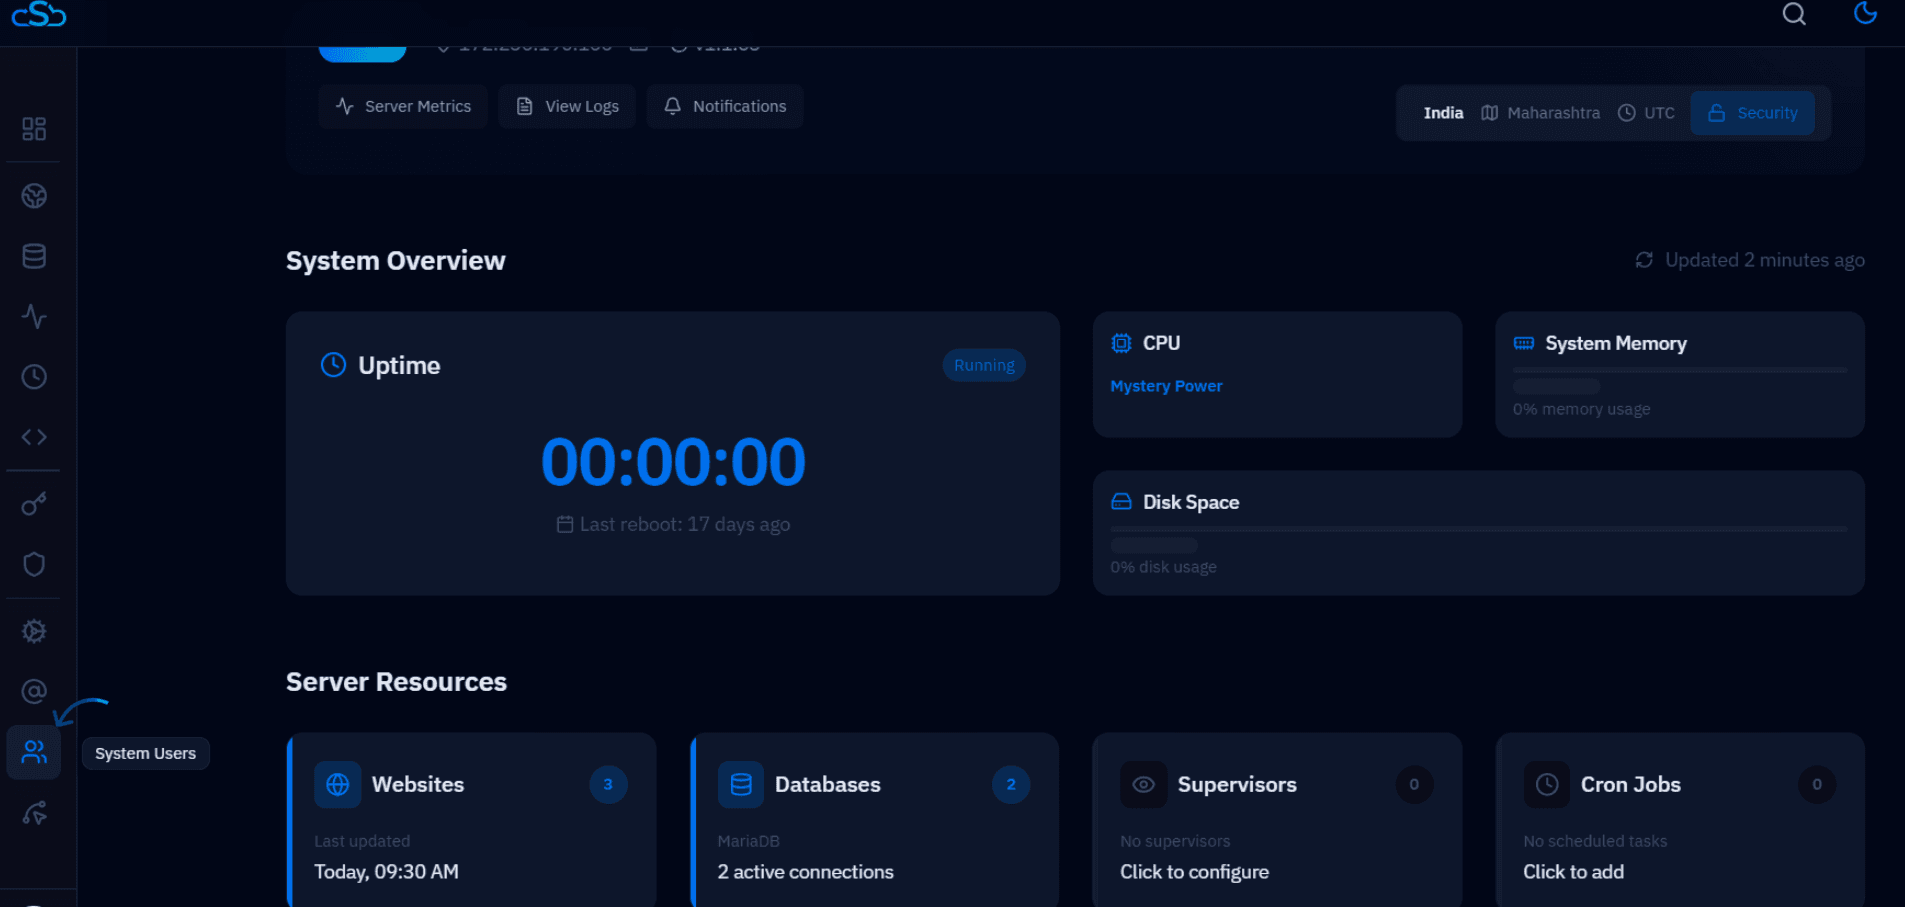
Fig. 01 — Server panel with the System Users icon highlighted in the left-hand navigation menu.
Step 2: Create a New System User
On the System Users page you will see all existing users on the server. Click the button in the top-right corner to open the creation form.
1. Click + Add System USer: Find the blue button in the top-right corner of the System Users page and click it.
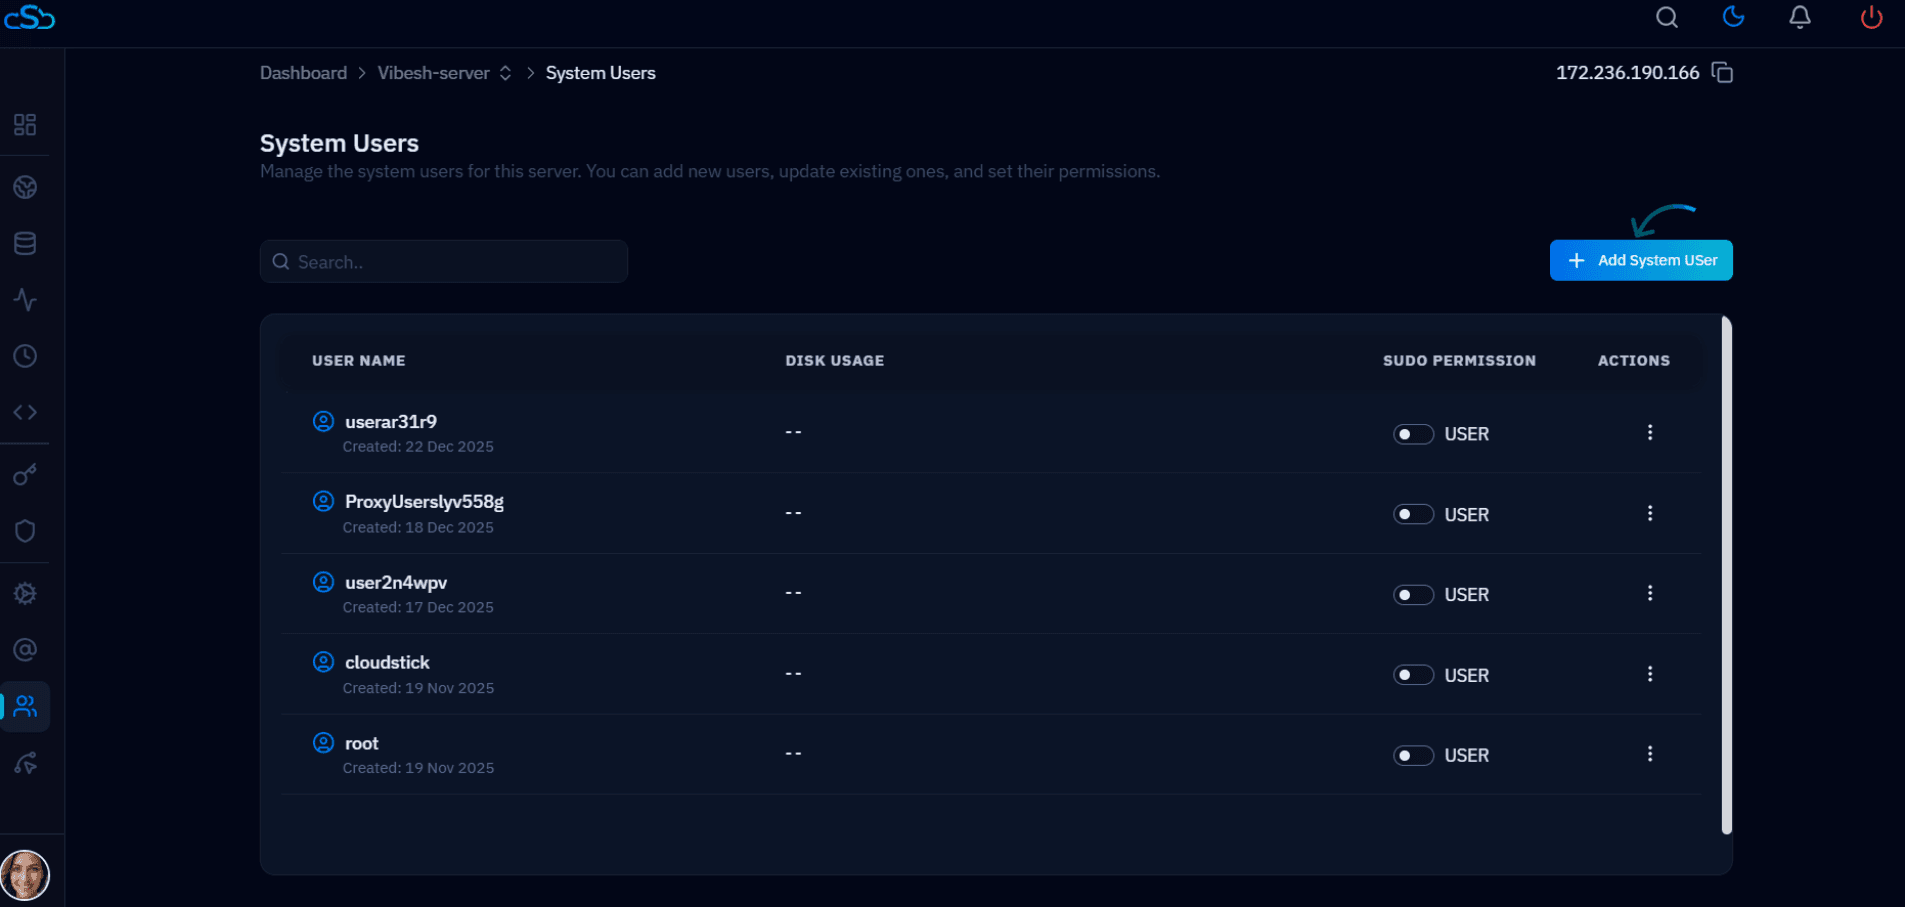
Fig. 02 — System Users list showing existing users with the "+ Add System USer" button in the top-right corner.
2. Enter a username: Type the desired username in the User Name field. Usernames must be lowercase and contain no spaces.
3. Set a password: Enter a strong password of at least 8 characters in the Password field, then repeat it in the Confirm Password field.
4. Click Create User: Click the blue Create User button to confirm. The new user will appear immediately in the System Users list.
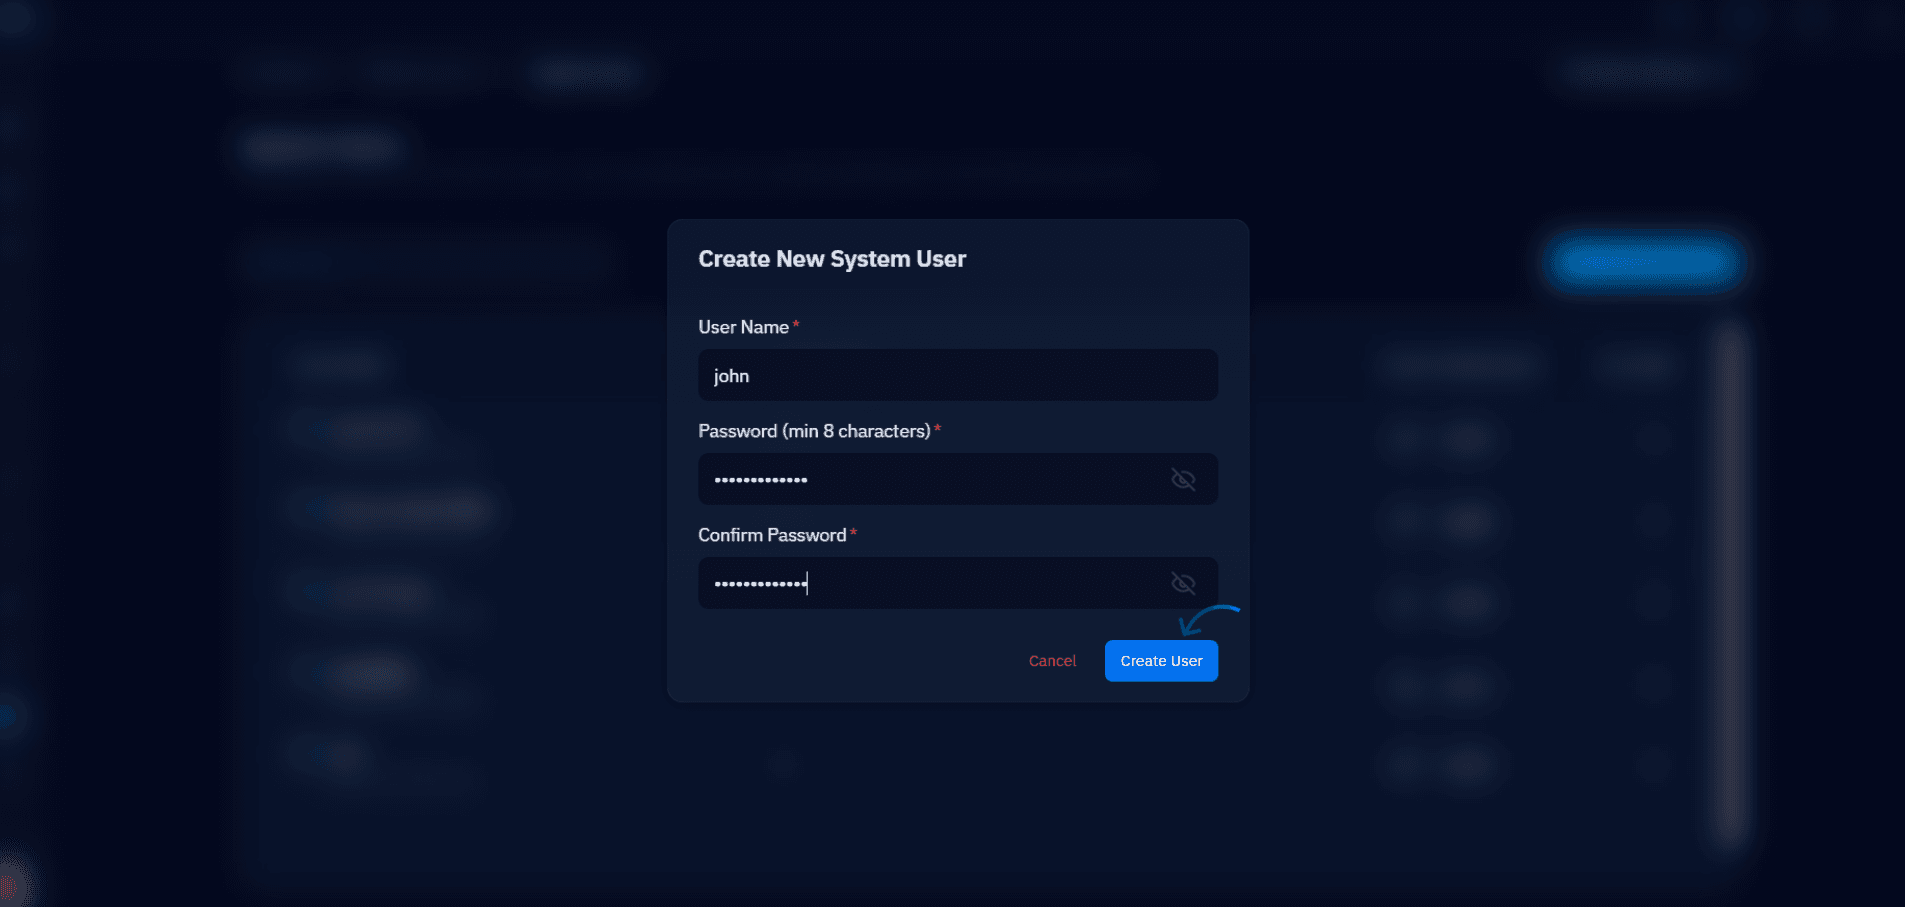
Fig. 03 — Create New System User modal with username, password, and confirm password fields.
The username you set here will be used for SSH and SFTP access. Store the password securely — CloudStick does not display it again after creation.
Step 3: Manage Existing Users
After a user is created, the Actions menu (three-dot icon) on each row gives you quick access to all user management options.
Change Quota: Configure or modify the maximum disk space this user's files can occupy on the server.
Change Password: Update the SSH/FTP password for the user at any time without recreating the account.
Delete User: Permanently remove the system user and their associated files from the server. This action cannot be undone.
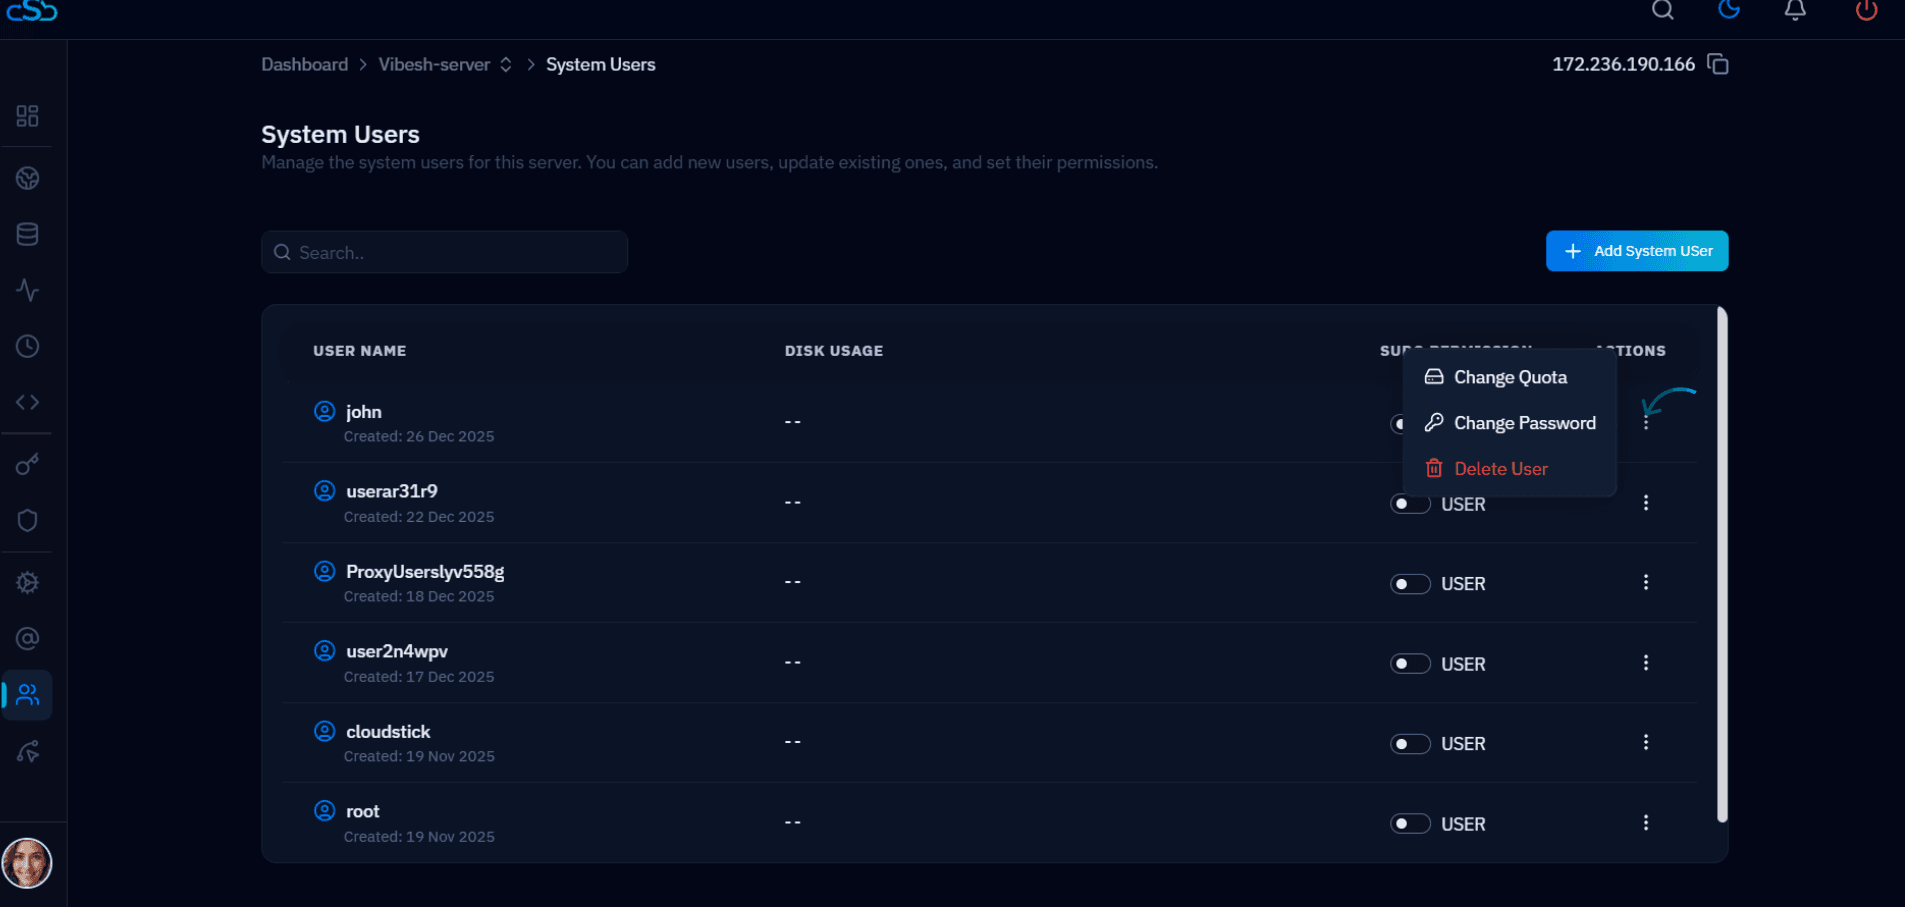
Fig. 04 — Actions menu expanded for a system user showing Change Quota, Change Password, and Delete User options.
Grant Sudo Access: Toggle the Sudo Permission switch on a user's row to elevate them from USER to SUDO. This grants the user root-level privileges on the server. A success toast will confirm the change.
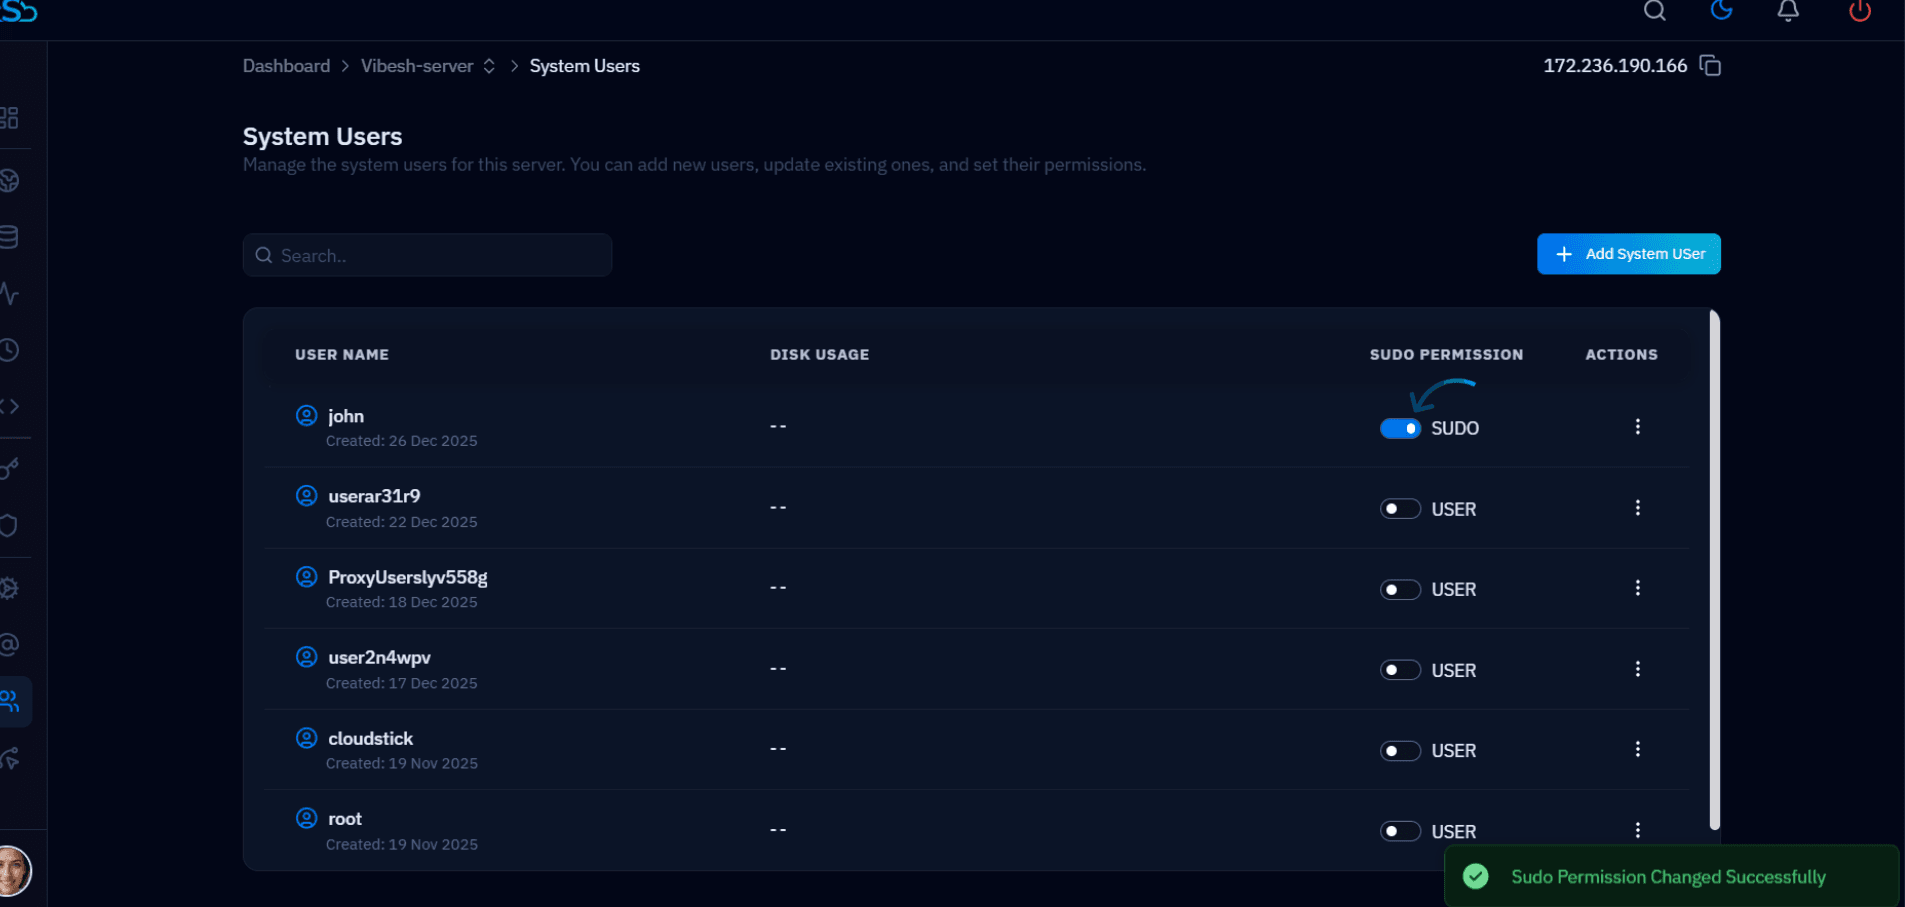
Fig. 05 — Sudo Permission toggle enabled for a user, with the "Sudo Permission Changed Successfully" confirmation toast.
Grant sudo access only to trusted users. A SUDO-level system user has full administrative privileges on the server and can modify any file or service. Use the toggle to revoke sudo at any time.