How to Create a Ghost Application in CloudStick
Overview
Ghost is a modern open-source publishing platform built for blogs and newsletters — fast, distraction-free, and powered by Node.js. Normally, installing Ghost on your own server means setting up Node.js, the Ghost CLI, a MySQL database, and an Nginx reverse proxy by hand. With CloudStick, you can deploy a fully working Ghost website on your server directly from the dashboard: CloudStick installs the Ghost application, configures the web server and reverse proxy, sets up the database, and starts the Ghost service for you.
This guide walks you through logging in, selecting your server, opening the Websites section, choosing the Ghost stack, filling in the website details, and monitoring the live installation logs until you see the success confirmation.
You need at least one connected server in your CloudStick account before you can deploy Ghost. If you have not added a server yet, follow the guide on how to deploy your own server in CloudStick first.
Step 1: Log In to CloudStick
Everything starts from the CloudStick dashboard, which lists every server connected to your account along with its live resource usage.
Log in to your CloudStick account: Sign in at dash.cloudstick.io. The dashboard shows your Total Servers, Active Servers, and a card for each connected server with its OS, uptime, CPU, RAM, and disk usage.
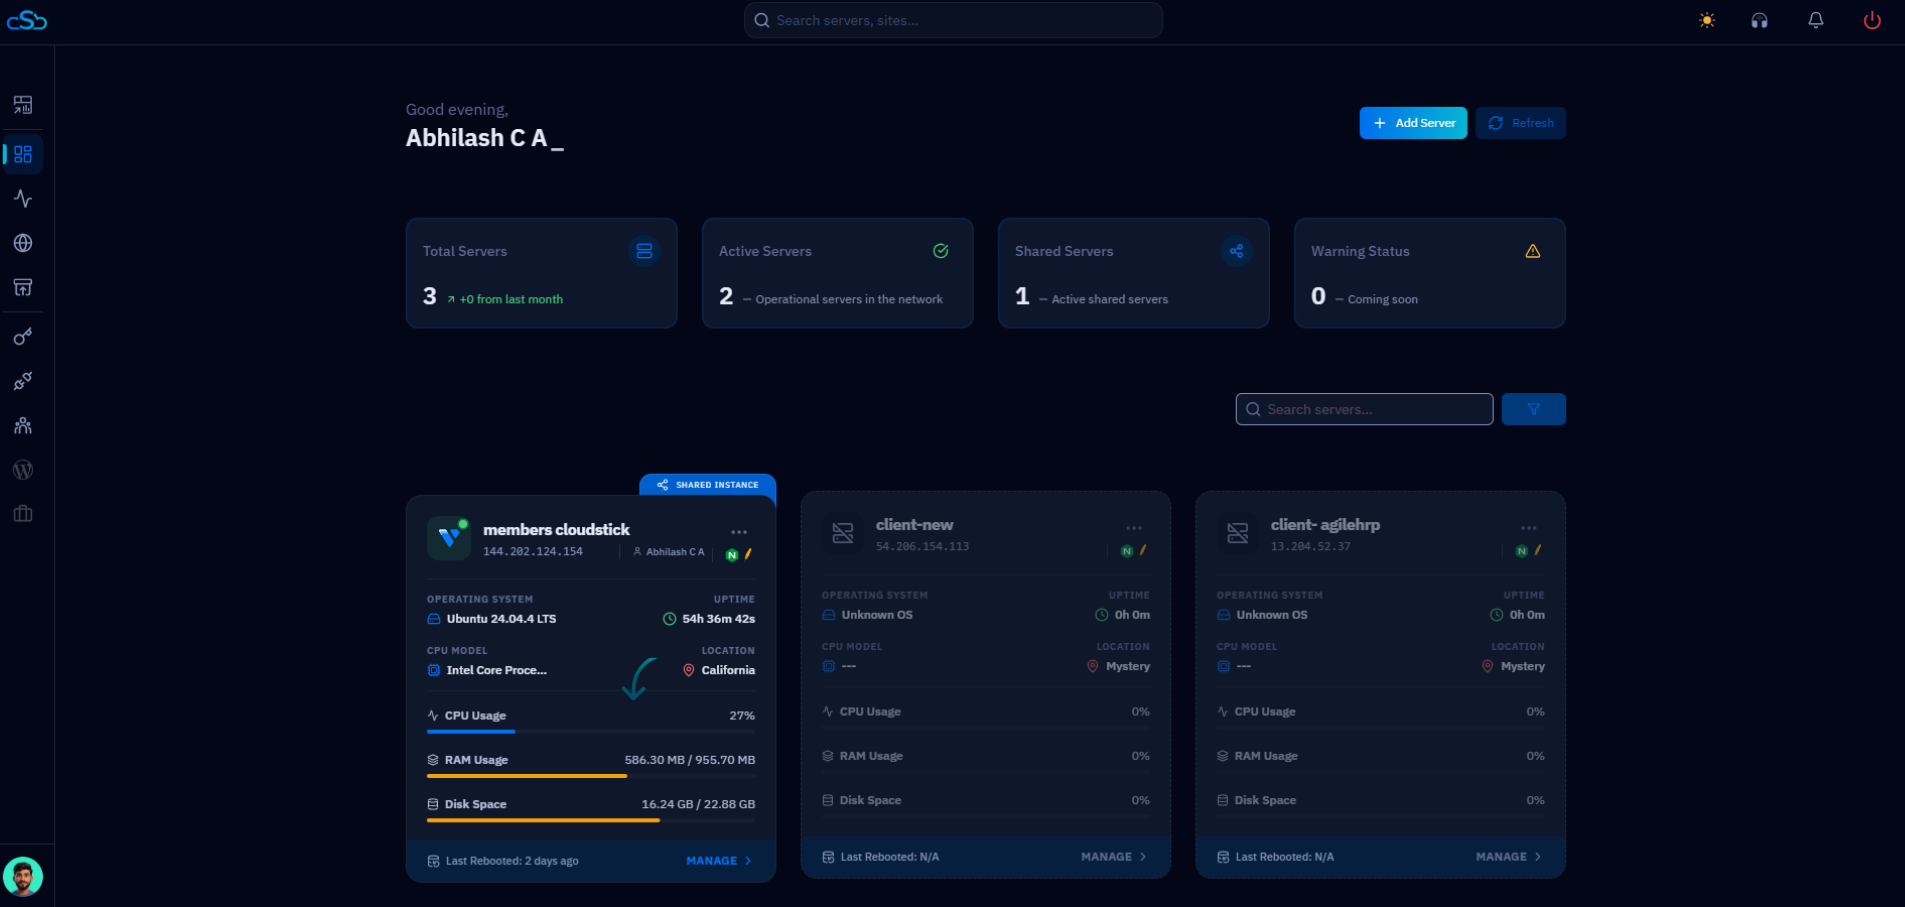
Fig. 01 — CloudStick dashboard after logging in, showing all connected servers with live resource metrics.
Step 2: Select Your Server
A Ghost application is deployed onto a specific server, so choose the server that will host your new blog or newsletter site.
Open the server panel: Click Manage on the server card where you want to deploy Ghost. You land on the server overview showing Uptime, CPU, System Memory, and Disk Space.
Confirm you are on the right server: Check the server name and IP address in the breadcrumb and header before continuing — especially if you manage multiple servers.
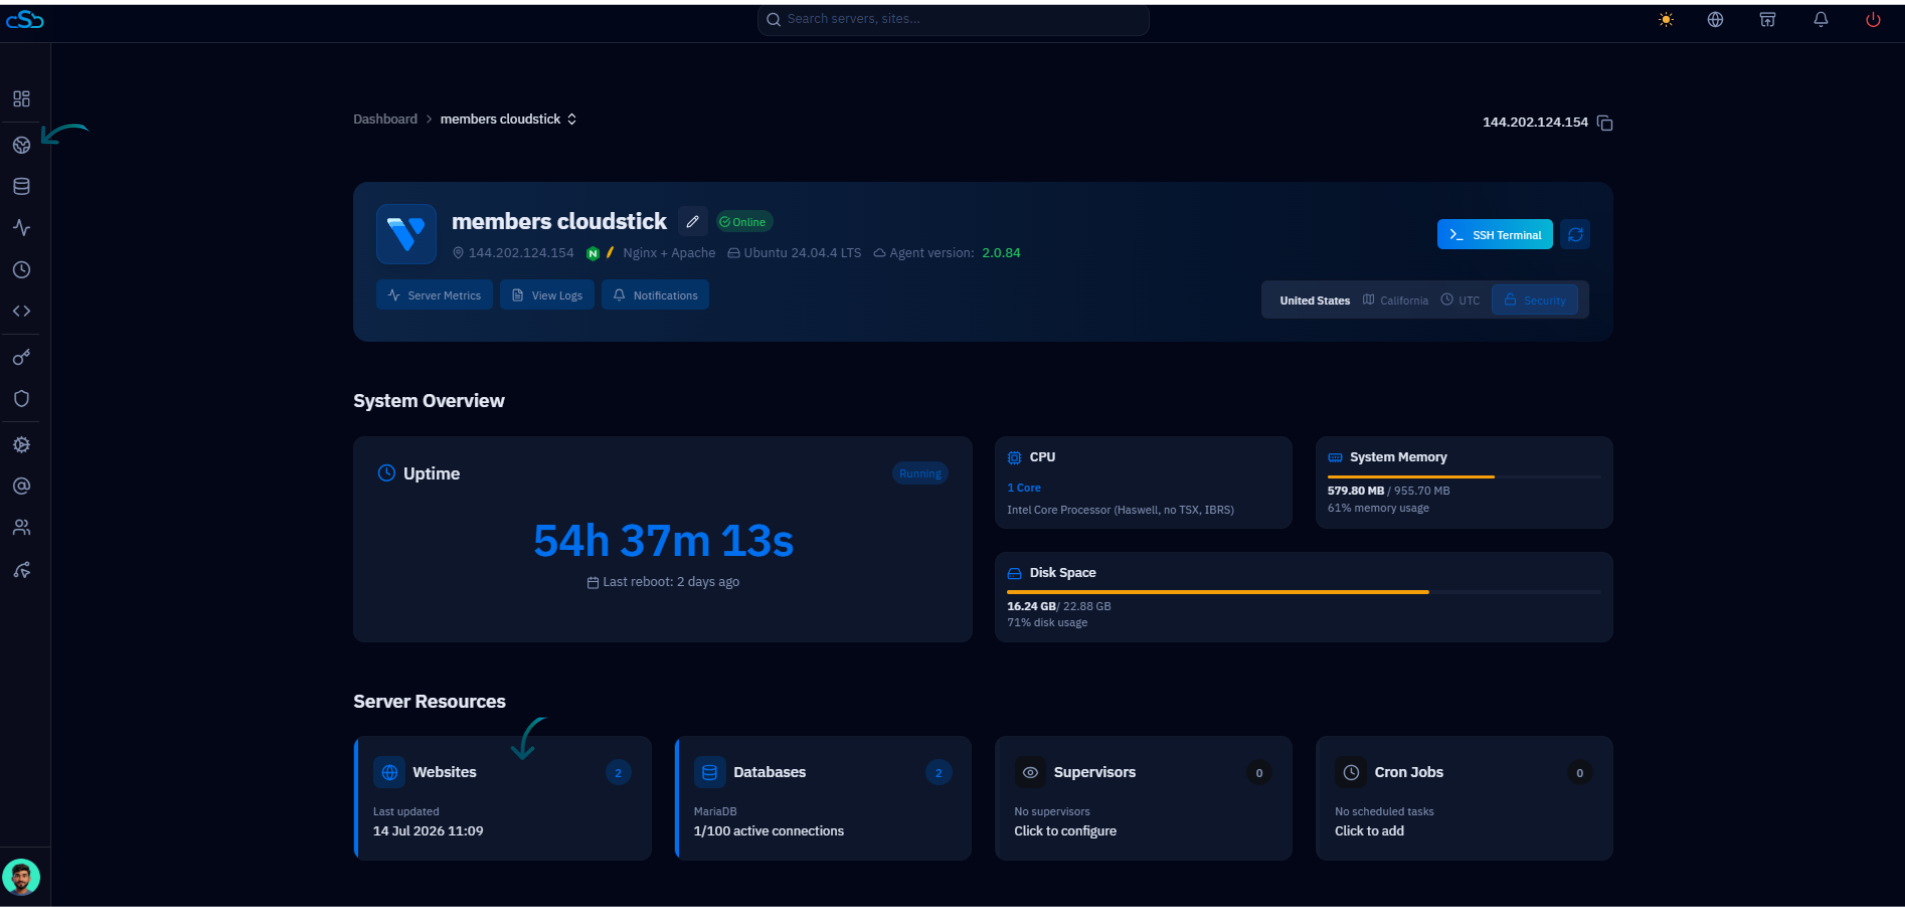
Fig. 02 — Server panel with the System Overview and the Websites card in the Server Resources section.
Step 3: Open Websites and Click Add Website
All sites hosted on a server are managed from the Websites section — this is where every new deployment begins.
Open Websites: Click Websites in the left-side navigation menu, or click the Websites resource card on the server overview. The Websites List shows every site currently hosted on this server.
Click + Add Website: In the top-right corner of the Websites List, click the + Add Website button to open the stack selection dialog.
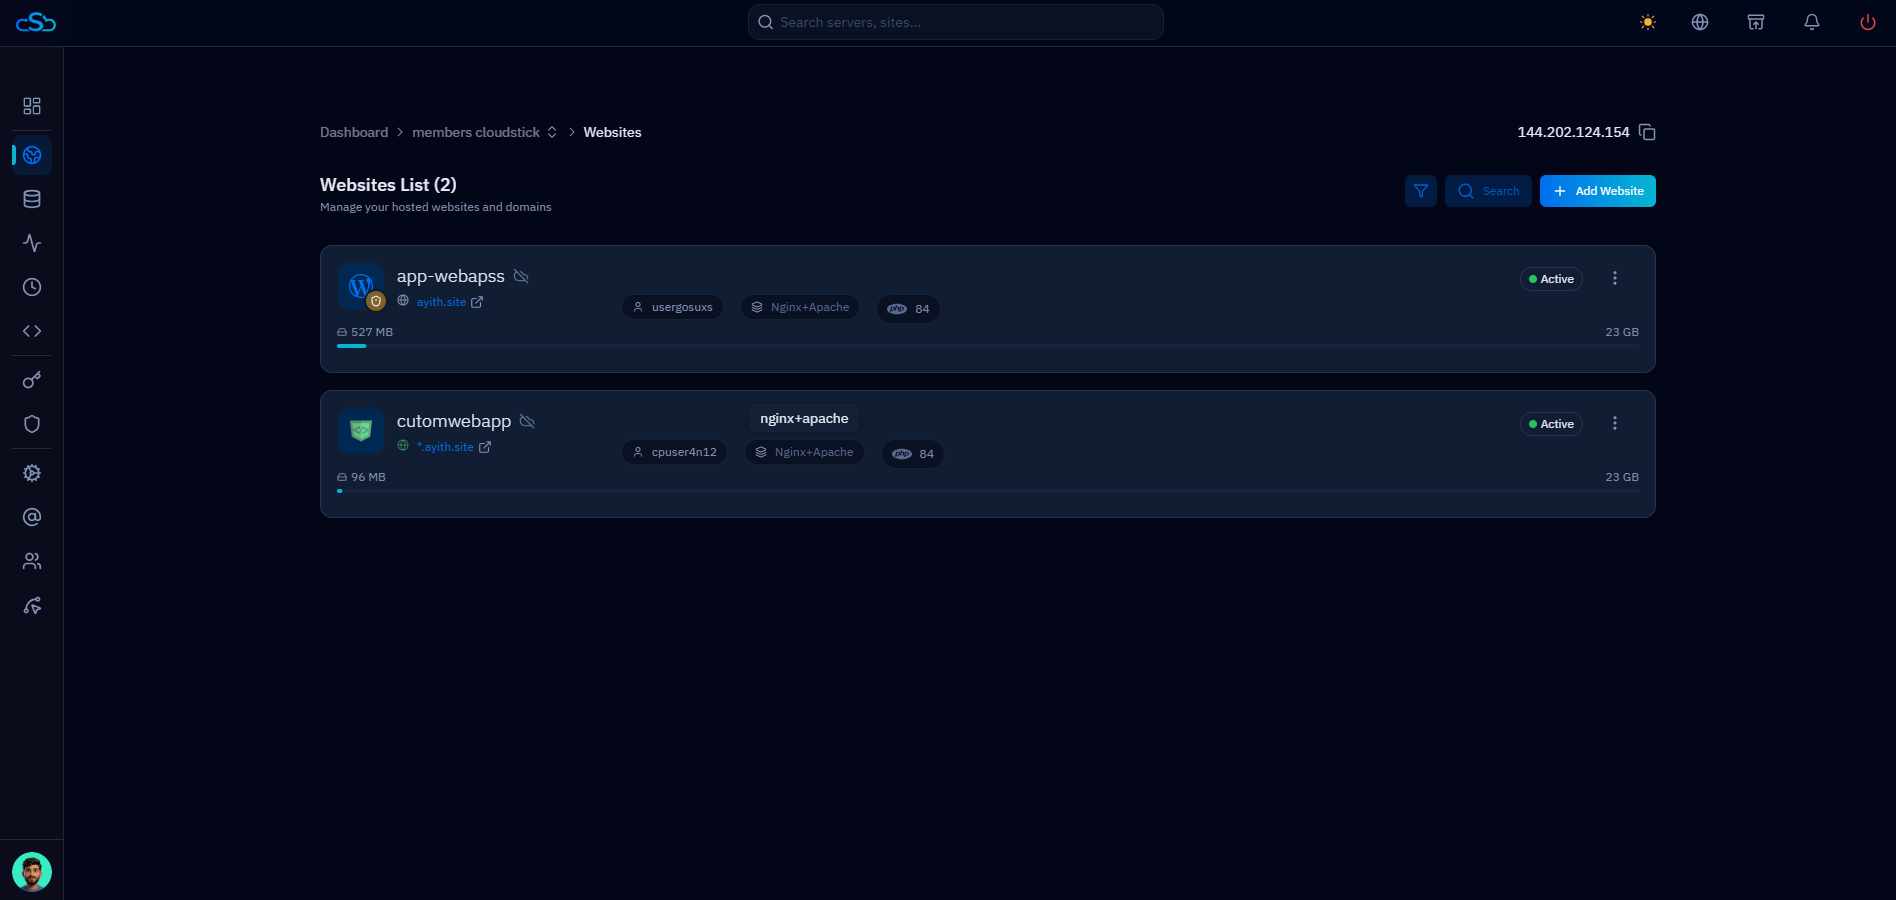
Fig. 03 — Websites List showing existing sites and the + Add Website button in the top-right corner.
Step 4: Select Ghost
The Create New Website dialog lists every application stack CloudStick can deploy — WordPress, Laravel, phpMyAdmin, NextCloud, Joomla, Moodle, and more.
Find Ghost in the list: Scroll through the available application types until you see the Ghost card, described as "Modern open-source publishing platform for blogs and newsletters". Ghost runs on Node.js, so it carries a No PHP badge.
Click Select on Ghost: Click the Select → link on the Ghost card to open the configuration form.
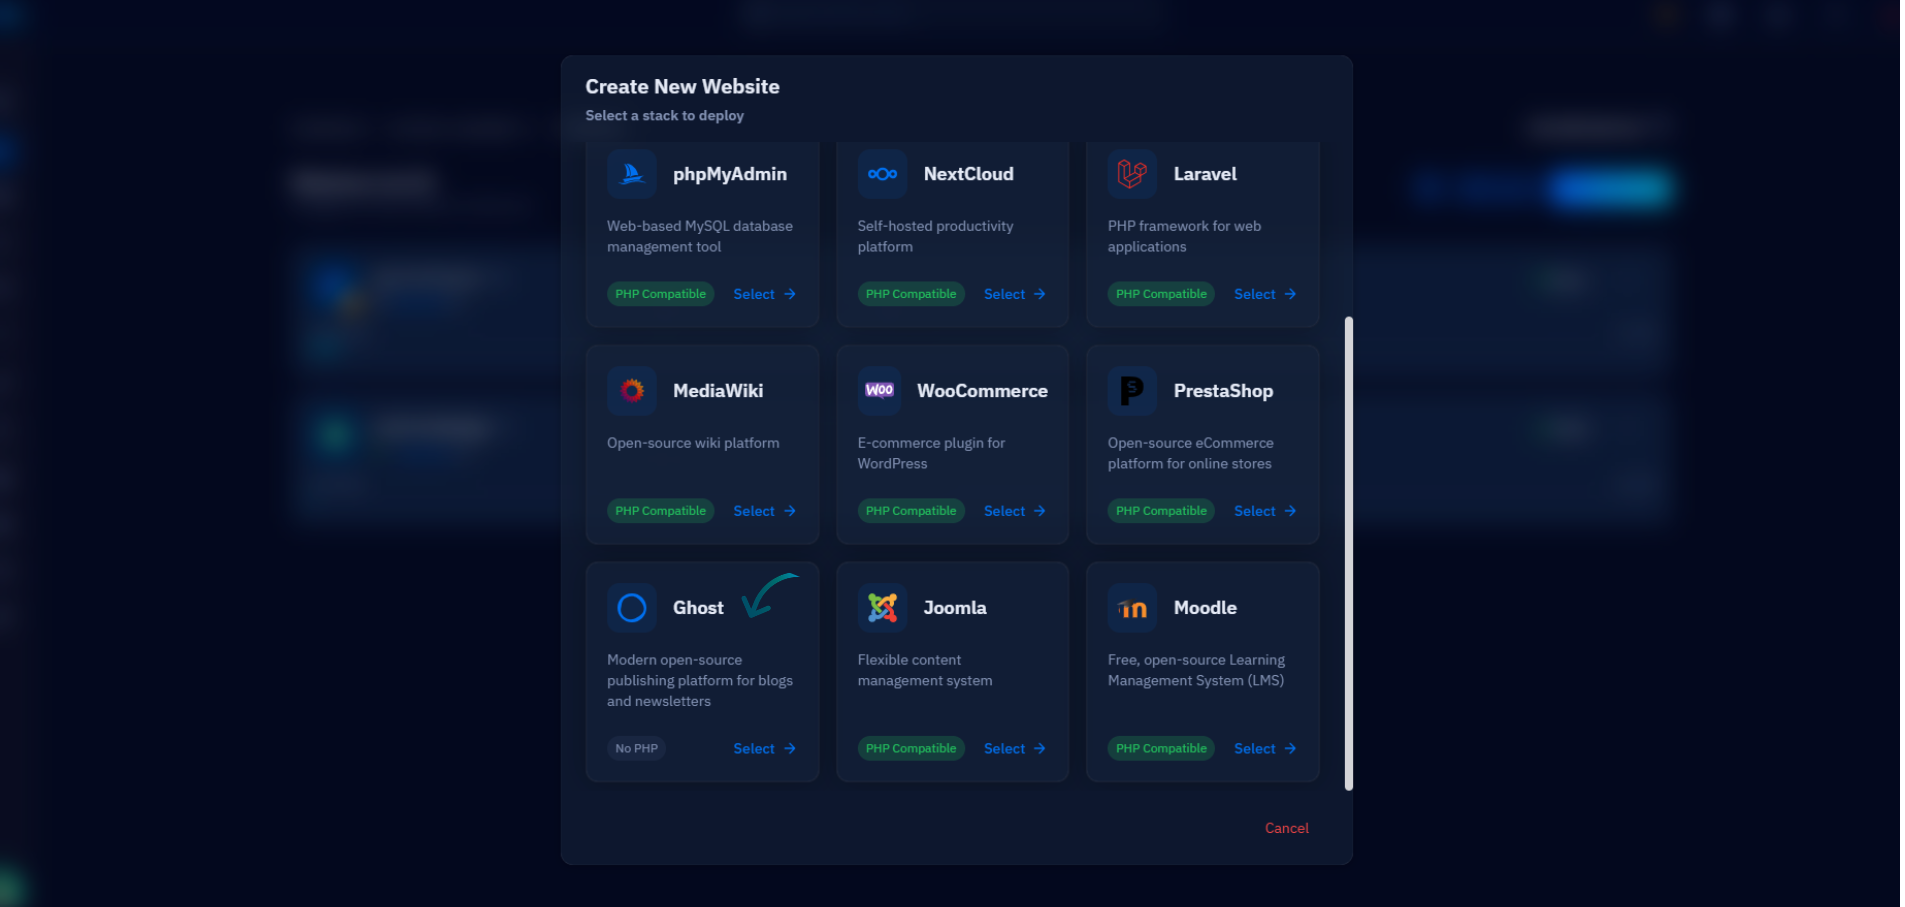
Fig. 04 — Create New Website dialog with the Ghost stack highlighted among the available application types.
Step 5: Enter Website Details
The Ghost form collects everything CloudStick needs to provision the site — your domain, a website name, the system user that will own the files, and the Ghost version to install.
Email Address: Enter the email address to associate with this website — it is used for SSL certificate notifications.
Website Name: Give the site a short identifier (e.g. app-ghost). This becomes part of the file path on the server.
Domain Type: Choose Use My Own Domain and enter your domain name, or select Use Temporary Domain to try Ghost before pointing your DNS.
Ghost Version: Pick the Ghost version to install from the dropdown — the latest stable release is listed first (e.g. v6.44.1), with earlier versions available if you need them.
Advanced Settings (optional): Expand Advanced Settings to review the auto-generated Database Name, DB Password, System User, and System User Password — CloudStick generates secure values for you, or you can set your own.
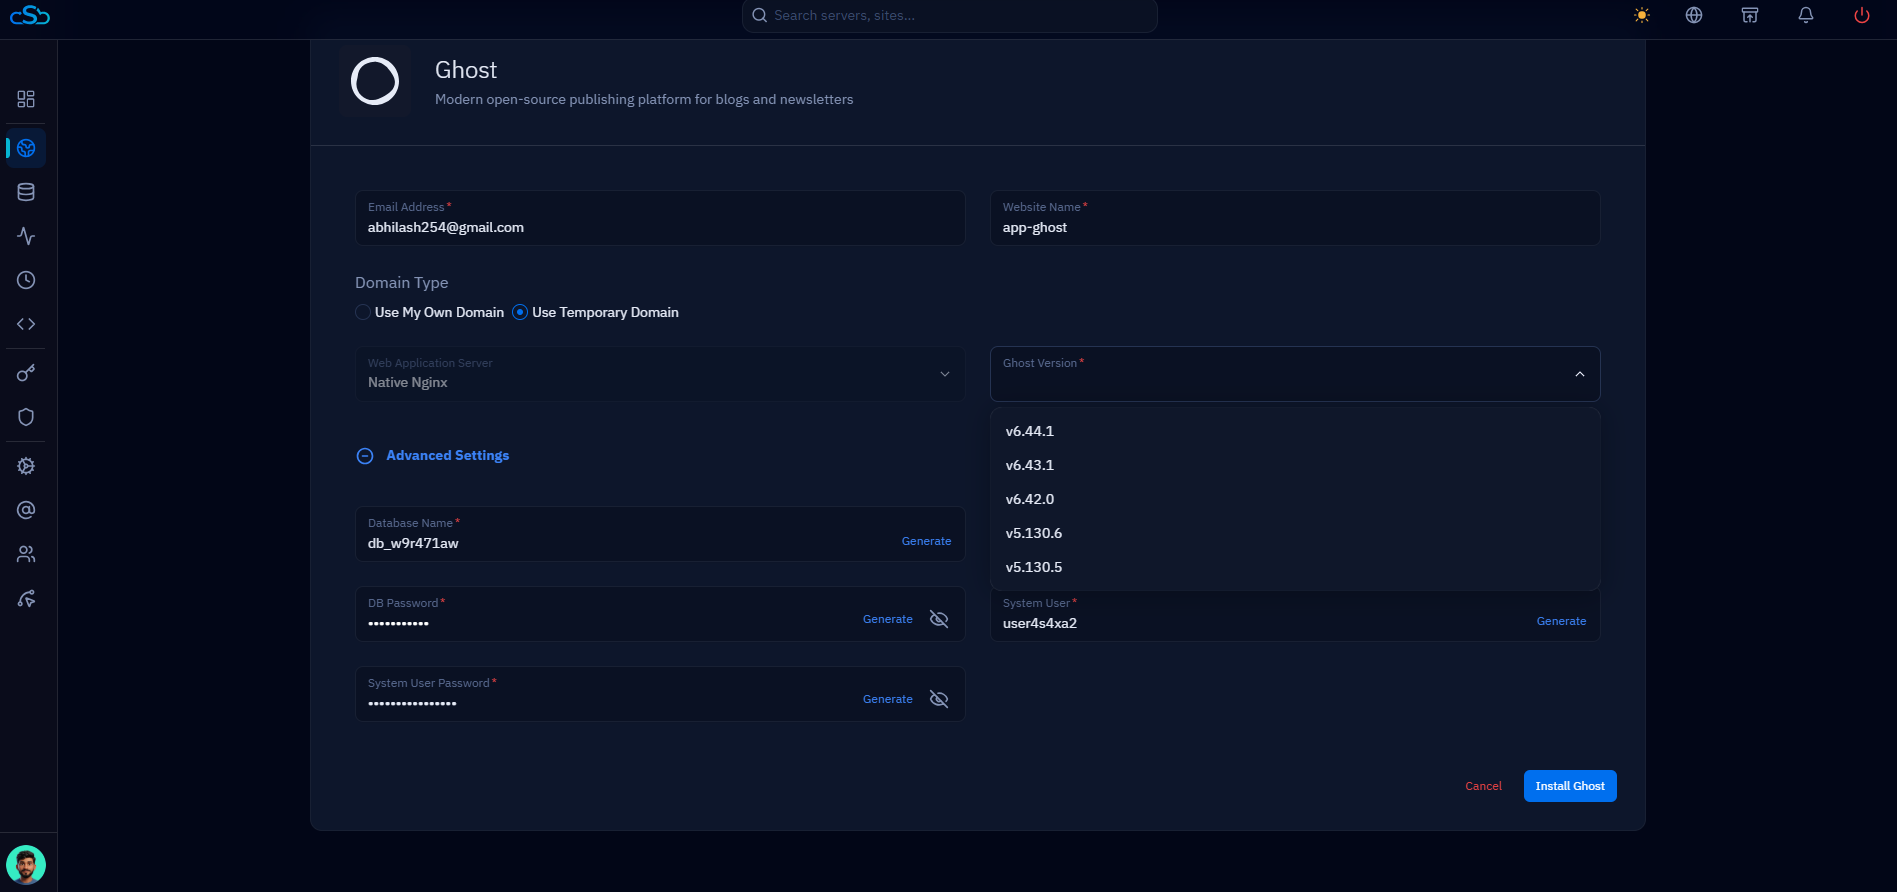
Fig. 05 — Ghost creation form showing Email Address, Website Name, Domain Type, Ghost Version dropdown, and Advanced Settings.
Step 6: Create the Application and Watch the Logs
Once the form is complete, start the deployment. CloudStick shows the installation progress in real time so you always know exactly what is happening on the server.
Click Install Ghost: Click the Install Ghost button at the bottom of the form to begin the deployment.
Monitor the installation logs: A live log window opens, showing each step of the process — downloading and installing Ghost, installing Node.js dependencies, configuring the web server, setting up the database, creating the application files, configuring the reverse proxy, and starting the Ghost service.
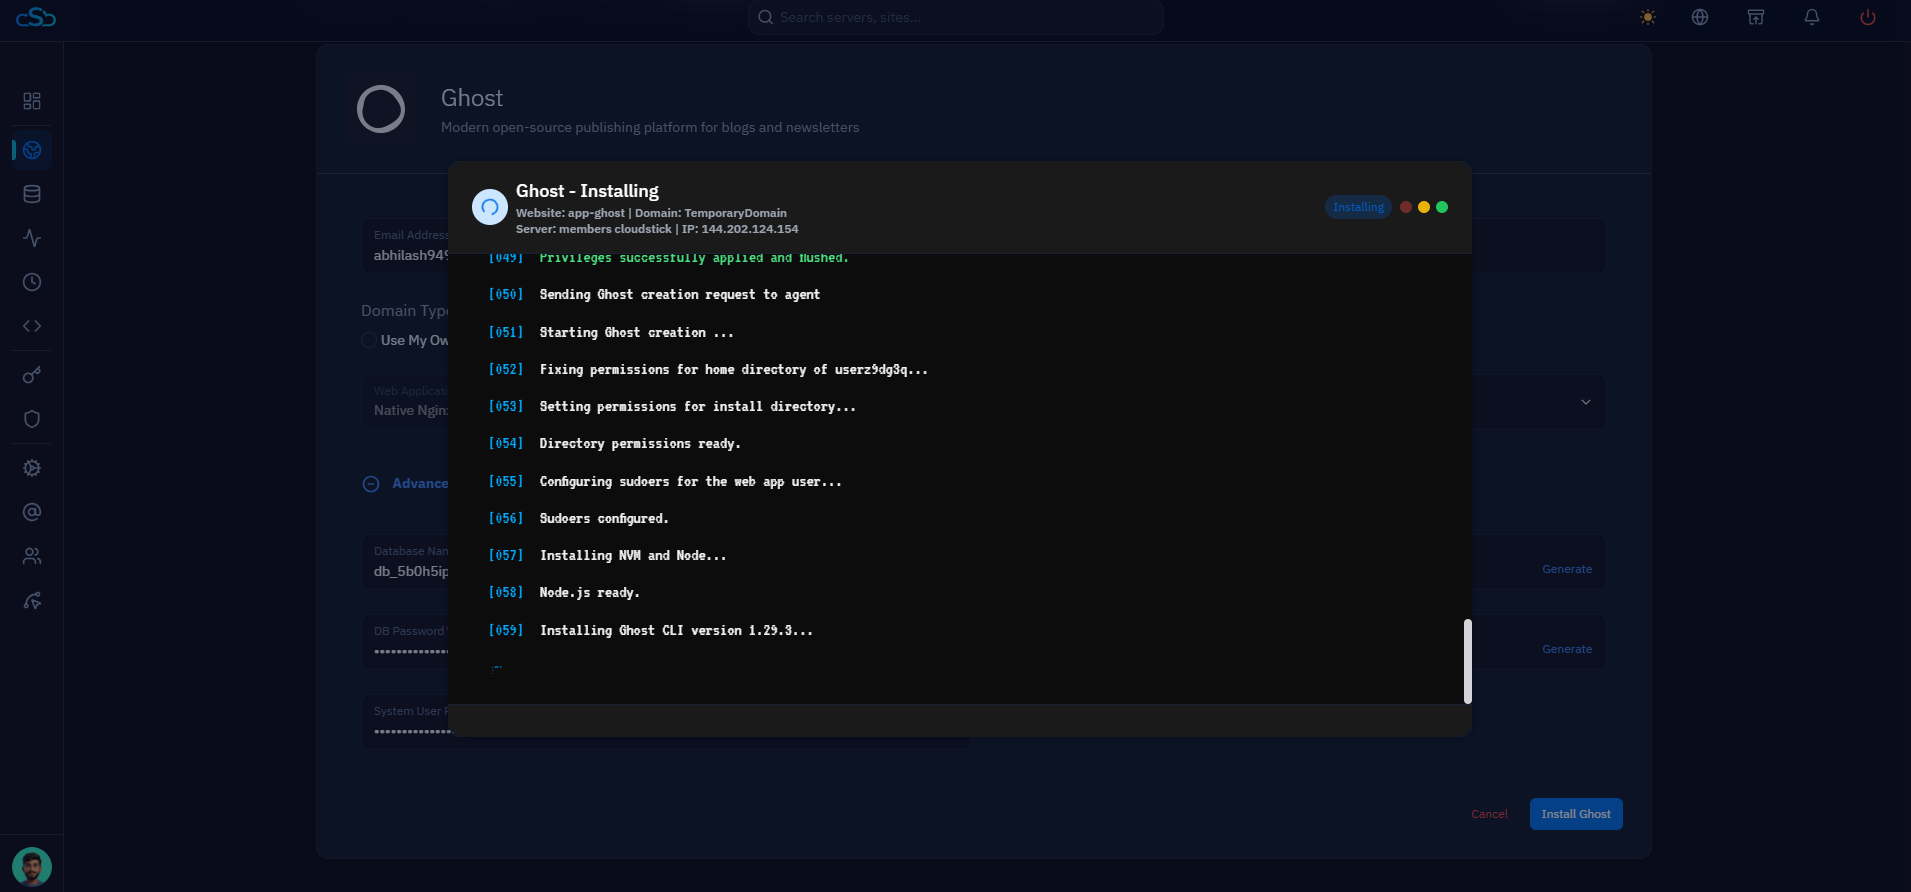
Fig. 06 — Live installation logs showing Node.js setup and the Ghost CLI being installed in real time.
If any step fails, the logs display the error details so you can troubleshoot the issue — there is no need to SSH into the server to find out what went wrong.
Step 7: Confirm the Installation
When every step completes, CloudStick confirms the deployment and hands you the details you need to start publishing.
Look for the Installation Successful message: A confirmation dialog appears summarizing your new site — the website name, its domain, the system user, the port Ghost is running on, and the public path to the application files.
Click See Website Details: Open the website's management page to configure SSL, domains, and other settings — or click Back to List to return to the Websites List.
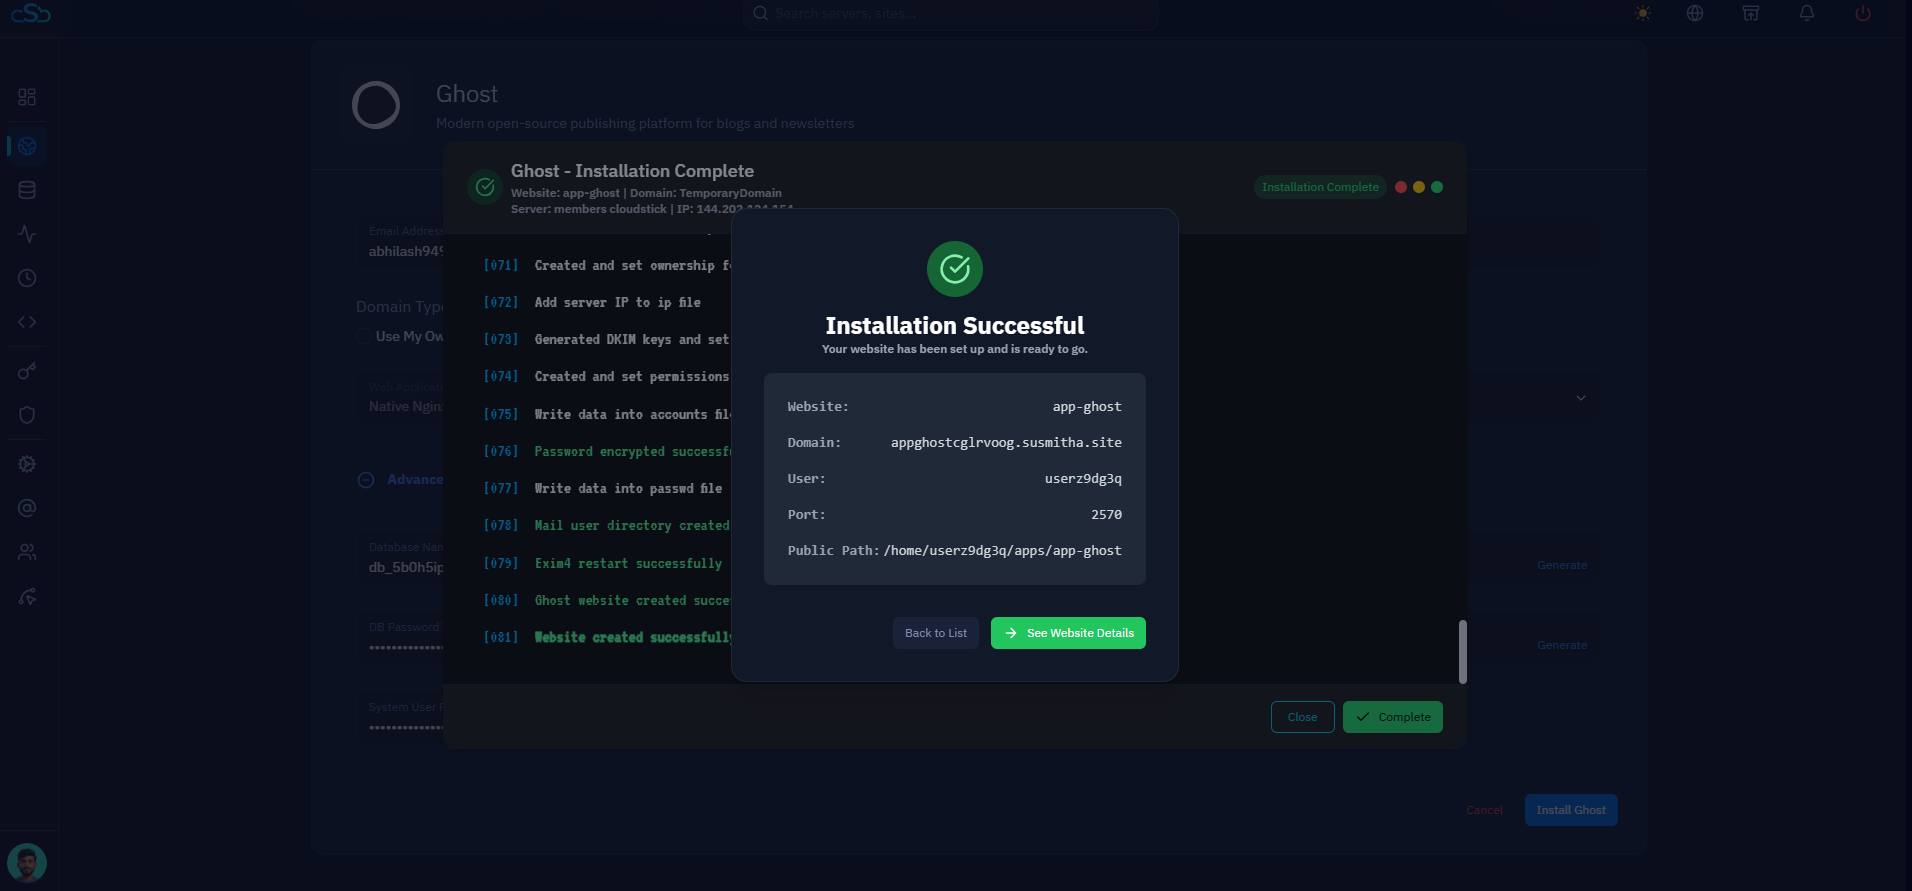
Fig. 07 — Installation Successful dialog showing the new Ghost site's domain, system user, port, and public path.
Your Ghost admin panel is available at https://yourdomain.com/ghost — open it to create your admin account and publish your first post. You can also install a free Let's Encrypt SSL certificate from the website's SSL section in CloudStick.