How to Create a Proxy Application in CloudStick
Overview
A Proxy App in CloudStick lets you put any application running on a custom port — a Docker container, a React app managed by PM2, a Next.js server, a Python (Flask/FastAPI/Django) service, or any Node.js process — behind a proper public domain or subdomain. CloudStick handles the Nginx reverse proxy configuration for you, so your application gets a clean URL, HTTPS support, and all the benefits of the CloudStick web stack without you needing to write a single line of server config.
This guide walks you through logging in, selecting your server, navigating to Websites, choosing the Proxy App stack, filling in your domain and port details, and understanding what happens after the site is created.
Your application must already be running on the server on the port you specify before visitors can reach it. The Proxy App only sets up the web-facing Nginx layer — starting your Docker container, PM2 process, or Python server is a separate step you handle on the backend.
Step 1: Log In and Select Your Server
A proxy app is tied to a specific server, so start by choosing which connected server is running your application.
Log in to your CloudStick account: Sign in at dash.cloudstick.io to reach the main dashboard showing all your connected servers.
Locate your server: Find the server where your application is running — you can see the server name, IP address, OS, and live CPU/RAM/disk usage on each card.
Click Manage: Click the Manage button on the server card to open that server's panel.
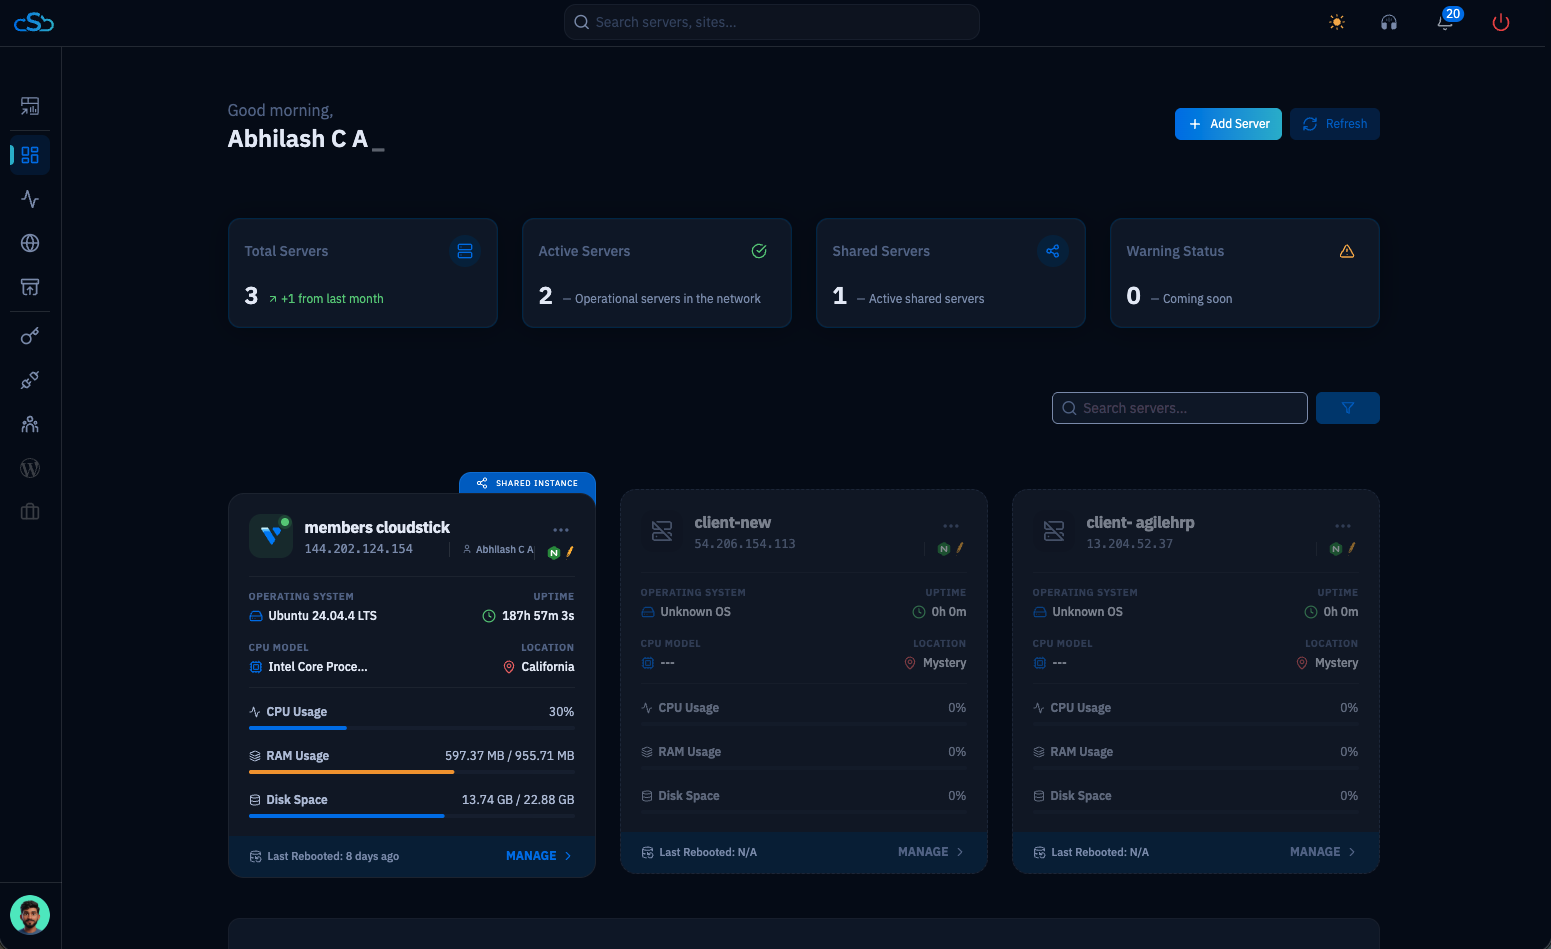
Fig. 01 — CloudStick dashboard listing all connected servers; click Manage on the server running your application.
Step 2: Open the Server Panel
After clicking Manage, you land on the server overview, which shows live system metrics and quick-access resource cards.
Review the System Overview: Confirm you are on the correct server by checking the server name and IP shown in the breadcrumb and the header card. The overview shows Uptime, CPU, System Memory, and Disk Space.
Locate the Websites resource card: In the Server Resources section you will see a Websites card showing how many sites are currently hosted on this server.
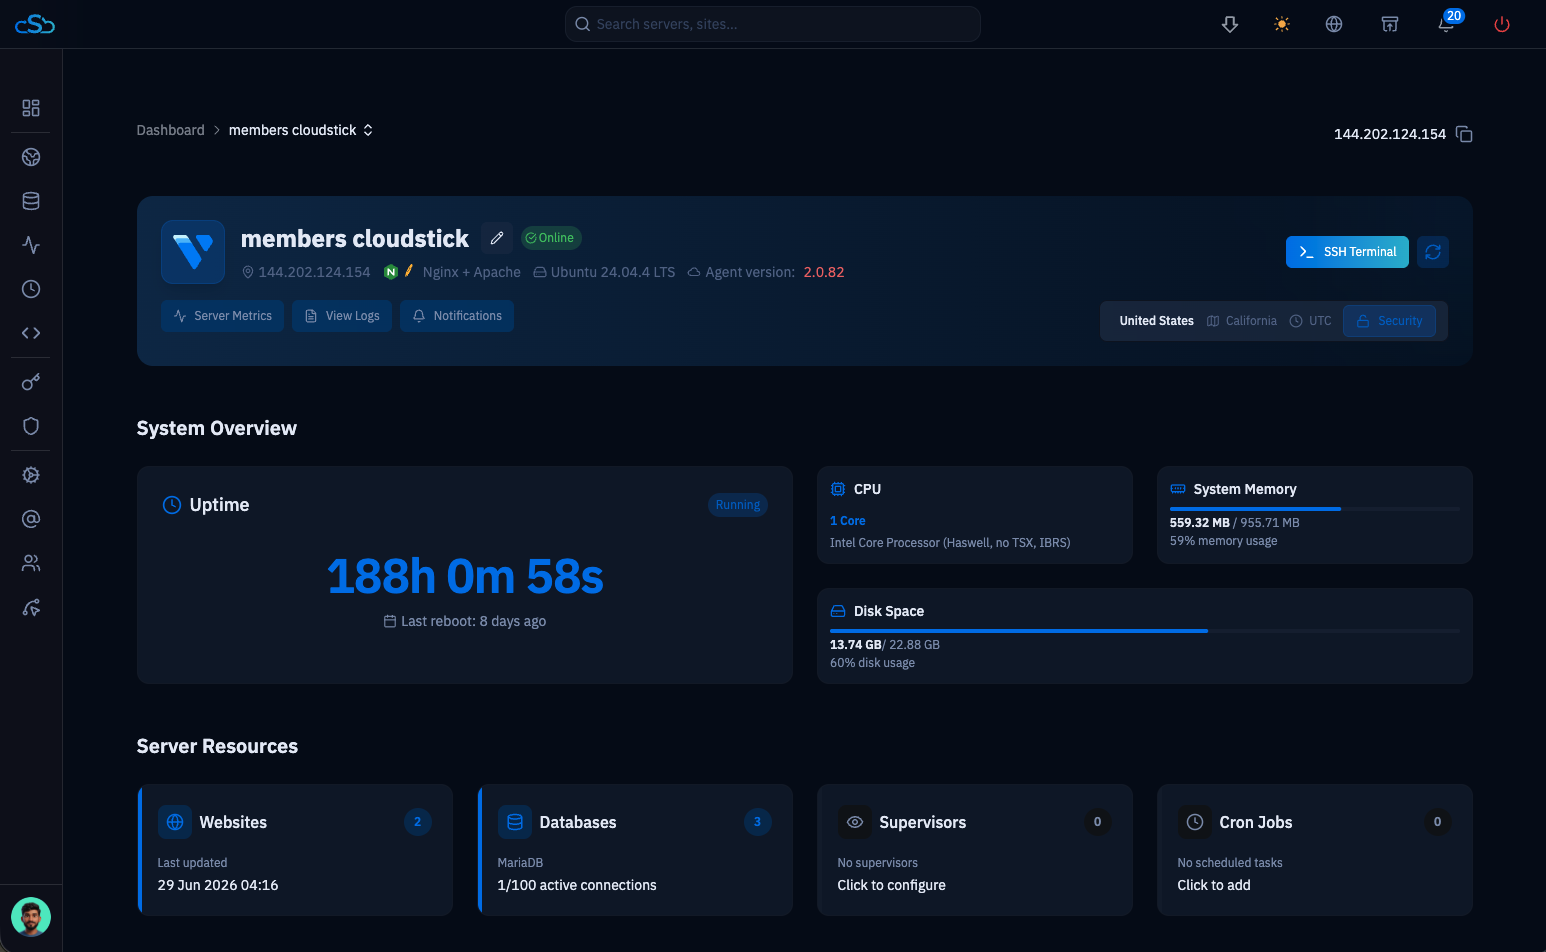
Fig. 02 — Server panel showing the System Overview and Server Resources section, including the Websites resource card.
Step 3: Go to Websites and Click Add Website
All websites and applications hosted on a server are managed from the Websites section. This is where you start a new deployment.
Open Websites: Click Websites in the left-hand navigation, or click the Websites resource card from the server overview. The Websites List shows every site currently hosted on this server.
Click + Add Website: In the top-right corner of the Websites List, click the + Add Website button to open the stack selection dialog.
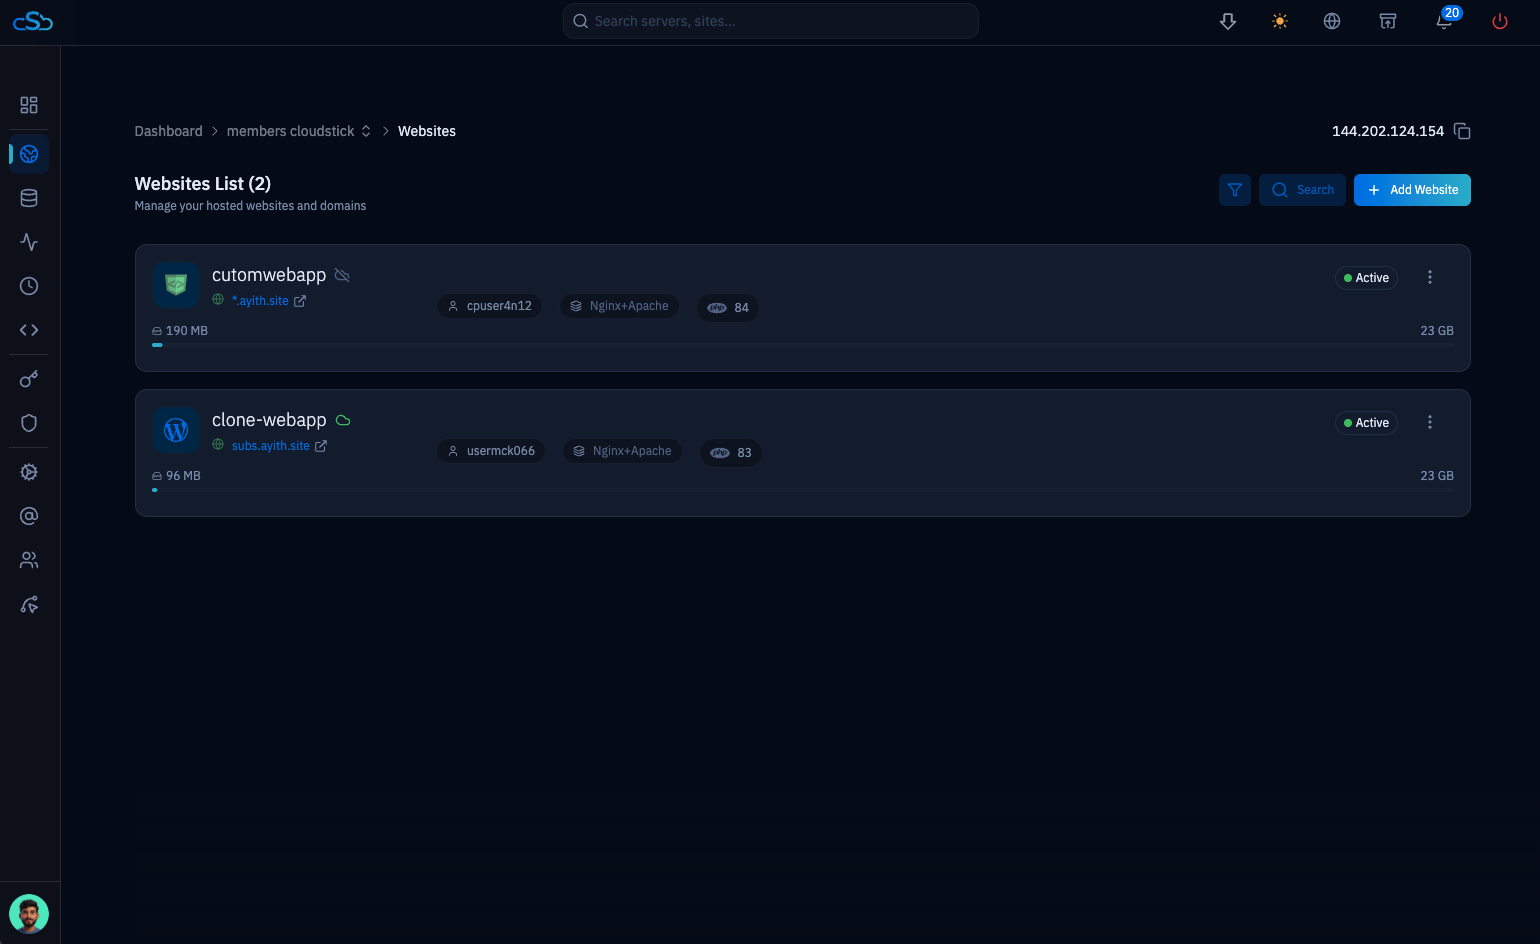
Fig. 03 — Websites List showing existing sites and the + Add Website button in the top-right corner.
Step 4: Select Proxy App
The Create New Website dialog lets you choose the type of application to deploy. For any app running on a custom port, select the Proxy App stack.
Find Proxy App in the list: The dialog shows all available stacks — WordPress, Custom PHP, Proxy App, phpMyAdmin, NextCloud, Laravel, and more. Proxy App is labelled as "JavaScript runtime for server-side applications" and carries a No PHP badge.
Click Select on Proxy App: Click the Select → link on the Proxy App card to proceed to the configuration form.
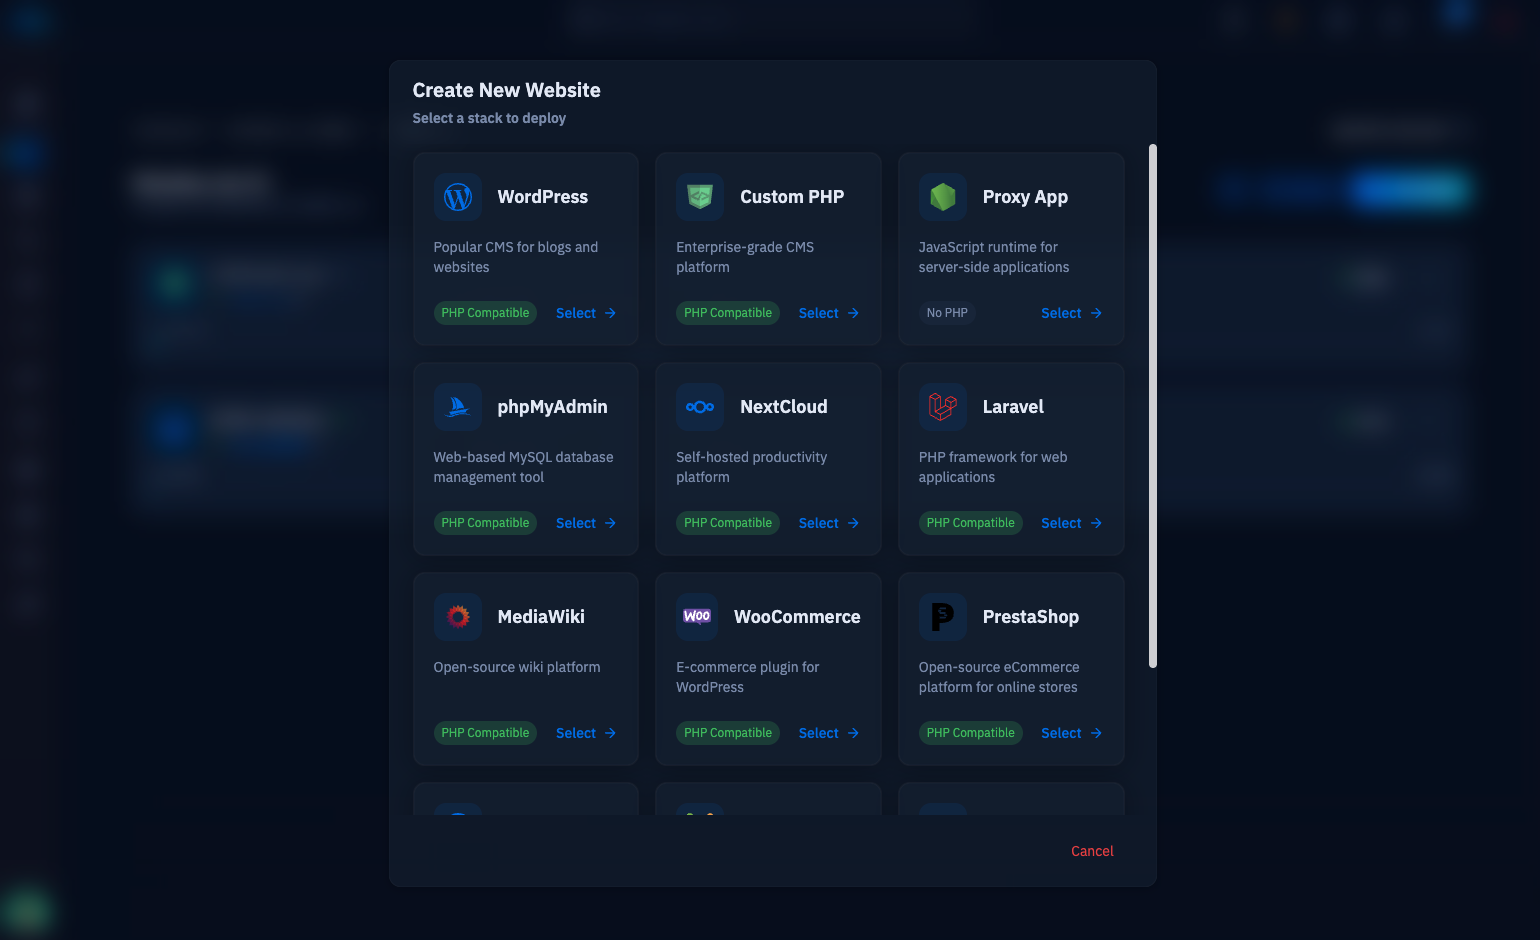
Fig. 04 — Create New Website dialog; click Select on the Proxy App card to configure a reverse-proxy site.
Step 5: Enter Application Details and Deploy
The Proxy App form is where you map your domain to the port your application listens on. Fill in all required fields and click the create button to deploy.
Email Address: Enter the email address to associate with this site — used for SSL certificate notifications.
Website Name: Give the app a short identifier (e.g. myreactapp). This becomes part of the system user and file path on the server.
Domain Type: Choose Use My Own Domain and enter your domain or subdomain (e.g. app.example.com), or select Use Temporary Domain to test before pointing your DNS.
Port: Enter the port your application is listening on — for example, 3000 for a React or Next.js app, 8000 for a Python app, or whatever port your Docker container exposes.
Click Add Website: Click the Add Website button to create the Proxy App. CloudStick will provision the Nginx vhost and wire it up to the port you specified.
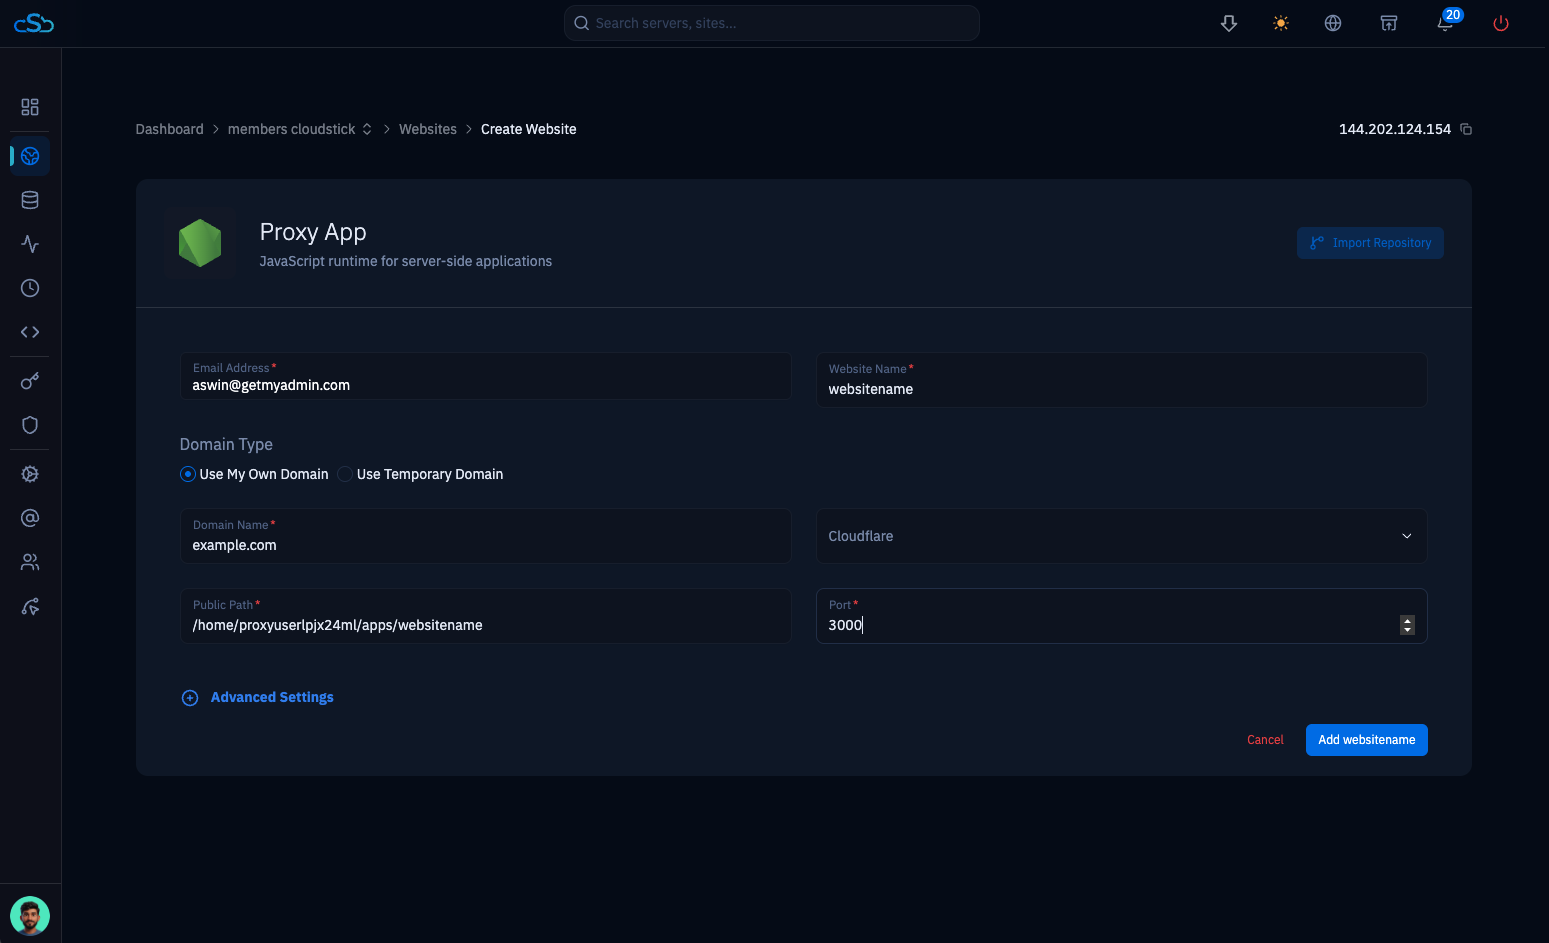
Fig. 05 — Proxy App creation form showing Email Address, Website Name, Domain Type, Domain Name, Public Path, and Port fields.
After creation, if you visit the domain and see a 502 Bad Gateway error, that is expected — it means the Nginx proxy is configured correctly but your application is not yet running on the specified port. Start your application on the server (e.g. pm2 start app.js or docker run) and refresh — your site will load. You can then install a free Let's Encrypt SSL certificate from the website's SSL section in CloudStick.