How to Install Let's Encrypt SSL in CloudStick
Overview
Every website served through CloudStick can be secured with a free Let's Encrypt SSL certificate in just a few clicks. SSL encrypts traffic between your visitors and your server, which is required for browser trust indicators, SEO rankings, and any site that handles user data or payments.
This guide walks through the complete process of installing a Let's Encrypt SSL certificate through the CloudStick dashboard — from navigating to your server, to selecting the correct authorization and access method, to confirming the certificate is live.
Make sure your domain's DNS is already pointing to your server's IP address before deploying SSL. Let's Encrypt validates domain ownership over HTTP, so DNS must be propagated for the certificate to issue successfully.
Step 1: Open the Server Dashboard
Start from the CloudStick main dashboard, where all your connected servers are listed. This is the first screen you see after logging in.
1. Locate your server: Find the server card showing your server name (e.g., nginx) and its IP address.
2. Click MANAGE: Click the MANAGE button on the server card to open the server management panel.
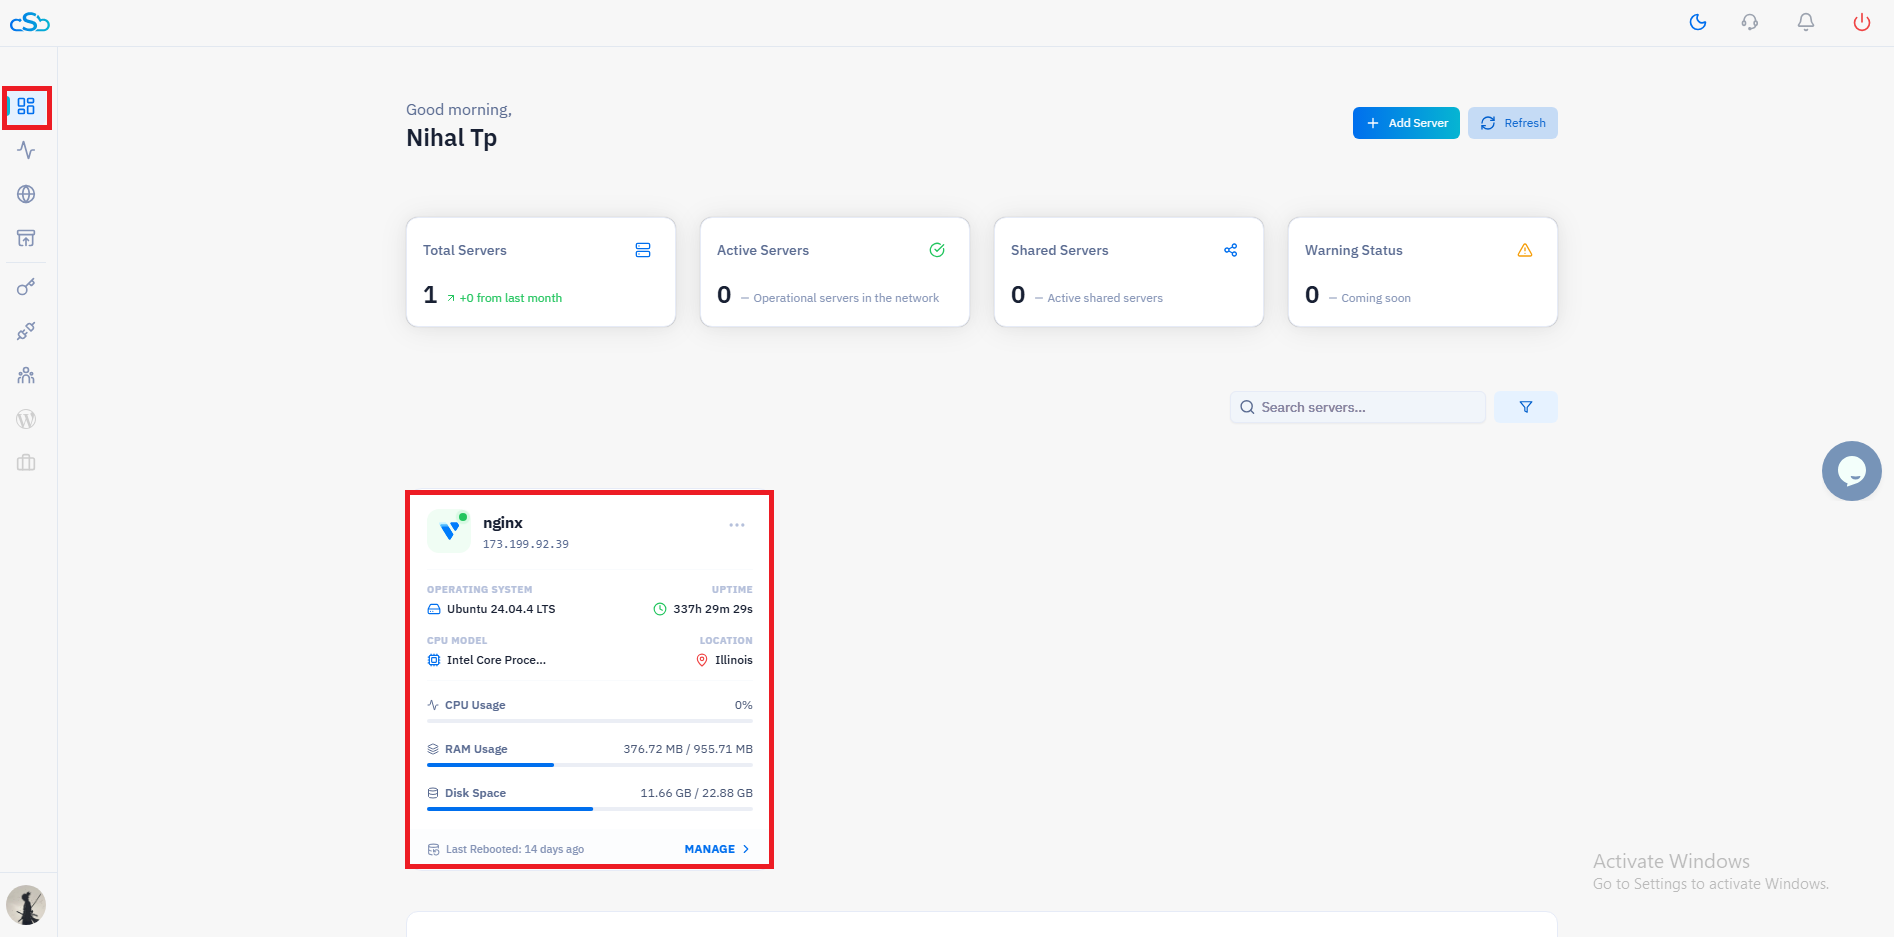
Fig. 01 — CloudStick main dashboard with the server card highlighted and the MANAGE button visible.
Step 2: Go to Websites
Inside the server management panel, you can see all the resources hosted on this server. Navigate to the Websites section to find the site you want to secure.
1. Scroll to Server Resources: In the server management page, locate the Server Resources section which shows Websites, Databases, Supervisors, and Cron Jobs.
2. Click Websites: Click on the Websites resource card to view all websites hosted on this server.
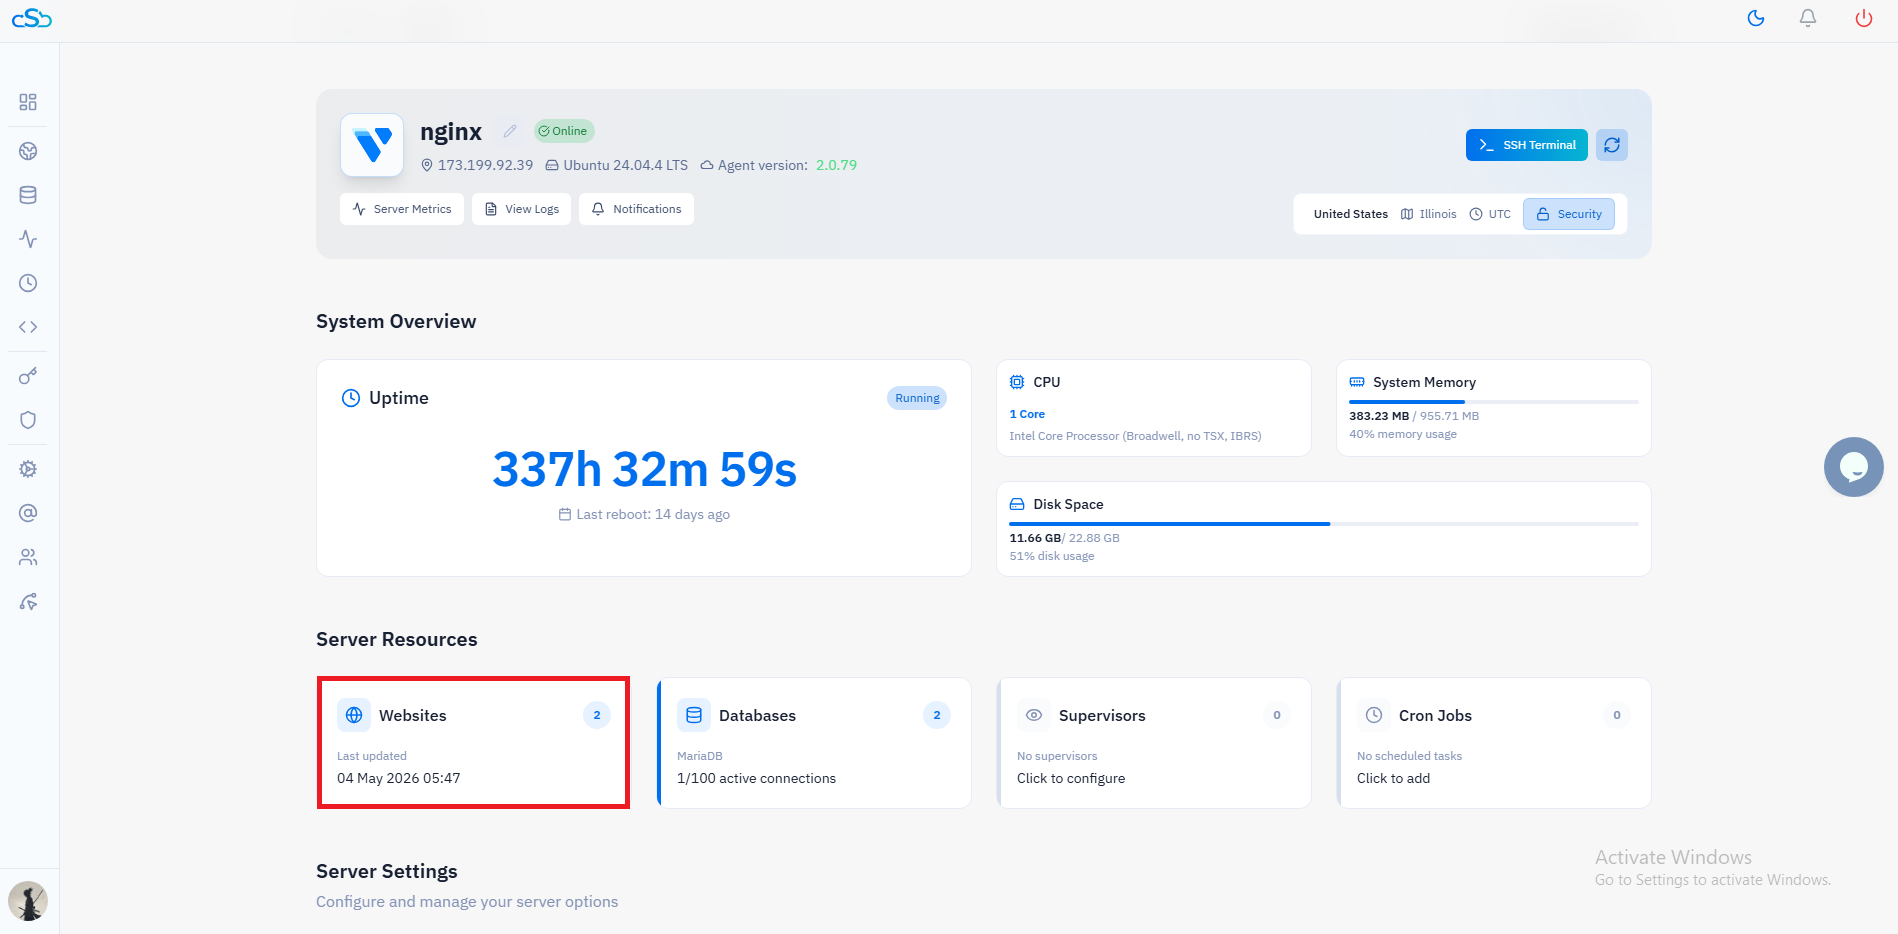
Fig. 02 — Server management page with the Websites resource card highlighted in the Server Resources section.
Step 3: Open the Site & Navigate to Manage SSL
Select the website you want to secure. Each website in CloudStick has its own SSL Management section accessible from the top navigation tabs.
1. Click on your website: From the Websites list, click on the site you want to add SSL to (e.g., custom-test).
2. Click Manage SSL: In the top navigation tabs of the website panel, click the Manage SSL tab.
3. Click Deploy New SSL: The SSL Management section will show 'No SSL found'. Click the Deploy New SSL button to open the configuration form.
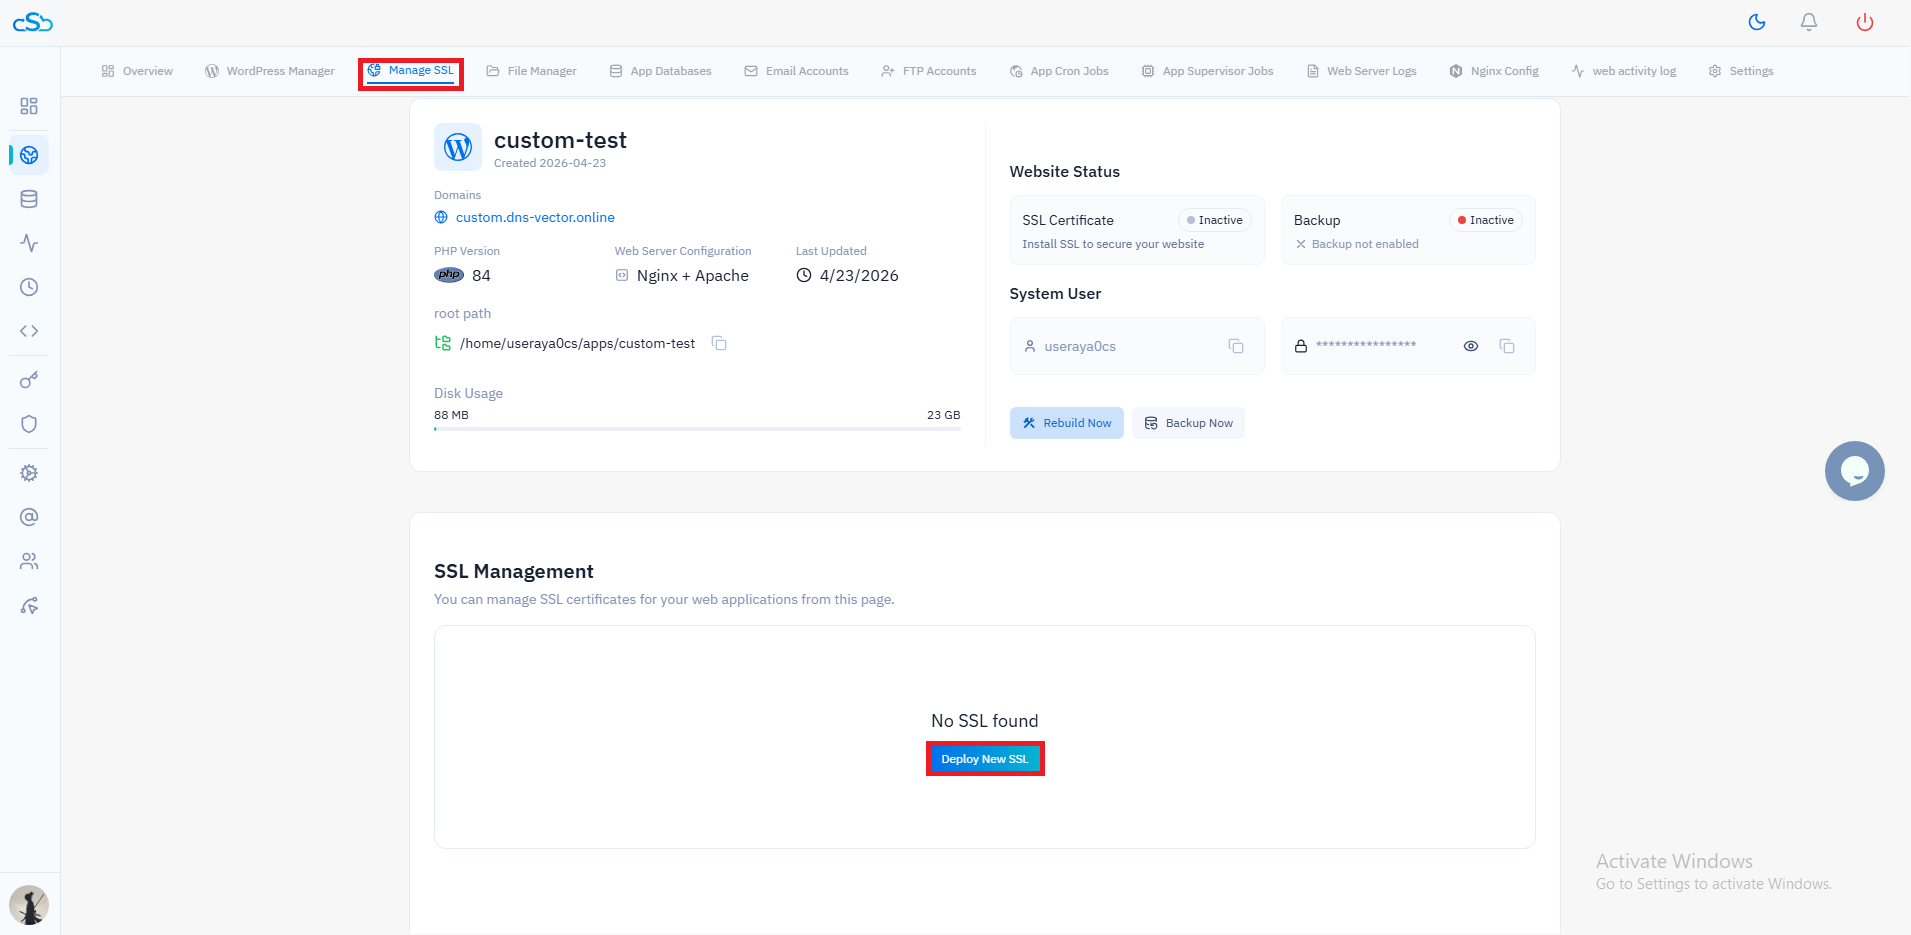
Fig. 03 — Website overview with the Manage SSL tab highlighted and the Deploy New SSL button visible.
Step 4: Configure SSL Settings
The SSL configuration form gives you control over the certificate provider, how Let's Encrypt verifies domain ownership, and how HTTPS is enforced on your site. Review each setting carefully before saving.
SSL Provider
Let's Encrypt (Free Certificate): Select this for the free, auto-renewing certificate issued by Let's Encrypt — the right choice for most sites.
Custom: Select this only if you have a paid certificate from a provider like Verisign or GoTrust and want to install it manually.
Authorization Method
HTTP Verification: The default and recommended option. Let's Encrypt validates your domain by accessing a file over HTTP. Use this for most setups.
DNS Verification: Required when your domain is behind Cloudflare or managed through an external DNS provider that proxies traffic, as HTTP verification may fail in those environments.
Access Method
HTTPS + HTTP: Allows both protocols. Recommended if your site is behind Cloudflare — this avoids redirect loops while still supporting HTTPS redirects.
HTTPS Only: Forcefully redirects all HTTP traffic to HTTPS. Use this for standard setups where you want strict HTTPS enforcement.
Once you have reviewed all three settings, click Save SSL Configuration to begin the certificate issuance process.
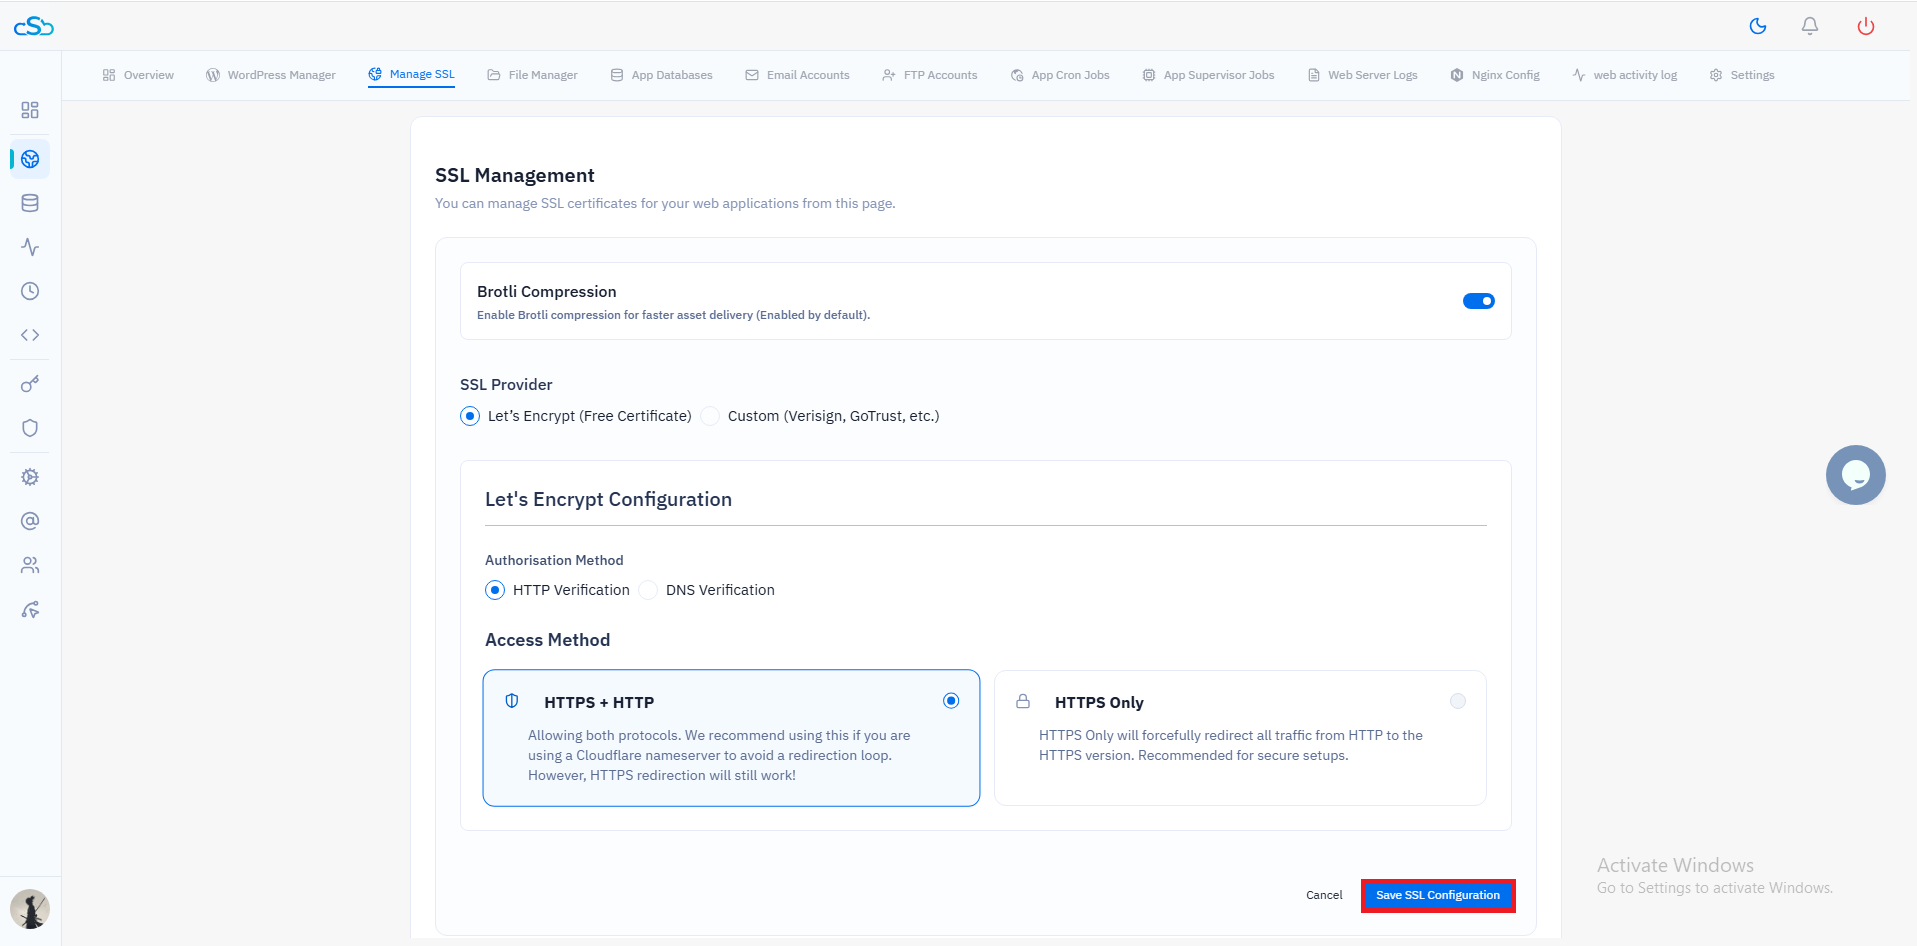
Fig. 04 — SSL configuration form showing SSL Provider, Authorization Method, Access Method, and the Save SSL Configuration button.
Step 5: Confirm Deployment
After saving the configuration, CloudStick contacts Let's Encrypt, validates your domain, and issues the certificate. The page refreshes automatically to show the result.
SSL Active and Secured: The SSL Management page will display this status with a green shield icon when the certificate is live.
Certificate details: The Certificate Life Cycle section shows the issuer (Let's Encrypt), the issue date, and the expiration date (90 days from issuance — auto-renewed by CloudStick).
Security Protocols: TLSv1.2 and TLSv1.3 are listed as supported, and Brotli Compression is shown as Enabled for faster asset delivery.
Success notification: A green toast at the bottom right confirms: "SSL Certificate configuration saved successfully!"
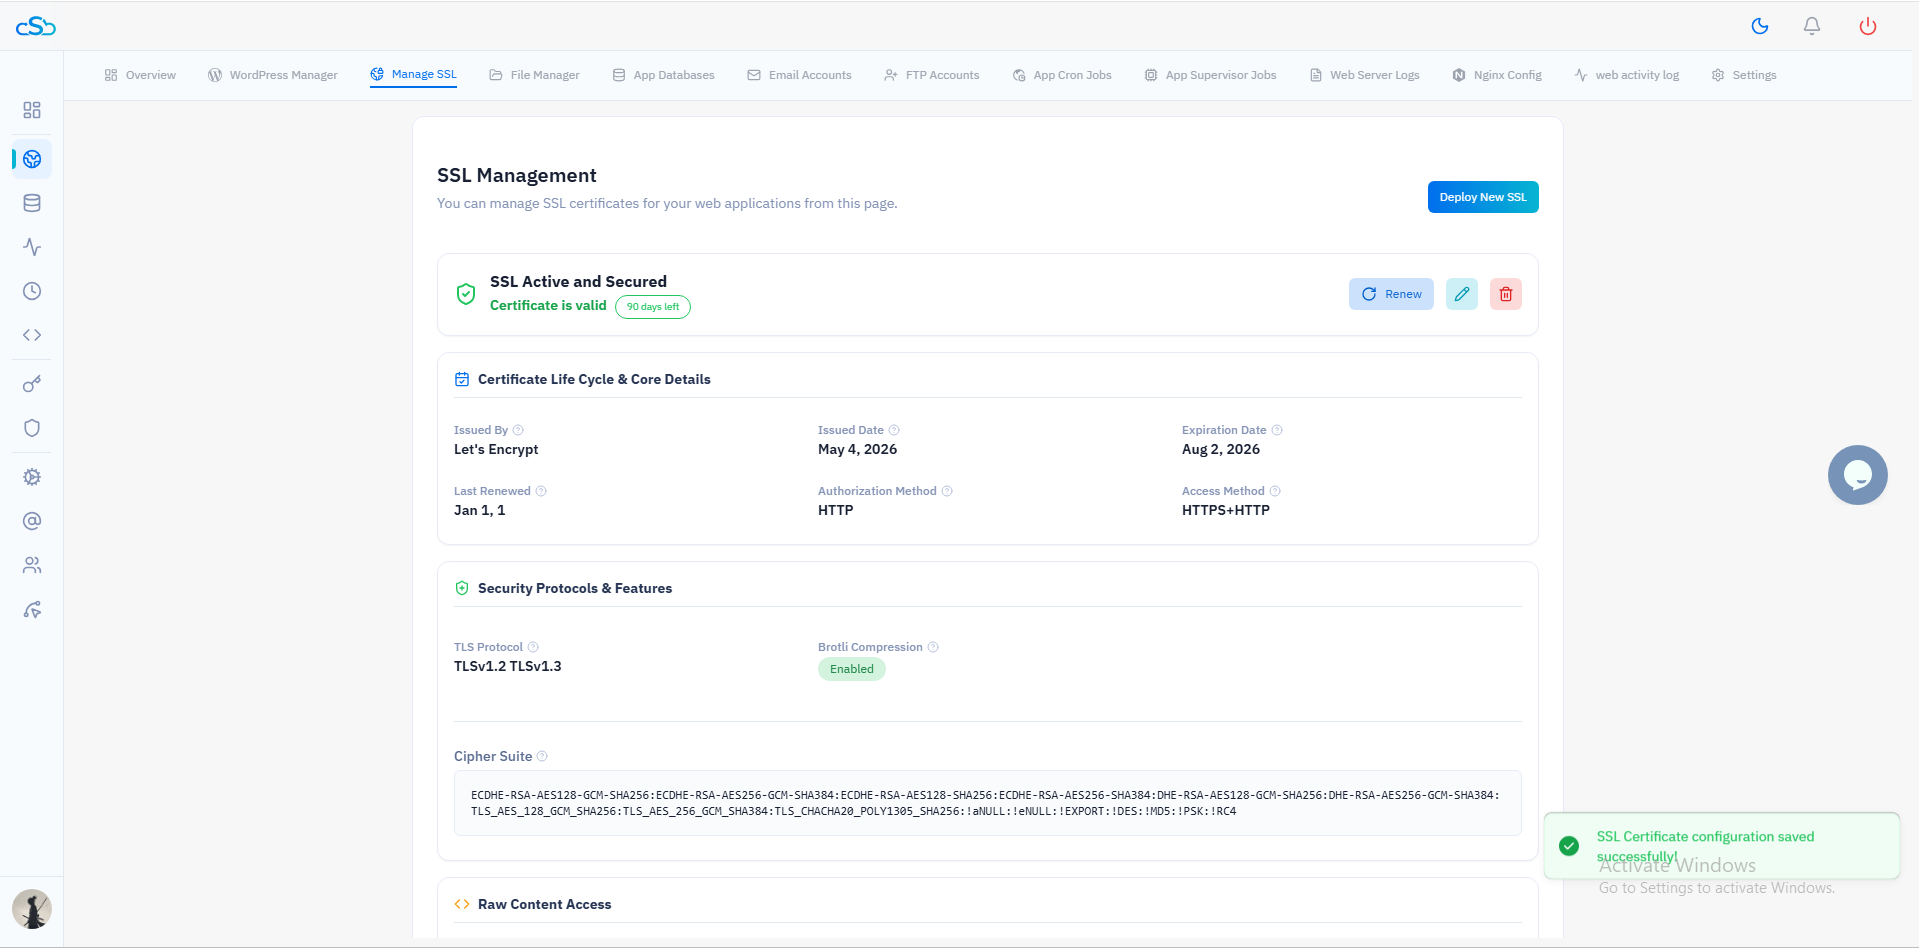
Fig. 05 — SSL Management page showing SSL Active and Secured with certificate details and the success toast notification.