How to Install an SSL Certificate for a Subdomain
Overview
A subdomain is treated as its own web application in CloudStick, which means it needs its own SSL certificate — the certificate on your main domain does not automatically cover blog.example.com or app.example.com. CloudStick makes securing a subdomain effortless: it issues a free Let's Encrypt certificate, installs it, and configures HTTPS for you, all from the dashboard — no command line, no manual certificate files, and automatic renewal included.
This guide walks you through opening the subdomain from your website's Sub Domains tab, verifying that DNS points to your server, and deploying the certificate from the Manage SSL tab in a single click.
This guide assumes the subdomain already exists on your website. If you haven't created it yet, follow How to Set Up a Subdomain first, then return here to secure it with SSL.
Step 1: Log In and Select Your Server
SSL certificates are deployed per web application, so start by opening the server panel for the server that hosts your subdomain.
Log in to your CloudStick account: Sign in at the CloudStick dashboard to see all of your connected servers.
Select your server: From the Dashboard, find the server where the subdomain is hosted and click Manage to open the server panel.
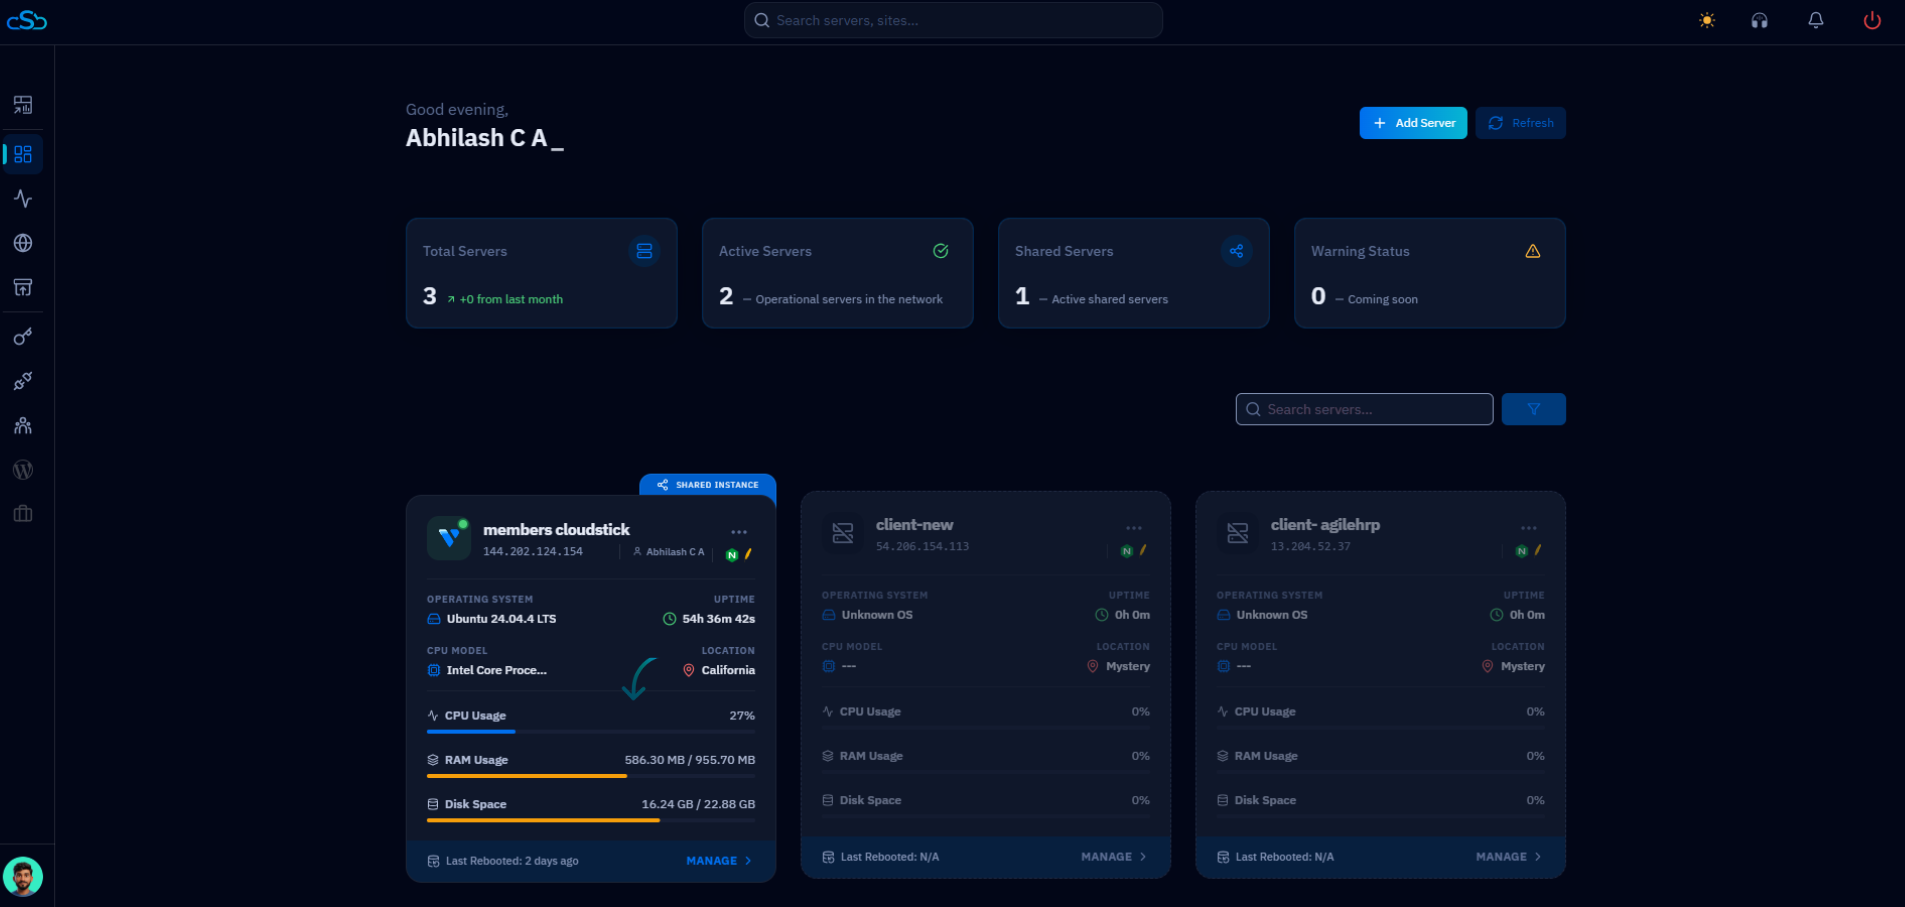
Fig. 01 — CloudStick Dashboard showing all connected servers; click Manage on the server that hosts your subdomain.
Step 2: Open the Websites Section
Inside the server panel, open the Websites area to see every website hosted on this server.
Open Websites: From the left-hand navigation, click Websites — or click the Websites resource card in the Server Resources section of the server overview.
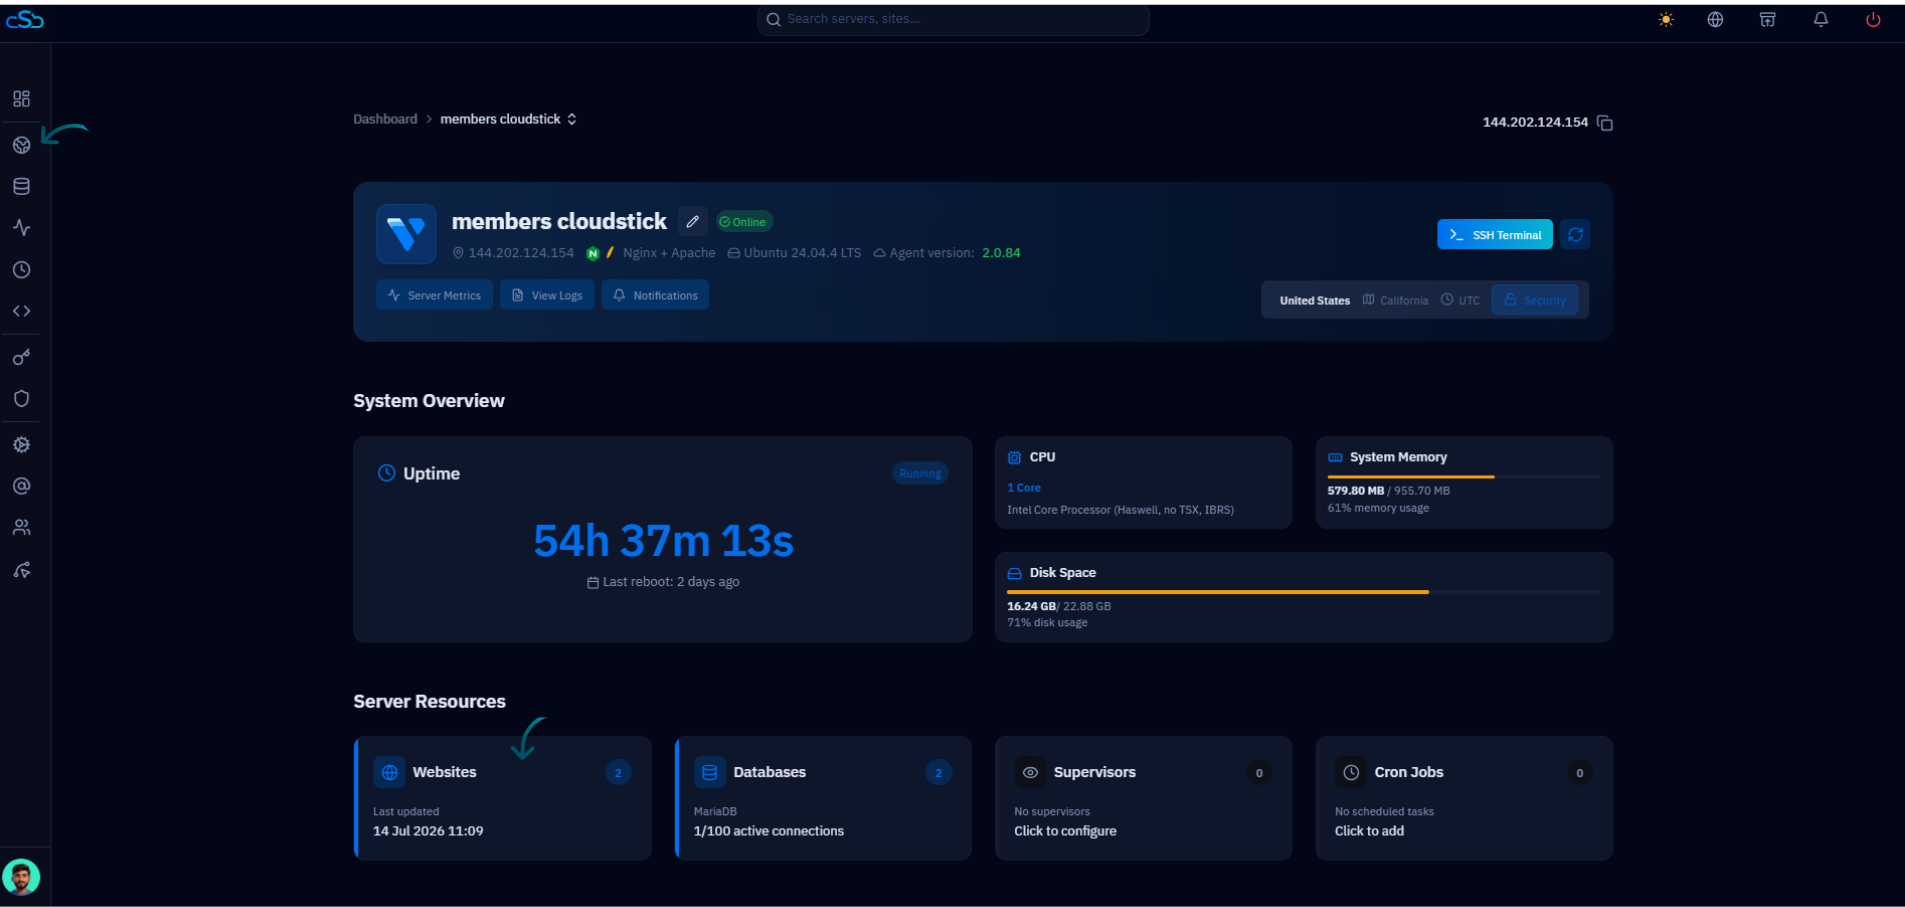
Fig. 02 — Server overview with the Websites resource card in the Server Resources section.
Step 3: Select the Website
The Websites List shows every website on the server along with its domain, system user, web stack, and PHP version. Open the website that contains your subdomain — not the subdomain itself yet.
Browse the Websites List: Each entry shows the application name, primary domain, status, and configuration details.
Click the parent website: Select the website your subdomain belongs to; this opens its management view.
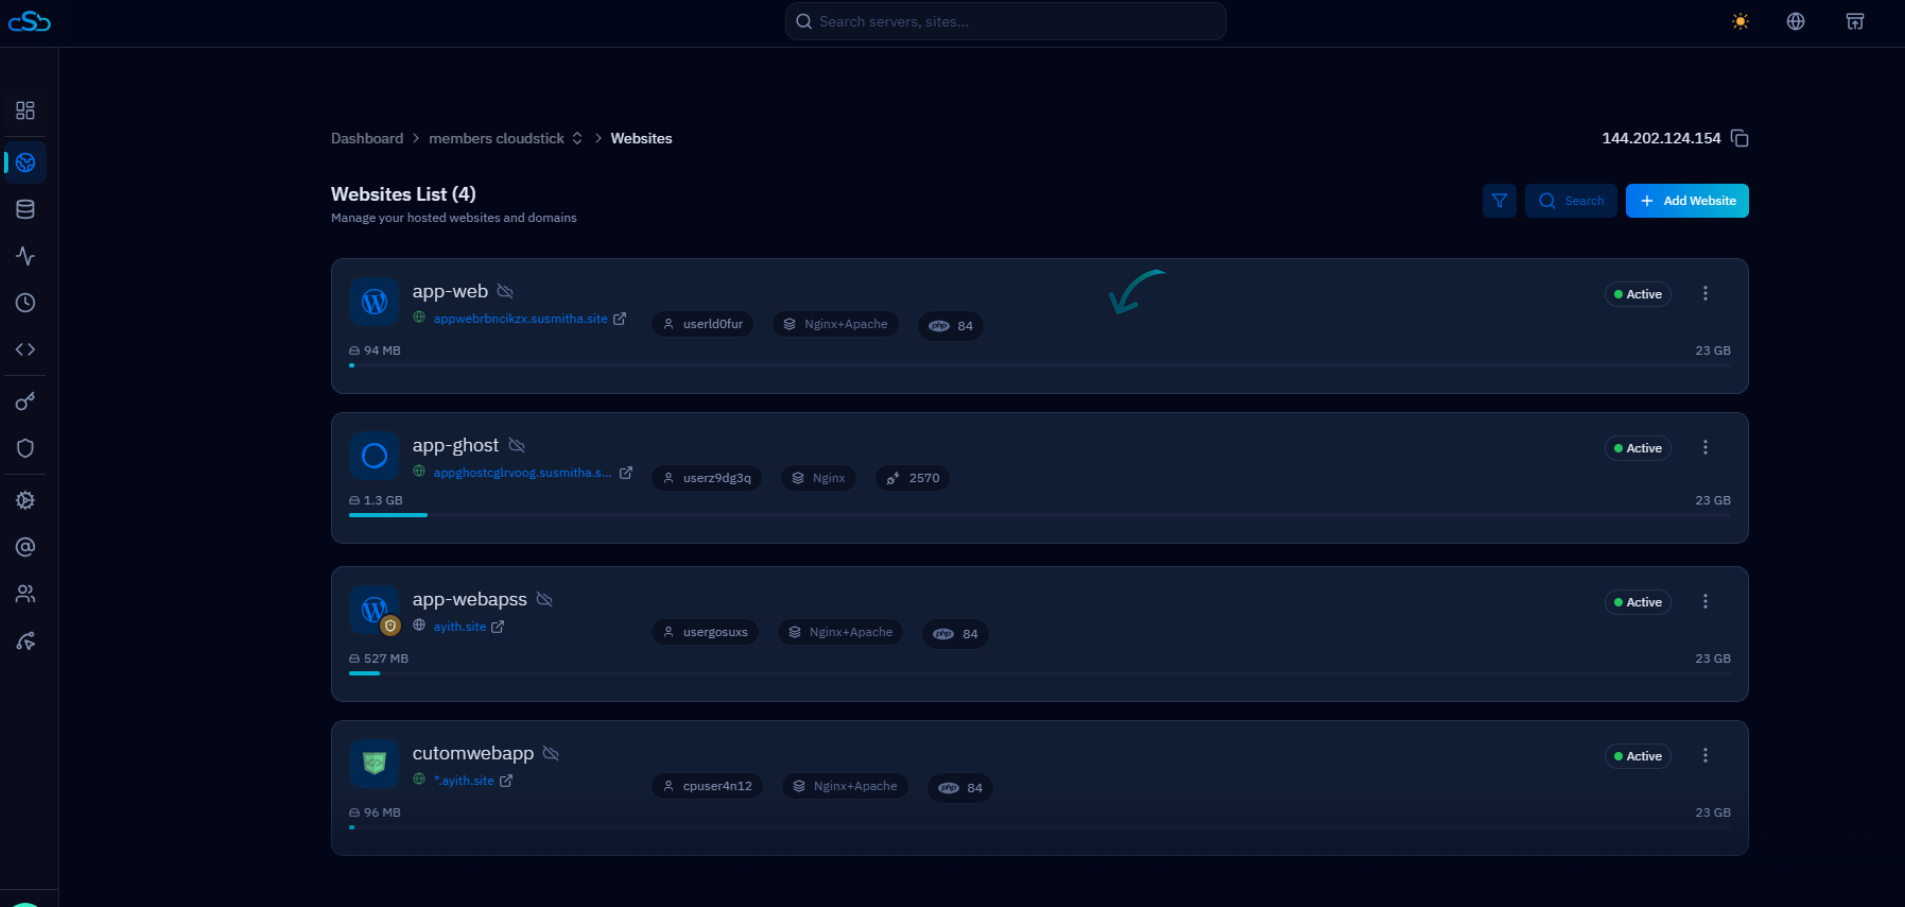
Fig. 03 — Websites List showing all hosted websites; click the website that contains your subdomain.
Step 4: Open the Sub Domains Tab
The website management page opens on the Website Summary view, with a row of tabs across the top for managing every aspect of the site.
Locate the top tab bar: At the top of the website management page you will see tabs such as Overview, Manage SSL, File Manager, App Databases, and more.
Click Sub Domains: Select the Sub Domains tab to view all subdomains connected to this website.
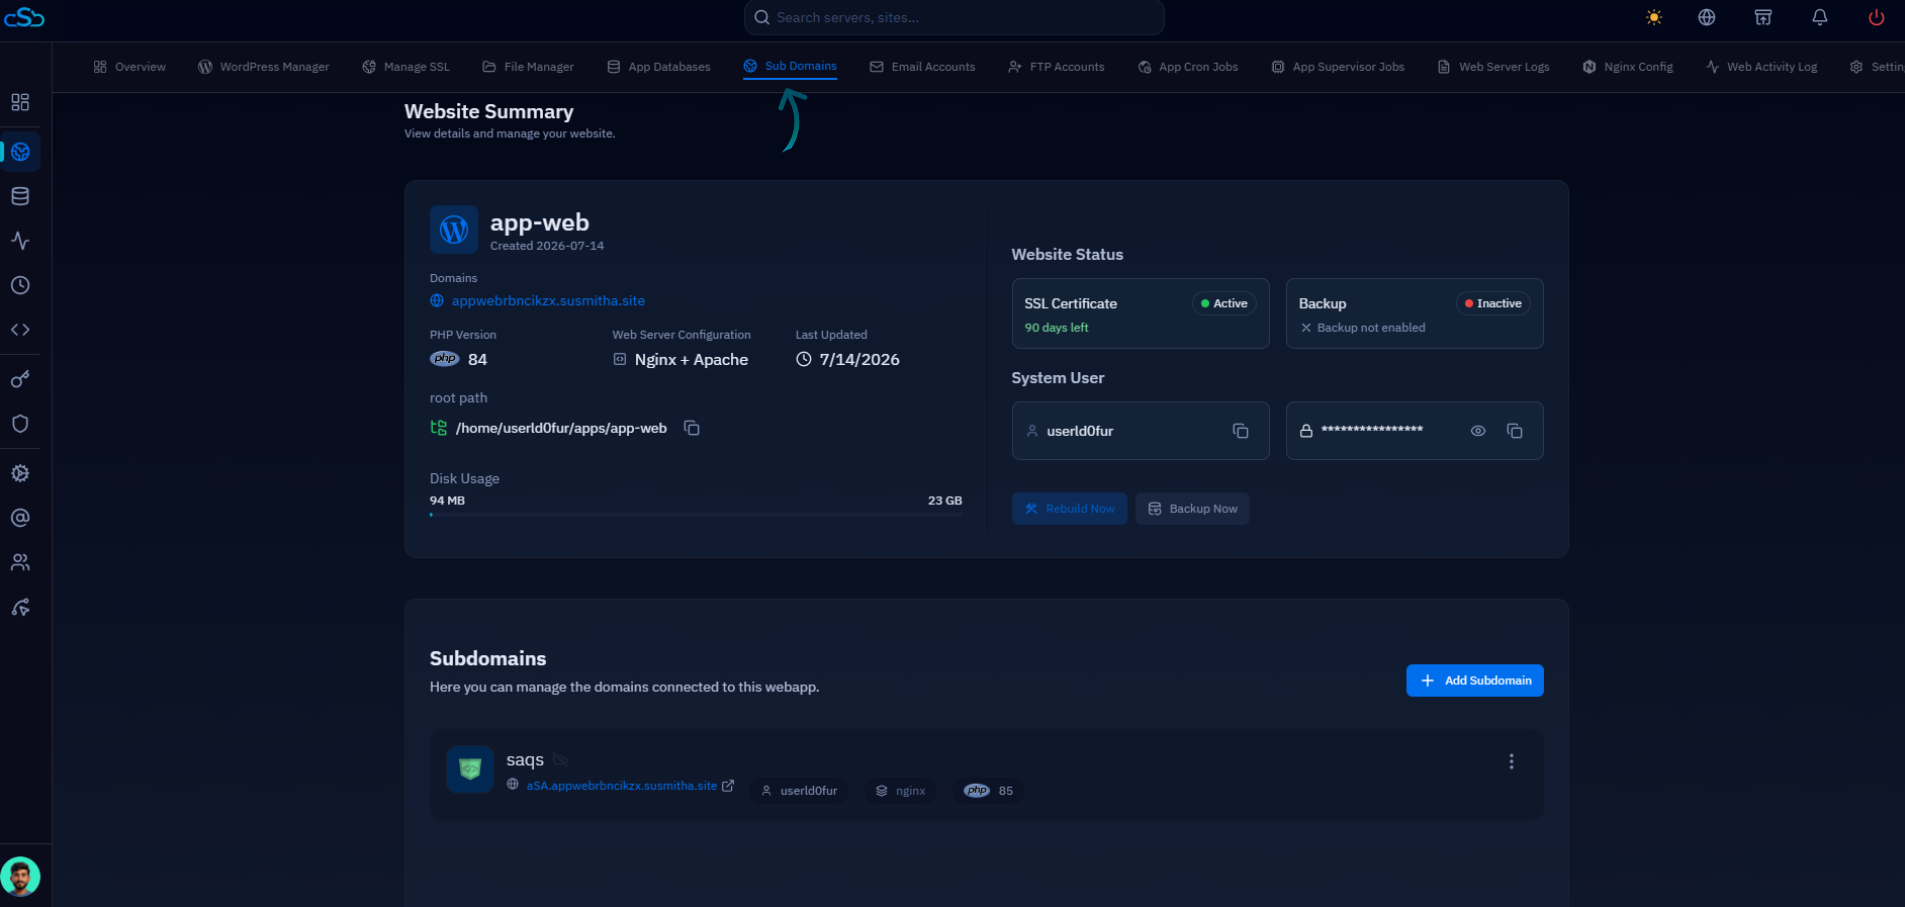
Fig. 04 — Website Summary page; the Sub Domains tab sits in the top navigation bar.
Step 5: Select Your Subdomain
The Subdomains section lists every subdomain created under this web application, each with its own system user, web stack, and PHP version.
Find your subdomain in the list: Each entry shows the subdomain name and its full address.
Click the subdomain: Select the subdomain you want to install the SSL certificate on; this opens the subdomain's own management view.
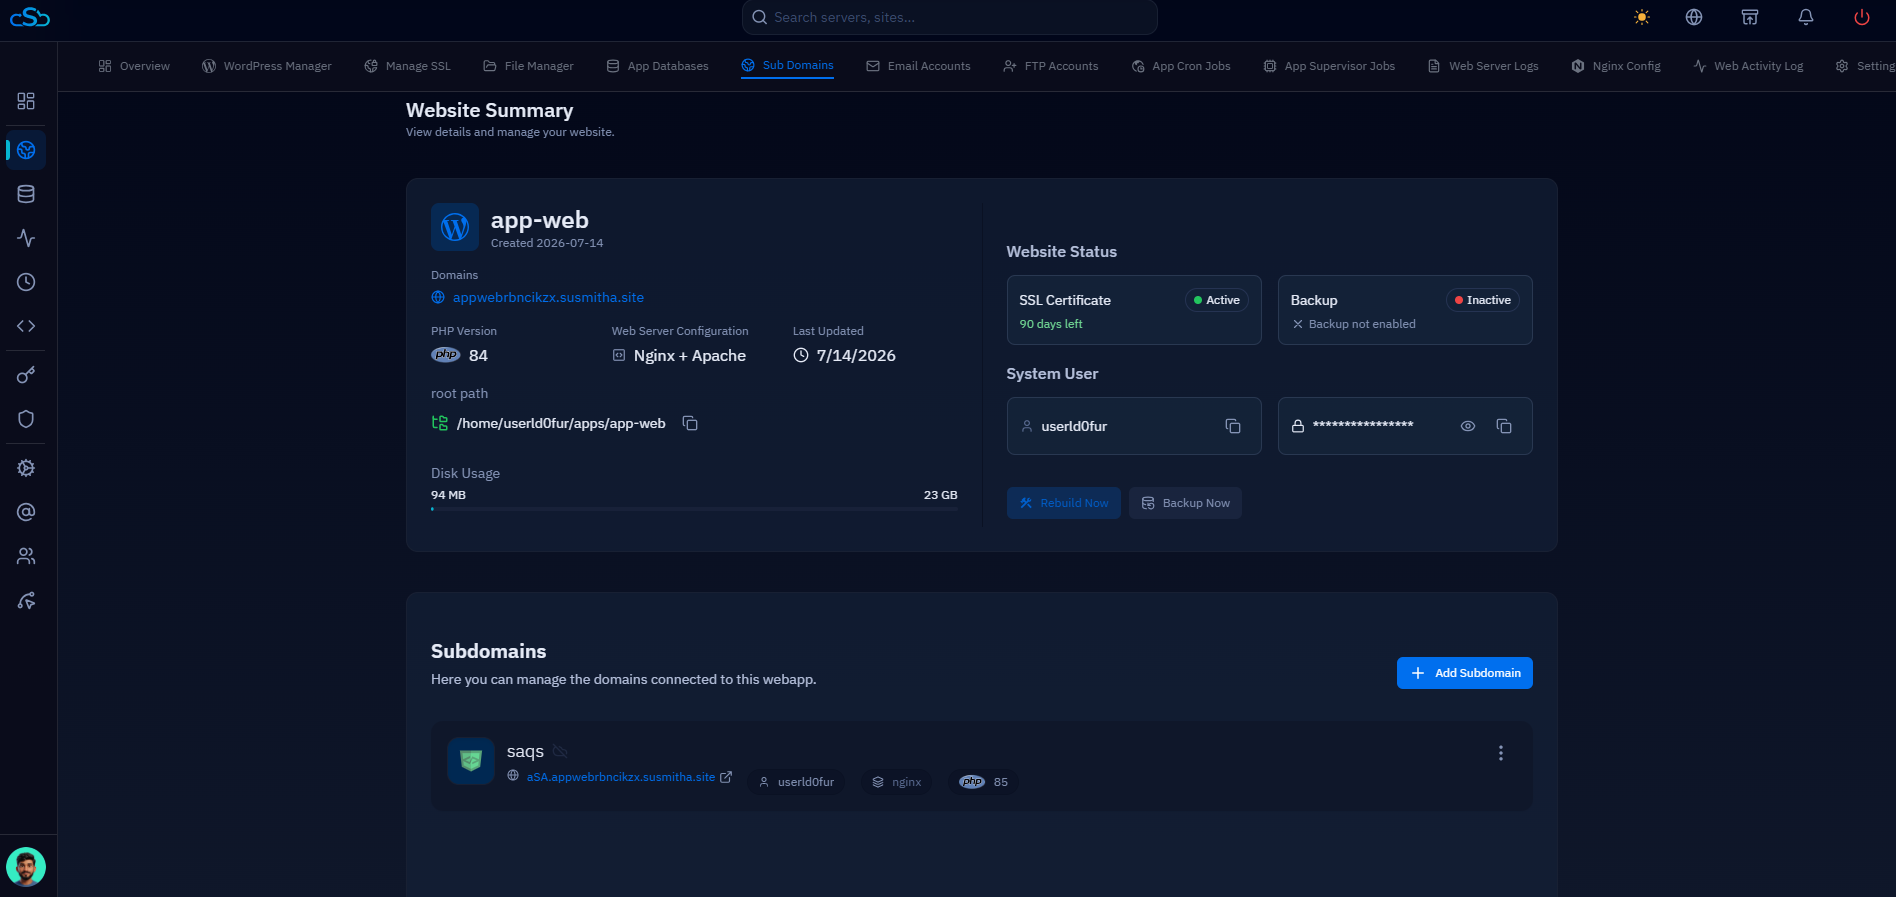
Fig. 05 — Subdomains section listing the subdomains connected to this website; click the one you want to secure.
Step 6: Verify DNS Before Deploying
Let's Encrypt validates that you control the subdomain by reaching it over the public internet. If DNS does not resolve to your server, certificate issuance will fail — so confirm the following before deploying.
Point the subdomain at your server: Create an A record for the subdomain that resolves to your server's public IP address.
Wait for DNS propagation: Make sure the record has fully propagated; a freshly created record can take some time to become visible worldwide.
Using Cloudflare? Temporarily set the subdomain's DNS record to DNS Only (grey cloud) so Let's Encrypt can reach your server directly during validation. You can re-enable the proxy afterwards.
Step 7: Deploy the SSL Certificate
With DNS in place, deploying the certificate takes one click. CloudStick handles validation, issuance, installation, and web-server configuration automatically.
Open Manage SSL: At the top of the subdomain's management page, click the Manage SSL tab. The SSL Management section shows the subdomain's current certificate status.
Click Deploy New SSL: Click the Deploy New SSL button to start the automated deployment.
CloudStick will automatically:
Verify the domain with Let's Encrypt
Issue a free Let's Encrypt SSL certificate
Install the certificate on your server
Configure HTTPS for the subdomain
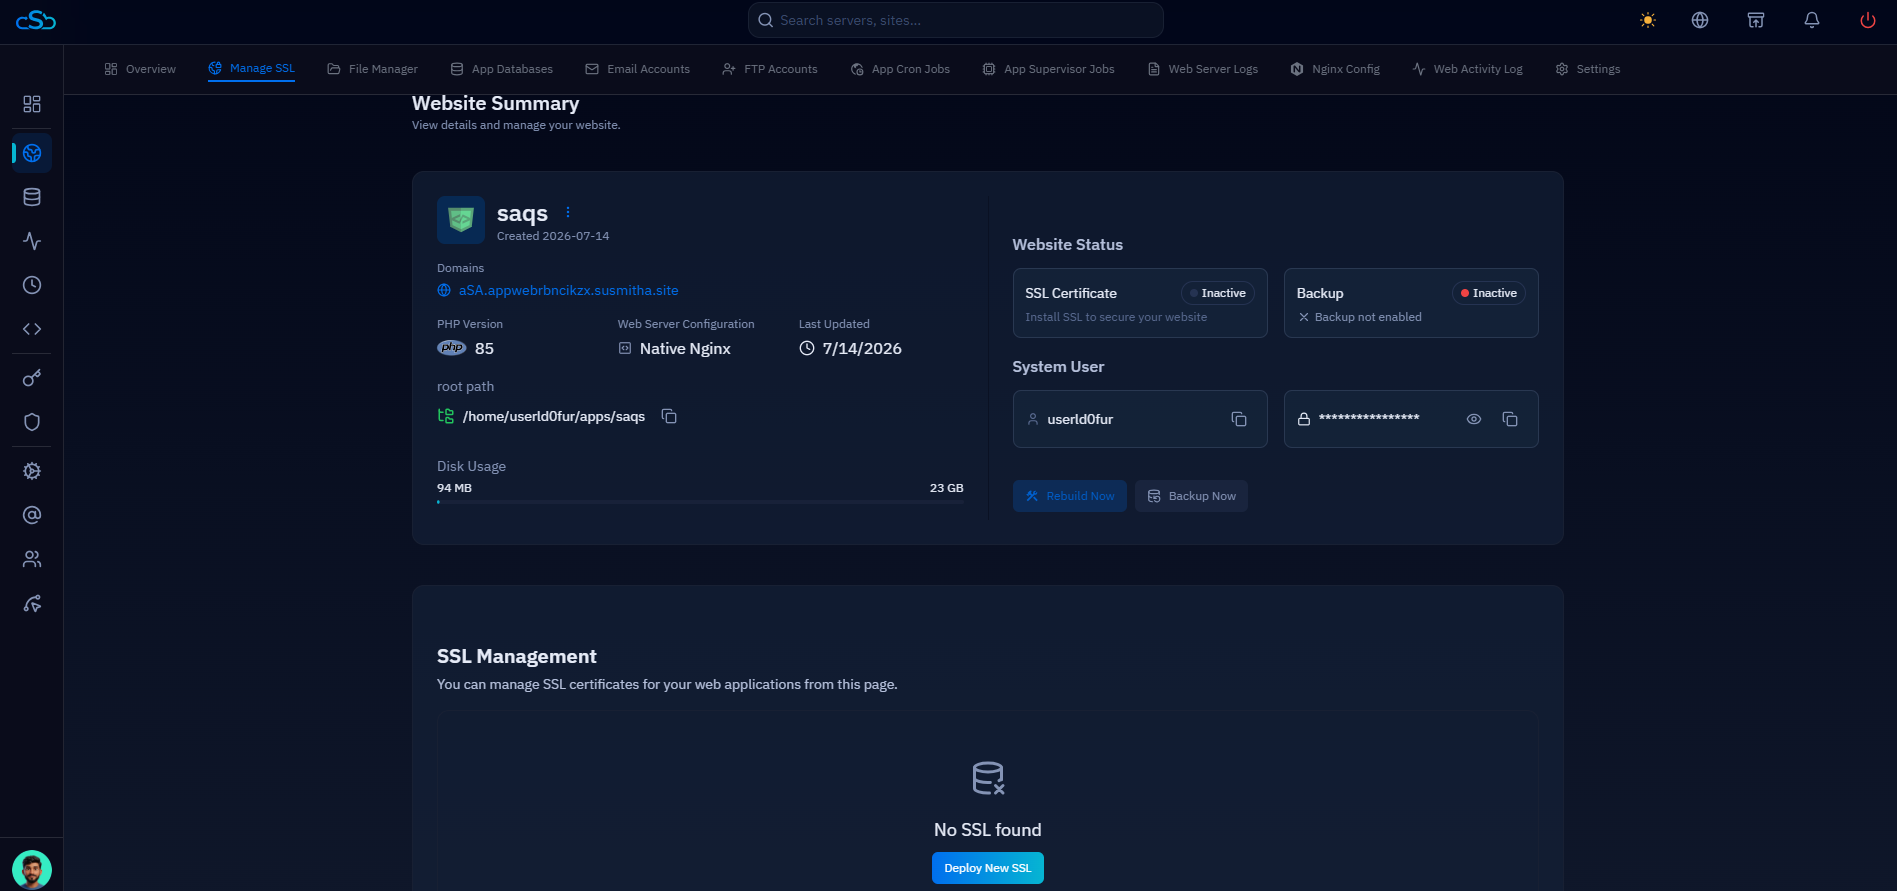
Fig. 06 — Subdomain's Manage SSL tab; the SSL Management section shows no certificate yet, with the Deploy New SSL button ready.
Let's Encrypt certificates deployed through CloudStick renew automatically — no manual action is needed when the certificate approaches expiry.
Step 8: Verify the SSL Certificate
Once deployment completes, confirm the subdomain is served securely over HTTPS.
Visit the subdomain: Open your browser and go to the HTTPS address, for example:
https://your-subdomain.example.com
Check for the padlock: Your subdomain should now load over a secure HTTPS connection, and the SSL Certificate status on the Website Summary shows Active.
If the site loads over HTTPS but keeps redirecting, see our guide on fixing a redirect loop after deploying SSL. For issuance or renewal problems, see SSL certificate renewal and troubleshooting.