How to fix redirect loop after deploying SSL
Overview
After enabling SSL in CloudStick, some users see an ERR_TOO_MANY_REDIRECTS error or an infinite redirect loop. This happens when two systems are both trying to redirect HTTP to HTTPS simultaneously — your browser gets bounced back and forth endlessly and never lands on a page. The most common culprits are Cloudflare proxy settings, duplicate Nginx redirect rules, or WordPress site URLs that still point to http:// after SSL is deployed.
This guide walks through three distinct fixes — one for Cloudflare users, one for non-Cloudflare DNS users, and one for WordPress URL mismatches. Identify which situation applies to you and follow the matching fix.
SSL must already be deployed on your website before following this guide. If you have not yet installed SSL, see How to install Let's Encrypt SSL first.
Fix A: Using Cloudflare as your nameserver
When Cloudflare is proxying your domain (orange cloud enabled), it has three independent settings that can each redirect HTTP to HTTPS: the proxy itself, the SSL mode, and the Always Use HTTPS toggle. If CloudStick is simultaneously set to HTTPS Only, multiple redirects stack and loop. The fix is to ensure only one layer handles the redirect.
Step 1: Navigate to Manage SSL in CloudStick
Go to your website in CloudStick: Open the website panel and click the Manage SSL tab in the top navigation.
Click the edit (pencil) icon: Next to your active certificate, click the pencil icon to open SSL configuration settings.
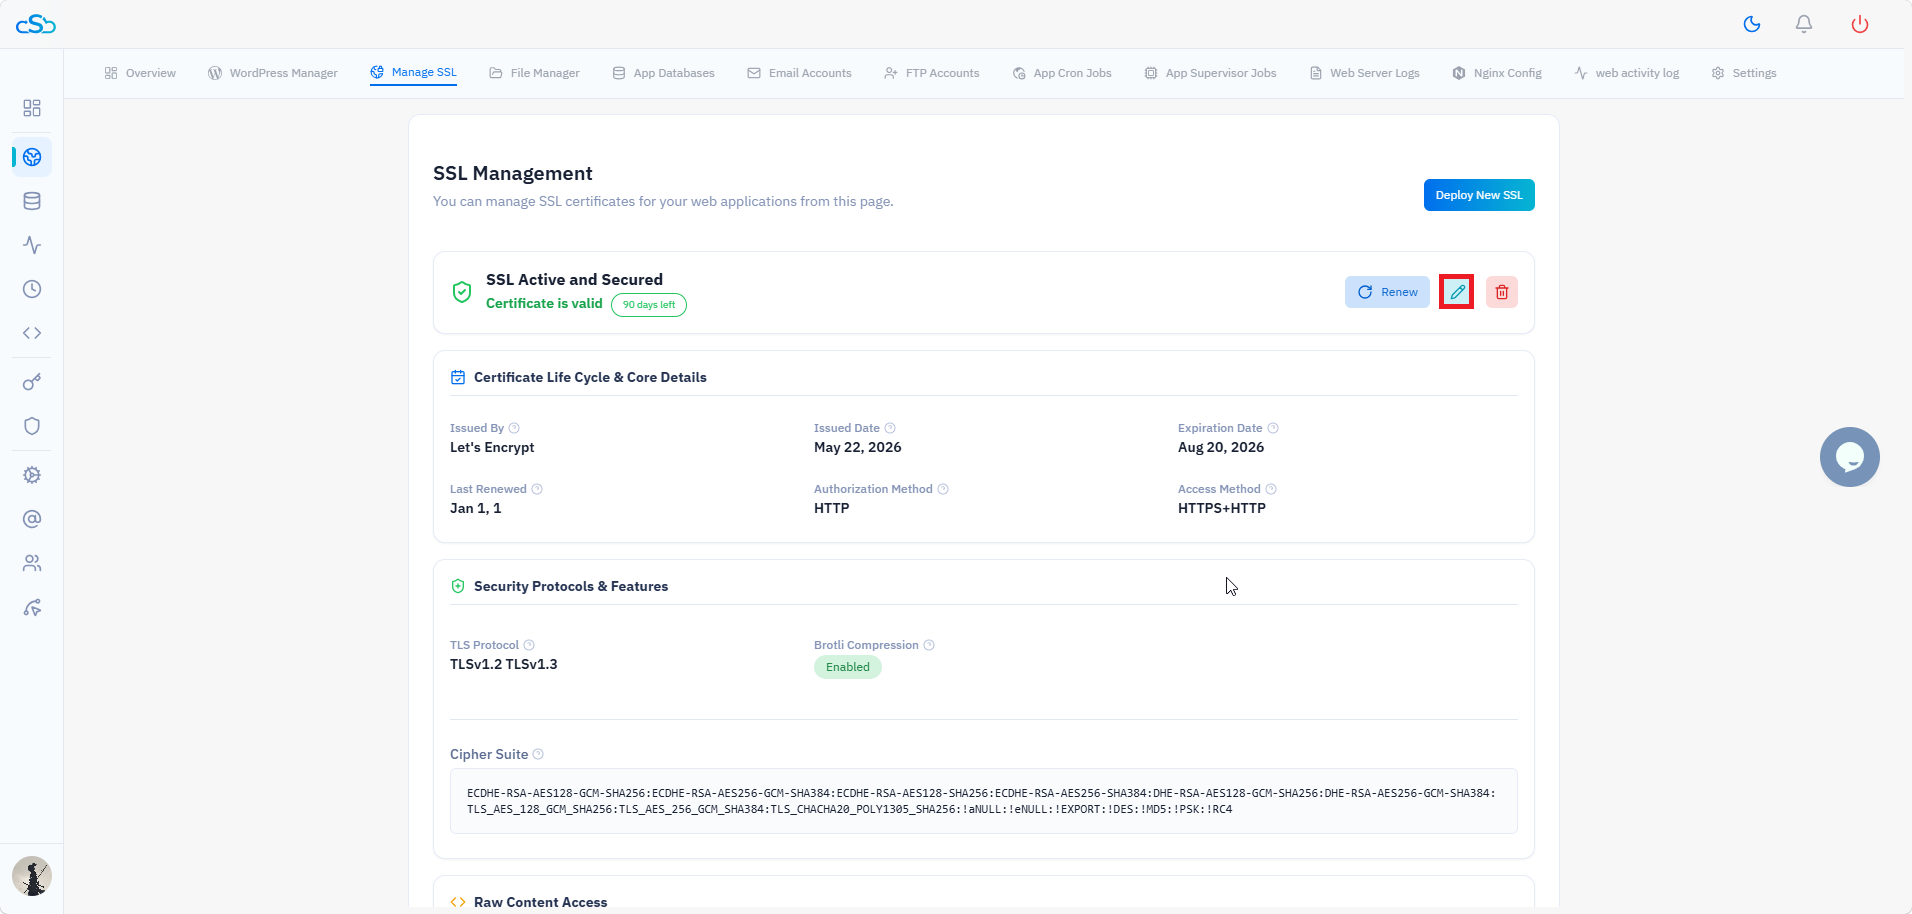
Fig. 01 — SSL Management overview showing the active certificate and the edit (pencil) icon.
Step 2: Switch the Access Method to HTTPS + HTTP
Under Access Method: Select HTTPS + HTTP instead of HTTPS Only.
Click Update SSL Configuration: Save the change and wait for it to apply. This allows Cloudflare to handle the HTTP → HTTPS redirect without CloudStick creating a second redirect that loops.
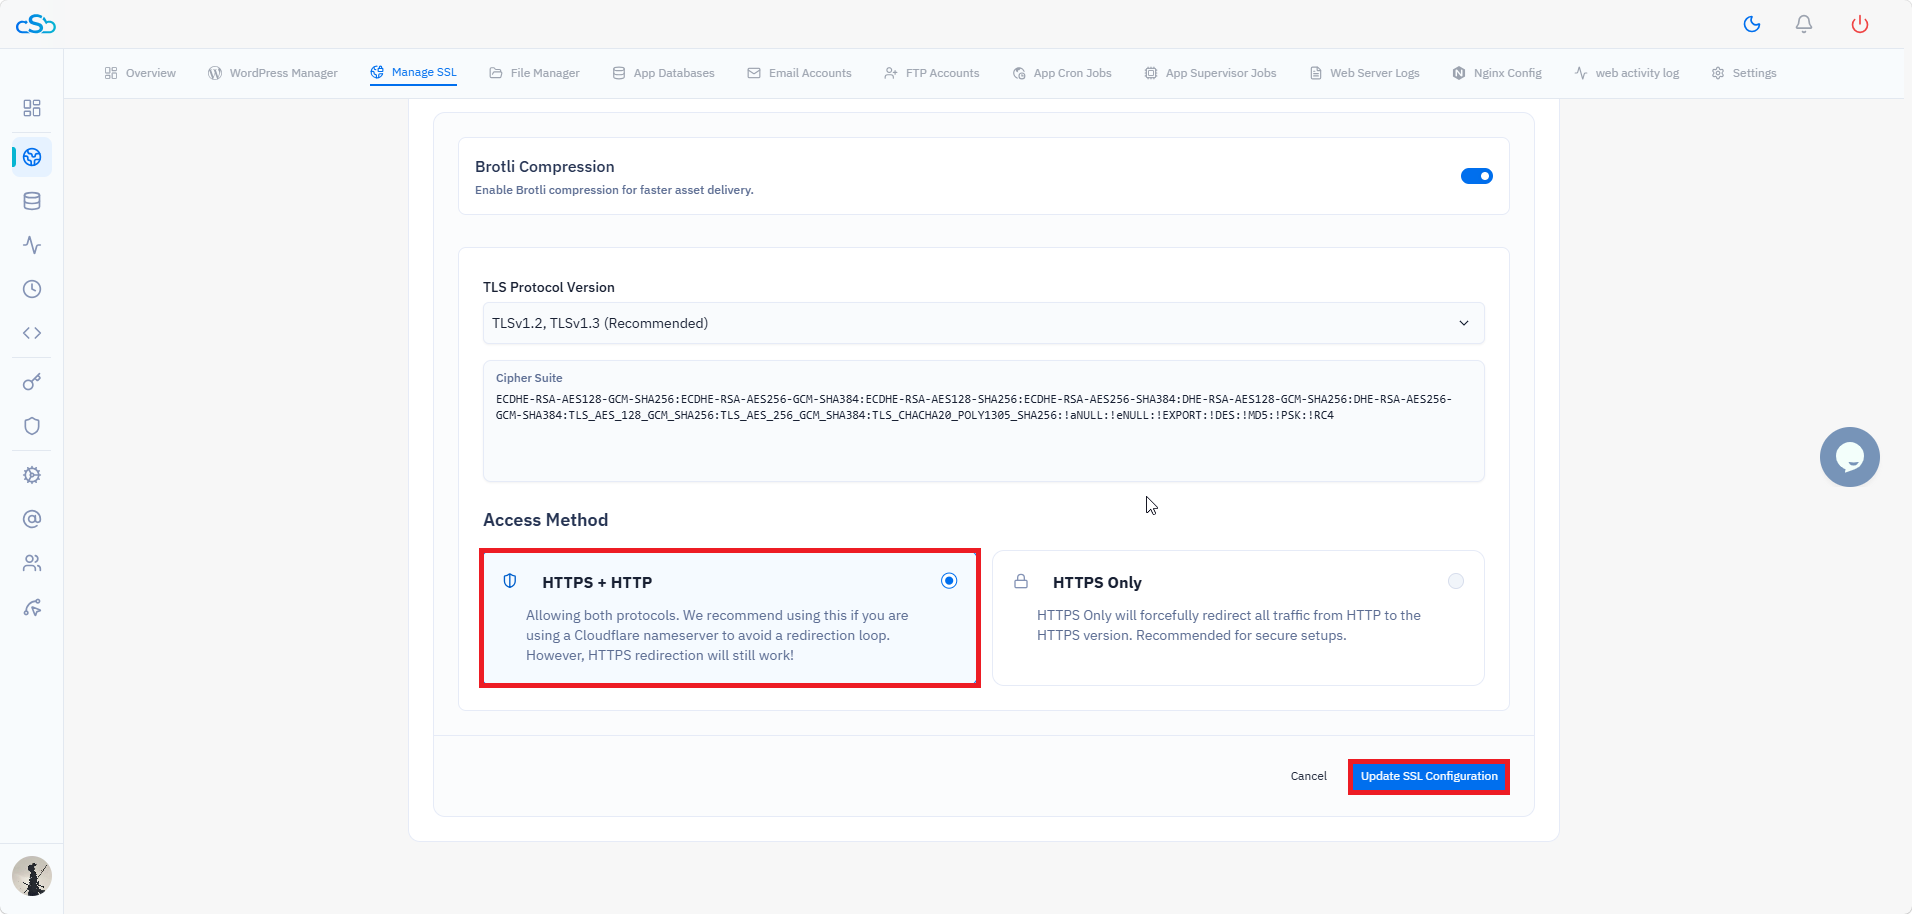
Fig. 02 — CloudStick Manage SSL with HTTPS + HTTP access method selected to prevent redirect conflicts with Cloudflare.
Step 3: Set Cloudflare SSL mode to Full or Full (Strict)
In your Cloudflare dashboard: Go to SSL/TLS → Overview.
Set the SSL mode to Full or Full (Strict): Never use Flexible mode. Flexible tells Cloudflare to connect to your server over HTTP internally while presenting HTTPS to visitors — when CloudStick also enforces HTTPS, this causes an immediate loop.
Click Save: The SSL mode change takes effect within a few seconds.
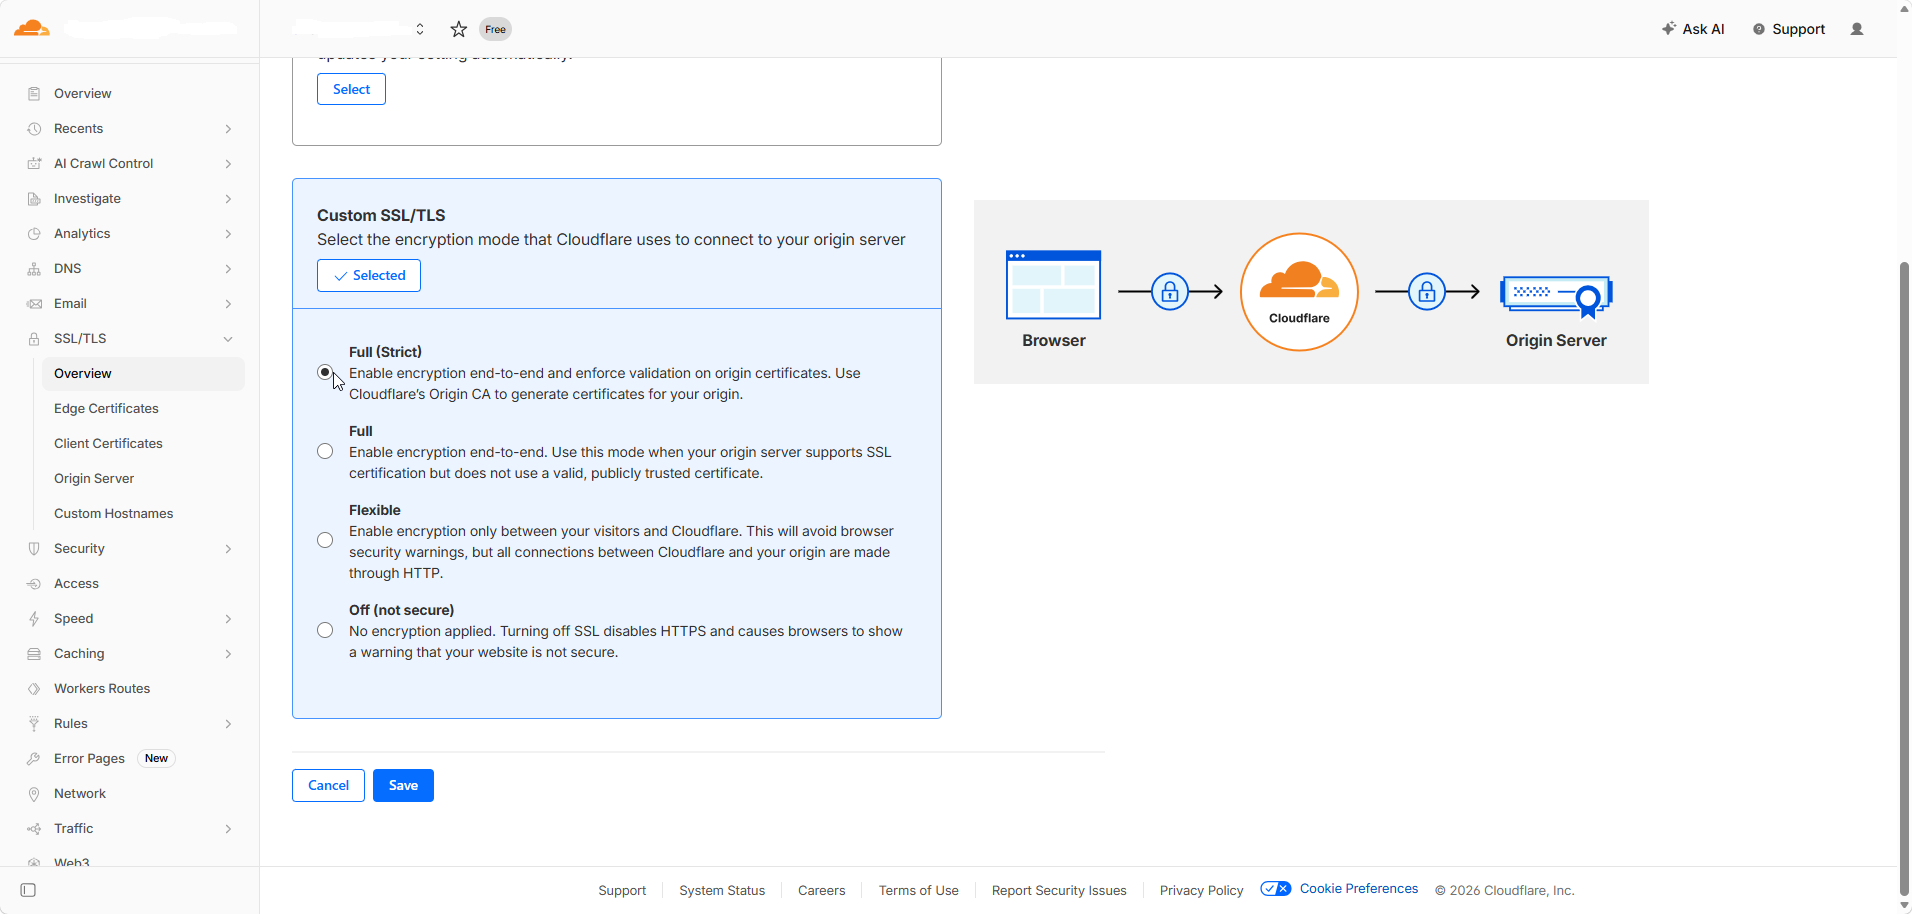
Fig. 03 — Cloudflare SSL/TLS mode selection showing Full (Strict) selected for end-to-end encryption.
Step 4: Disable "Always Use HTTPS" in Cloudflare Edge Certificates
In Cloudflare, go to SSL/TLS → Edge Certificates: Scroll down to find the Always Use HTTPS toggle.
Turn off Always Use HTTPS: When this is enabled alongside CloudStick's own redirect, both systems redirect the same request and create a loop. You only need one layer — either Cloudflare or CloudStick — handling the HTTP → HTTPS redirect.
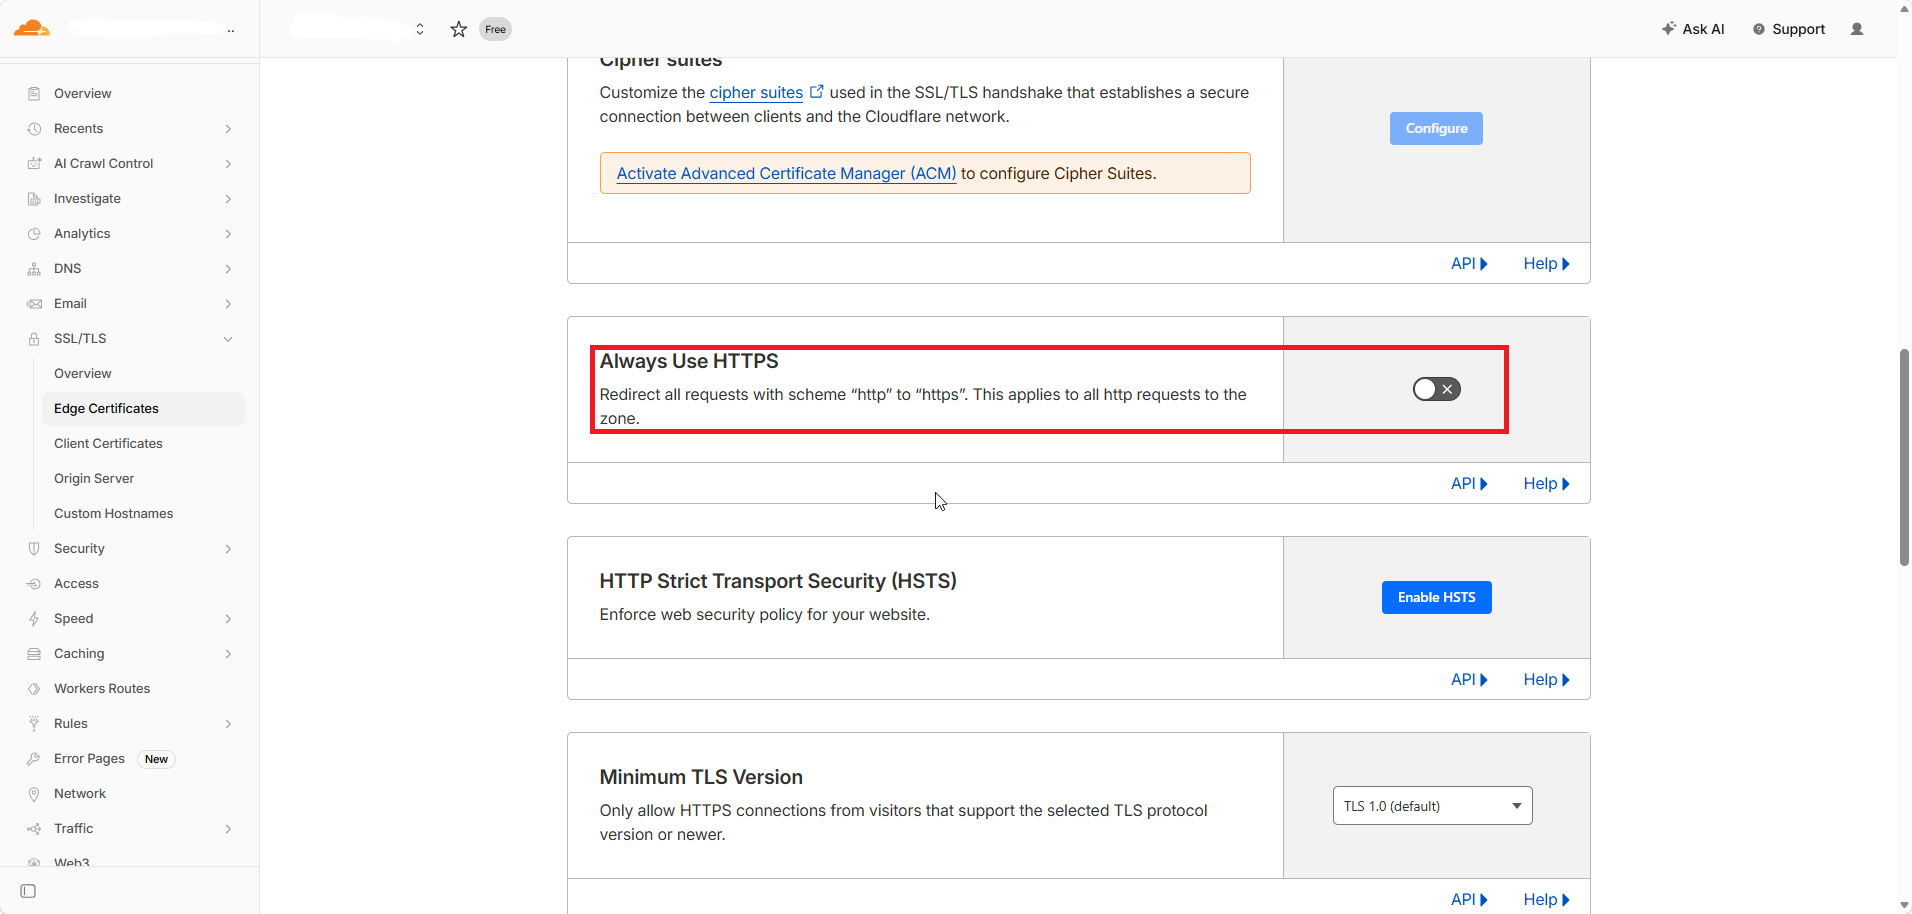
Fig. 04 — Cloudflare Edge Certificates with the Always Use HTTPS toggle highlighted — disable this when CloudStick manages the redirect.
Which layer should handle the redirect? If you are using Cloudflare proxy (orange cloud), let Cloudflare handle it — keep Always Use HTTPS on in Cloudflare and set CloudStick to HTTPS + HTTP. If you want CloudStick to handle it instead, turn off Always Use HTTPS in Cloudflare and set CloudStick to HTTPS Only. Either approach works — just not both at the same time.
Fix B: Using a different DNS provider (not Cloudflare)
Without a proxy layer, a redirect loop is usually caused by a duplicate redirect rule in your Nginx configuration or .htaccess conflicting with CloudStick's SSL access method setting. The fix is to ensure CloudStick is set to HTTPS Only and that no manual redirect rules duplicate it.
Go to Manage SSL → click the edit (pencil) icon: Open SSL configuration for the affected website.
Set Access Method to HTTPS Only: This is the correct setting when you are not behind a Cloudflare proxy. It forces a single clean HTTP → HTTPS redirect managed entirely by CloudStick.
Click Update SSL Configuration: Save and apply.
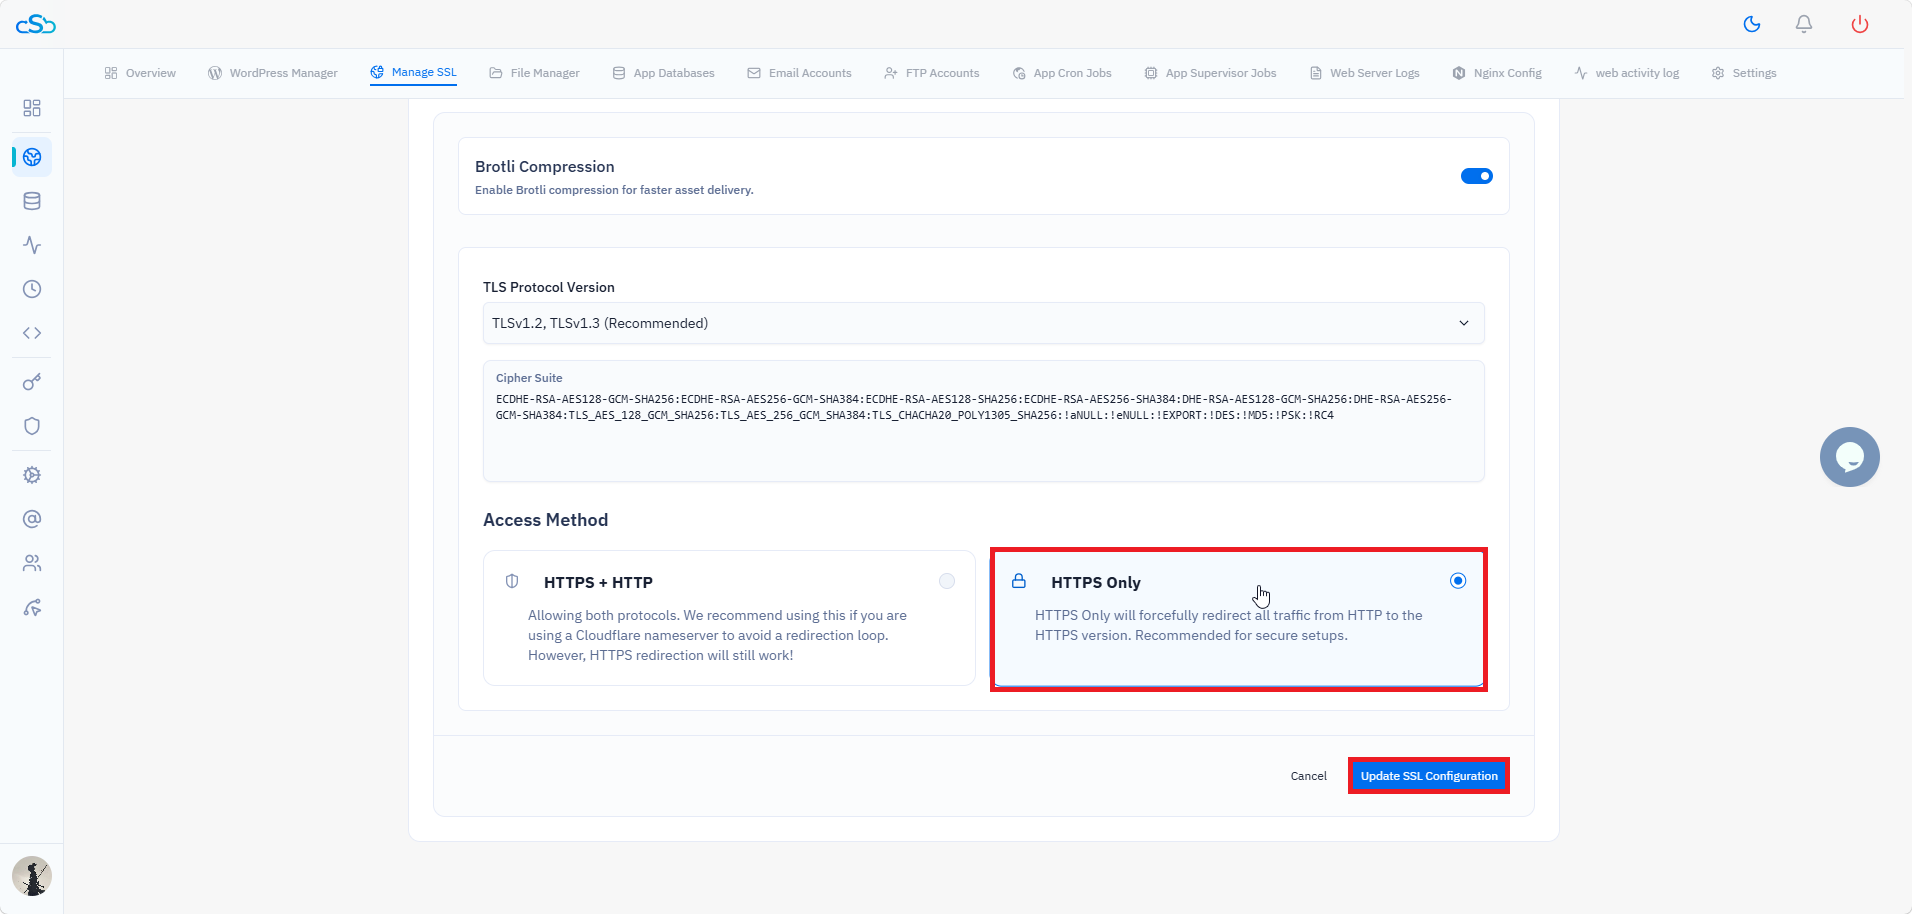
Fig. 05 — CloudStick Manage SSL with HTTPS Only selected — the correct access method for non-Cloudflare setups.
If the loop continues, check Nginx Config: Go to the Nginx Config tab in the website top navigation and look for any manual return 301 https:// redirect rules. Remove any duplicate redirect rules and save the config.
Expected result: A single clean HTTP → HTTPS redirect with no conflicting rules. Your site should load correctly over HTTPS without looping.
Fix C: WordPress URL mismatch
When WordPress is first installed, the Site URL and Home URL are both set to http:// by default. After you deploy SSL, these URLs must be updated to https:// — otherwise WordPress keeps serving requests over HTTP and conflicts with the SSL redirect, creating a loop.
Log in to your WordPress admin dashboard: Navigate to Settings → General.
Update WordPress Address (URL) and Site Address (URL): Change both values from http:// to https:// and save.
If you cannot access wp-admin due to the loop: Use the CloudStick File Manager to edit wp-config.php directly. Add the following two lines above the line that reads /* That's all, stop editing! */:
define('WP_HOME', 'https://yourdomain.com');
define('WP_SITEURL', 'https://yourdomain.com');Replace yourdomain.com with your actual domain.
Save the file and reload your site. Once WordPress loads correctly, you can remove these lines and set the URLs through Settings → General instead.
Expected result: WordPress serves all requests over HTTPS, eliminating the HTTP/HTTPS conflict that caused the loop.