How to Install an SSL Certificate Using GoDaddy DNS
Overview
CloudStick issues free Let's Encrypt SSL certificates for every website, and normally verifies domain ownership over HTTP. If your domain's nameservers point to GoDaddy, you can instead use DNS Verification — CloudStick talks directly to your GoDaddy account, creates the required validation records automatically, and issues the certificate without needing your site to be publicly reachable over HTTP first. This is especially useful for wildcard certificates and sites that aren't fully live yet.
This guide walks through opening Manage SSL for a website, deploying a new certificate, selecting GoDaddy as the DNS provider, choosing the GoDaddy integration you've already connected to CloudStick, and saving the configuration to complete the install.
Before you begin, make sure your domain's DNS is actually managed by GoDaddy and that you have already connected your GoDaddy account to CloudStick. Without an existing GoDaddy integration, there will be no account to select in Step 7.
Step 1: Log In to CloudStick
Every SSL deployment starts from your CloudStick dashboard, so the first step is simply signing in to your account.
Go to the CloudStick login page and sign in with your account credentials.
Step 2: Open Your Server
SSL certificates are managed per website, and every website lives under one of your connected servers, so you'll navigate there first.
From the dashboard, click Servers.
Select the server that hosts the website you want to secure with SSL.
Step 3: Select Your Website
Once inside the server panel, pick the specific website that needs a certificate installed.
From the list of websites on this server, click the website for which you want to install an SSL certificate.
Step 4: Open SSL Management
Each website has its own SSL Management screen, reachable from the top menu of the website panel.
From the top menu, click Manage SSL.
Step 5: Deploy SSL Certificate
If the website doesn't already have a certificate installed, the SSL Management page shows a No SSL found state — this is where you start the deployment.
Click Deploy New SSL to open the certificate configuration screen.
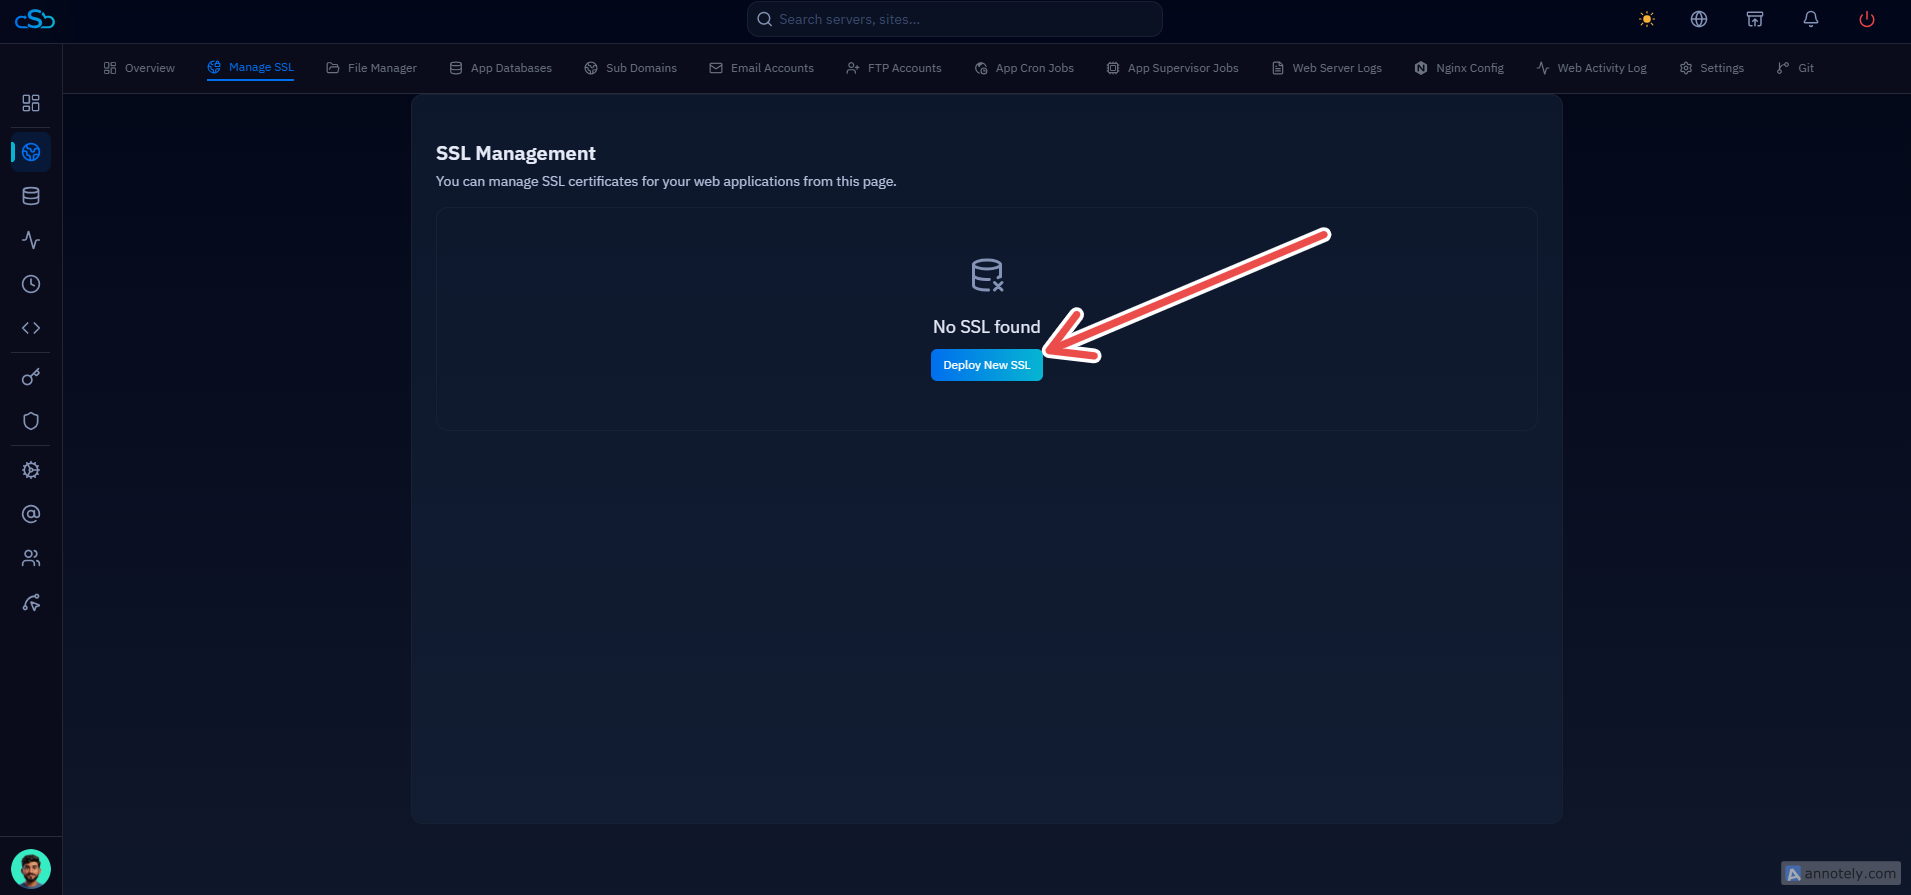
Fig. 01 — The SSL Management page showing No SSL found and the Deploy New SSL button.
Step 6: Select GoDaddy as the DNS Provider
On the Let's Encrypt Configuration screen, choose DNS Verification as the authorisation method so CloudStick can validate your domain through GoDaddy instead of over HTTP.
SSL Provider: Keep Let's Encrypt (Free Certificate) selected.
Authorisation Method: Select DNS Verification.
Under DNS Provider & Account, open the dropdown and select GoDaddy from the list of supported DNS providers.
Step 7: Choose Your GoDaddy Integration
With GoDaddy selected as the provider, CloudStick lists every GoDaddy account you've already integrated so you can pick the correct one for this domain.
Under Available GoDaddy Accounts, select the GoDaddy integration you previously added to CloudStick.
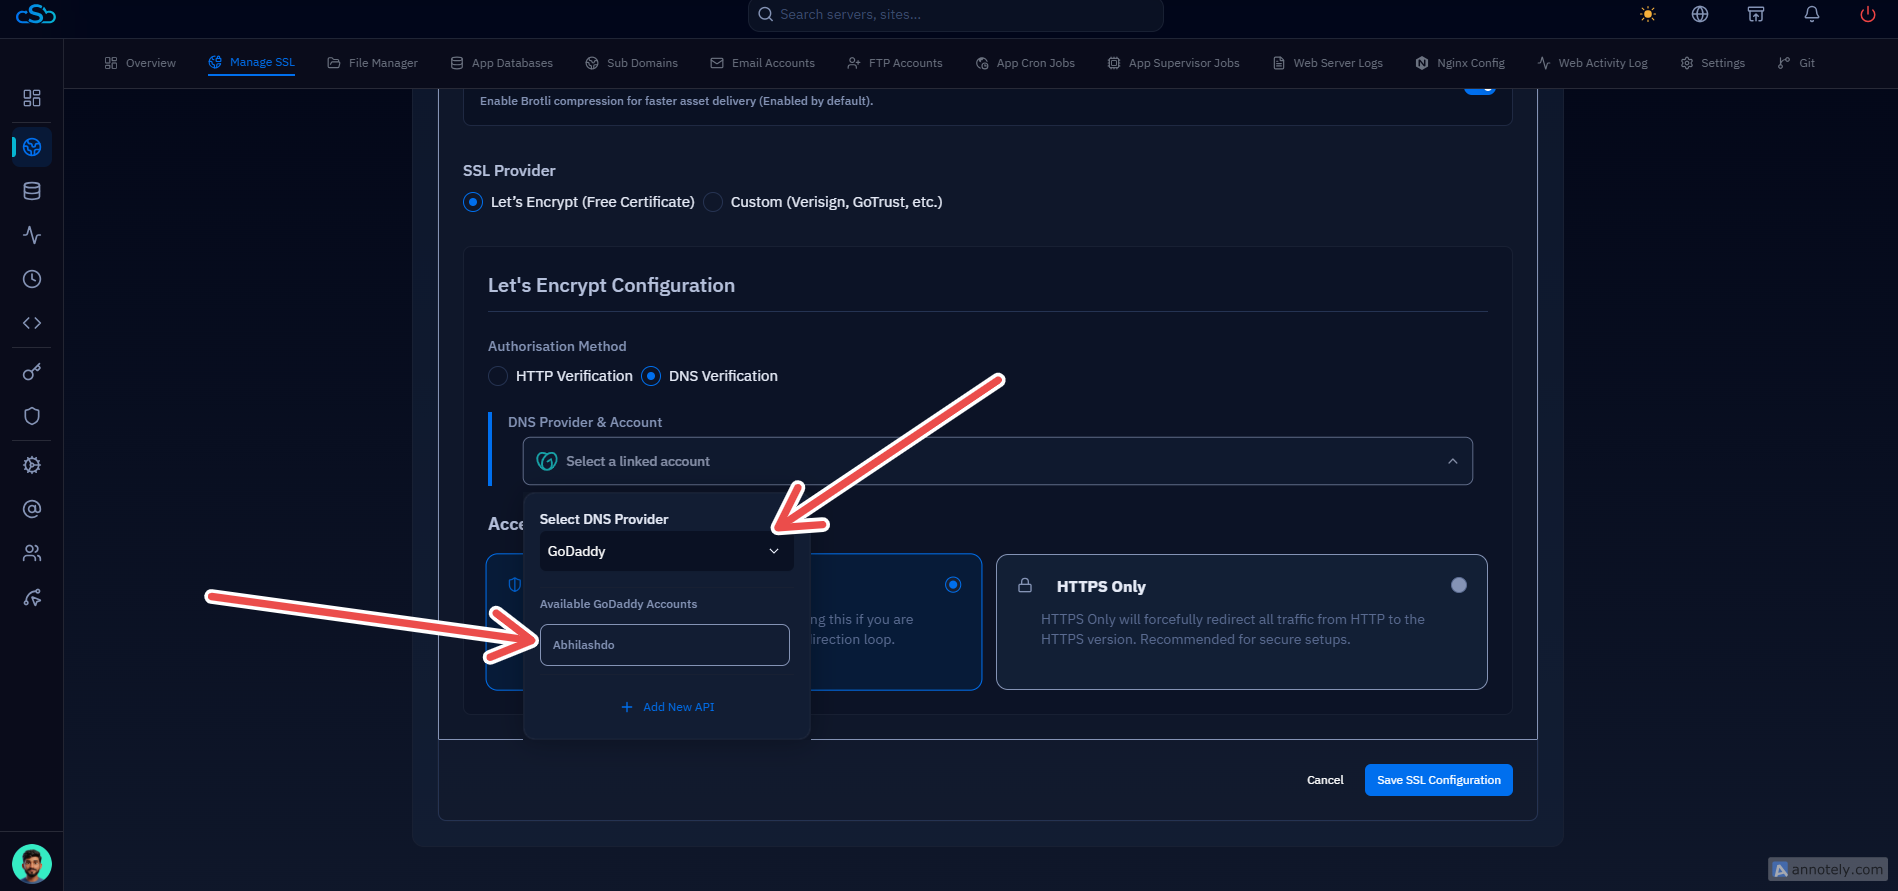
Fig. 02 — Selecting GoDaddy as the DNS provider and choosing the linked GoDaddy account.
Step 8: Save the SSL Configuration
With DNS Verification, GoDaddy, and your account all selected, the last step is choosing how traffic should be handled and saving the configuration to deploy the certificate.
Access Method: Choose HTTPS + HTTP (recommended if you use a Cloudflare nameserver, to avoid a redirect loop) or HTTPS Only to force all traffic to HTTPS.
Click Save SSL Configuration to finish.
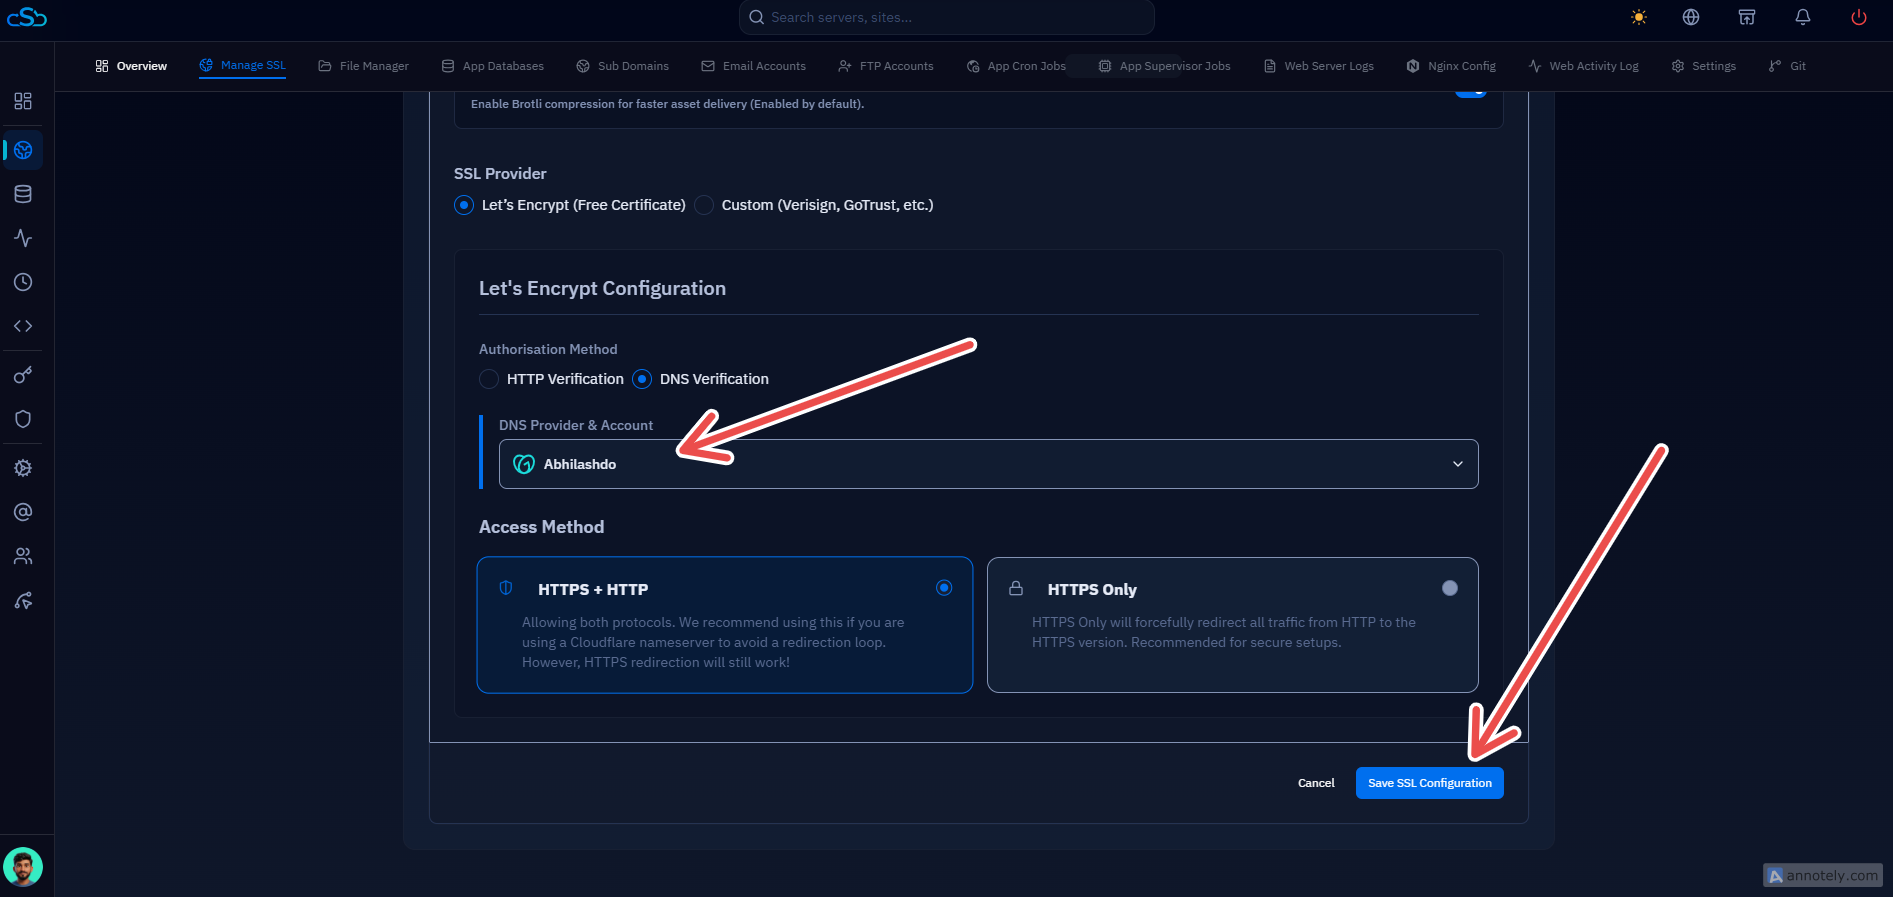
Fig. 03 — The completed SSL configuration with the GoDaddy account selected and the Save SSL Configuration button.
After you save, CloudStick automatically verifies your domain using your GoDaddy DNS account, creates the required DNS validation records, and installs the SSL certificate — no further action is needed on your part.