How to Create an FTP Account in CloudStick
Overview
An FTP (File Transfer Protocol) account gives you a dedicated login for uploading, downloading, and managing the files of a specific website — without needing full SSH access to the server. This is ideal when you want to hand off file access to a developer or client while keeping it scoped to a single application directory.
CloudStick lets you create and manage FTP accounts directly from the website panel. This guide walks through selecting your server and website, opening the FTP Accounts tab, and creating a new account with a username, password, directory path, and optional quota.
Prerequisites: A connected server with at least one website is required before you can create an FTP account. On the FREE plan only SFTP is available — full FTP & SFTP access is included on the BASIC plan and above. Always create FTP accounts with a strong password, since they grant direct access to your website files.
Step 1: Open Your Website's FTP Accounts
FTP accounts are managed per website, so the first step is to navigate from your dashboard to the website you want to grant access to.
Log in: Sign in to your CloudStick dashboard. The dashboard lists all of your connected servers.
Select your server: Click the server that hosts the website you want to manage to open its server panel.
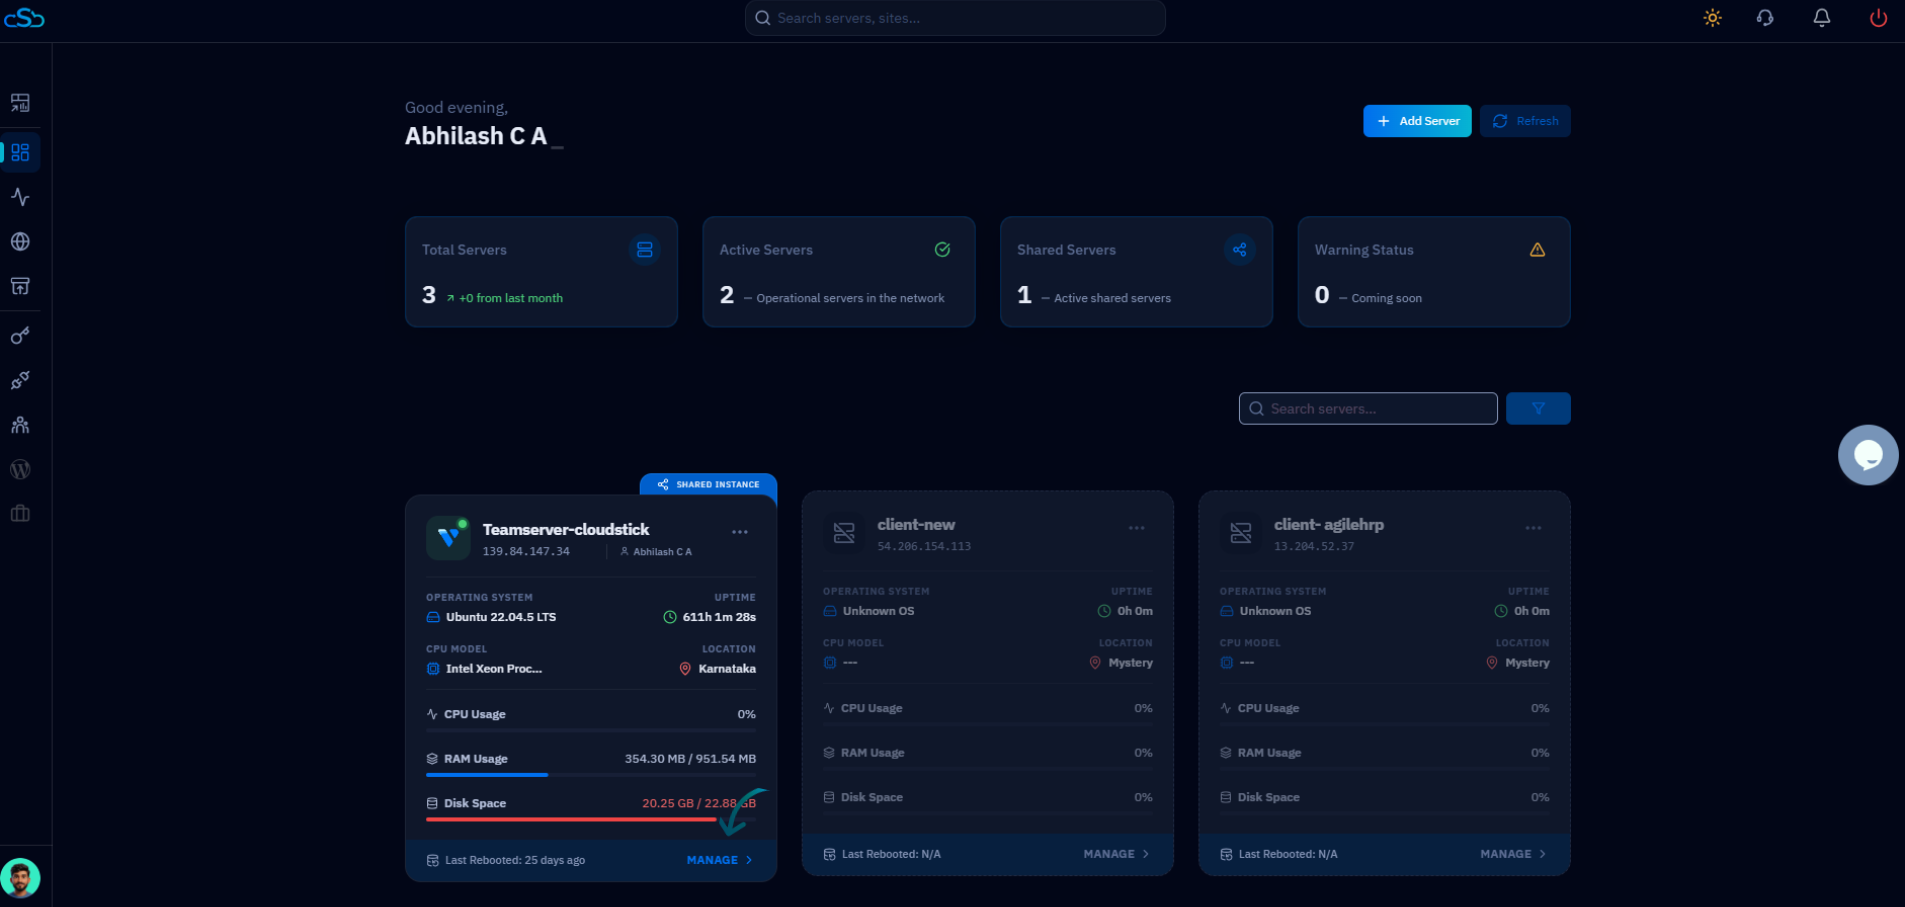
Fig. 01 — The CloudStick dashboard showing your connected servers; select the server that hosts your website.
Open Websites: From the left-hand navigation in the server panel, click Websites to view all hosted web applications on this server.
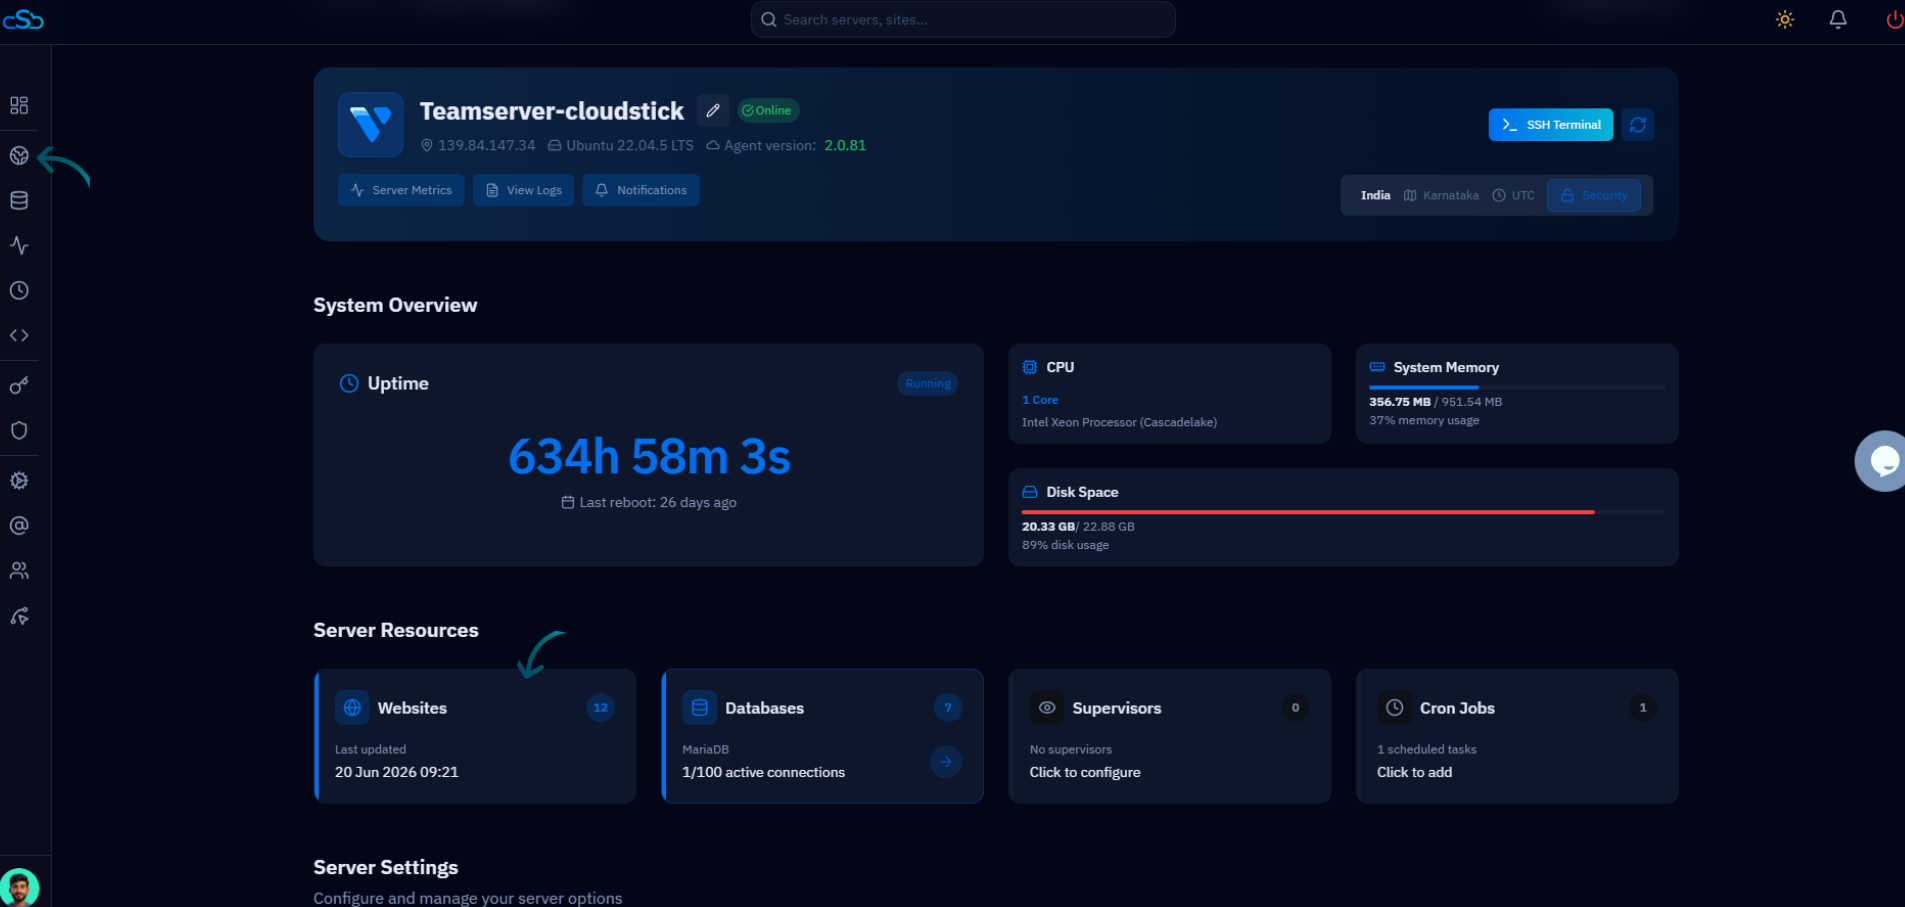
Fig. 02 — The server panel; open the Websites section from the left-hand navigation.
Select a website: Choose the website for which you want to create an FTP account to open its management view.
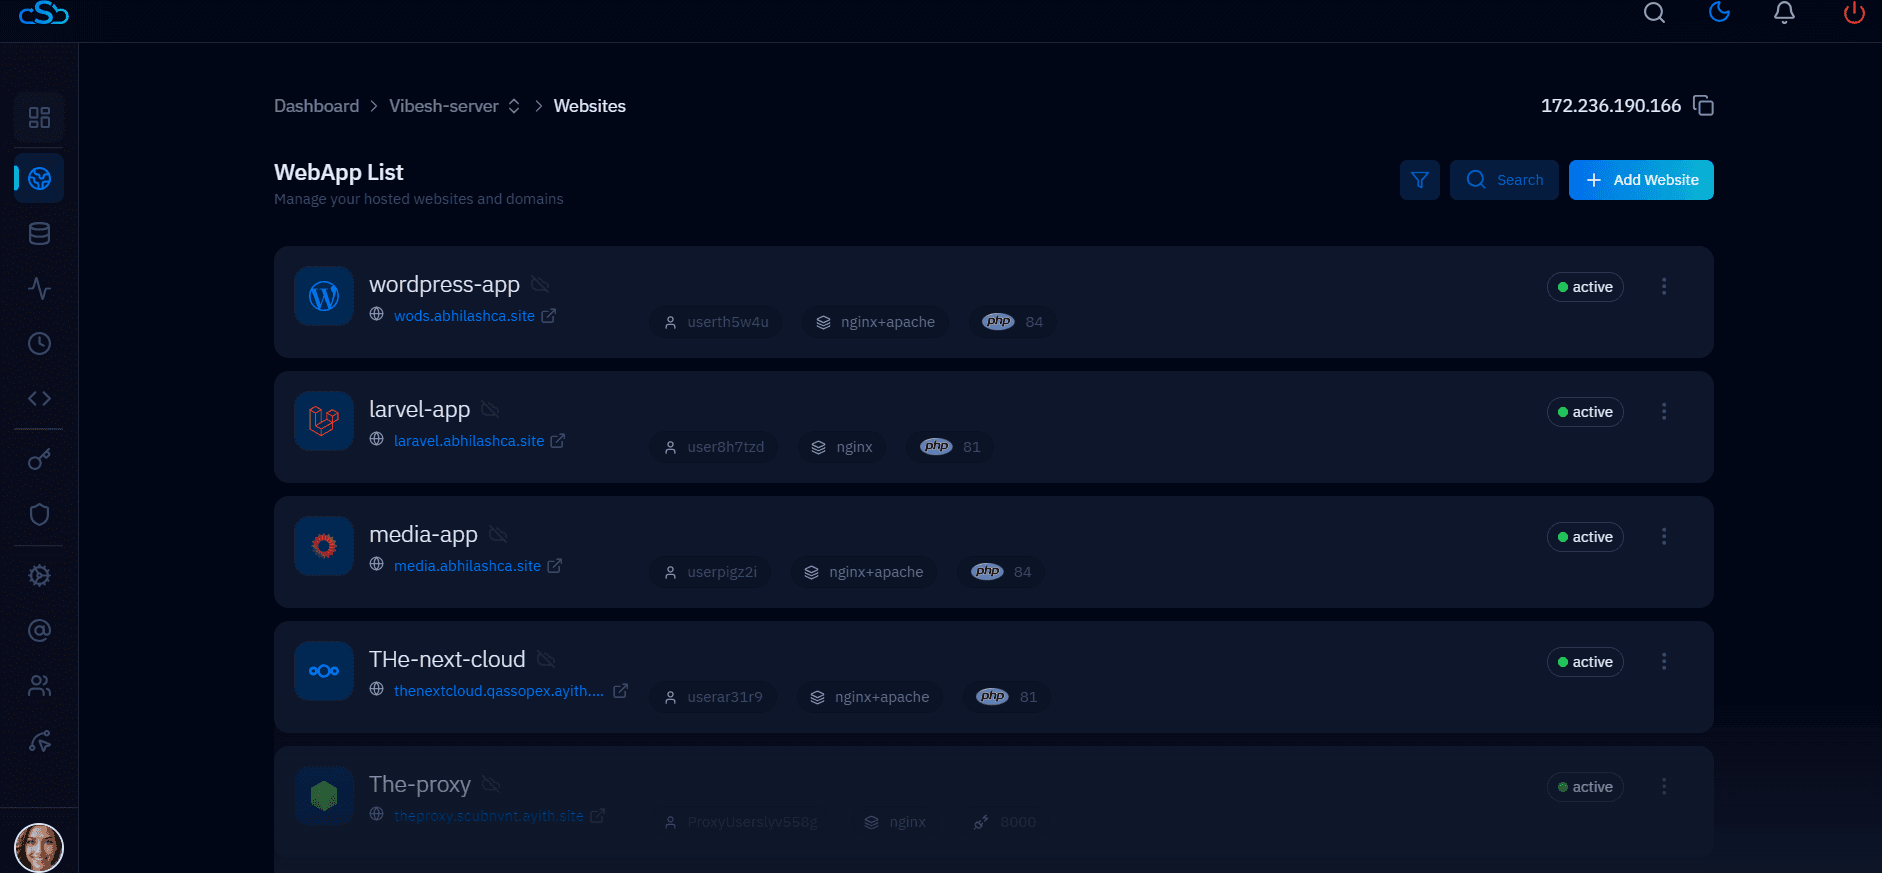
Fig. 03 — The WebApp List; click the website you want to create an FTP account for.
Open FTP Accounts: At the top of the website management page, click the FTP Accounts tab.
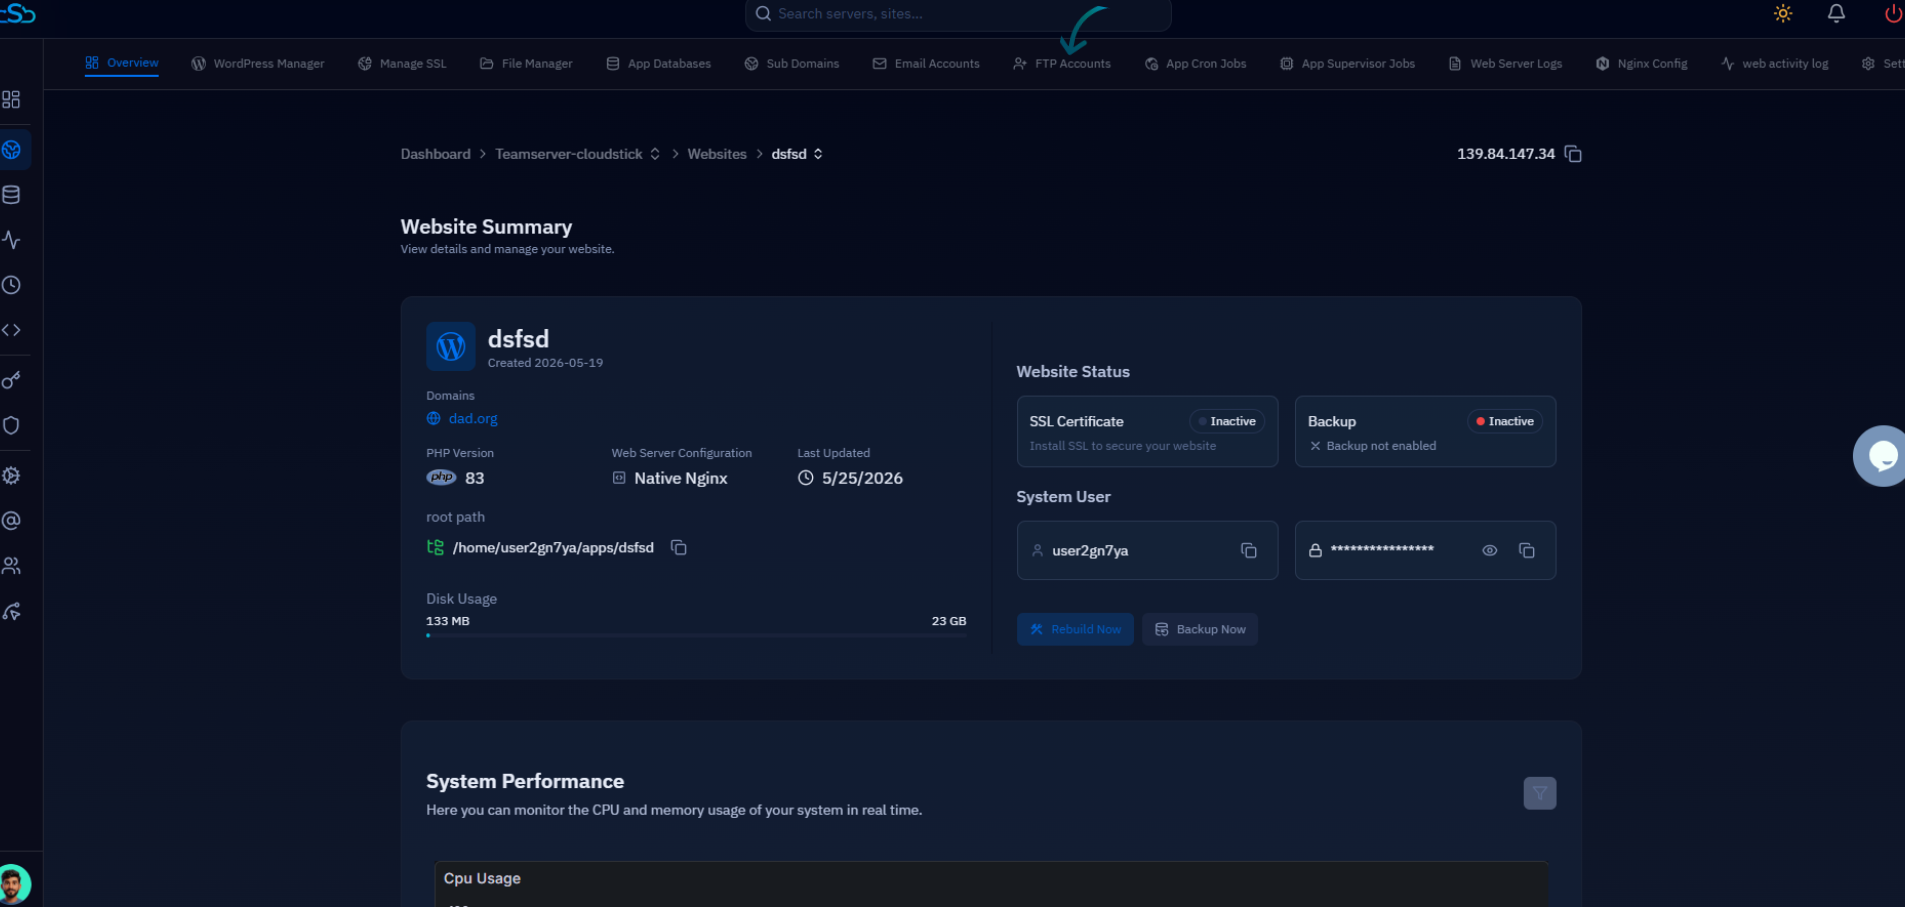
Fig. 04 — The website management page with the FTP Accounts tab in the top navigation.
Step 2: Create a New FTP Account
The FTP Accounts page lists every existing account for this website along with its directory path and quota. To add a new one, start the creation flow.
Click Create FTP Account: In the top right corner of the FTP Accounts page, click the Create FTP Account button.

Fig. 05 — The FTP Accounts page with the Create FTP Account button highlighted.
Step 3: Enter FTP Account Details
The Create New FTP Account form appears. Fill in the details that define the new account's credentials and access scope.
FTP Username: Enter a username for the account, or click Generate to create one automatically. The full login name is shown beneath the field.
Password: Enter a strong password, or click Generate to produce a secure one. Use the eye icon to reveal the value before saving.
Directory: Set the directory the account can access. The Full Path shown below the field confirms exactly where the user will land — leave the default to scope access to the application root.
Quota (optional): Optionally set a storage limit in MB to cap how much disk space this FTP user can consume. Leave it blank for no limit.
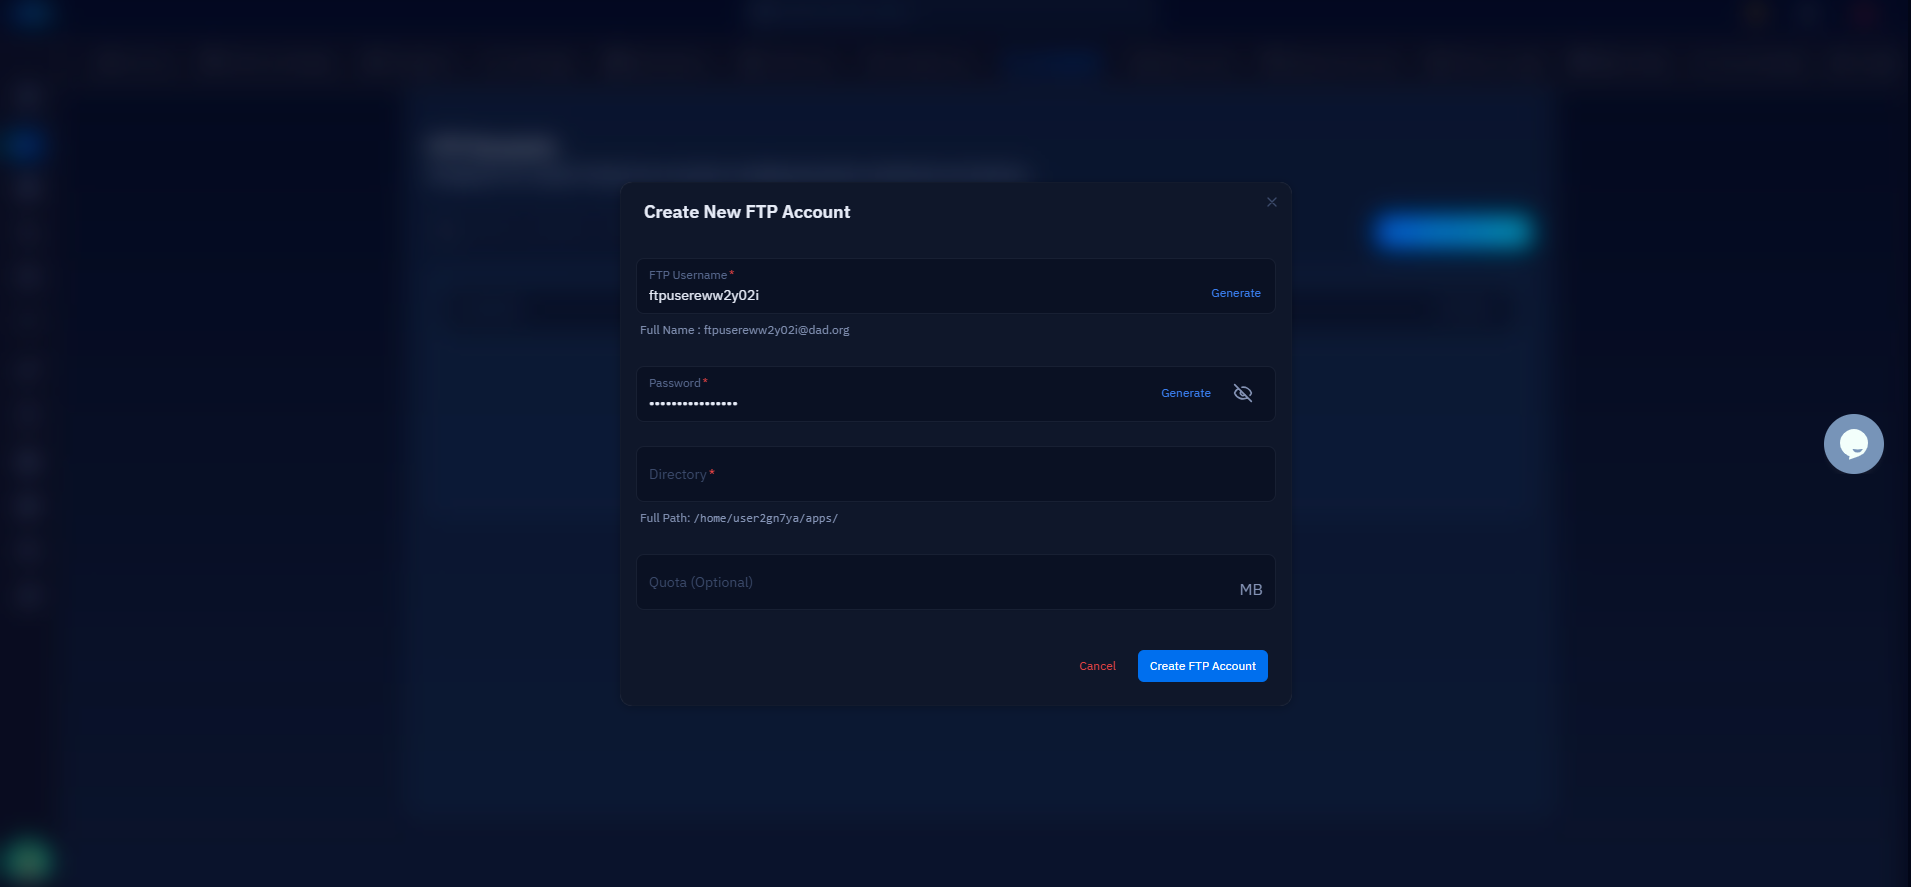
Fig. 06 — The Create New FTP Account form showing the Username, Password, Directory, and optional Quota fields.
Restricting the directory to a specific subfolder is the safest option when you only need to share part of a website — the FTP user will not be able to browse outside the path you set.
Step 4: Save & Verify the Account
Once all the details are filled in, save the account. CloudStick provisions it on the server immediately.
Click Create FTP Account: Click the Create FTP Account button at the bottom of the form to save it.
Once created, the new FTP account appears in the list with its Username, Directory Path, and Quota.
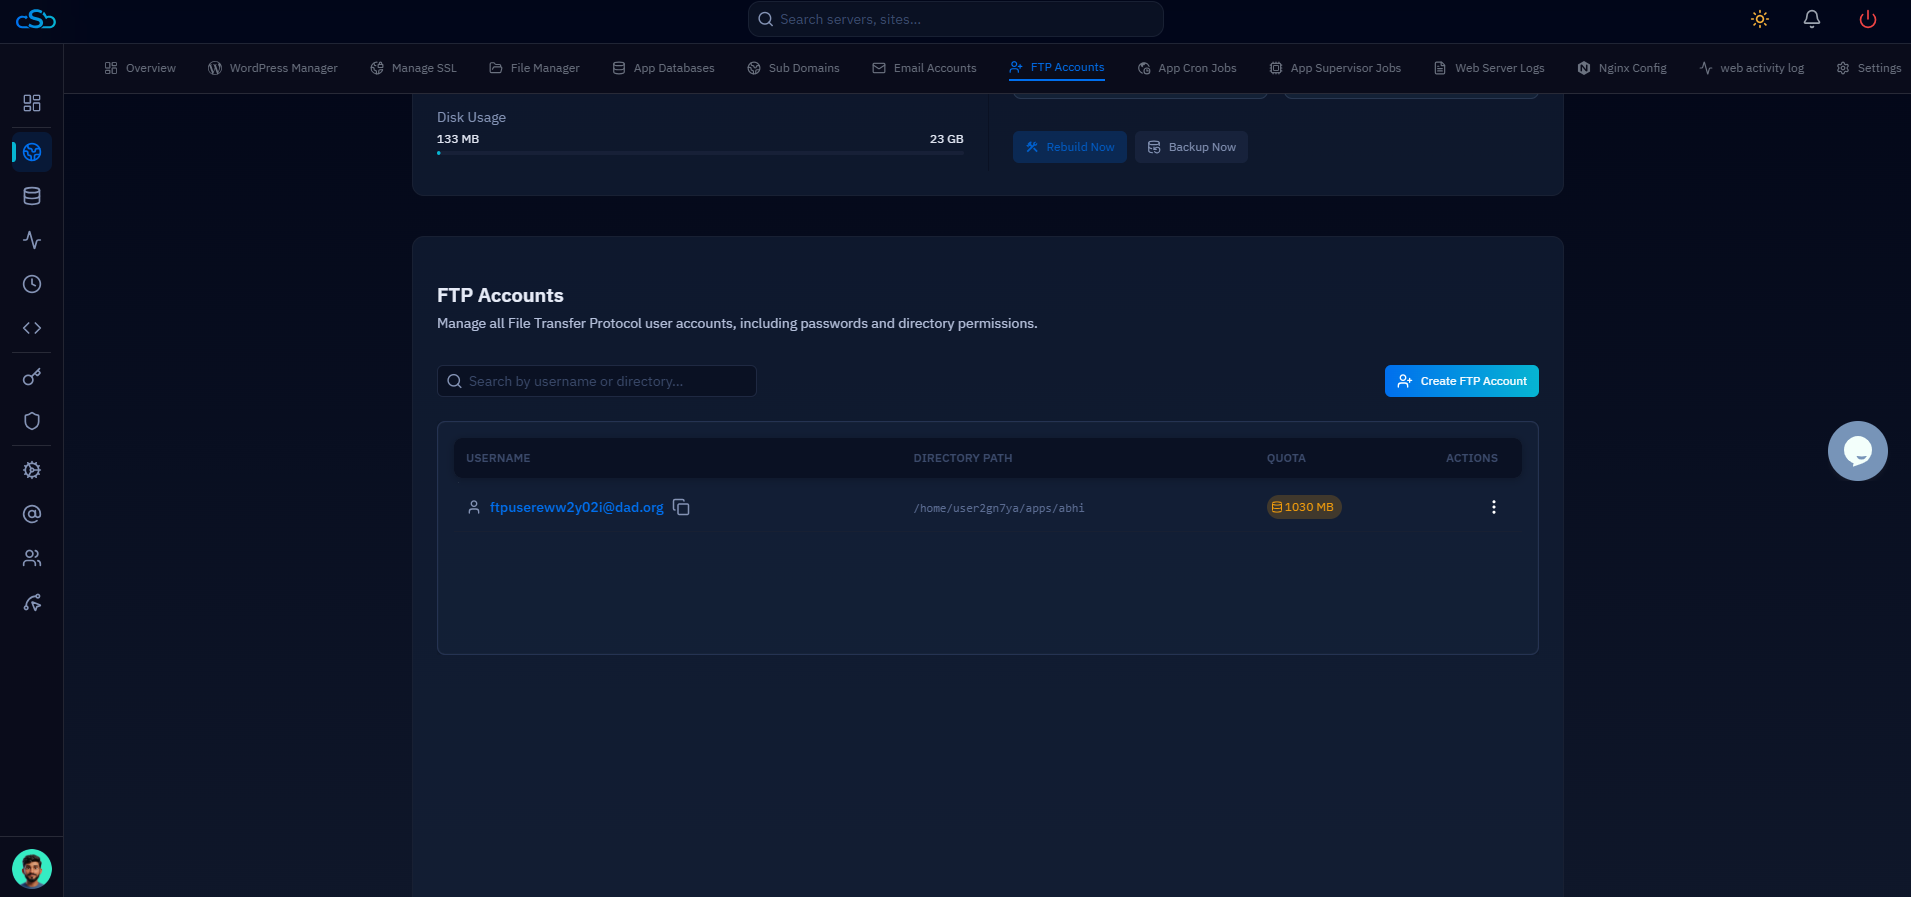
Fig. 07 — The FTP Accounts list showing the newly created account with its directory path and quota.
Your FTP account is now active. Connect using any FTP/SFTP client (such as FileZilla or WinSCP) with your server's IP address or hostname, the username and password you just set, and the appropriate port.
If you cannot connect, confirm that your server firewall allows FTP/SFTP traffic and that you are using the correct port. Connection timeouts are most often caused by a blocked port rather than incorrect credentials.