How do I secure my server using a firewall?
Overview
Server security is one of the most critical aspects of running any production infrastructure. CloudStick uses ConfigServer Security & Firewall (CSF) — a powerful, stateful packet inspection firewall — to protect your server from unauthorized access, brute-force login attempts, and suspicious network activity. By default, CSF is installed on every CloudStick-managed server but must be explicitly enabled from the dashboard.
This guide walks you through enabling CSF, understanding its built-in security features, and applying best-practice configurations to keep your server locked down.
You must have a server connected to your CloudStick account before configuring firewall settings. If you have not yet added a server, follow the How to Deploy Your Own Server guide first.
Step 1: Enable CSF Firewall
Enabling the CSF Firewall activates packet inspection and connection tracking on your server, blocking malicious traffic before it reaches your applications.
1. Open your Server panel: From the main CloudStick Dashboard, click on the server you want to secure to open its management view.
2. Navigate to Security: In the left-hand navigation, click the shield icon to open the Server Security section.
3. Enable the Firewall: Under Core Firewall Management, locate the Firewall Status row and toggle it on. The status will update to "Firewall is currently enabled and running."
4. Enable Brute Force Shield: Toggle on Brute Force Shield to automatically block repeated failed login attempts for services like SSH and FTP.
After enabling the firewall, click Firewall Restart if you make any subsequent rule changes to apply them immediately. Use Flush All Blocks to clear any stale IP blocks if legitimate traffic is being denied.
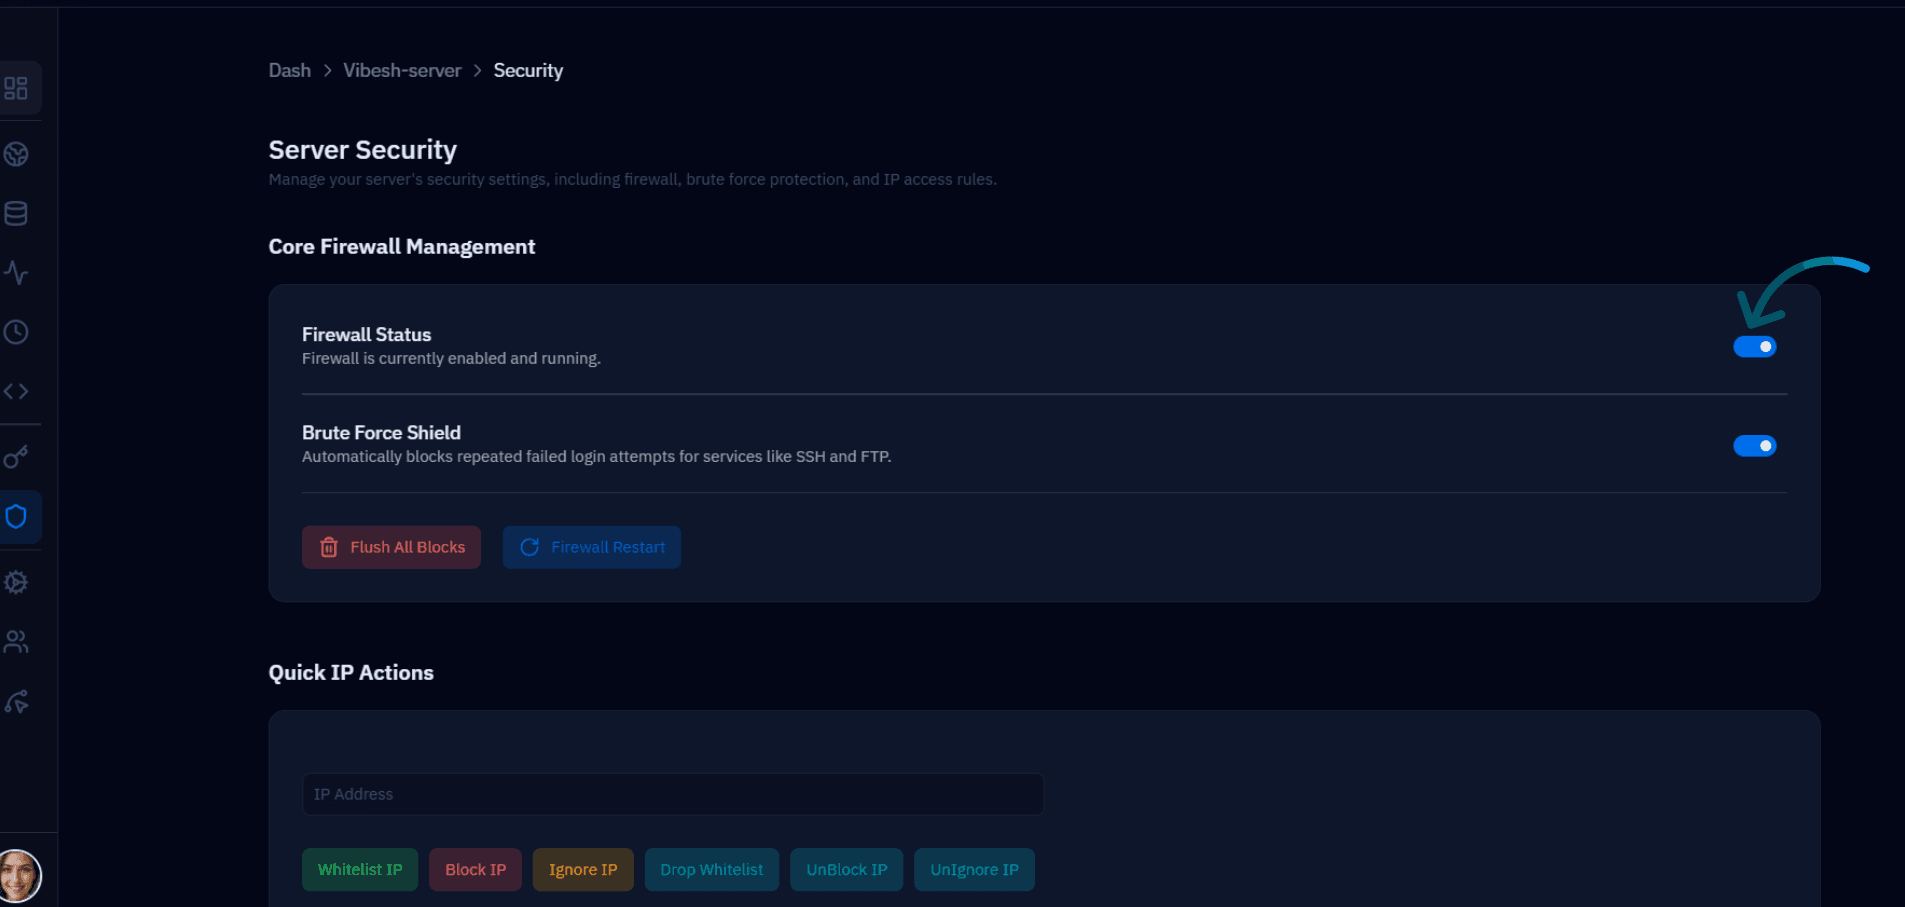
Fig. 01 — Server Security page showing Core Firewall Management with Firewall Status and Brute Force Shield toggles enabled.
Step 2: Understanding Firewall Features
CSF provides a layered set of security protections that work automatically once the firewall is enabled. Knowing what each feature does helps you make informed decisions about your security posture.
Login & Intrusion Detection: CSF monitors authentication logs across all services and flags unusual login patterns, alerting you before a breach occurs.
SSH Login Notifications: Every successful SSH login triggers an email notification so you are immediately aware of any access to your server.
Excessive Connection Blocking: Connections that exceed defined thresholds (such as too many requests per second from a single IP) are automatically blocked to prevent DDoS and flood attacks.
Suspicious File Reporting: CSF can detect file modifications and additions in sensitive directories, helping you identify potential web shell uploads or malware activity.
Quick IP Actions: The Security page provides one-click IP management tools — Whitelist IP, Block IP, Ignore IP, Drop Whitelist, UnBlock IP, and UnIgnore IP — so you can respond to threats instantly without touching the command line.
Step 3: Security Best Practices
Enabling the firewall is only the first step. Following these best practices ensures your server stays protected as your infrastructure grows.
Only open ports for active services: Every open port is a potential attack surface. If a service is not running, its port should be closed. Review your allowed ports regularly and remove any that are no longer needed.
Keep Brute Force Shield enabled: Services like SSH and FTP are common brute-force targets. Keeping this shield active ensures repeated failed login attempts are automatically blocked before an attacker can guess valid credentials.
Use Whitelist IP for trusted sources: If you access your server from a fixed IP address (such as an office network), whitelist it to ensure your IP is never accidentally blocked by rate-limiting rules.
Periodically flush stale blocks: Over time, legitimate IPs may get blocked by automated rules. Use the Flush All Blocks button in the Security section to clear stale entries and then re-evaluate your rules.
Step 4: SSH Port Configuration
If you have changed your server's default SSH port from 22 to a custom port for additional security, you must ensure the firewall allows traffic on that new port — otherwise you will be locked out of your own server.
Identify your custom SSH port: Note the port number you configured when hardening your SSH daemon (e.g., port 2222 or any non-standard port).
Add the port to TCP_IN: In your CSF configuration, ensure the custom port is added to the TCP_IN (incoming TCP) allowed list. This permits inbound SSH connections on the new port.
Restart the firewall: After updating the allowed ports, click Firewall Restart in the Security section to apply the changes without disrupting existing connections.
Always add your new SSH port to the firewall allowlist before restarting the SSH daemon. Applying the firewall change first ensures you will not be locked out mid-configuration.