How to change SSH port?
Overview
The SSH port is the door attackers scan first — leaving it on the default 22 makes your server an easy target for automated brute-force bots. Moving SSH to a non-standard port doesn't replace proper authentication, but it does cut down the noise from mass scanners hitting your server around the clock. Traditionally this meant editing sshd_config over a terminal session — get it wrong, and you can lock yourself out entirely.
CloudStick removes that risk with a graphical SSH Configuration panel built into the server dashboard. This guide walks through changing your server's SSH port from the dashboard — no terminal or command line required.
Before changing the port, make sure the new port is allowed in your cloud provider's firewall or security group (AWS Security Groups, DigitalOcean Cloud Firewall, etc.) and that it is opened for the TCP protocol. If the new port is blocked upstream, you will not be able to reconnect to the server once the change takes effect.
Step 1: Select Your Server
SSH settings are configured per server, so start by opening the specific server you want to update.
1. Log in to CloudStick: Sign in to your CloudStick account.
2. Choose your server: On the dashboard, all connected servers are listed as cards. Click the one whose SSH port you want to change.
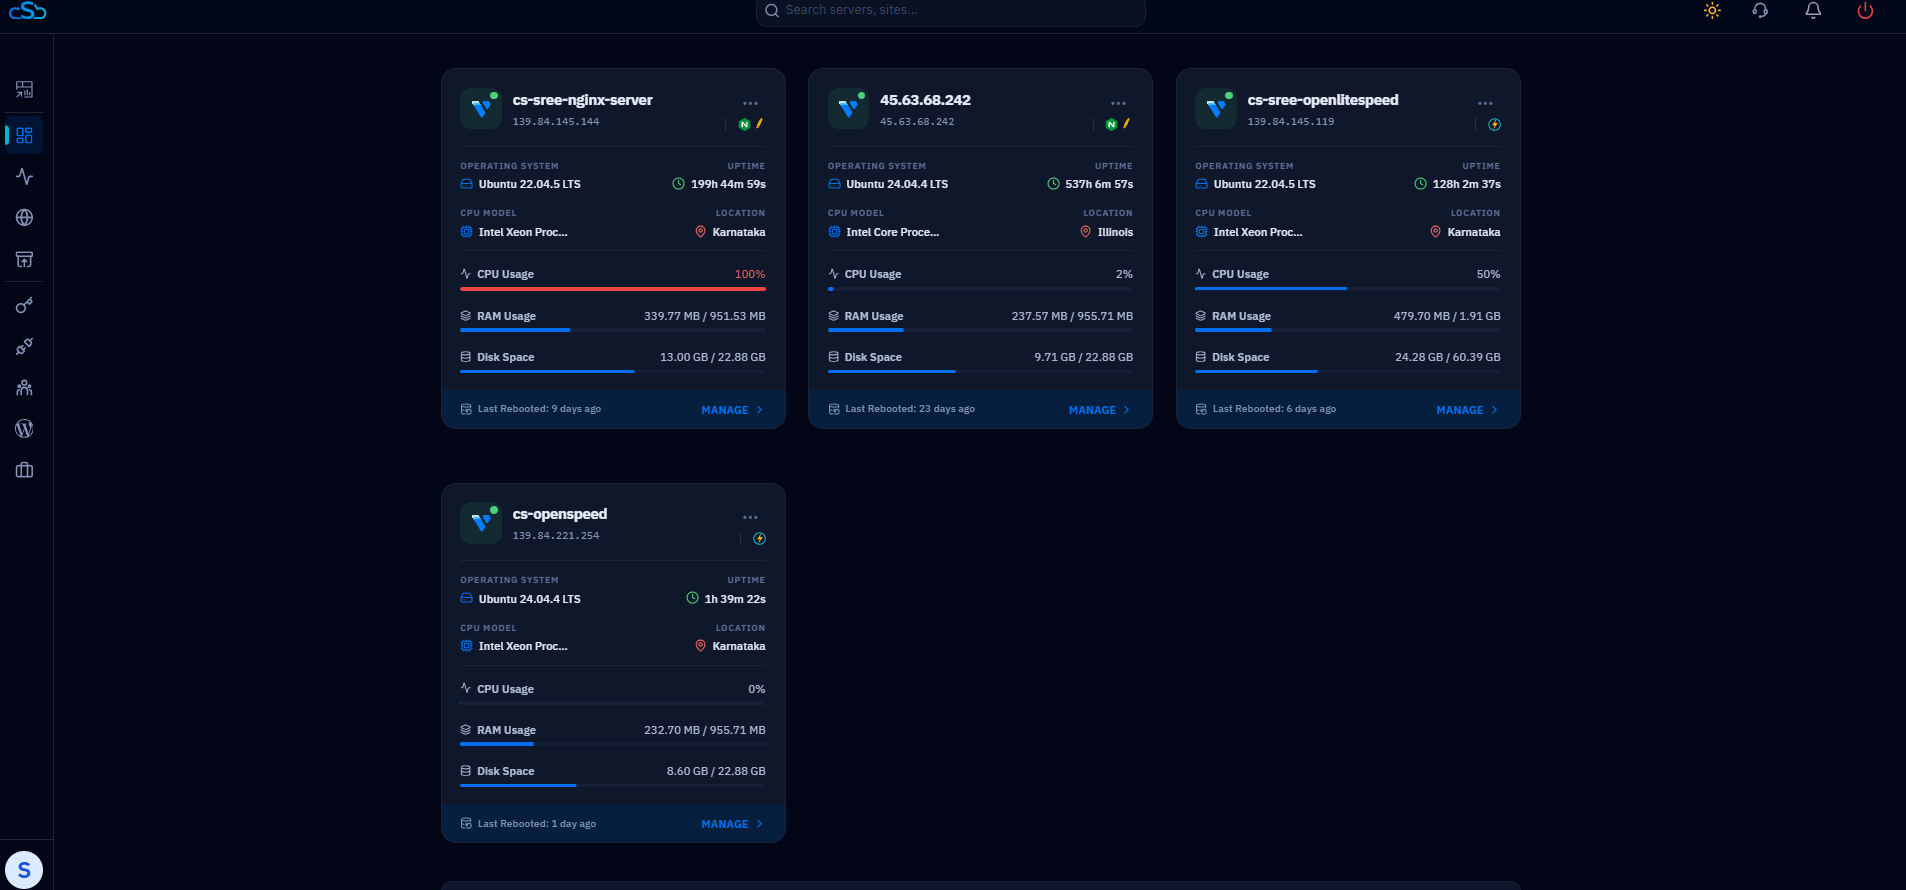
Fig. 01 — CloudStick dashboard showing connected servers. Select the server you want to configure.
Step 2: Open the SSH Keys Section
SSH port settings live alongside SSH key management, inside the server panel's left-hand navigation.
1. Locate the SSH Key icon: In the left-hand navigation of the server panel, find the key-shaped icon — this opens SSH access management for the server.
2. Click it: This opens the SSH Keys screen, where both public key access and the SSH Configuration panel are managed.
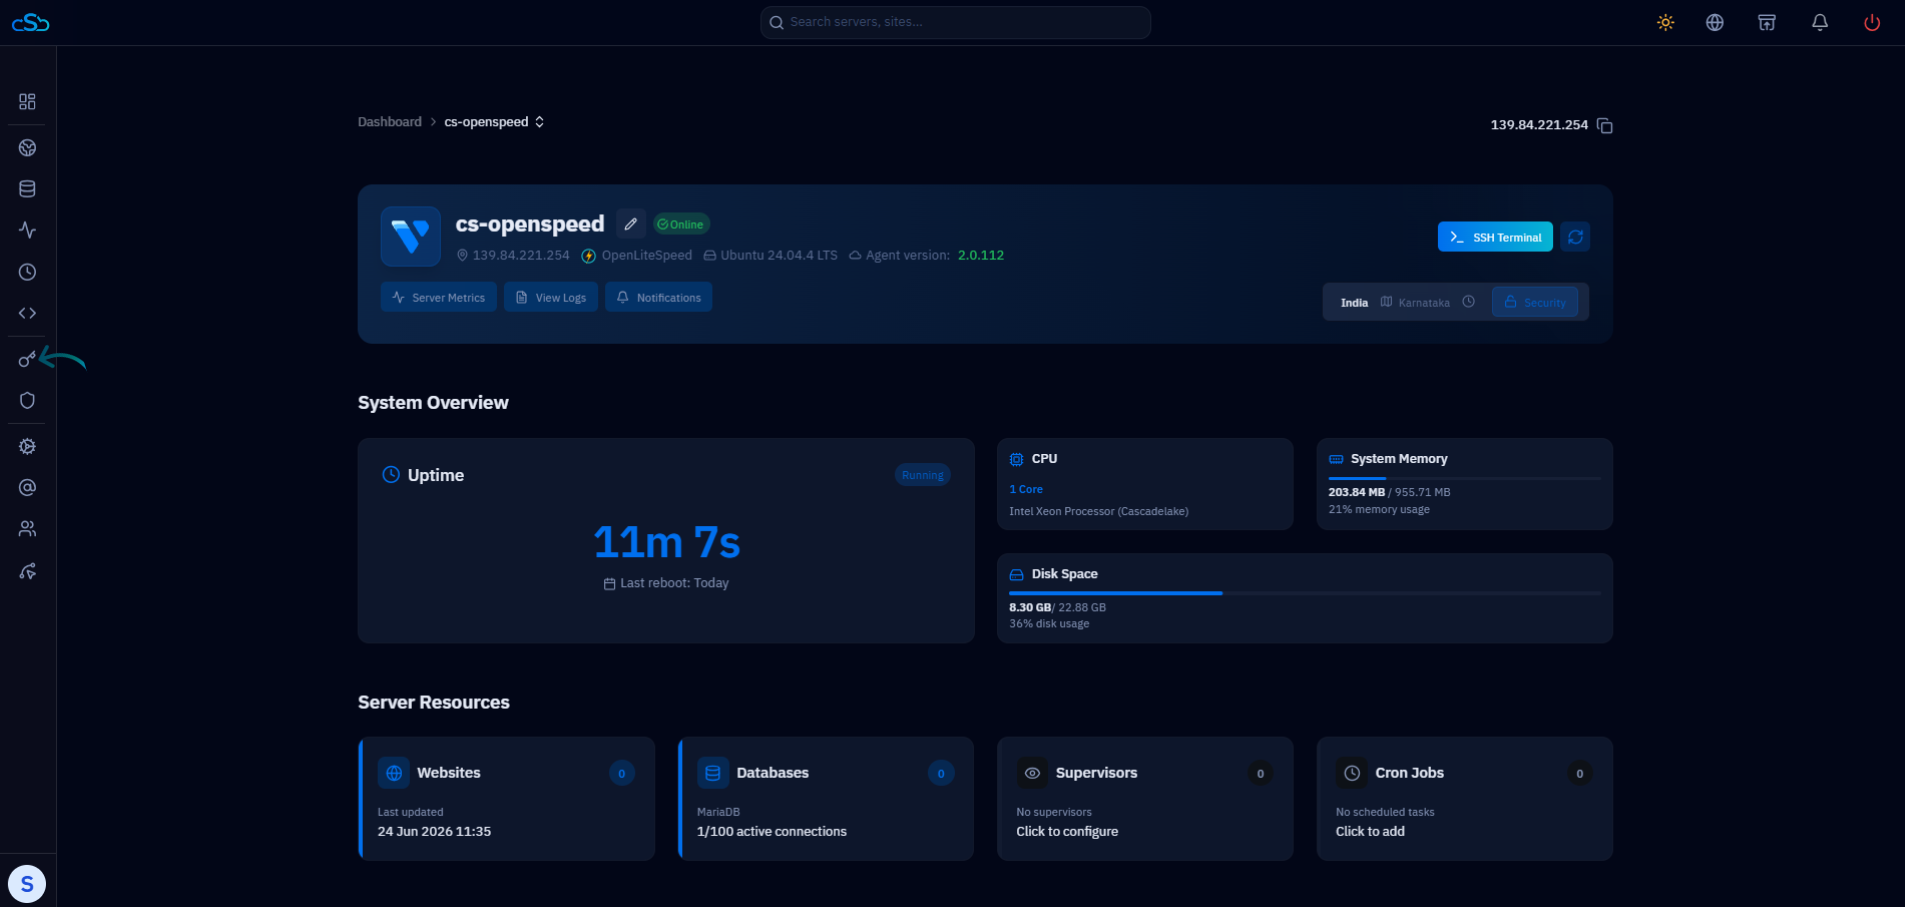
Fig. 02 — Server overview panel with the SSH Key icon highlighted in the left-hand navigation.
Step 3: Open SSH Configuration
The SSH Keys screen manages public keys used for SSH access — the port itself is changed from a separate configuration panel.
1. Find the SSH Configuration button: In the top-right of the SSH Keys screen, next to Add SSH Key, click SSH Configuration.
2. Review the panel: This opens a panel with authentication toggles (Password Authentication, Permit Root Login, Use DNS, Pubkey Authentication) along with the SSH Port field.
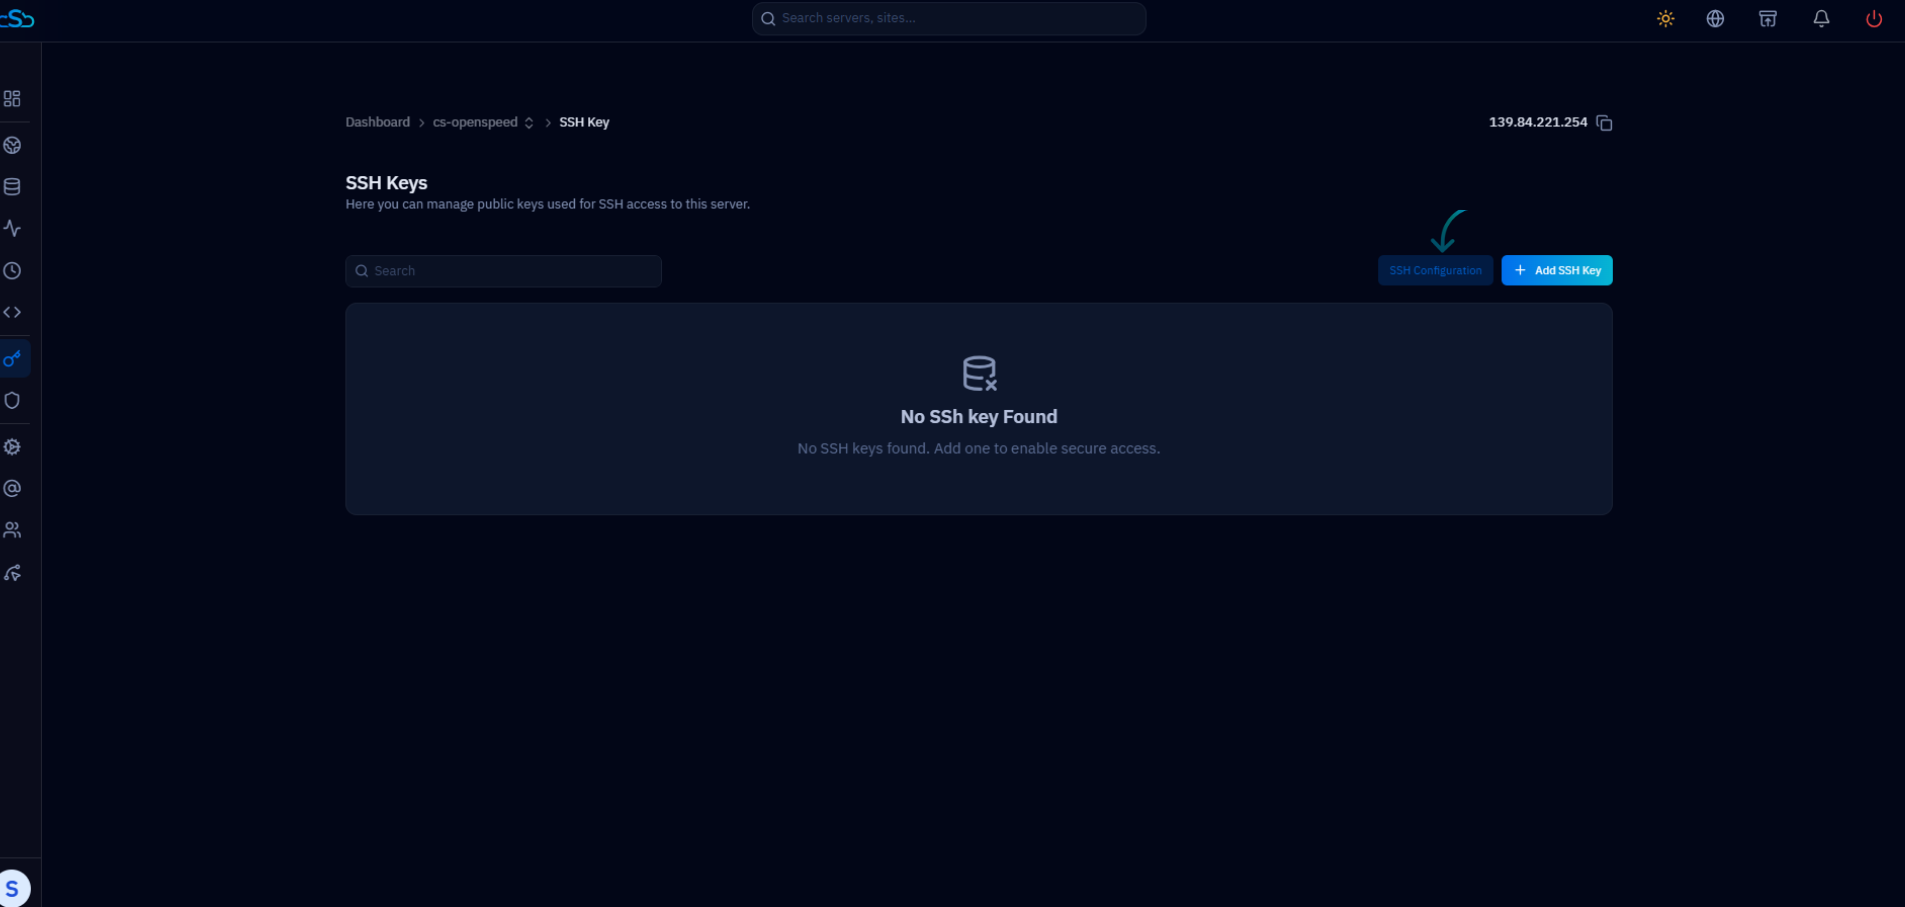
Fig. 03 — SSH Keys screen with the SSH Configuration button highlighted.
The other toggles in this panel control authentication behavior. Changing the SSH port does not require adjusting them — leave them as configured unless you specifically intend to change authentication settings too.
Step 4: Change the SSH Port
With the SSH Configuration panel open, you can now set the new port.
1. Locate the SSH Port field: It shows the current port (the default is 22).
2. Enter the new port number: Choose a port between 1024 and 65535 that isn't already in use by another service on the server.
3. Click Save: CloudStick updates the SSH configuration automatically. The new port becomes active shortly after saving — no manual server restart is needed.
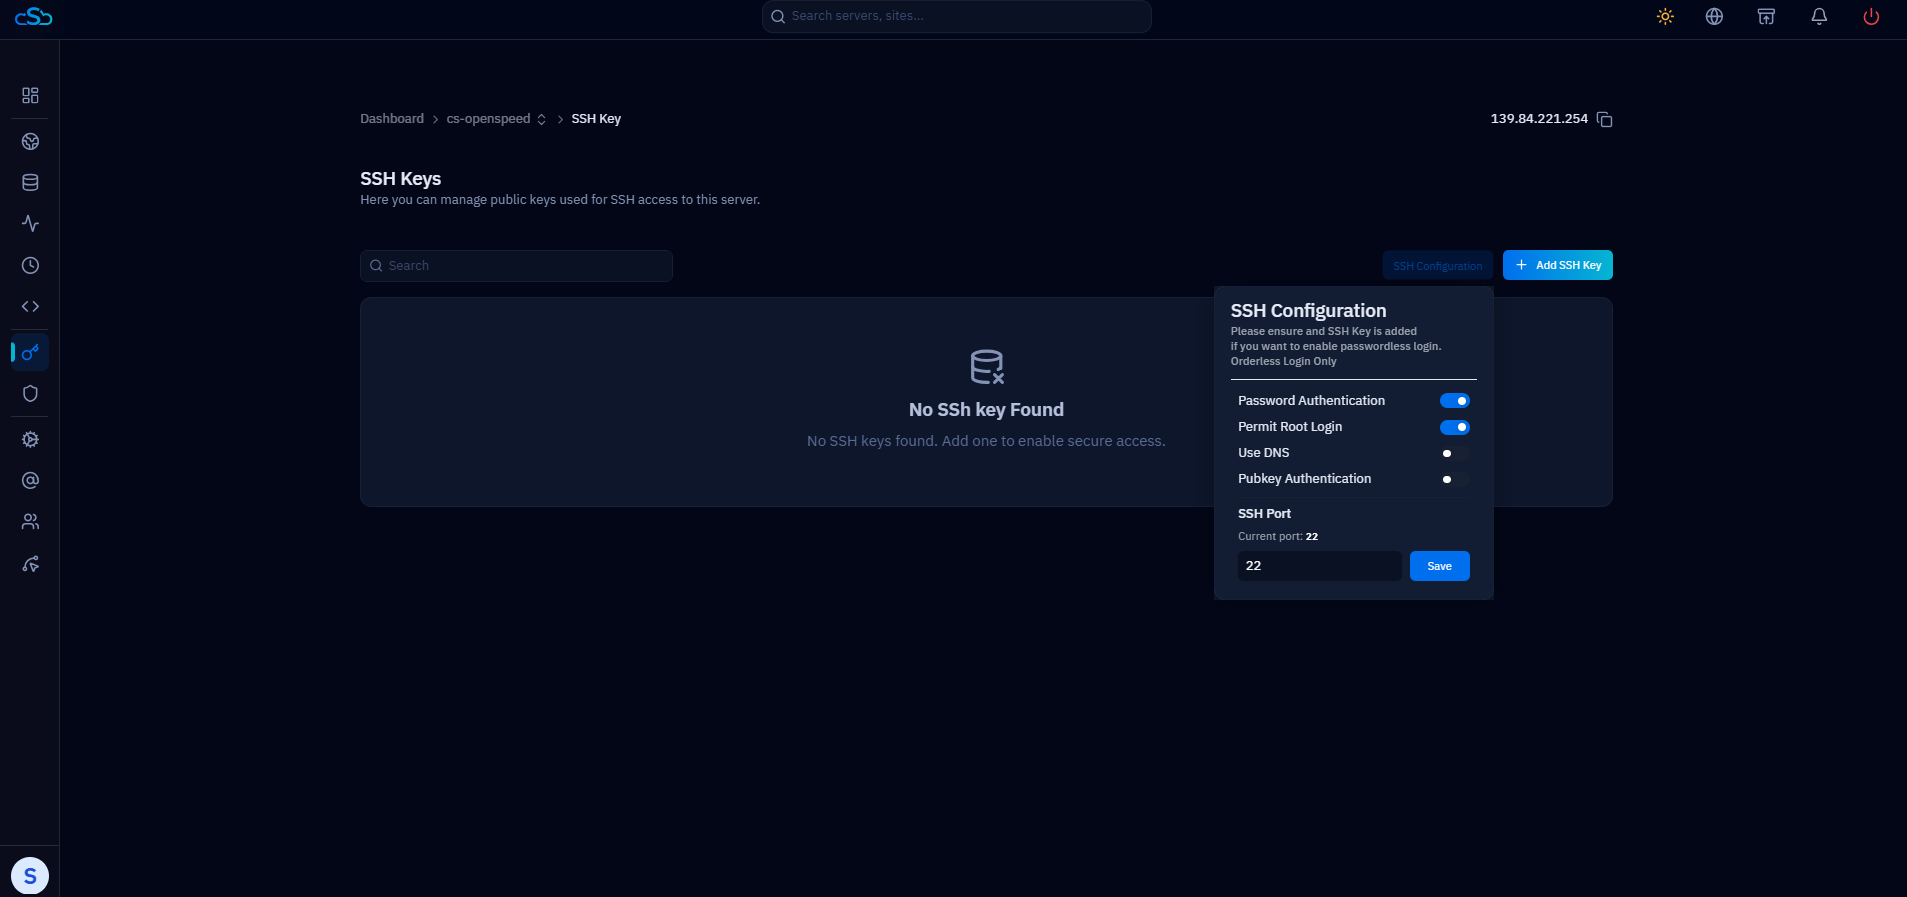
Fig. 04 — SSH Configuration panel with the SSH Port field and Save button.
Keep your current terminal session open until you've confirmed you can connect on the new port. If the connection fails, you still have your existing session to revert the change — closing it prematurely could lock you out until the port is corrected through your server provider's console.