Why am I getting a connection timeout when I try to connect through SSH and FTP?
Overview
If you are suddenly unable to connect to your server via SSH or FTP and your client is timing out instead of showing an authentication prompt, the most likely cause is that your IP address has been automatically blocked by the CSF (ConfigServer Security & Firewall) Brute Force Shield. This is not a server outage — it is a security mechanism triggered by too many failed login attempts from your IP.
This guide explains why the block happens, how to confirm your IP is in the deny list, and how to unblock it from the CloudStick dashboard so you can regain access immediately.
Before proceeding, double-check that you are using the correct SSH username, port, and credentials. A block is only triggered after failed authentication attempts — if your credentials are wrong, unblocking your IP will not solve the problem.
Step 1: Why Your IP Was Blocked
CloudStick's CSF Firewall enforces a strict login attempt limit to protect your server from credential-guessing attacks. Understanding this limit helps you avoid triggering it accidentally in the future.
Failed attempt limit: CSF allows a maximum of 3 failed login attempts per connection on SSH and FTP services. This limit applies per IP address within a rolling time window.
Automatic block: Once your IP exceeds 3 failed attempts, CSF automatically adds it to the deny list. The block happens immediately — subsequent connection attempts from that IP will time out or be refused.
Reason logged: The Currently Denied IPs List in the Security page shows the exact reason for each block. The entry will read something like: "lfd: (sshd) Failed SSH login from X.X.X.X: 3 in the last 3600 secs" — confirming it was a failed authentication block, not a manual deny rule.
This limit is intentional and cannot be increased from the dashboard. If you frequently connect from a fixed IP address, whitelist that IP using the Whitelist IP button in the Quick IP Actions panel to prevent accidental blocks in the future.
Step 2: Unblocking Your IP Address
You can unblock your IP directly from the CloudStick Server Security page using either the Currently Denied IPs List or the Quick IP Actions panel.
Method A — Remove from Currently Denied IPs List
This method lets you see all blocked IPs and their reason before removing them:
In your server panel, navigate to the Security page via the left-hand navigation.
Scroll down to the Currently Denied IPs List section.
Use the Search By IP field to find your IP address in the list.
Click the ✕ (remove) button in the Actions column next to your IP. The block is removed immediately.
Method B — Use Quick IP Actions
If you know your IP address, this is the fastest option:
In the Security page, locate the Quick IP Actions panel at the top.
Enter your IP address in the IP Address field.
Click the UnBlock IP button. CSF removes the deny rule and restores your access.
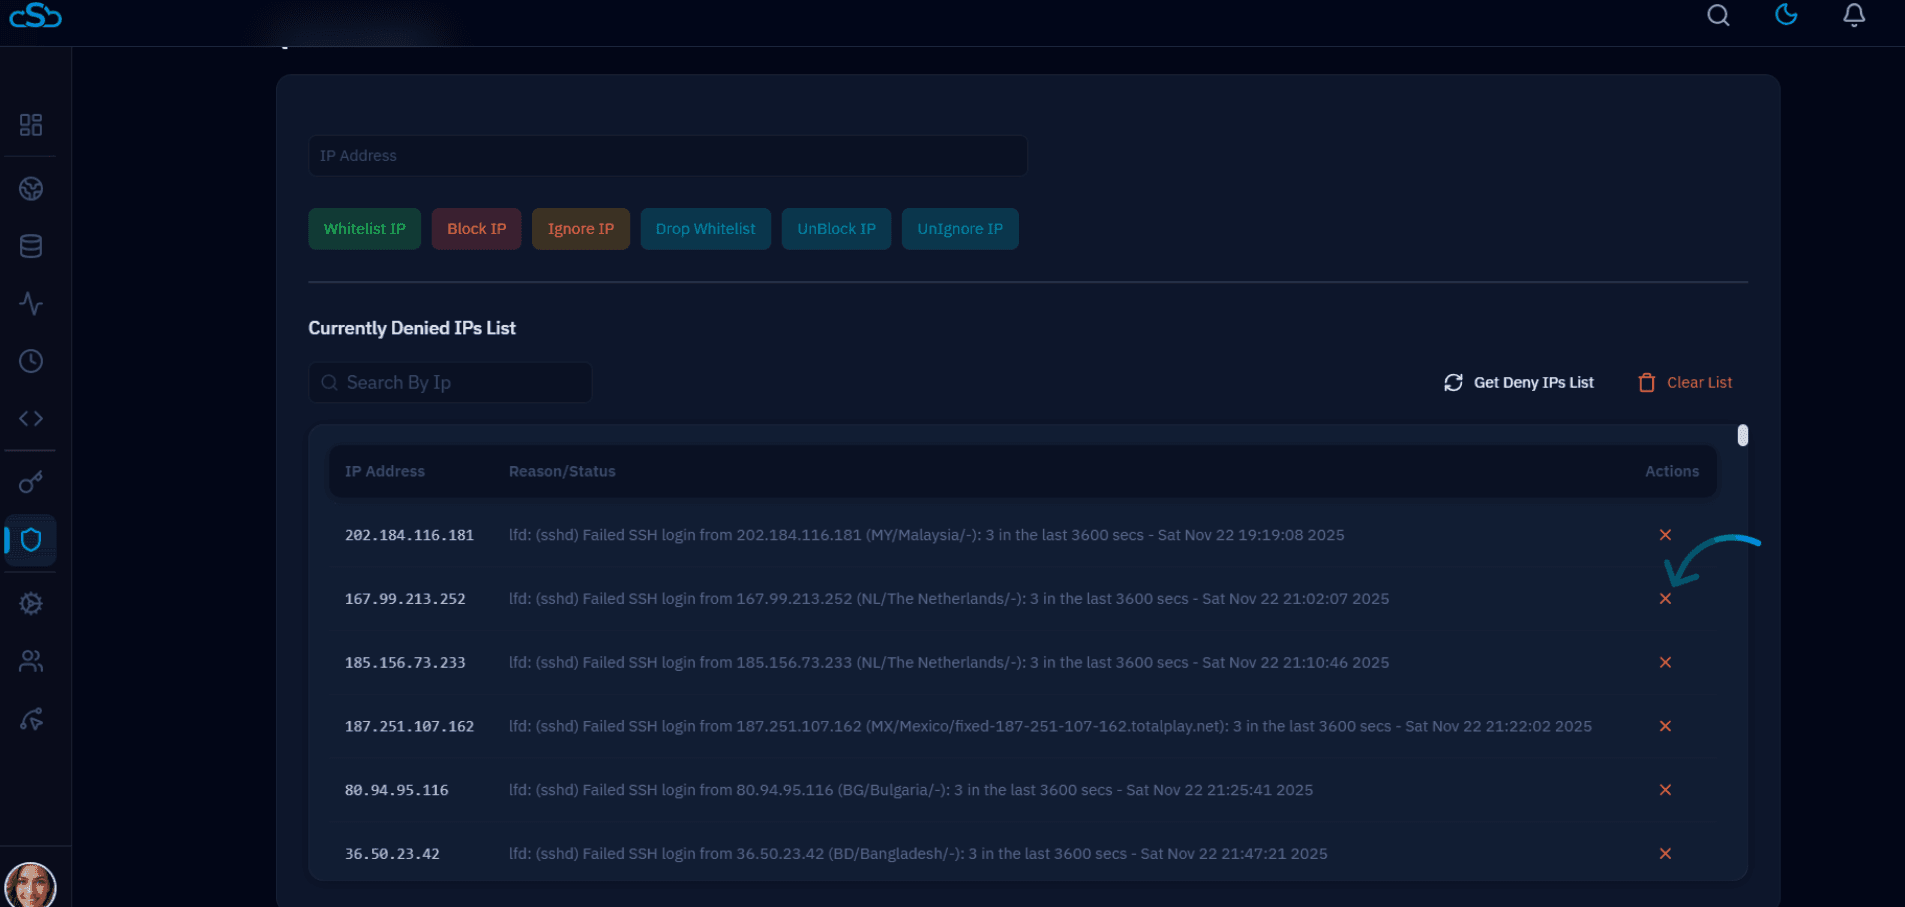
Fig. 01 — Currently Denied IPs List showing blocked IPs with SSH failure reasons and the remove (✕) action button highlighted.
After unblocking, your SSH or FTP client should connect on the next attempt. If the timeout persists, verify that your server's SSH port is open in the firewall and that the CSF Firewall is running.