How do I block/whitelist IP within a server?
Overview
Controlling which IP addresses can access your server is one of the most effective ways to reduce your attack surface. CloudStick's CSF (ConfigServer Security & Firewall) integration gives you a Quick IP Actions panel directly in the Server Security page — letting you whitelist trusted sources, block malicious actors, ignore IPs from firewall scanning, and undo any of these actions, all without touching the command line.
This guide covers the three core IP management operations: whitelisting (allowing) an IP, blocking an IP, and unblocking a previously blocked IP — along with the distinction between whitelisting and ignoring.
The CSF Firewall must be enabled on your server before IP actions take effect. If you have not enabled it yet, see the How do I secure my server using a firewall? guide first.
Step 1: Whitelisting an IP Address
Whitelisting grants a specific IP address unrestricted access through the firewall. Use this for trusted sources such as your office network, a developer's static IP, or a monitoring service that must always reach the server.
Option A — Whitelist IP (Allow All Ports)
Use this to grant full access to an IP across all open ports:
1. Open Server Security: In the left-hand navigation of your server panel, click the shield icon to open the Security page.
2. Locate Quick IP Actions: Scroll down to the Quick IP Actions section. You will see an IP Address input field with colored action buttons below it.
3. Enter the IP address: Type the IPv4 address you want to allow into the IP Address field (e.g., 203.0.113.42).
4. Click Whitelist IP: Click the green Whitelist IP button. CSF will add this IP to its allow list, permitting inbound connections from that address on all ports.
Option B — Ignore IP (Bypass Firewall Scanning)
Use this to exempt a trusted IP from CSF's rate-limiting and connection scanning without fully whitelisting it across all ports:
Enter the IP address in the same IP Address field.
Click the Ignore IP button. CSF will stop monitoring this IP for suspicious activity patterns.
Use Ignore IP only for IPs you fully trust. An ignored IP bypasses intrusion detection and excessive connection blocking — if that IP is ever compromised, CSF will not detect or stop the malicious traffic.
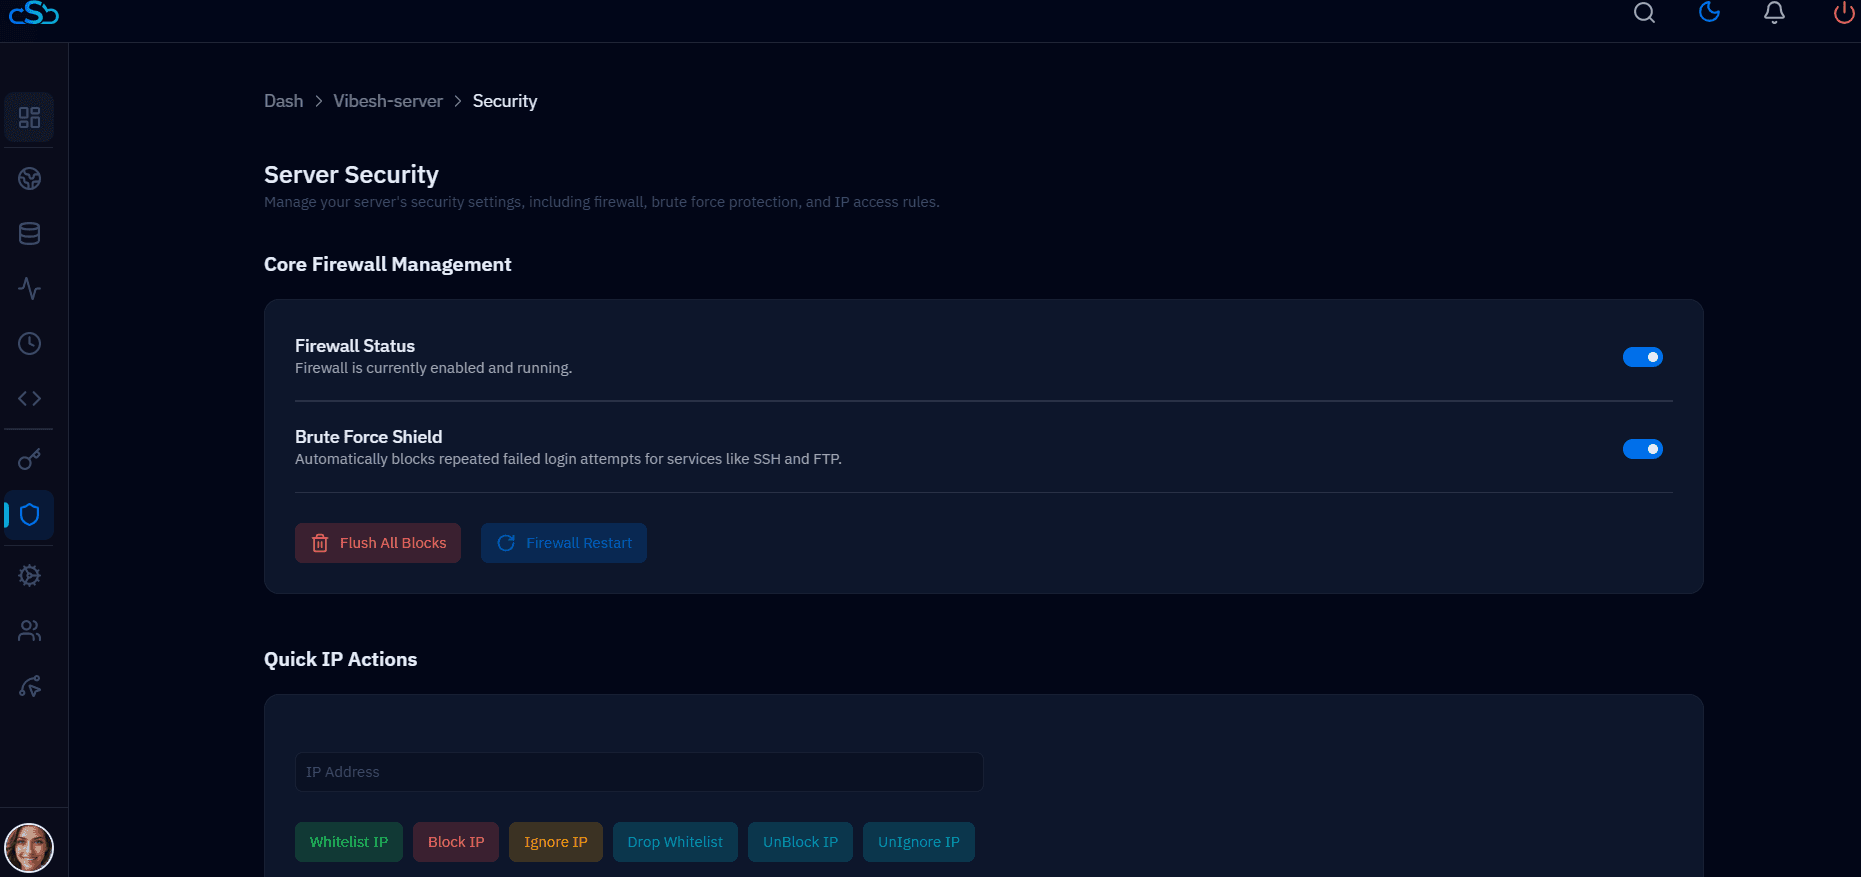
Fig. 01 — Server Security page showing the Quick IP Actions panel with Whitelist IP, Block IP, Ignore IP, Drop Whitelist, UnBlock IP, and UnIgnore IP buttons.
Step 2: Blocking an IP Address
Blocking an IP immediately drops all incoming connections from that address at the firewall level. Use this when you identify a malicious actor, a bot hammering your server, or an IP flagged in your access logs.
1. Go to the Security page: Open the Server Security section from the left-hand navigation in your server panel.
2. Enter the IP address: In the Quick IP Actions panel, type the IPv4 address you want to block into the IP Address field.
3. Click Block IP: Click the red Block IP button. CSF will immediately add a deny rule for this IP, dropping all inbound traffic from that address.
Blocked IPs take effect immediately without requiring a firewall restart. To see or manage your current block list, use the CSF configuration options accessible via SSH if needed.
Step 3: Unblocking an IP Address
If a legitimate IP was blocked — either manually or automatically by the Brute Force Shield — you can remove the block instantly from the same Quick IP Actions panel.
1. Go to the Security page: Open the Server Security section from the left-hand navigation in your server panel.
2. Enter the blocked IP address: Type the IP address you want to unblock into the IP Address field.
3. Click UnBlock IP: Click the UnBlock IP button. CSF will remove the deny rule for that address, restoring normal access.
4. Remove a whitelist entry (optional): If you previously whitelisted an IP and want to remove it, enter the IP address and click the Drop Whitelist button instead.
Use UnIgnore IP to remove an IP from the ignore list if it was added via Ignore IP. Each action (whitelist, block, ignore) has a corresponding removal button in the same panel.