How to Assign a User into a PostgreSQL Database
Overview
Creating a PostgreSQL database is only the first step — for an application to actually connect to it, a database user needs to be granted access with the right privileges. CloudStick's visual database manager lets you assign a user into a PostgreSQL database directly from the dashboard, with no manual GRANT statements required.
This guide walks you through selecting your server, opening the Databases section, and using the Grant User option on your PostgreSQL database to assign a user into it and confirm the assignment.
You need an existing PostgreSQL database before you can assign a user into it. If you haven't created one yet, see How to Create a PostgreSQL Database first.
Step 1: Select Your Server
Databases and their users are managed per server, so the first step is opening the server that hosts the PostgreSQL database.
Log in to your CloudStick dashboard.
Click the server card for the server you want to work with to open its server panel.
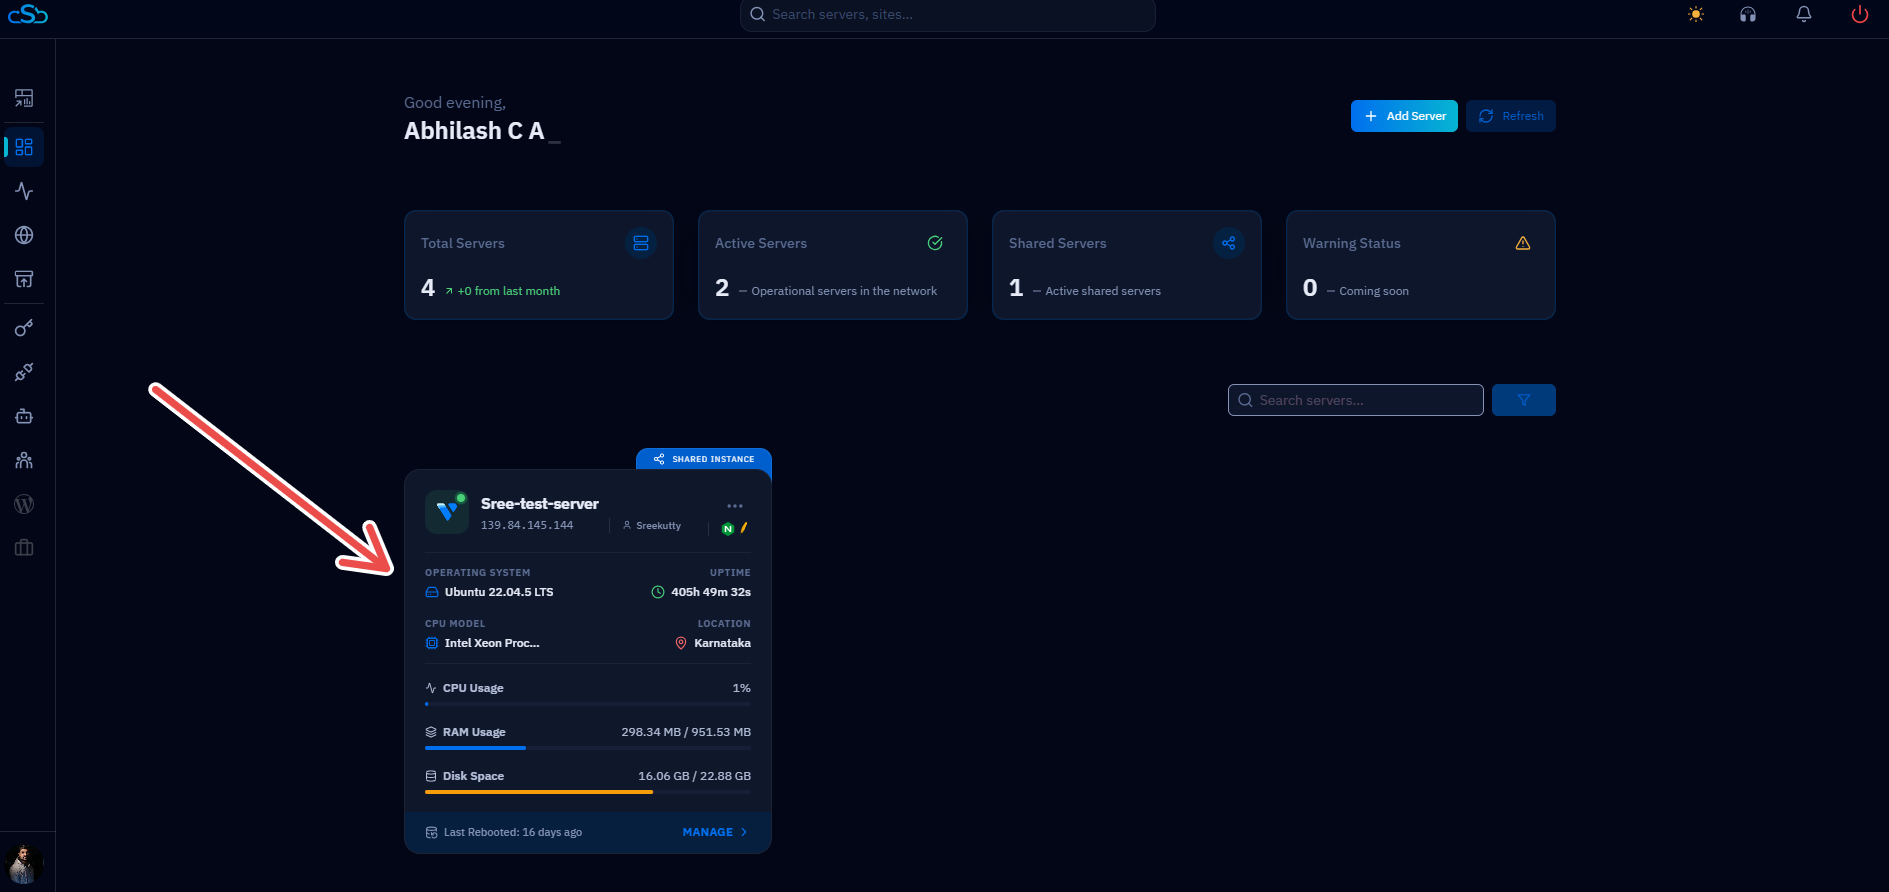
Fig. 01 — CloudStick dashboard listing connected servers. Click a server card to open its server panel.
Step 2: Open the Databases Section
Inside the server panel, the Databases section lists every MySQL, PostgreSQL, and MongoDB database on this server, along with the users already attached to each.
In the left-hand navigation of the server panel, click the Databases icon.
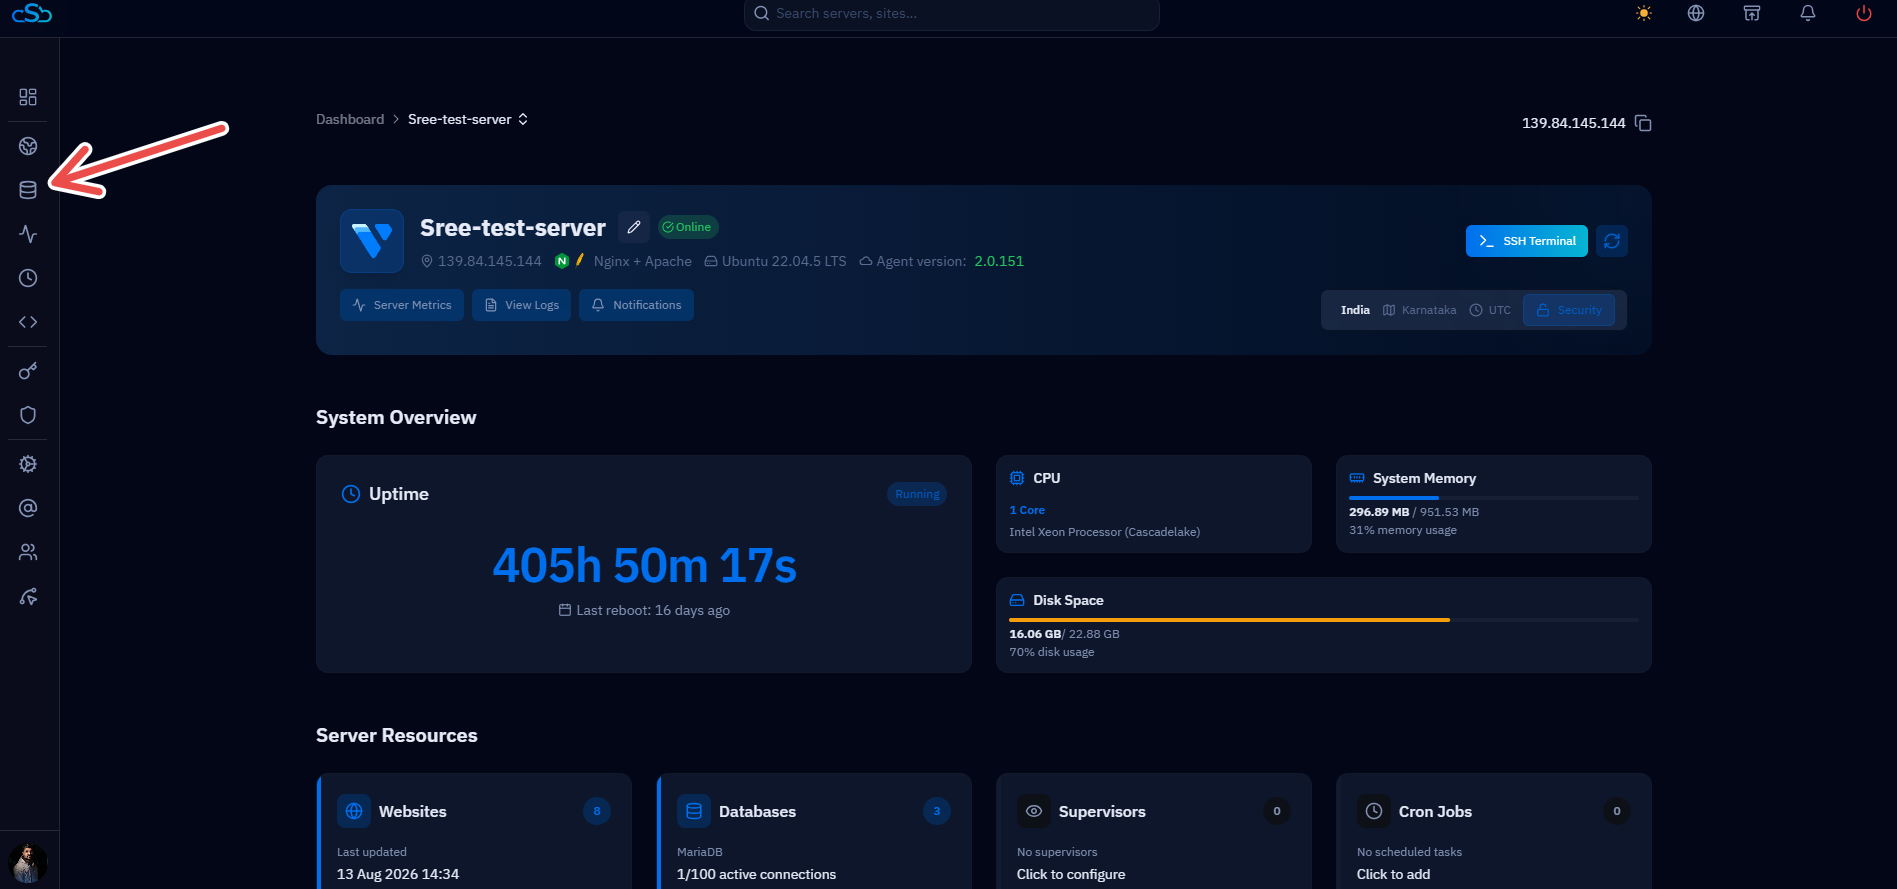
Fig. 02 — Server panel with the Databases icon highlighted in the left-hand navigation.
Step 3: Click Grant User on the PostgreSQL Database
Each database row on the Databases page has its own Grant User action, which is how you attach a user to that specific database.
Locate your PostgreSQL database in the list.
On that database's row, click Grant User to open the assignment form.
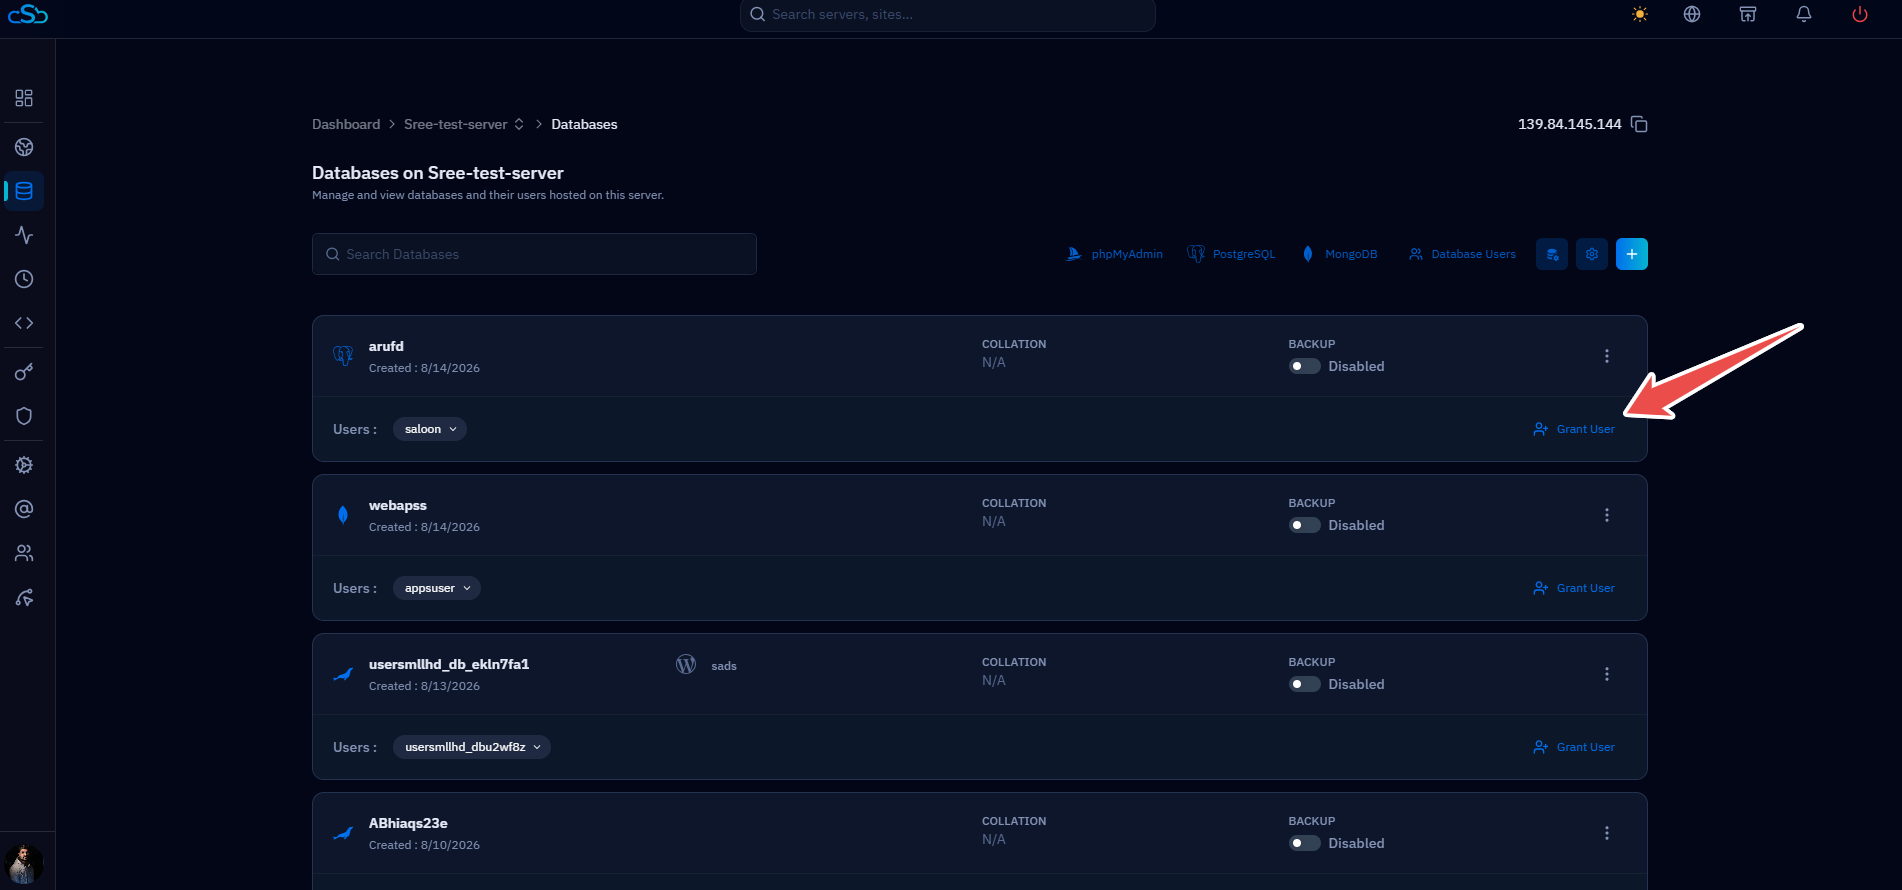
Fig. 03 — The Databases page with the Grant User link highlighted on a PostgreSQL database row.
Step 4: Select the User & Add User
The Add User form lets you choose which user to attach, exactly what it is allowed to do, and where it may connect from.
Select User: Choose the database user you want to add from the list of existing users.
Privileges: Select the privileges the user should have, or choose All Privileges for full access to the database.
Host: Choose where the user may connect from — Local Host for same-server connections, or a remote host if the application connects from another machine.
Grant only the privileges the application actually needs. Following the principle of least privilege keeps your database more secure — choose All Privileges only when full access is genuinely required.
Once the user, privileges, and host are set, click Add User to apply the changes.
The user is now attached to the PostgreSQL database and appears under its Users list on the Databases page.
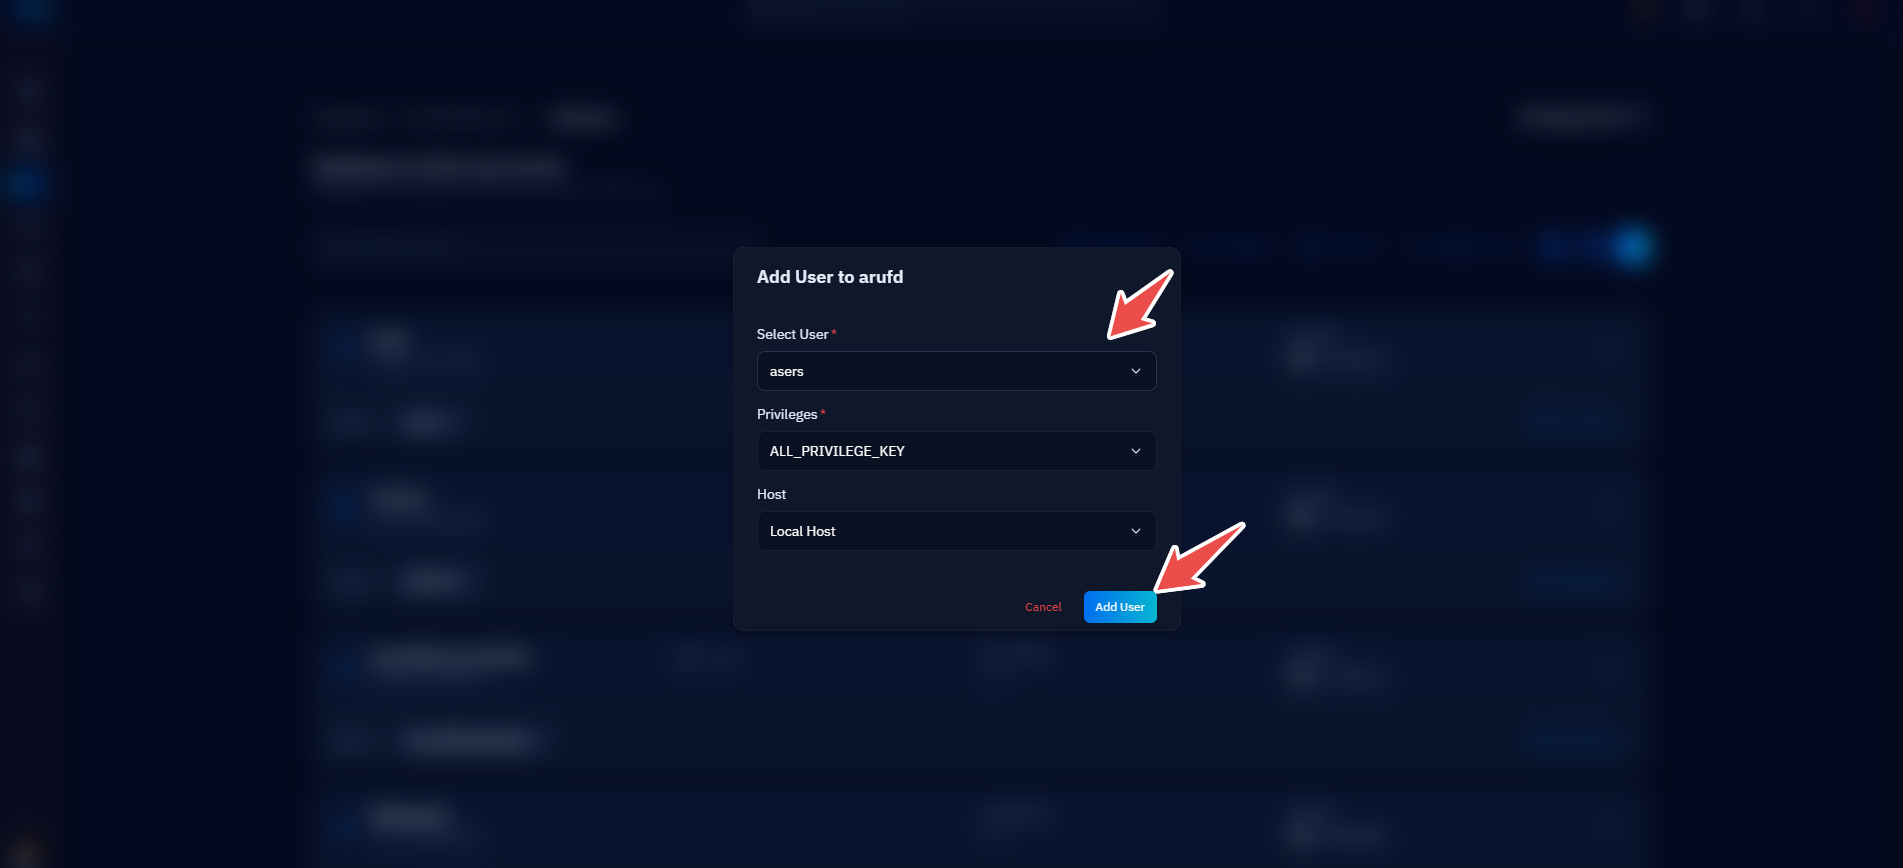
Fig. 04 — The Add User to database form showing the Select User, Privileges, and Host fields.