How to Onboard a New Client Server in Minutes


Connect the Client Server
The first step is attaching the client's VPS to your control panel, not registering DNS or touching WordPress. Whether the client is handing you an existing droplet or you're provisioning a fresh Ubuntu 22.04 or 24.04 server for them, connect it before you do anything else so every later step runs through the same interface instead of raw SSH sessions.
In CloudStick, this means adding the server with its IP and root SSH credentials (or the one-line install script pasted into the box), which installs the namespaced stack — nginx-cs, apache2-cs, the PHP-FPM pools, MariaDB, and CSF — without touching any packages the client may already have on the box. That isolation matters for handoffs: if the client eventually wants their own hosting, the CloudStick-managed stack can be removed cleanly without breaking system-level services.
Have root (or sudo) SSH access to the server and the client's intended domain name ready before you start — you'll need both within the first two minutes of onboarding.
Point DNS to the New Server
DNS should be pointed the moment the server is connected, not after WordPress is installed, so propagation has the maximum possible time to finish in the background while you do the rest of the setup. Create an A record for the domain (and a second one for www) pointing at the server's public IPv4 address at whichever registrar or DNS provider the client uses.
Don't wait around refreshing a browser to see if it's live — query the authoritative record directly and move on to the next step while it propagates:
If the client's domain is on Cloudflare, CloudStick's Cloudflare integration can create and update these records directly from the dashboard, which saves a tab-switch to a separate registrar panel during a live onboarding call.
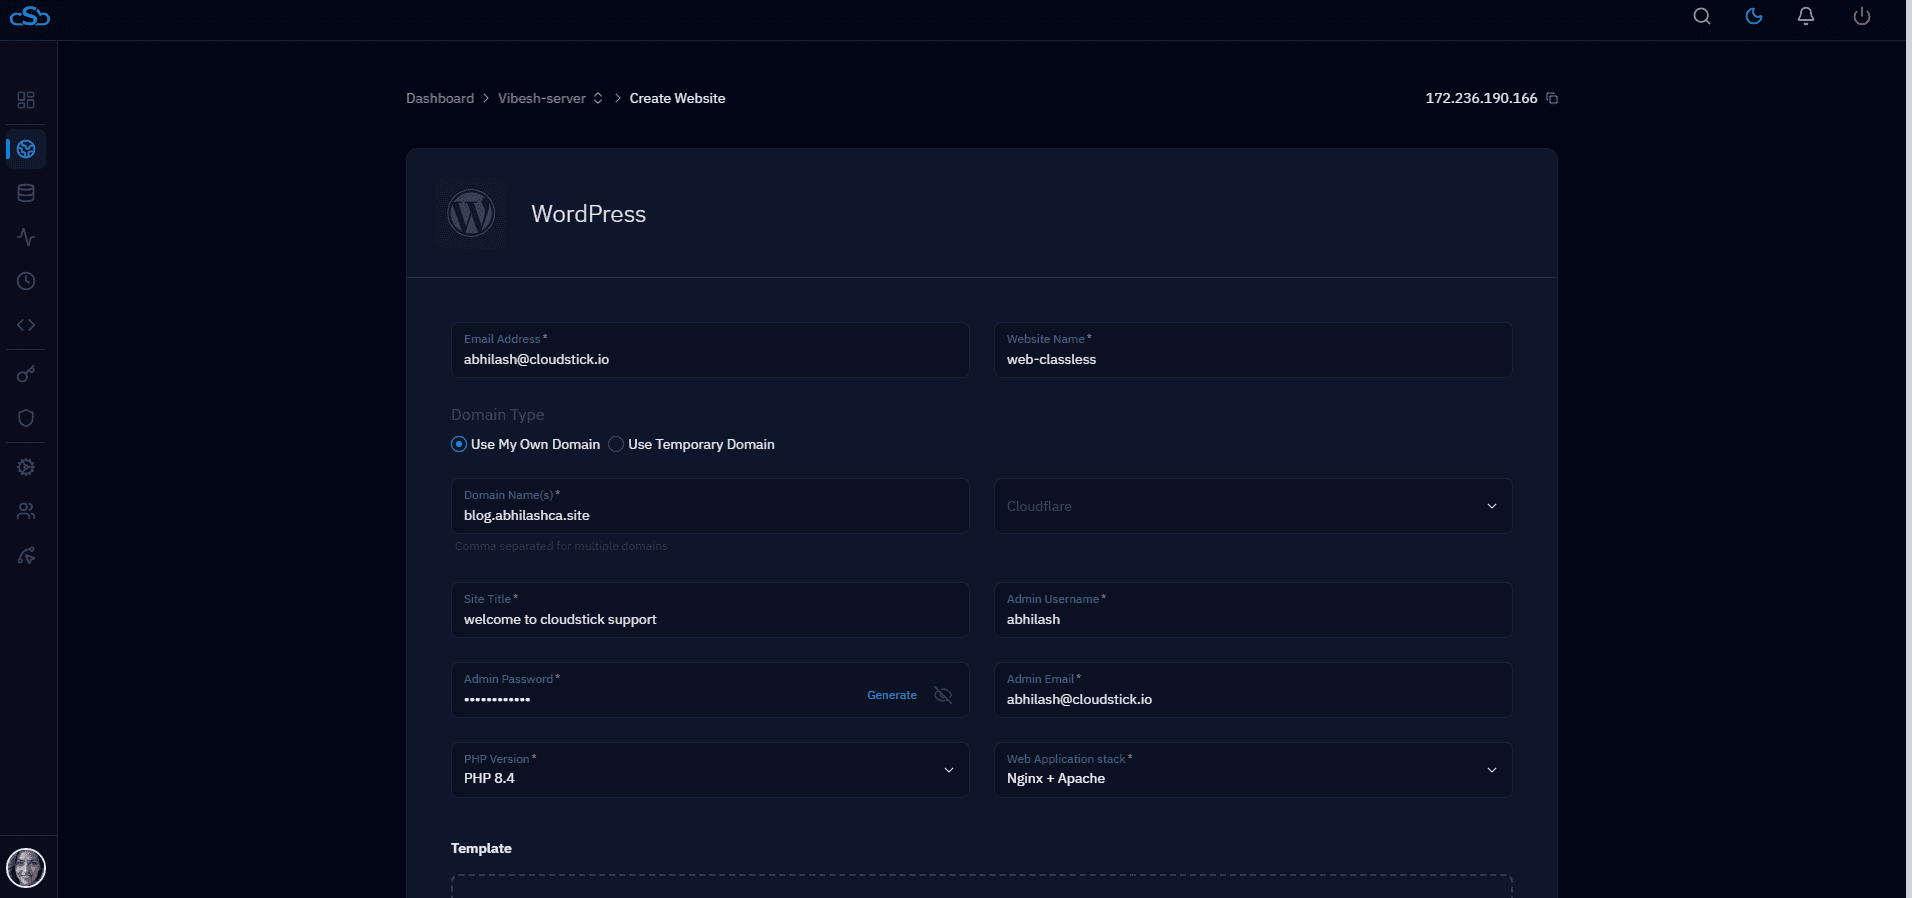
Install WordPress in One Step
WordPress should go on the server before SSL, not after, because the install creates the docroot and site user that the certificate will be issued against. A manual install means downloading WordPress core, creating a database and user by hand, writing wp-config.php, and setting file ownership — a sequence that's easy to get wrong under time pressure on a client call.
If you're doing it by hand or scripting it for a non-panel box, WP-CLI collapses that into a single command once the database exists:
CloudStick's one-click WordPress install skips all of that manual sequencing entirely: pick the domain, and the panel provisions the site user, database, PHP-FPM pool, and a fresh WordPress install in one action, ready for the SSL step immediately after.
Issue SSL Automatically
SSL should be issued as soon as DNS has propagated and the site responds on port 80, since Let's Encrypt's HTTP-01 challenge needs the domain to resolve to the server before it can validate ownership. Re-run the dig check from earlier if you're not sure propagation has finished — issuing too early just means retrying the request once it has.
CloudStick issues and auto-renews a free Let's Encrypt certificate for the domain with a single toggle in the site's SSL tab, and it re-validates and renews automatically before expiry, so there's no cron job or certbot timer for you to maintain on the client's behalf.
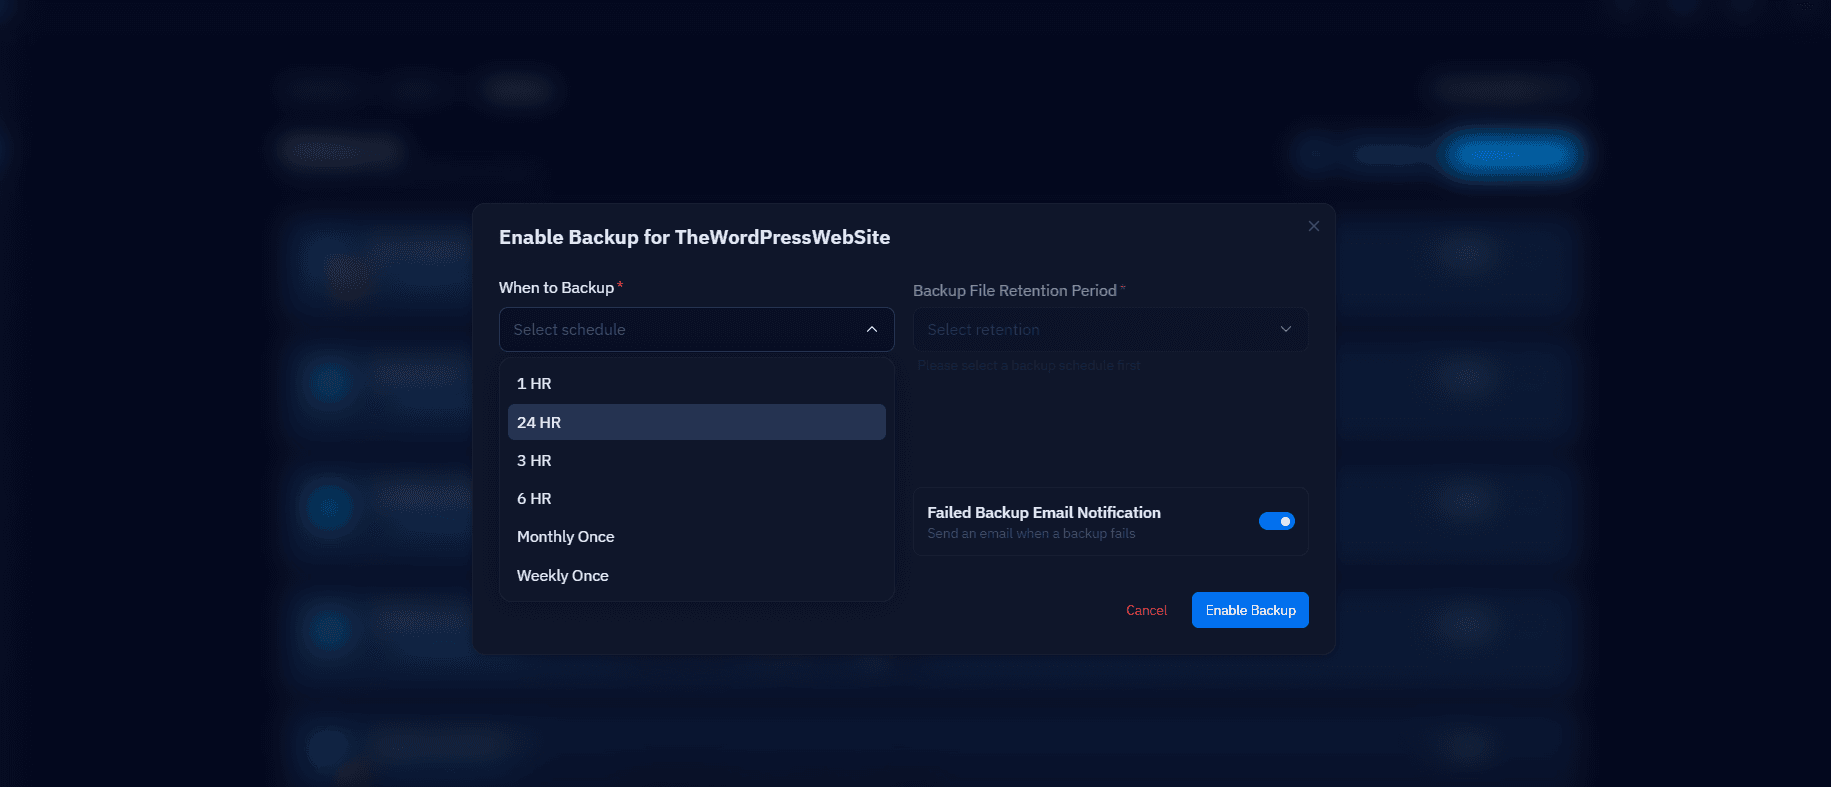
Set the Initial Backup Schedule
A backup schedule should exist before the client starts adding content, not after the first support ticket about lost work. Decide on a cadence that matches how often the client will actually publish — daily for an active blog or store, weekly for a mostly-static brochure site — and set retention long enough to recover from a mistake that isn't noticed for a few days.
Set the backup schedule in the same sitting as the WordPress install, while the site is still empty. It takes seconds now and means the very first backup already covers the client's initial content instead of starting a day or two late.
CloudStick's Visual Database Manager lets you schedule daily, weekly, or custom backups per database with a set retention window right from the dashboard, and you can download or browse archived backups later without SSH or phpMyAdmin if the client ever needs a rollback.
Next Steps After Onboarding
The server is client-ready once DNS resolves, WordPress is installed, SSL is issued, and a backup schedule is running — usually all inside a single sitting rather than the half-day a fully manual setup takes. From here, the remaining work is administrative rather than technical: document the PHP version, plugins, and backup cadence you configured so the next person touching this site (including future-you) doesn't have to reverse-engineer it.
If you're onboarding more than one client a month, the next win is turning this checklist into a repeatable template so every new server gets the same PHP version, stack, and backup policy without re-deciding it each time — standardizing that setup is what actually keeps support load flat as the client list grows.