How to Set Up a Subdomain on Your Server

%203.png&w=256&q=75)
What a subdomain actually needs
A working subdomain needs exactly three things: a DNS record that points the name at your server, a virtual host on the server that answers for that name, and an SSL certificate that covers it. Miss the first and the browser never finds your server. Miss the second and Nginx serves whatever its default site is — usually the wrong website, which is how staging.example.com ends up showing your main homepage. Miss the third and every visitor gets a certificate warning, because the certificate for example.com does not cover staging.example.com. The whole job takes about ten minutes, and each of the three steps is independent — you can do DNS first or the vhost first, the order only matters when you get to SSL, because Let's Encrypt needs the DNS record resolving before it will issue a certificate.
You need a registered domain whose DNS you can edit (at your registrar or Cloudflare), a server with a public IP running Nginx, and SSH access with sudo. If the server is connected to CloudStick, you can skip the SSH parts entirely — the dashboard performs the vhost and SSL steps for you.
Create the DNS record: A record vs CNAME
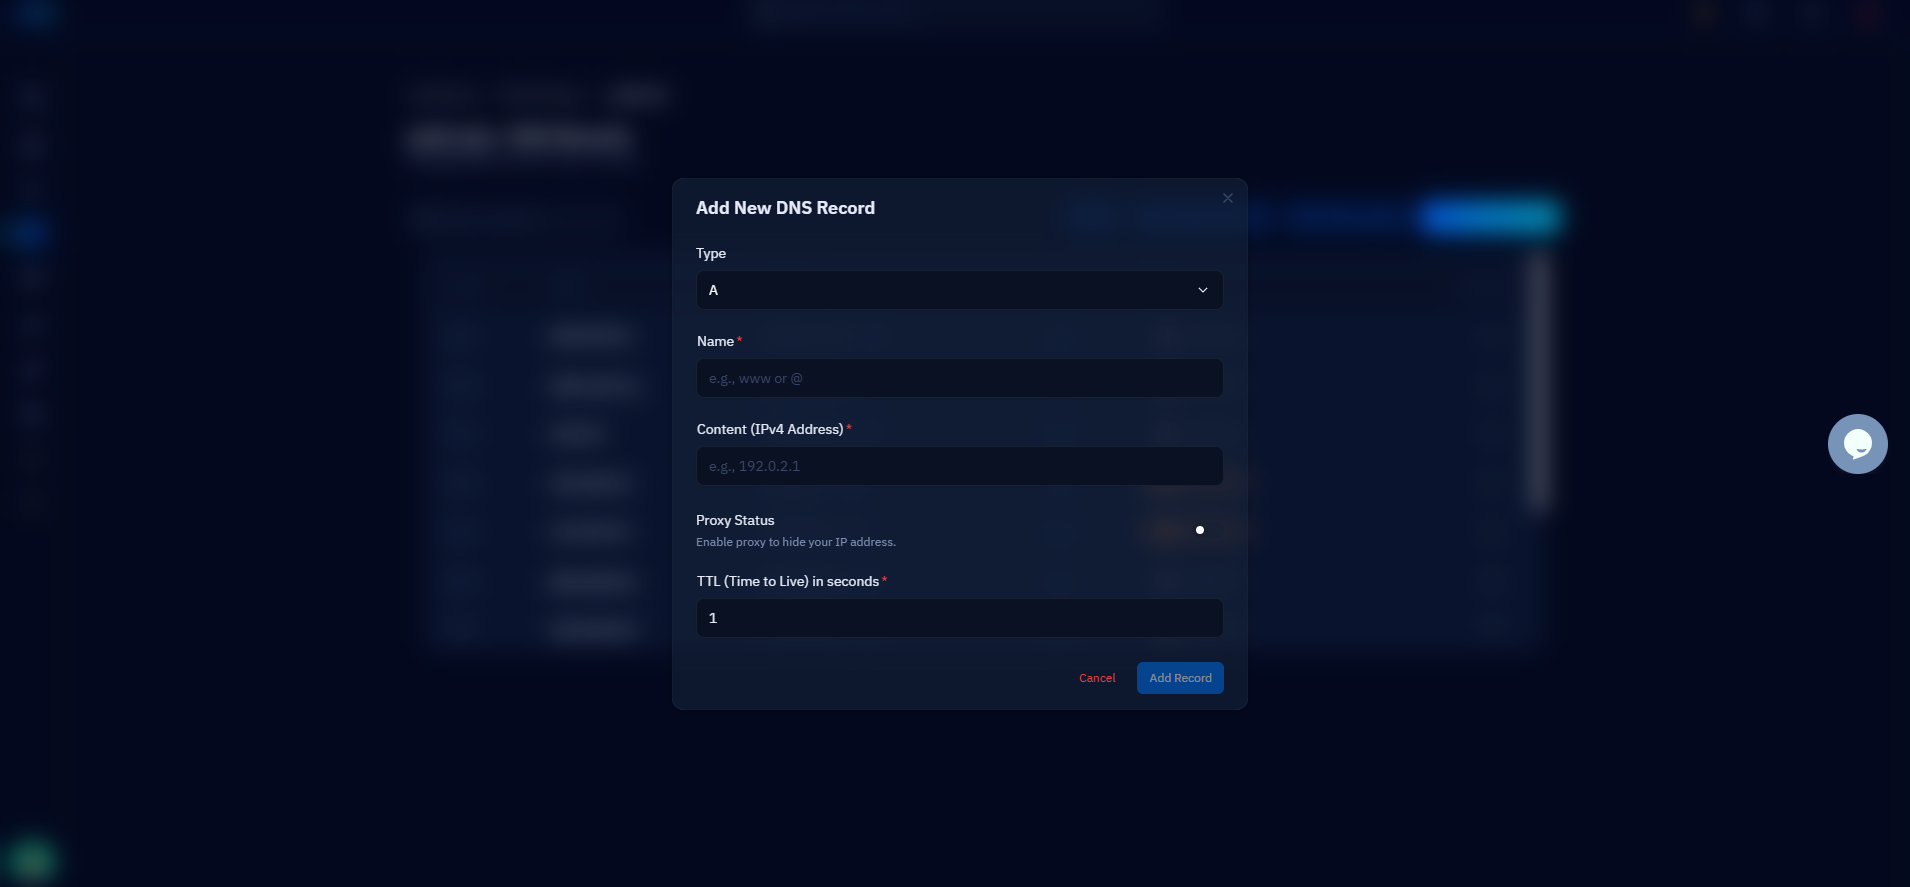
Use an A record when you want to state the IP directly; use a CNAME to the apex when the subdomain should always live on the same server as the main domain. Both are one line in your DNS panel. An A record maps the name straight to an IPv4 address — one lookup, no indirection, and the subdomain can point anywhere, including a completely different server from the main site. A CNAME says "this name is an alias of that name": point app.example.com at example.com and it inherits whatever IP the apex resolves to, forever. Move the whole site to a new server later and you update one A record instead of six.
The trade-offs are simple. A CNAME cannot coexist with any other record at the same name — so a subdomain that also needs its own MX or TXT records must use an A record instead. A CNAME also costs resolvers an extra lookup, though caching makes that irrelevant in practice. And you can never put a CNAME at the apex itself; that restriction is why apex records are always A records. Rule of thumb: same server as the main site, CNAME to the apex; separate server or separate lifecycle, direct A record. Set the TTL to 300 seconds while you are setting things up so mistakes clear quickly.
Create the Nginx vhost for the subdomain
On the server, a subdomain is just another server block whose server_name matches the new name. Nginx picks which site to serve by comparing the Host header against every server_name it knows, so the subdomain gets its own block, its own document root, and its own logs — fully isolated from the main site:
Always run nginx -t before reloading — a typo in one vhost takes down config reloads for every site on the server. On a CloudStick-managed server you never write this file by hand: creating a subdomain site is exactly the same flow as creating a normal website. Enter staging.example.com as the domain in the dashboard, and the agent generates the vhost (stored under /etc/nginx-cs/vhosts.d/ rather than /etc/nginx/), creates the isolated system user and document root, and reloads Nginx safely.
SSL: per-subdomain Let's Encrypt vs a wildcard cert
For one or two subdomains, issue a normal Let's Encrypt certificate per subdomain; once you are managing many, a wildcard certificate for *.example.com is less churn. The per-subdomain route is a single command and uses the easy HTTP-01 challenge — certbot proves control by serving a token from your new vhost. The wildcard route requires the DNS-01 challenge, meaning certbot must create a TXT record in your zone, which is only hands-off if your DNS provider has an API plugin (Cloudflare does):
Two wildcard caveats worth knowing: *.example.com does not cover the bare apex, which is why the command above lists both names, and it does not cover nested levels like dev.staging.example.com. CloudStick removes this decision fatigue — when the dashboard creates the subdomain site it issues and auto-renews the Let's Encrypt certificate for it, and wildcard SSL is supported if you prefer one certificate across every subdomain on the server.
Common subdomain patterns and why they exist
Three patterns cover most real-world use. staging.example.com is a full copy of the site where you test changes before they touch production — same server or a cheaper one, always with its own database, and ideally behind HTTP basic auth plus an X-Robots-Tag: noindex header so search engines never index the duplicate. app.example.com separates a web application from the marketing site, letting each run a different stack: the marketing pages stay static and cached hard, while the app runs Node or PHP with no caching. api.example.com gives your API its own name so it can live on its own server, scale independently, and carry its own CORS policy.
One detail that bites teams later: cookies set for .example.com are sent to every subdomain, so a heavy session cookie on the main site rides along on every api.example.com request too. Scope cookies to the exact host that needs them, and treat subdomains as the security boundary they are not — they share the parent domain's reputation and, unless you are careful, its cookies.
Verify with dig and curl, then ship it
Verification is two commands: dig confirms the DNS layer, curl confirms the server layer. Check them in that order, because a curl failure means nothing if the name does not resolve yet:
If dig returns nothing, the record has not propagated — query your nameserver directly with dig @1.1.1.1 to bypass your local cache. If dig resolves but curl returns the wrong site, the server_name in your vhost does not match the hostname exactly. If curl complains about the certificate, SSL was issued for a different name than the one you are hitting. Those three failure modes account for nearly every broken subdomain. Your next step: pick the subdomain you have been meaning to create — a staging copy is the highest-value first one — add the record with a 300-second TTL, create the vhost or the CloudStick site, and run the two verification commands before you tell anyone the URL.