How to Set Up Cron Jobs on a Linux Server (Beginner's Guide)


%203.png&w=256&q=75)
What cron is and why it matters
Cron is the scheduler that has shipped with virtually every Unix system since 1975, and on a modern Ubuntu 24.04 or Debian server it is already installed, enabled, and running before you type a single command. The cron daemon wakes up once a minute, compares the current time against every schedule it knows about, and runs whatever commands are due. That is the entire model: no queues, no agents, no dependencies — just a background process and a set of text files called crontabs that tell it what to run and when. On Ubuntu and Debian the implementation ships as the cron package, and the daemon is an ordinary service you can inspect like any other: systemctl status cron shows it active from first boot.
Why it matters is equally simple: every server accumulates tasks that must happen on a schedule. Database dumps at 2 a.m., log cleanup on Sundays, certificate renewal checks, cache warming, report generation, WordPress maintenance events. Doing any of these by hand is a job you will eventually forget, and forgetting is how you end up restoring a three-week-old backup. Cron turns each of those obligations into one line of configuration that runs whether or not you remember it — which is precisely what a server should do for you.
Creating your first cron job with crontab -e
The command crontab -e opens your personal crontab in an editor, and saving the file installs it — there is no reload step, no service restart, nothing else to do. The first time you run it on Ubuntu or Debian you will be asked to pick an editor; choose nano unless you have a reason not to, and if you regret the choice later, select-editor lets you change it at any time.
You need a Linux server (Ubuntu 24.04 or Debian in the examples below) with SSH access and a user account that can run sudo. Everything else — the cron daemon itself and the crontab command — ships with the base system.
That example pings a health endpoint every five minutes. Two habits are worth forming from day one. First, always end the crontab file with a newline — cron silently ignores a final line that lacks one, and this single quirk has consumed hours of debugging time for generations of administrators. Second, use crontab -l after every edit to confirm what is actually installed rather than what you think you saved.
The crontab format in two minutes
Every crontab line is five time fields followed by the command: minute (0-59), hour (0-23), day of month (1-31), month (1-12), and day of week (0-7, where both 0 and 7 mean Sunday). An asterisk means "every value", a slash defines steps, a comma lists values, and a hyphen defines ranges. Read the five fields left to right and say them out loud — "at minute 30, at hour 2, every day of month, every month, on Monday" — and most schedules become obvious.
The four lines above translate to: every day at 02:30, every ten minutes, weekdays at 09:00, and the first of every month at midnight. Cron also accepts shortcuts like @daily, @hourly, and @reboot in place of the five fields. When a schedule gets complicated, paste it into crontab.guru — it renders any expression as plain English and catches mistakes before cron does.
User crontabs vs system crontabs
The crontab you edit with crontab -e belongs to one user, and every command in it runs as that user — this is the right home for jobs tied to a specific application or website. System-level schedules live elsewhere and use a slightly different format. The file /etc/crontab and any file dropped into /etc/cron.d/ add a sixth column between the schedule and the command: the user to run as. Packages install their schedules into /etc/cron.d/ so they never touch anyone's personal crontab.
There is a third mechanism: drop an executable script into /etc/cron.daily/, /etc/cron.weekly/, or /etc/cron.monthly/ and it runs at the interval the directory name implies, no schedule line needed. The practical rule for beginners: use your own crontab for your own jobs, use /etc/cron.d/ when a job must run as root or another user, and leave /etc/crontab itself alone so package upgrades never collide with your edits. Remember that root's personal crontab (sudo crontab -e) is a separate file from yours — a job installed in one is invisible when you list the other.
Absolute paths and environment gotchas
The single most common beginner failure is a job that works perfectly in your shell and never works from cron — and the cause is almost always environment. Cron runs commands with a nearly empty environment: PATH is typically just /usr/bin:/bin, the shell is /bin/sh rather than bash, and none of your .bashrc exports exist. A command like php artisan schedule:run fails silently because cron cannot find php the way your login shell can.
The fix is discipline: write absolute paths for every binary and every file your job touches, and set the environment explicitly at the top of the crontab when you need more. One more trap worth knowing early: the percent sign is special in crontab lines — it becomes a newline unless escaped as a backslash-percent, which bites anyone embedding a date format in a command.
Verifying your jobs, and your next step
Never assume a cron job ran — verify it. Cron logs every execution to syslog, so one grep shows exactly what fired, when, and as which user. If a job appears in the log but did not do its work, the schedule is fine and the command is broken; if it never appears at all, the schedule or the crontab itself is the problem. That one distinction cuts most debugging sessions in half.
A reliable trick while testing: temporarily set the schedule to * * * * * so the job runs every minute, watch the log until you see it fire and succeed, then set the real schedule. It beats waiting until 2 a.m. to find a typo.
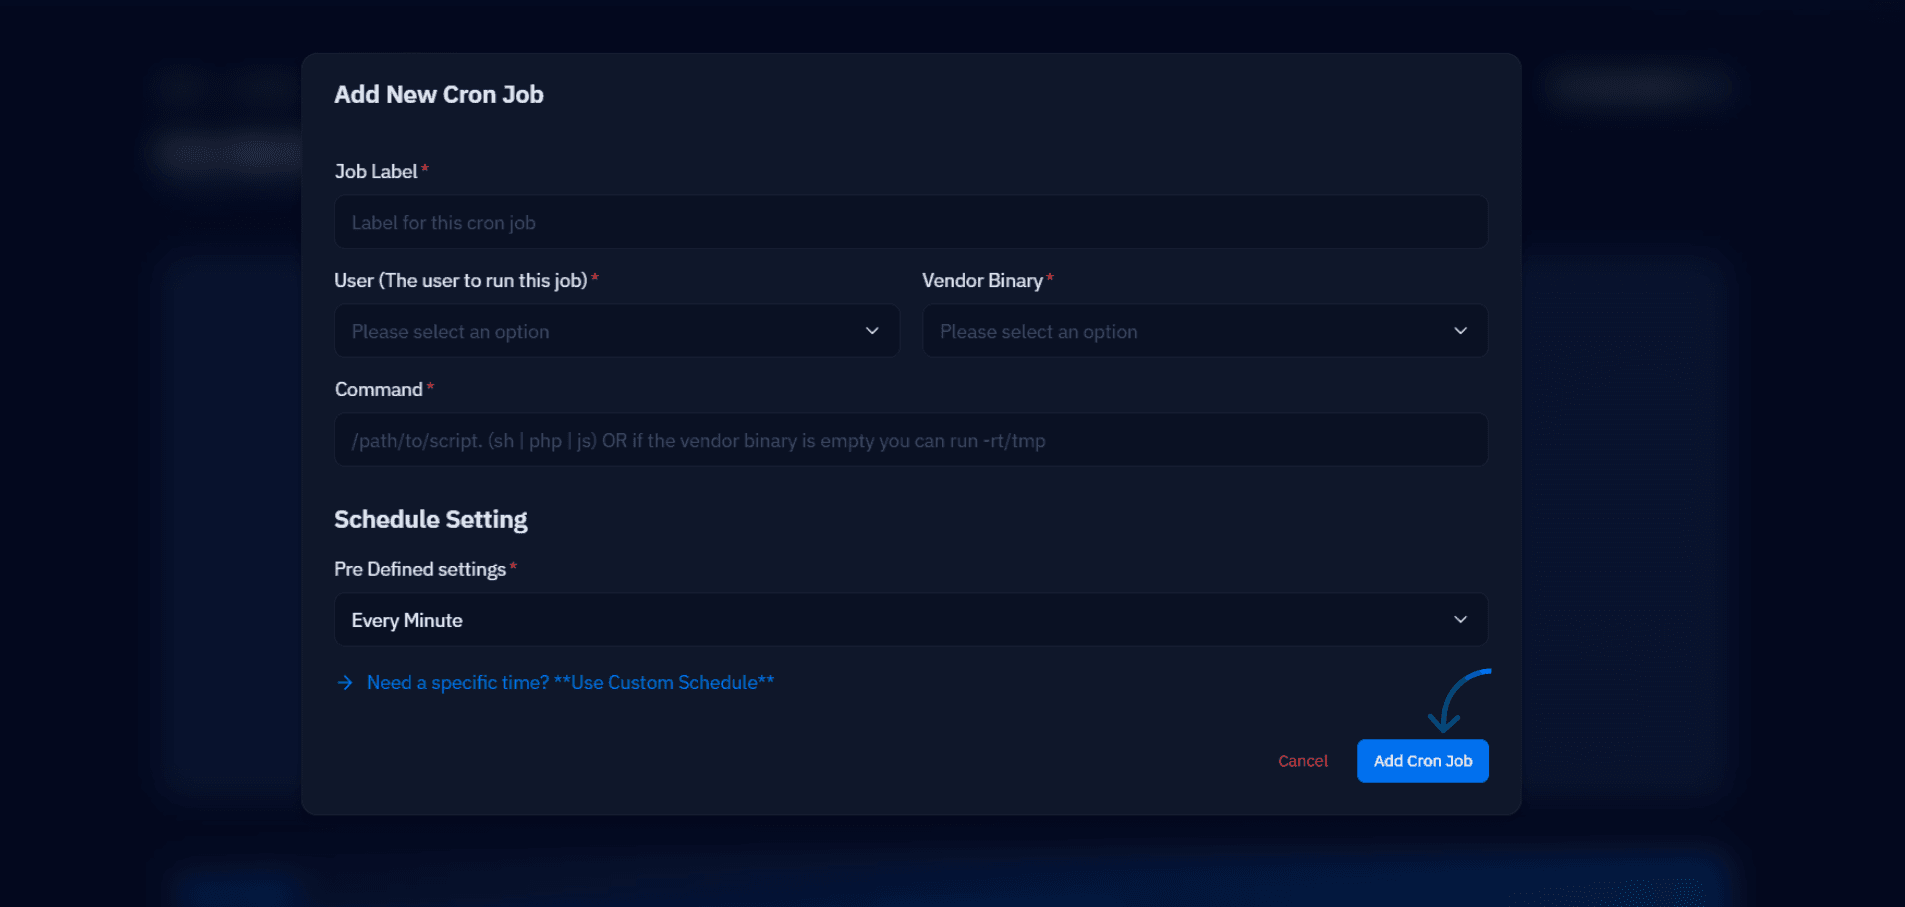
From here, your next step is to move one real task — a database dump, a cache clear, a report — into cron and verify it end to end. If your server is connected to CloudStick, the dashboard includes a CronJobs manager for every website on all plans, so you can create and edit schedules for each site from the web UI instead of editing crontabs over SSH — the same cron underneath, with the syntax handled for you. Either way, the goal is identical: every recurring obligation on your server written down as a schedule, running without you.