How to Set Up Transactional Email for Your Web App

%203.png&w=256&q=75)
Transactional and marketing email are different products
A password reset that arrives in four minutes is a support ticket; one that arrives in four seconds is invisible. That is the bar for transactional email — the one-to-one messages your application sends because a user did something: reset links, receipts, magic sign-in links, shipping notices, two-factor codes. Marketing email is the opposite shape — one-to-many, scheduled, optional. Users tolerate a newsletter landing in the Promotions tab. They do not tolerate a login code that never arrives.
The reason to keep them physically separate is reputation isolation. Gmail and Outlook score senders continuously — by domain, by IP, by complaint rate — and that score decides whether your next message hits the inbox, the spam folder, or a silent drop. Marketing traffic generates spam complaints and unsubscribes by nature; if it shares a sending identity with your app mail, one bad campaign drags your password resets into spam with it. Separate the streams from day one: different sending domains, ideally different provider accounts or subusers, so the two reputations can never touch.
Choosing a delivery path: relay, API, or raw Postfix
For most apps the right answer is an SMTP relay through a specialist provider — SendGrid, Postmark, or Amazon SES. Your app speaks plain SMTP to the provider's endpoint on port 587, and the provider handles the hard part: maintained IP pools, retry queues, TLS negotiation with every receiving server, and the feedback loops with Gmail and Microsoft that no individual VPS gets access to. Every framework supports SMTP out of the box, and switching providers later means changing four environment variables, not rewriting code.
The same providers also expose HTTP APIs. An API call skips the SMTP handshake, so it is faster per message, returns structured errors instead of SMTP status codes, and unlocks provider features like server-side templates. The trade-off is coupling: your code now imports a vendor SDK, and moving from SendGrid to Postmark becomes a refactor instead of a config change. A reasonable rule — start with SMTP, adopt the API when you have a measured reason to.
What you should almost never do is make your own Postfix the final hop for app mail. A fresh VPS IP has no sending reputation, and many cloud providers block outbound port 25 entirely until you file an unblock request. Even when the mail flows, you now own IP warm-up, DKIM key rotation, bounce processing, blacklist monitoring, and the slow negotiation of trust with every major mailbox provider — a part-time job that specialist providers do at scale for fractions of a cent per message. Postfix on your server is fine as a local relay that forwards to a provider; as a standalone transactional sender, it is the wrong call.
Send from a dedicated subdomain, not your root domain
App mail should come from a dedicated subdomain — no-reply@mail.example.com, not no-reply@example.com. Sender reputation attaches to the domain that authenticates the mail, and a subdomain carries its own SPF and DKIM records, so it builds its own reputation. If a compromised contact form or a runaway retry loop ever floods spam traps, the damage is scoped to mail.example.com — your root domain, and the human mailboxes on it, stay clean. With SendGrid the records for the subdomain look like this:
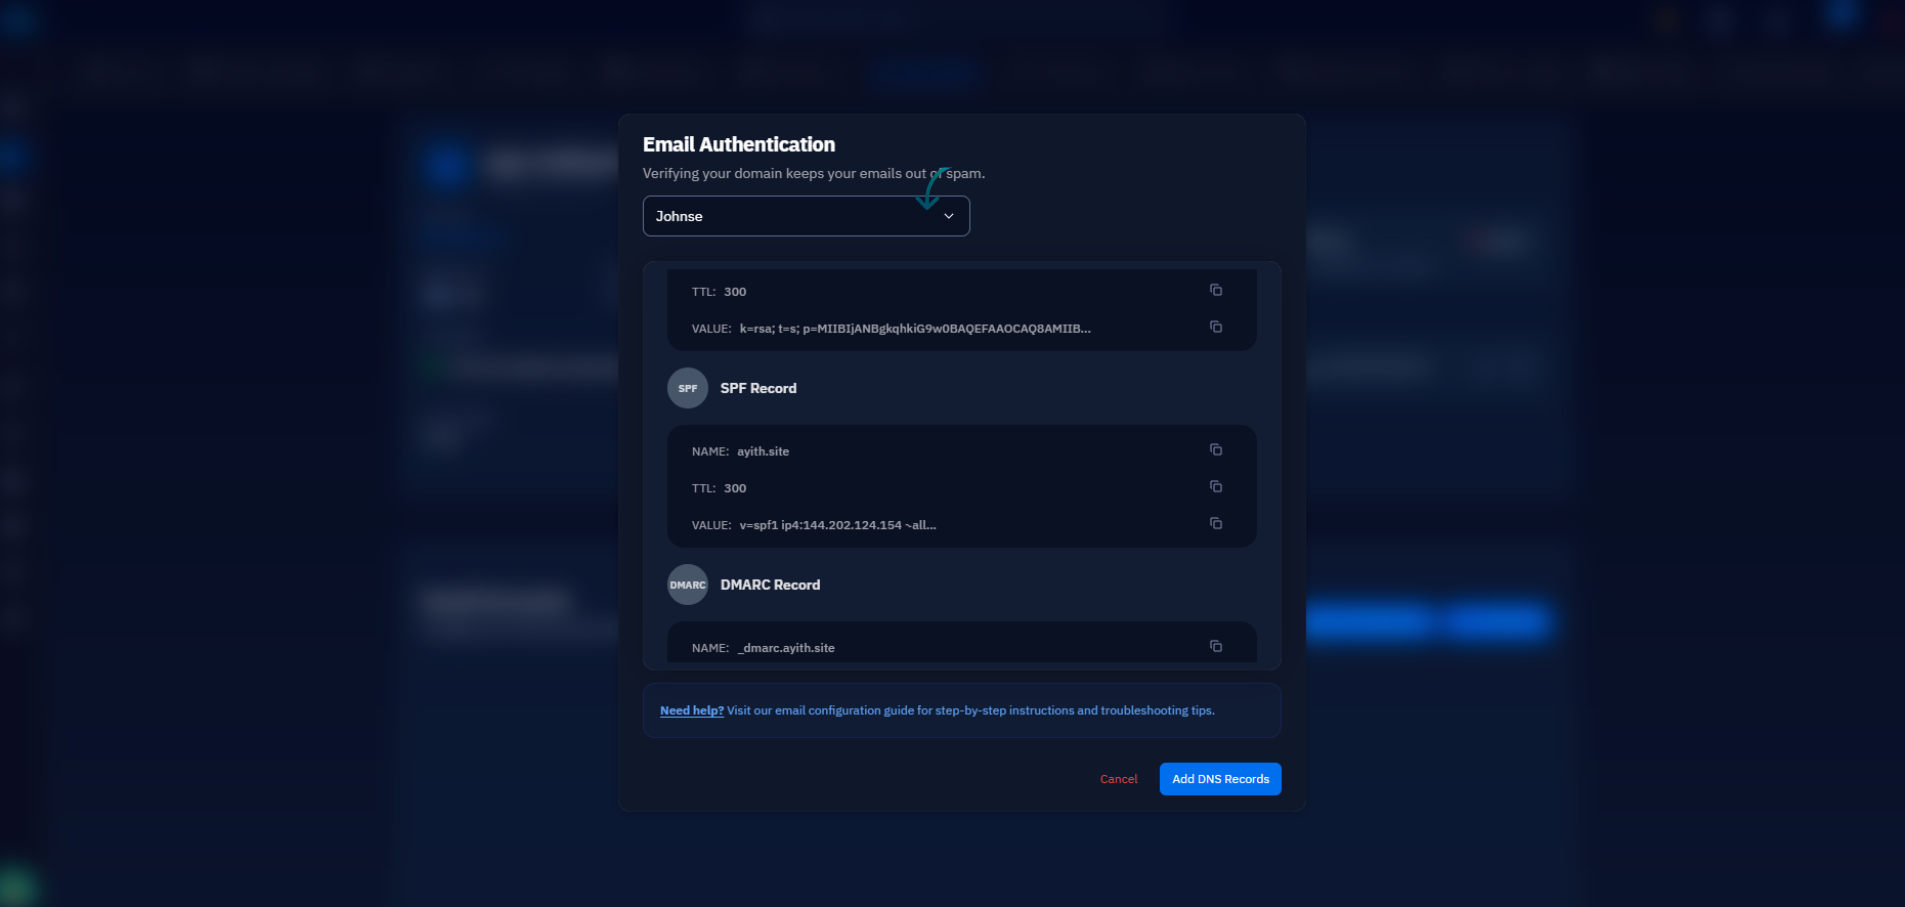
SPF names the servers allowed to send for the subdomain, the DKIM CNAMEs delegate signature keys to the provider (so it can rotate them without you touching DNS again), and DMARC tells receivers what to do when a message fails both. If your server runs on CloudStick, this layer is handled from the dashboard: CloudStick supports SMTP relay configuration for outbound mail and manages the DNS records for the sending domain through its Cloudflare integration — and SendGrid is among its supported third-party integrations, so the relay and the records above come from the same panel.
Wiring it into your app: Laravel and Node.js
Once the relay and DNS exist, the application side is a handful of settings. In Laravel, everything lives in .env — note that SendGrid's SMTP username is literally the string apikey, and the password is the API key itself:
Port 587 with MAIL_ENCRYPTION=tls means STARTTLS — the connection opens in plain text and upgrades to TLS before authentication, which is what every major relay expects. In Node.js, Nodemailer is the standard library and the equivalent configuration is:
Never send synchronously inside an HTTP request. An SMTP handshake takes hundreds of milliseconds on a good day and thirty seconds on a bad one — push sends onto a queue instead (queued Mailables in Laravel, a BullMQ or similar worker in Node) so a slow relay delays the email, not the user's page load. It also gives you automatic retries when the relay briefly refuses connections.
Handling bounces and webhooks
The pipeline is not finished until delivery results flow back into your application. Every provider can POST event webhooks to an endpoint you expose — delivered, bounced, deferred, marked as spam. SendGrid calls this the Event Webhook, Postmark has per-type webhooks, and Amazon SES publishes to an SNS topic you subscribe to. Verify the webhook signature on every request (each provider signs its payloads) so a stranger cannot inject fake bounce events into your database.
Act on two events above all. A hard bounce — the mailbox does not exist — means you flag the address as invalid and never send to it again; providers track your bounce rate, and repeatedly hitting dead addresses is one of the fastest ways to torch a young sending reputation. A spam complaint means the user hit "report spam", and the only correct response is immediate suppression. Providers maintain their own suppression lists as a backstop, but your app should mirror that state so the account page can show the user why their notifications stopped, instead of silently failing forever.
Testing locally, then going live
Never point your development environment at the real relay — one seeded database plus one notification loop equals a hundred test emails to real customers. Run a local mail catcher instead. Mailpit is the current standard: a single binary that accepts SMTP on port 1025, delivers nothing, and shows every captured message in a web UI on port 8025, HTML rendering and headers included. Point your app at it and the entire mail path is testable offline:
Going live is then a short checklist. Send a real message to a Gmail address and open "Show original" — SPF, DKIM, and DMARC should all read PASS in the Authentication-Results header. Confirm the bounce webhook fires by sending to a provider test address. Confirm your queue worker is running so sends survive a relay hiccup. And keep the streams separate as you grow: transactional on its subdomain with its clean reputation, marketing somewhere else entirely. Do that, and the password reset that used to take four minutes arrives before the user finishes typing their complaint.