How to Connect CloudStick MCP with Claude
Overview
CloudStick MCP lets you connect your CloudStick account to Claude so you can monitor and manage your servers and websites directly through a conversation, instead of switching back to the dashboard for routine checks. Once the connection is authorized, Claude can call CloudStick's own tools on your behalf — the same actions available in the dashboard, exposed to Claude through the Model Context Protocol (MCP).
This guide walks you through the full setup: opening Connected Apps in CloudStick, copying the MCP connection URL, adding it to Claude as a custom connector, authorizing the connection, and choosing which tool permissions Claude is allowed to use.
Use the same email address for your Claude account and your CloudStick account. If the two don't match, the authorization step will fail to link the connection to the correct CloudStick account.
Step 1: Open Connected Apps
Every MCP connection starts from your CloudStick dashboard, where you generate the URL that Claude will use to reach your account.
Log in to CloudStick: Sign in to your CloudStick account as you normally would.
Open Connected Apps: In the left-hand navigation, click Connected Apps to open the page that lists AI assistants and other apps that can access your account via MCP.
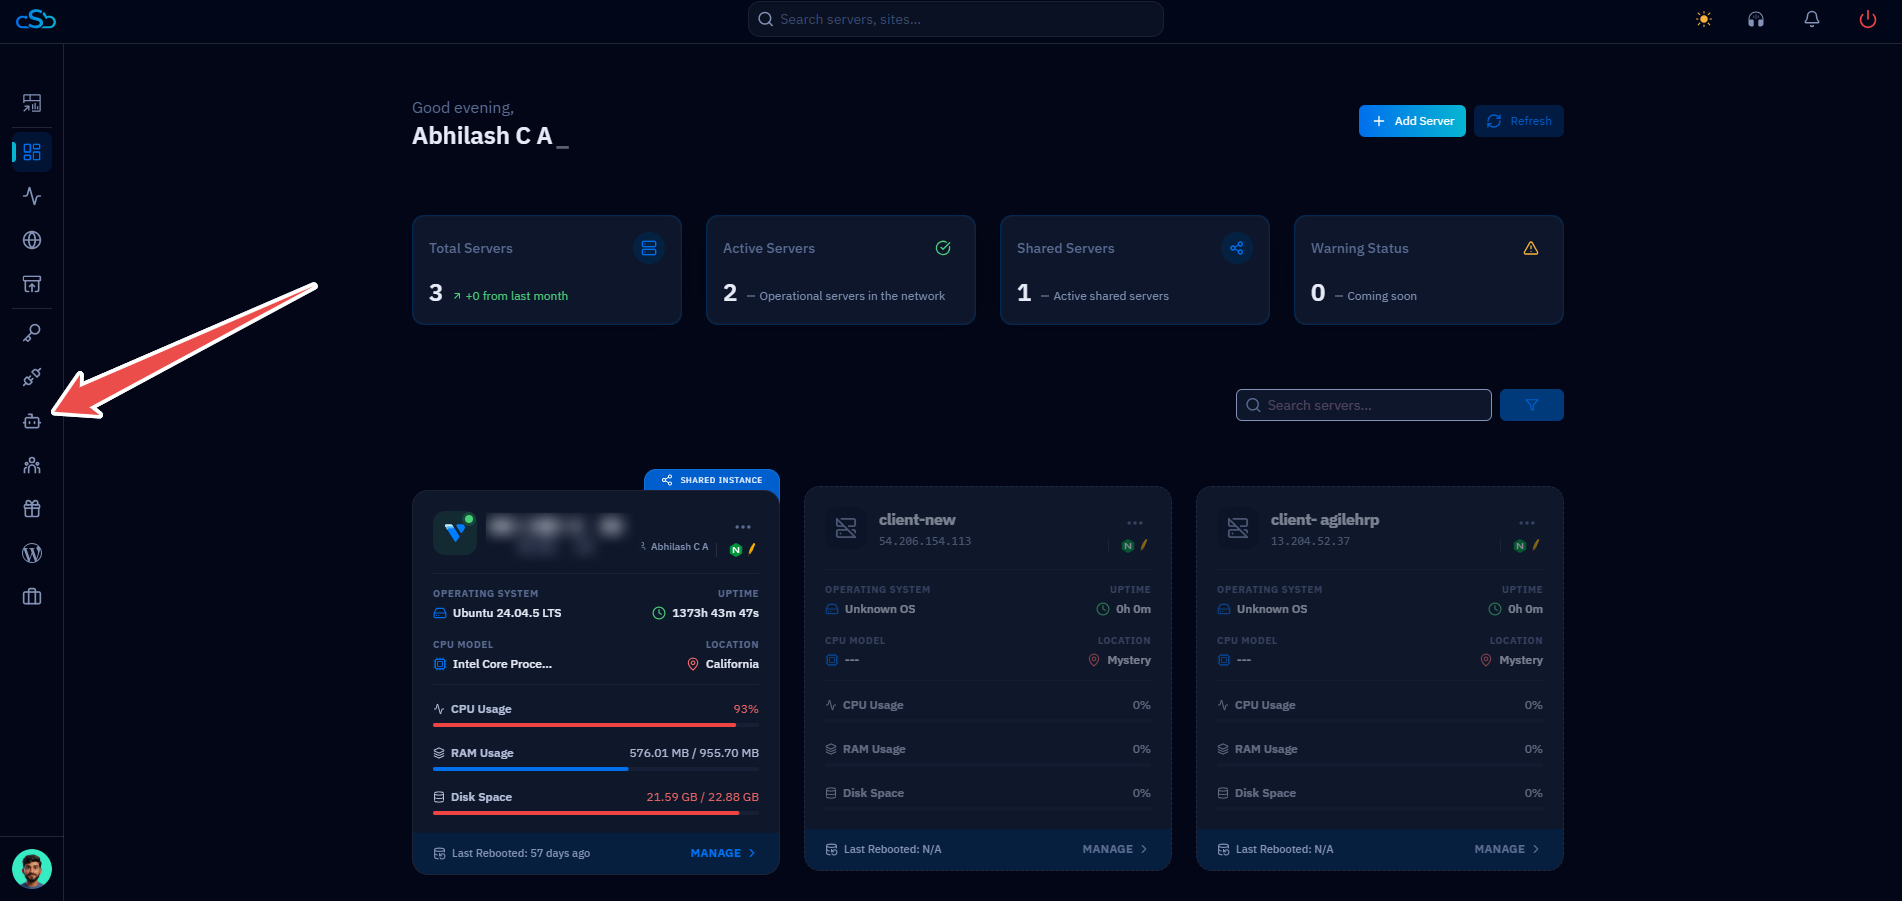
Fig. 01 — The CloudStick dashboard with Connected Apps highlighted in the left-hand navigation.
Step 2: Connect an AI App
The Connected Apps page is where CloudStick generates the connection URL used by Claude, ChatGPT, or any other MCP-compatible application.
Inside Connected Apps, locate the Connect an AI app card — this is where CloudStick displays your account's unique MCP connection URL.
Any app you authorize afterward, such as Claude, appears listed below this card along with its current permission level.
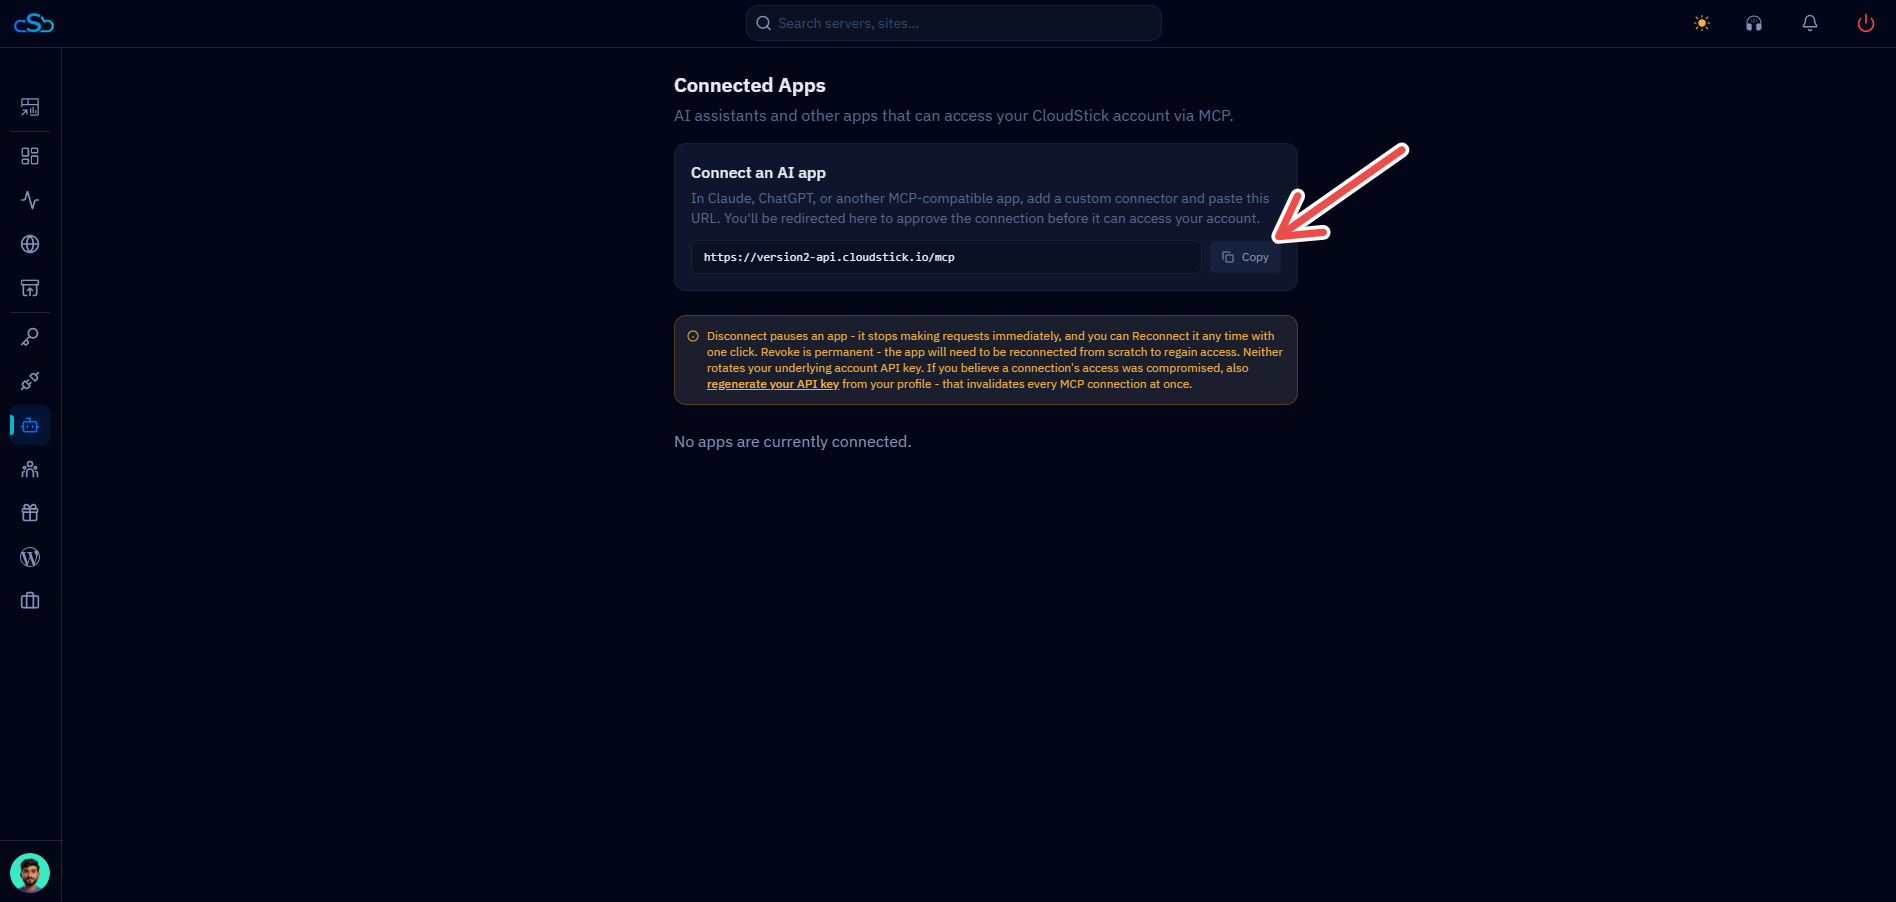
Fig. 02 — The Connected Apps page with the Copy button highlighted next to the CloudStick MCP URL.
Step 3: Copy the CloudStick MCP URL
You'll paste this URL into Claude in the next step, so copy it now to make sure it's entered correctly.
Click Copy: Next to the MCP URL field, click the Copy button to copy the full connection URL to your clipboard.
For example: https://version2-api.cloudstick.io/mcp
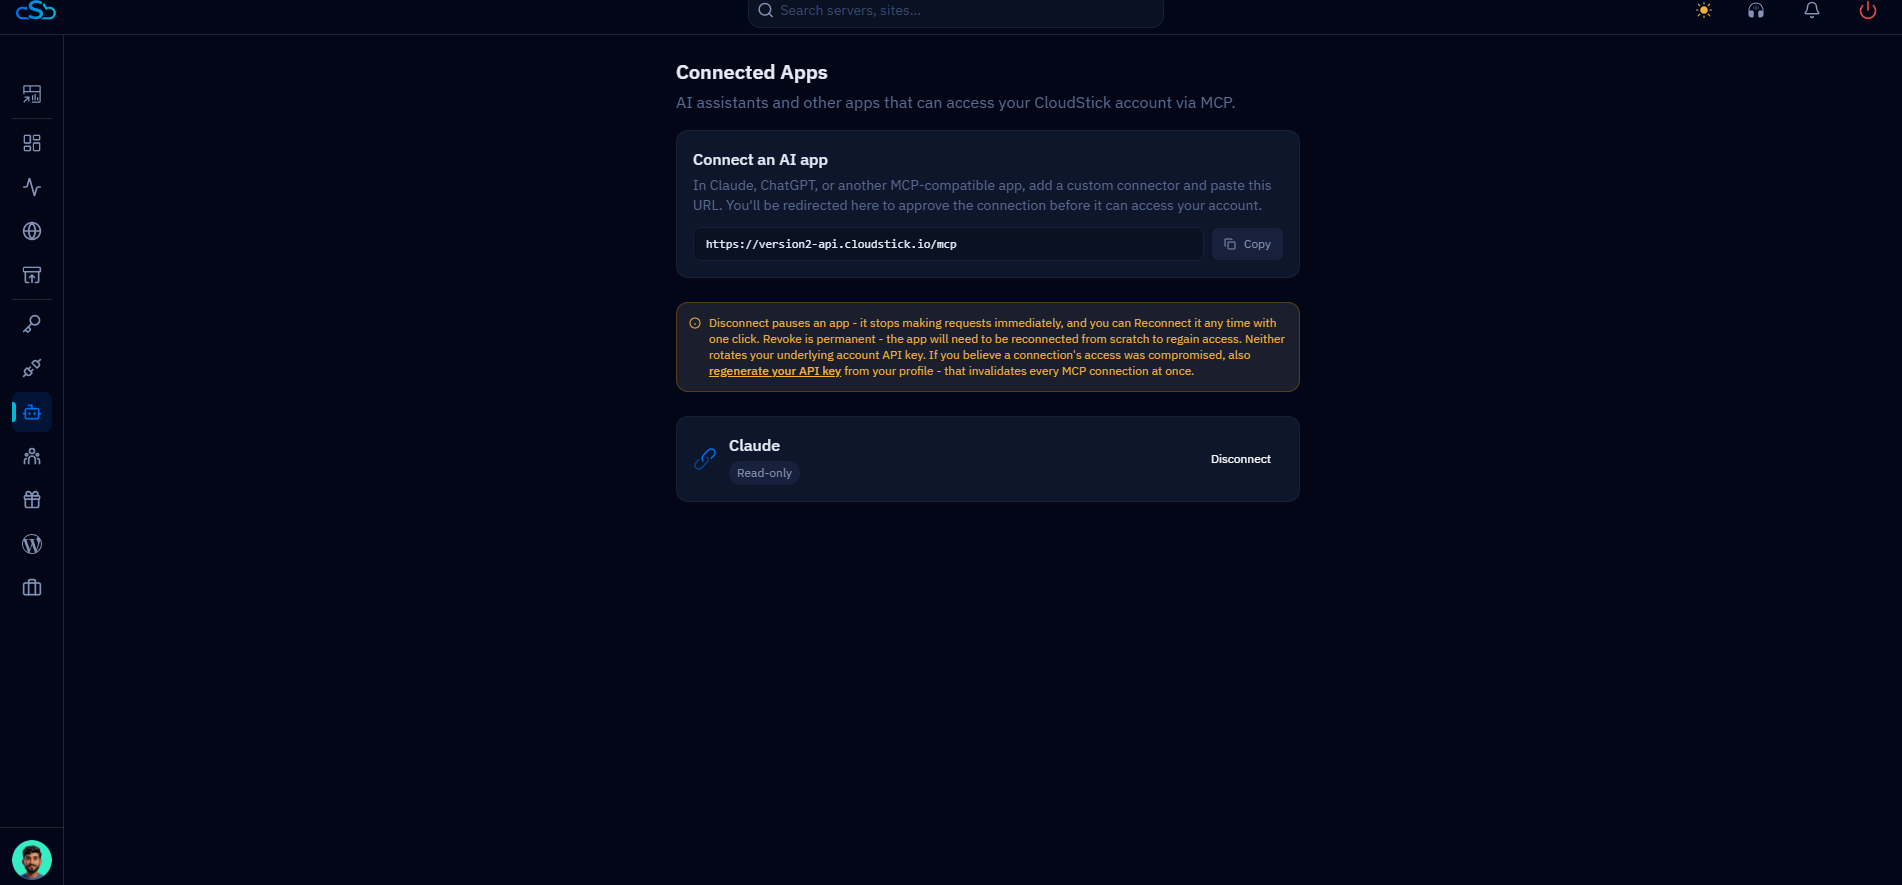
Fig. 03 — The Connect an AI App card showing the CloudStick MCP URL, with Claude already listed as a connected app.
Step 4: Add CloudStick to Claude
With the URL copied, switch over to Claude to register CloudStick as a custom connector.
Open Claude: Go to Claude and open the connector or MCP settings, either from the attachment (+) menu in a chat or from Settings → Connectors.
Add a custom connector: Choose the option to add a custom connector, then paste the CloudStick MCP URL you copied in the previous step.
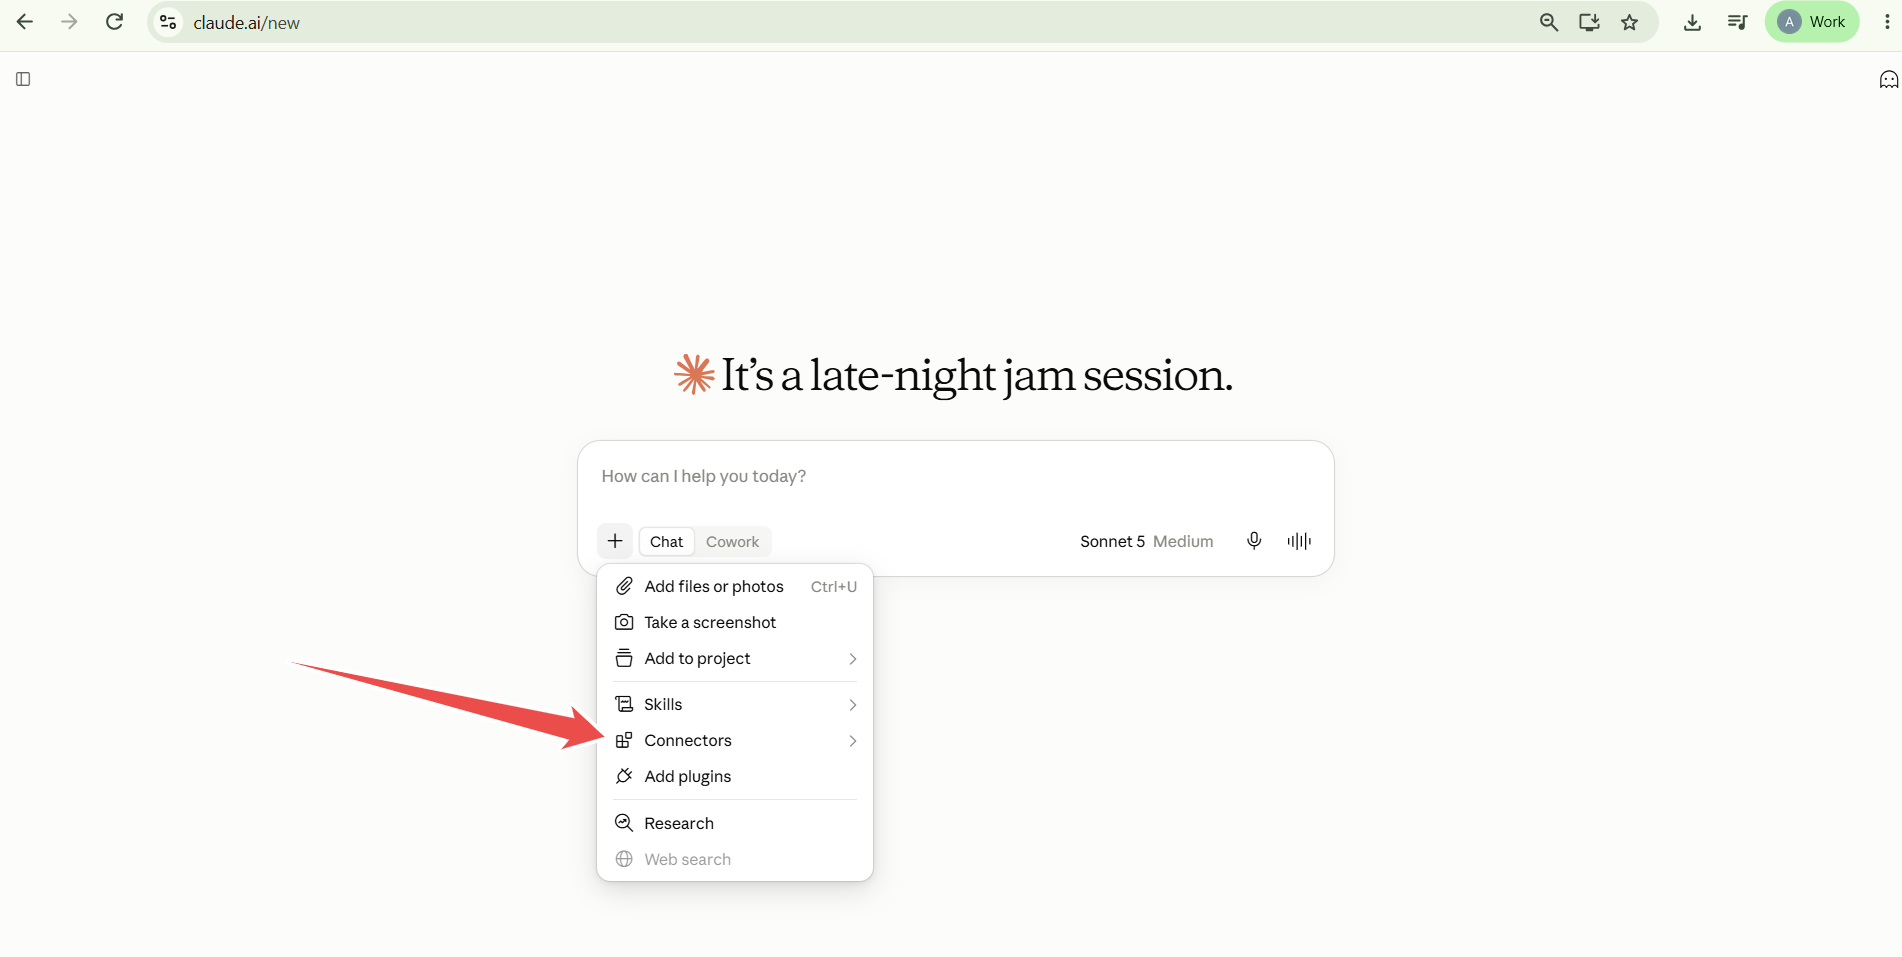
Fig. 04 — The Claude chat composer's + menu with Connectors highlighted, where a custom connector is added.
Step 5: Approve the Connection
After you add the connector, Claude redirects you back to CloudStick to confirm you want to authorize the connection.
Log in with the same email address associated with your CloudStick account.
Review the requested access, then approve the connection to complete the authorization.
Once authorized, Claude is connected to your CloudStick account. You can pause the connection at any time from Connected Apps — Disconnect stops it immediately, and Revoke removes it permanently.
Step 6: Configure Tool Permissions
CloudStick MCP exposes its tools in two groups, and you control which group — or which individual tools — Claude is allowed to use.
Read-only tools: Retrieve information without changing anything, for example Get billing, Get server, List servers, List websites, Manage phpMyAdmin, Manage provisioning, Search, and View server logs.
Write/Delete tools: Can create, modify, or remove resources in your CloudStick account, such as updating server settings or deleting a website.
Open the Connectors settings for CloudStick in Claude and set each group, or each individual tool, to Allow, Needs approval, or Deny.
If this is your first time connecting CloudStick MCP, start with Read-only tools. Only enable Write/Delete tools once you're comfortable letting Claude make changes to your servers and websites.
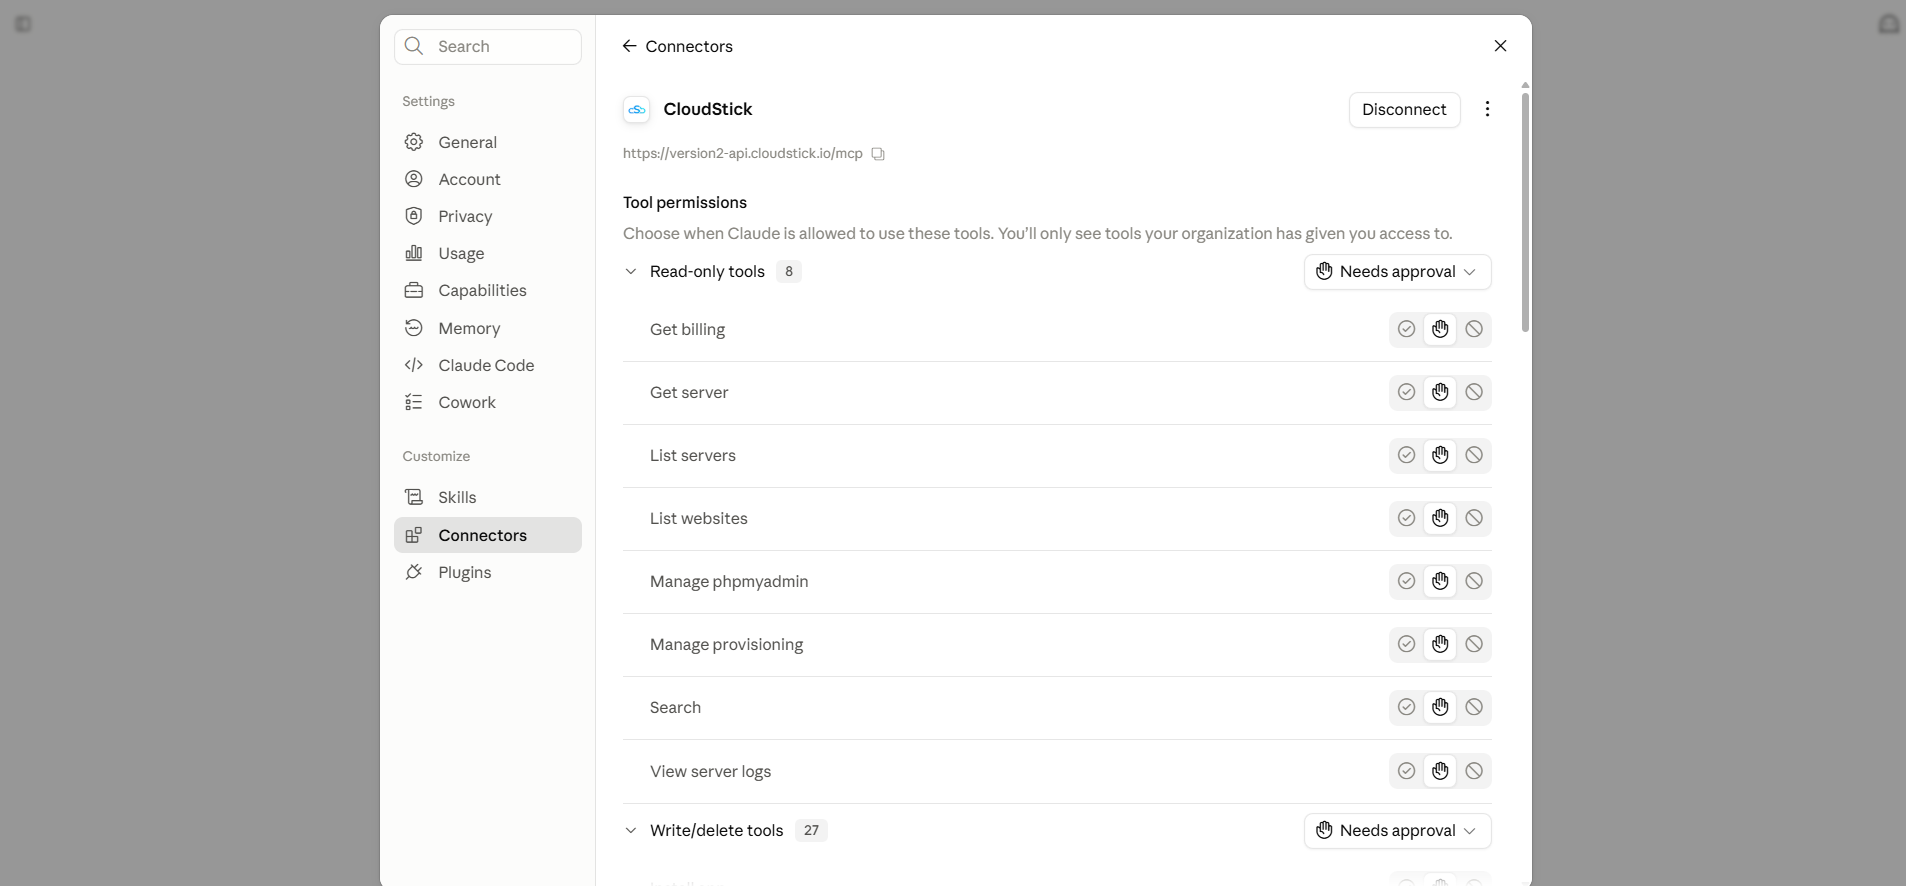
Fig. 05 — The CloudStick connector's Tool permissions screen in Claude, listing the eight read-only tools.
Step 7: Start Managing CloudStick Through Claude
Once CloudStick MCP is connected, you can ask Claude questions about your account instead of navigating the dashboard yourself.
Try prompts such as: "List my CloudStick servers," "Show me the websites on this server," "Check the server information," "Show me the server logs," or "Check my CloudStick billing information."
If a tool is set to Needs approval, Claude will ask you to confirm before it runs — click Allow once or Always allow to continue.
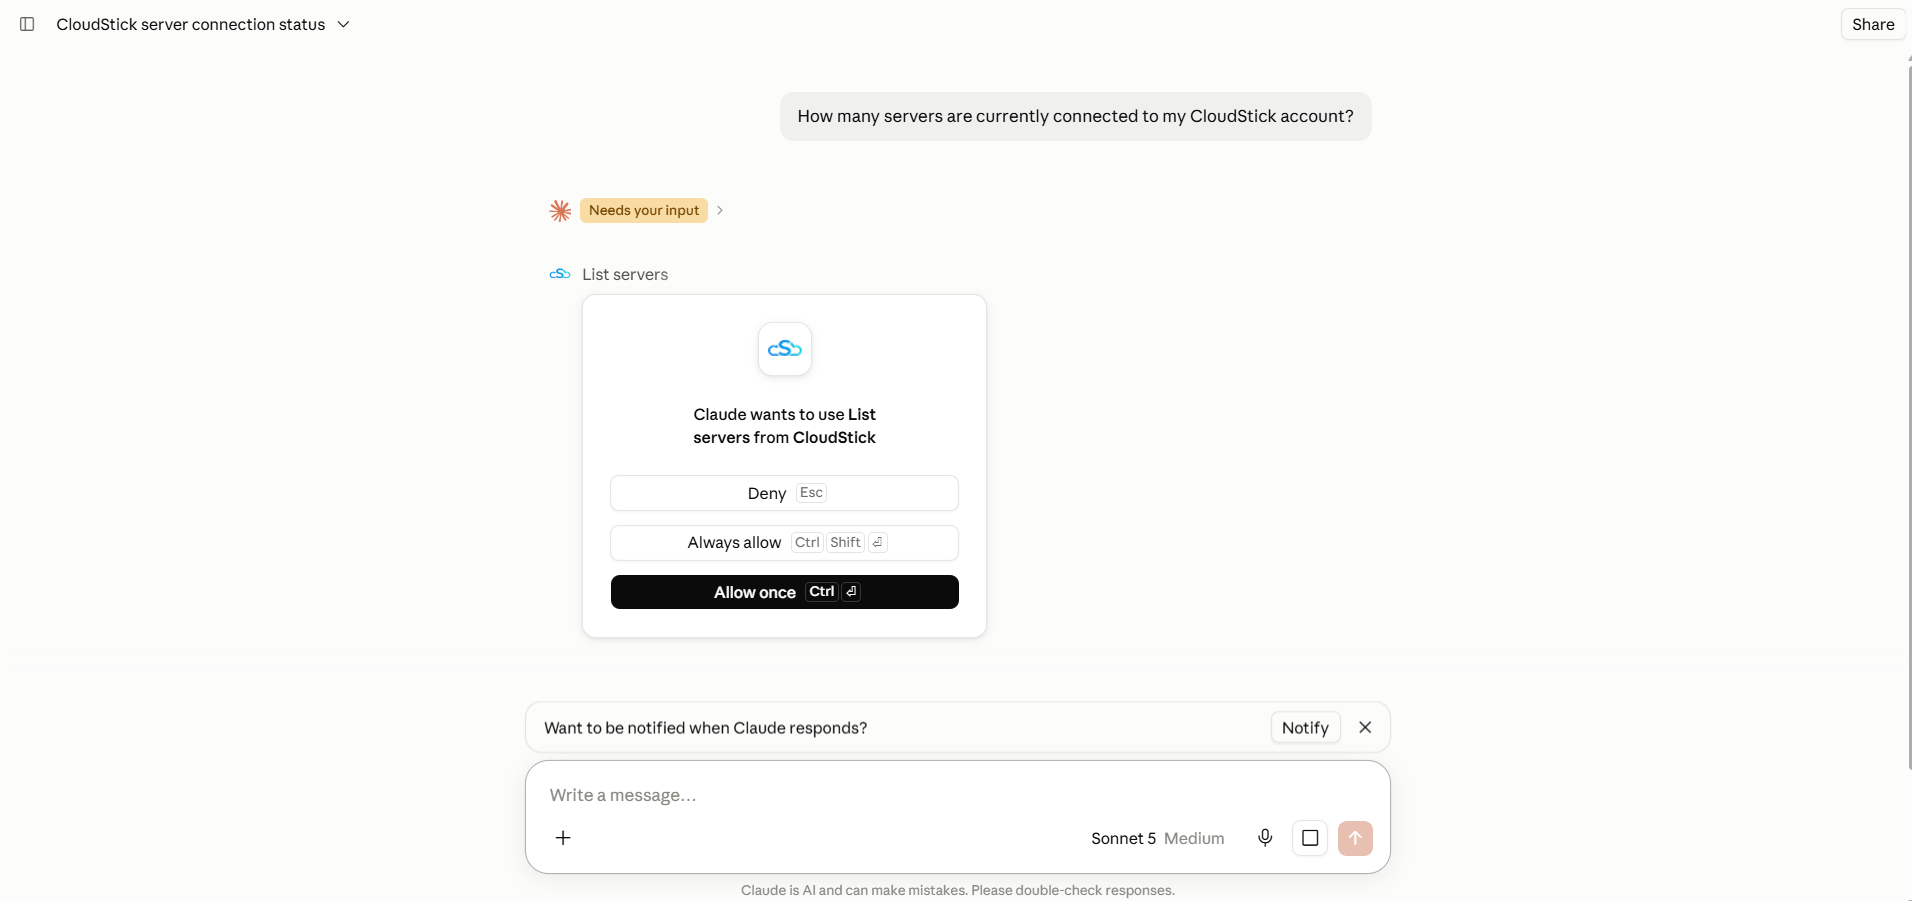
Fig. 06 — Claude requesting approval to use the List servers tool from CloudStick before running it.
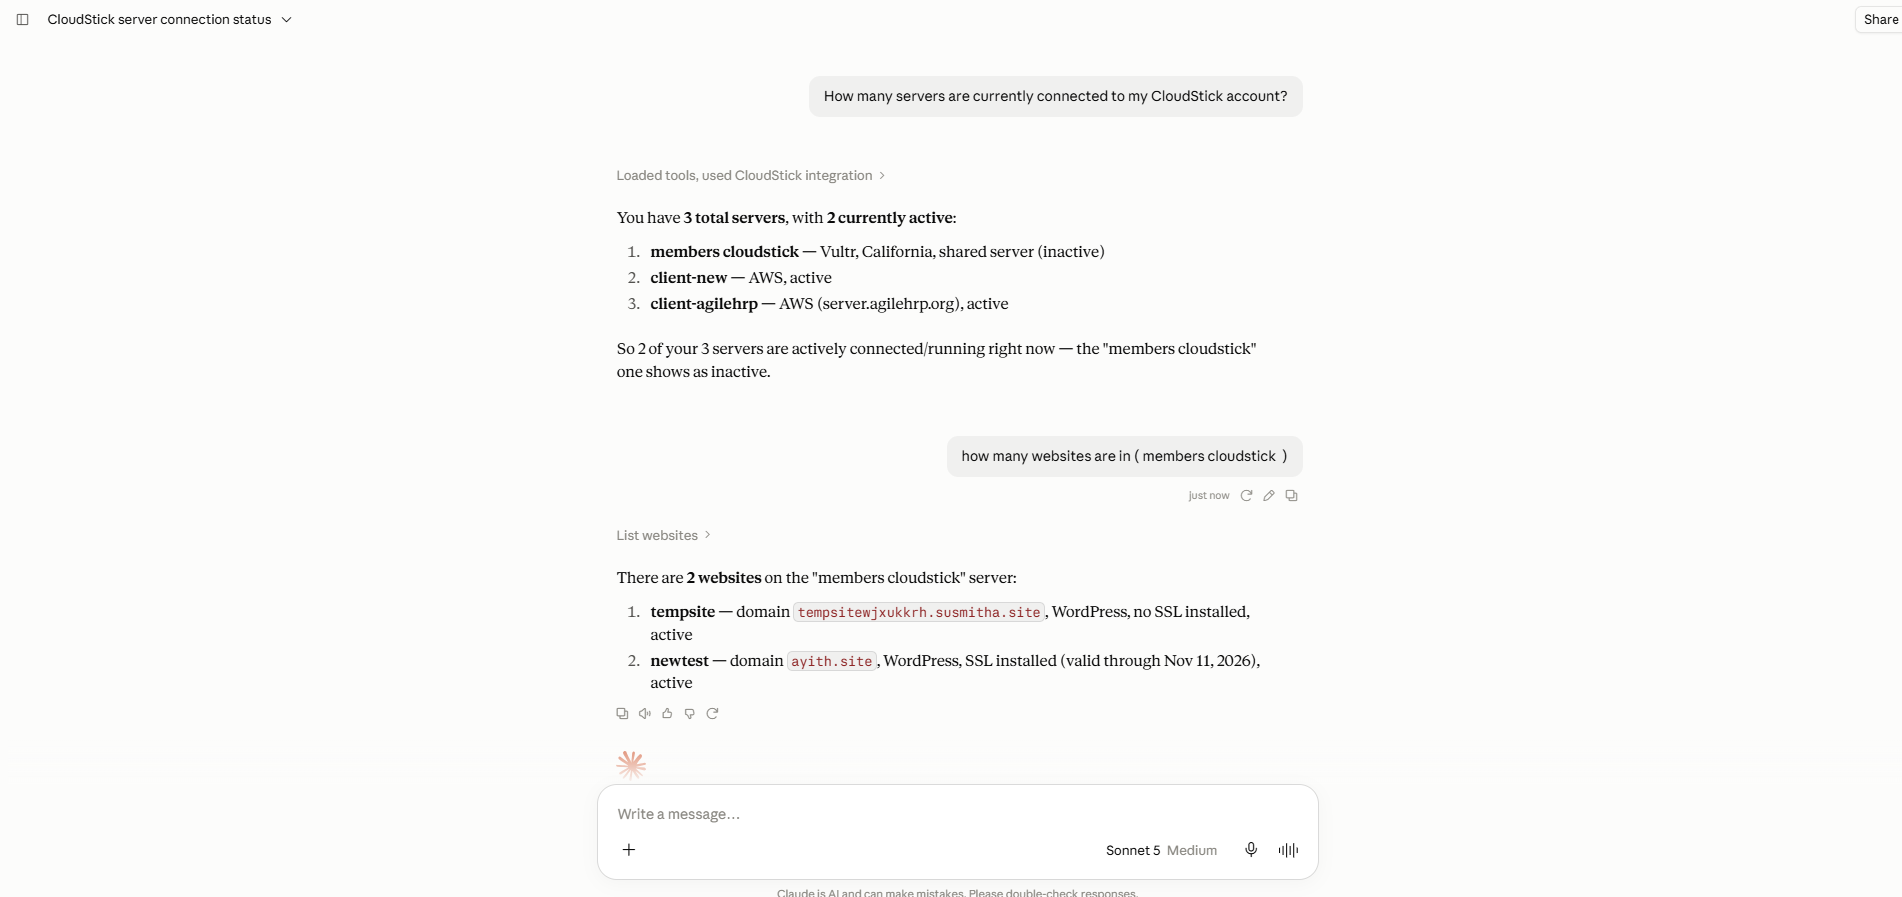
Fig. 07 — Claude responding with the connected servers and the websites hosted on one of them, based on live CloudStick data.
Depending on the permissions you've enabled, Claude accesses only the corresponding CloudStick tools — always review a requested action before approving it, especially for Write/Delete tools.