How to Integrate DigitalOcean with CloudStick
Overview
Integrating DigitalOcean with CloudStick connects your DigitalOcean account directly to the CloudStick dashboard, letting you provision and manage DigitalOcean droplets without switching between platforms. DigitalOcean is one of the most popular cloud providers for developers and agencies — pairing it with CloudStick means you get flexible, affordable infrastructure managed through a clean, unified control panel.
This guide walks you through the complete setup: creating a DigitalOcean project, generating a personal access token with full permissions, and registering that token in your CloudStick account via the Third Party Integrations section.
You must have an active DigitalOcean account before starting. If you do not have one, sign up at digitalocean.com and complete account verification before proceeding.
Step 1: Create a New DigitalOcean Project
DigitalOcean organises resources within projects. Creating a dedicated project keeps your servers and API token scoped cleanly.
1. Login to your DigitalOcean account and click on 'New Project' under the Project menu on the top-left corner of the dashboard.
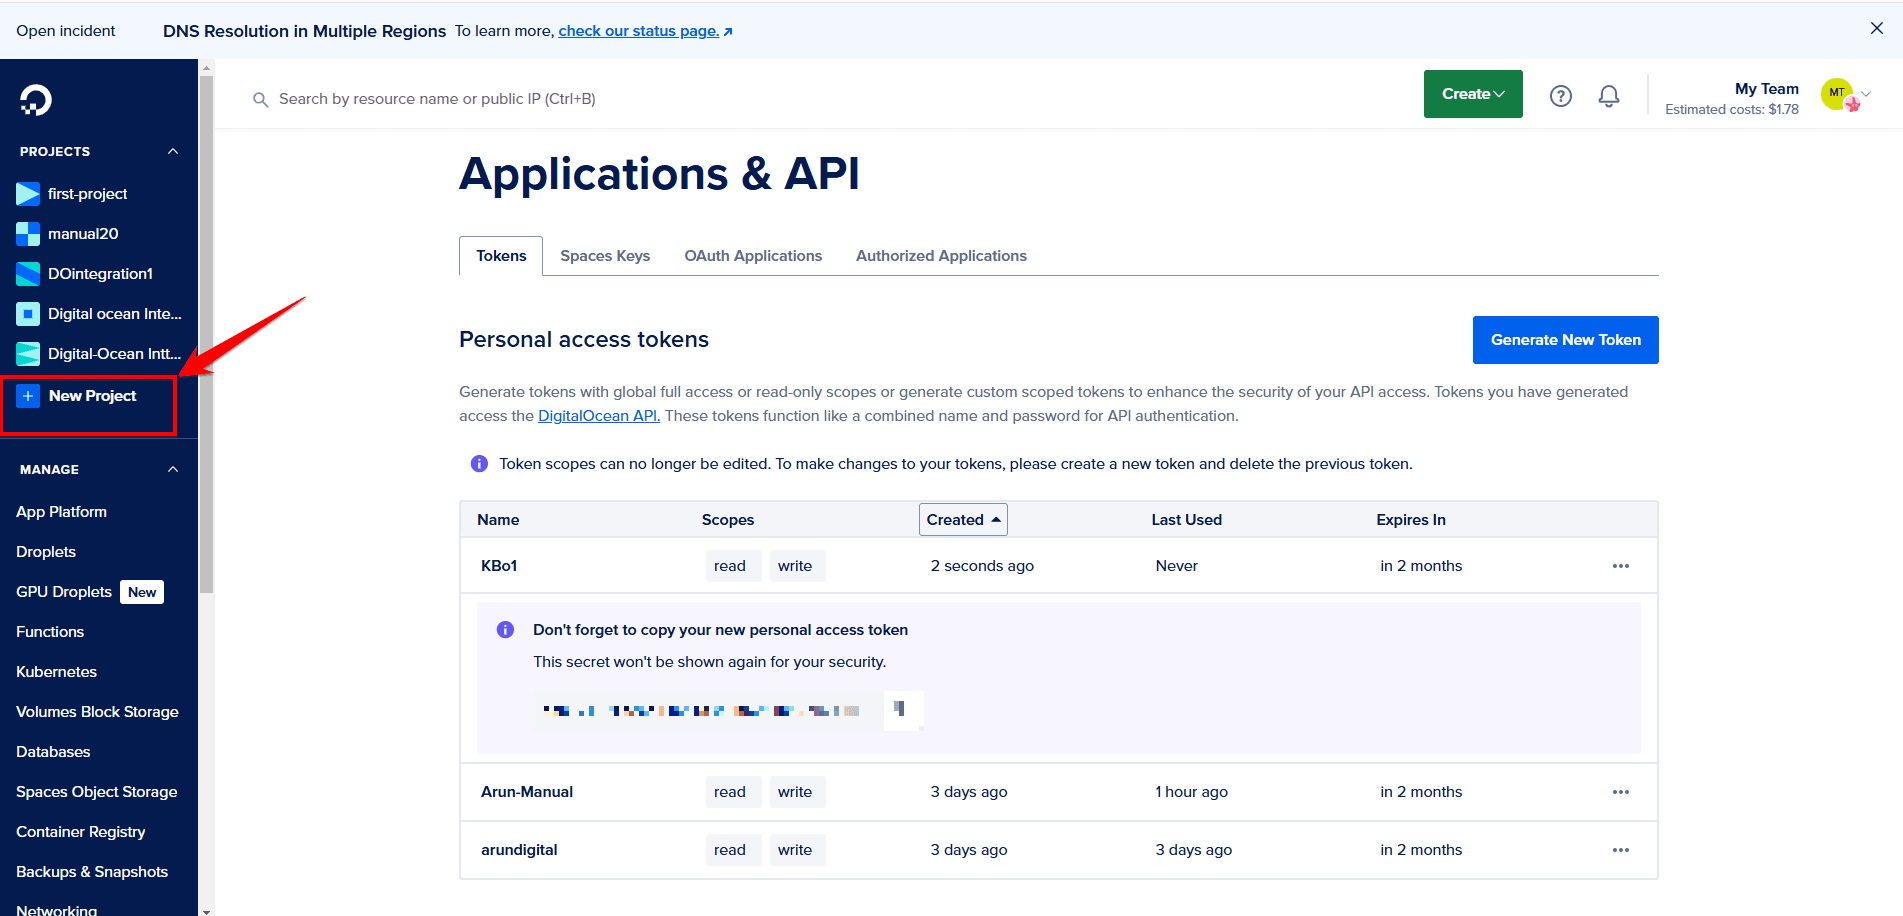
Fig. 01 — DigitalOcean dashboard showing the New Project option in the Project menu.
2. Enter the project name, provide a description, select the appropriate purpose for the project, and then click Create Project to finalise the setup.
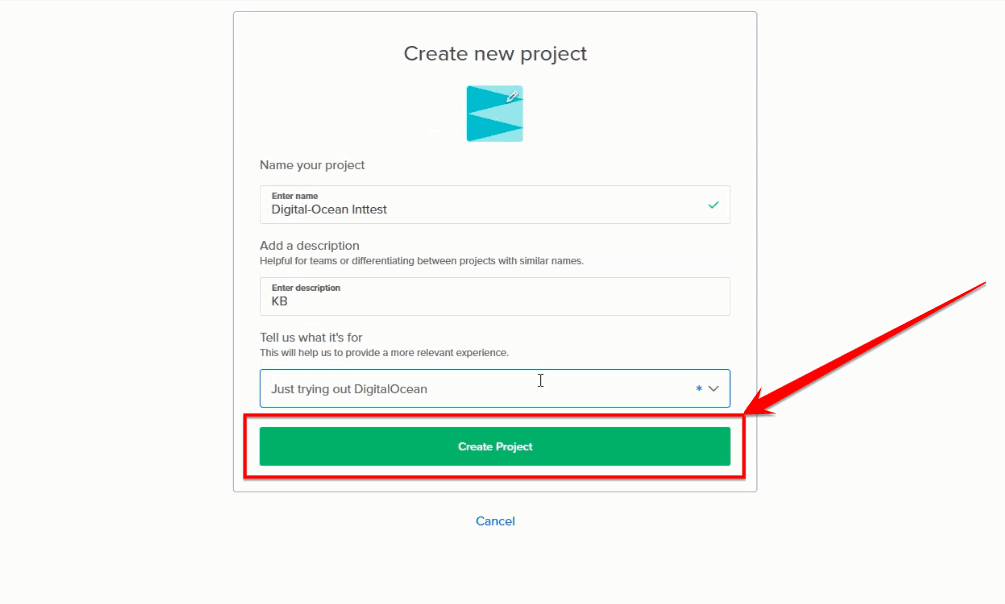
Fig. 02 — New project form with name, description, and purpose fields before clicking Create Project.
Step 2: Navigate to the API Section
DigitalOcean manages personal access tokens from the API section. Scroll down the left-hand menu to find it.
1. Scroll down the left-hand menu panel and select API under the By DigitalOcean section.
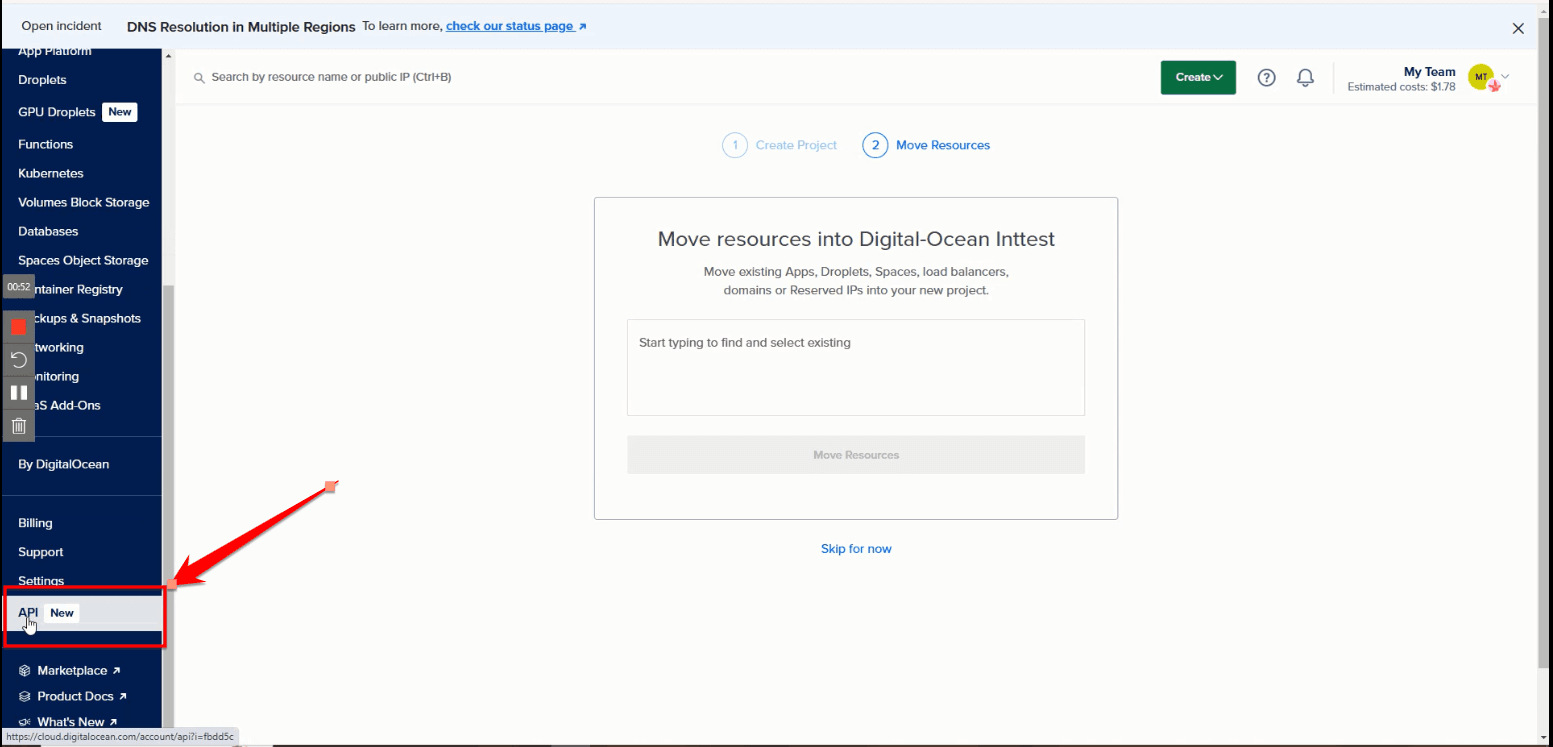
Fig. 03 — DigitalOcean left-hand menu with the API option highlighted under By DigitalOcean.
2. Click on Generate New Token to create a fresh authentication token for your account.
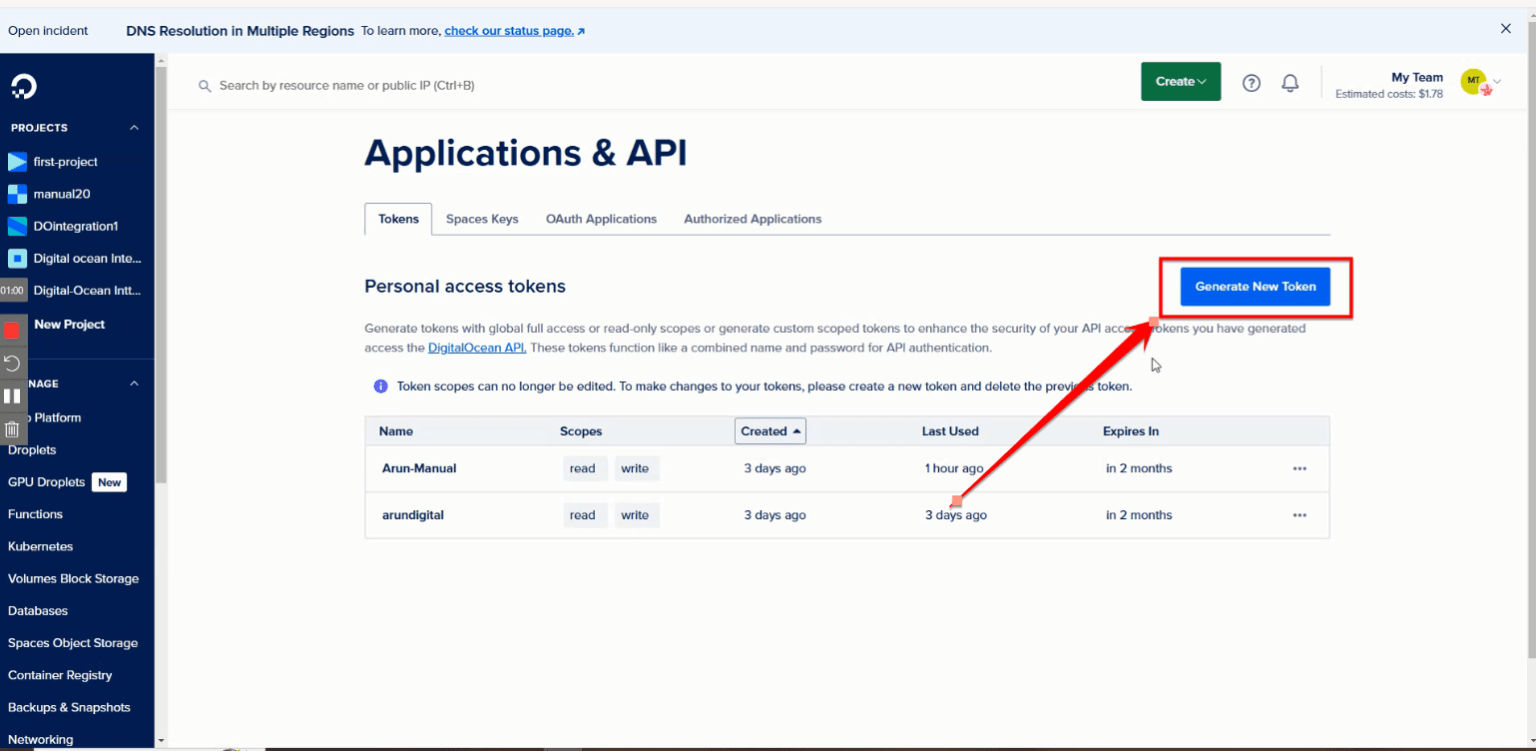
Fig. 04 — API tokens page showing the Generate New Token button.
Step 3: Generate a Personal Access Token
Configure the token with the right permissions. CloudStick requires full access to provision and manage droplets on your behalf.
1. Make sure you click Full Access to grant CloudStick the permissions it needs.
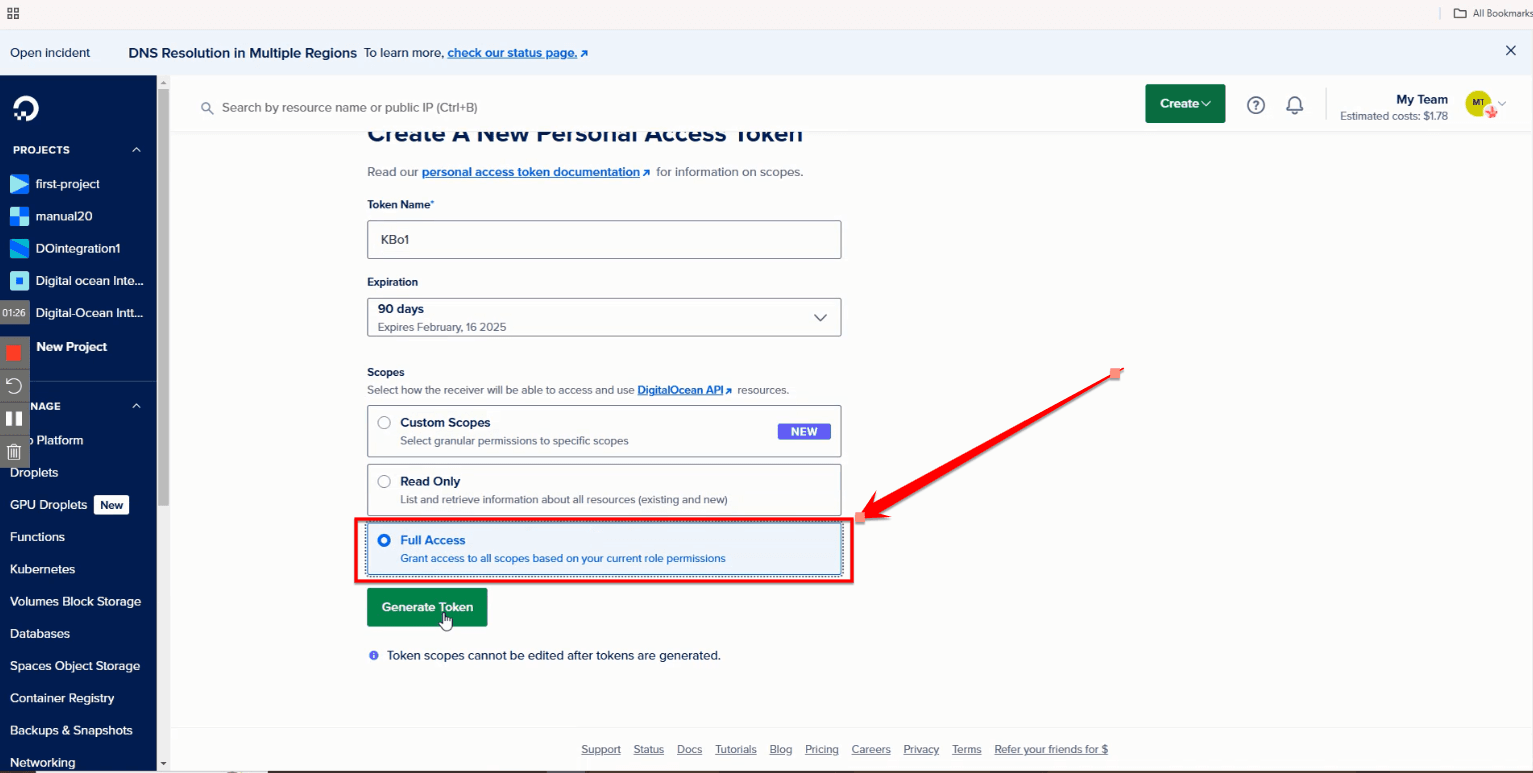
Fig. 05 — Token creation form with the Full Access option selected.
2. Once you have filled in all the required fields, click Generate Token to create your authentication token.

Fig. 06 — Token form with all fields filled and the Generate Token button ready to click.
3. Click the Copy button to quickly copy the generated token to your clipboard.
DigitalOcean only shows this token once. Copy it immediately and store it in a secure location such as a password manager — if you lose it you will need to generate a new one.
Step 4: Add DigitalOcean Integration in CloudStick
With the token copied, switch to CloudStick and complete the integration from the 3rd Party Integrations section.
1. Log in to your CloudStick account and navigate to the 3rd Party Integration section to begin the setup process.
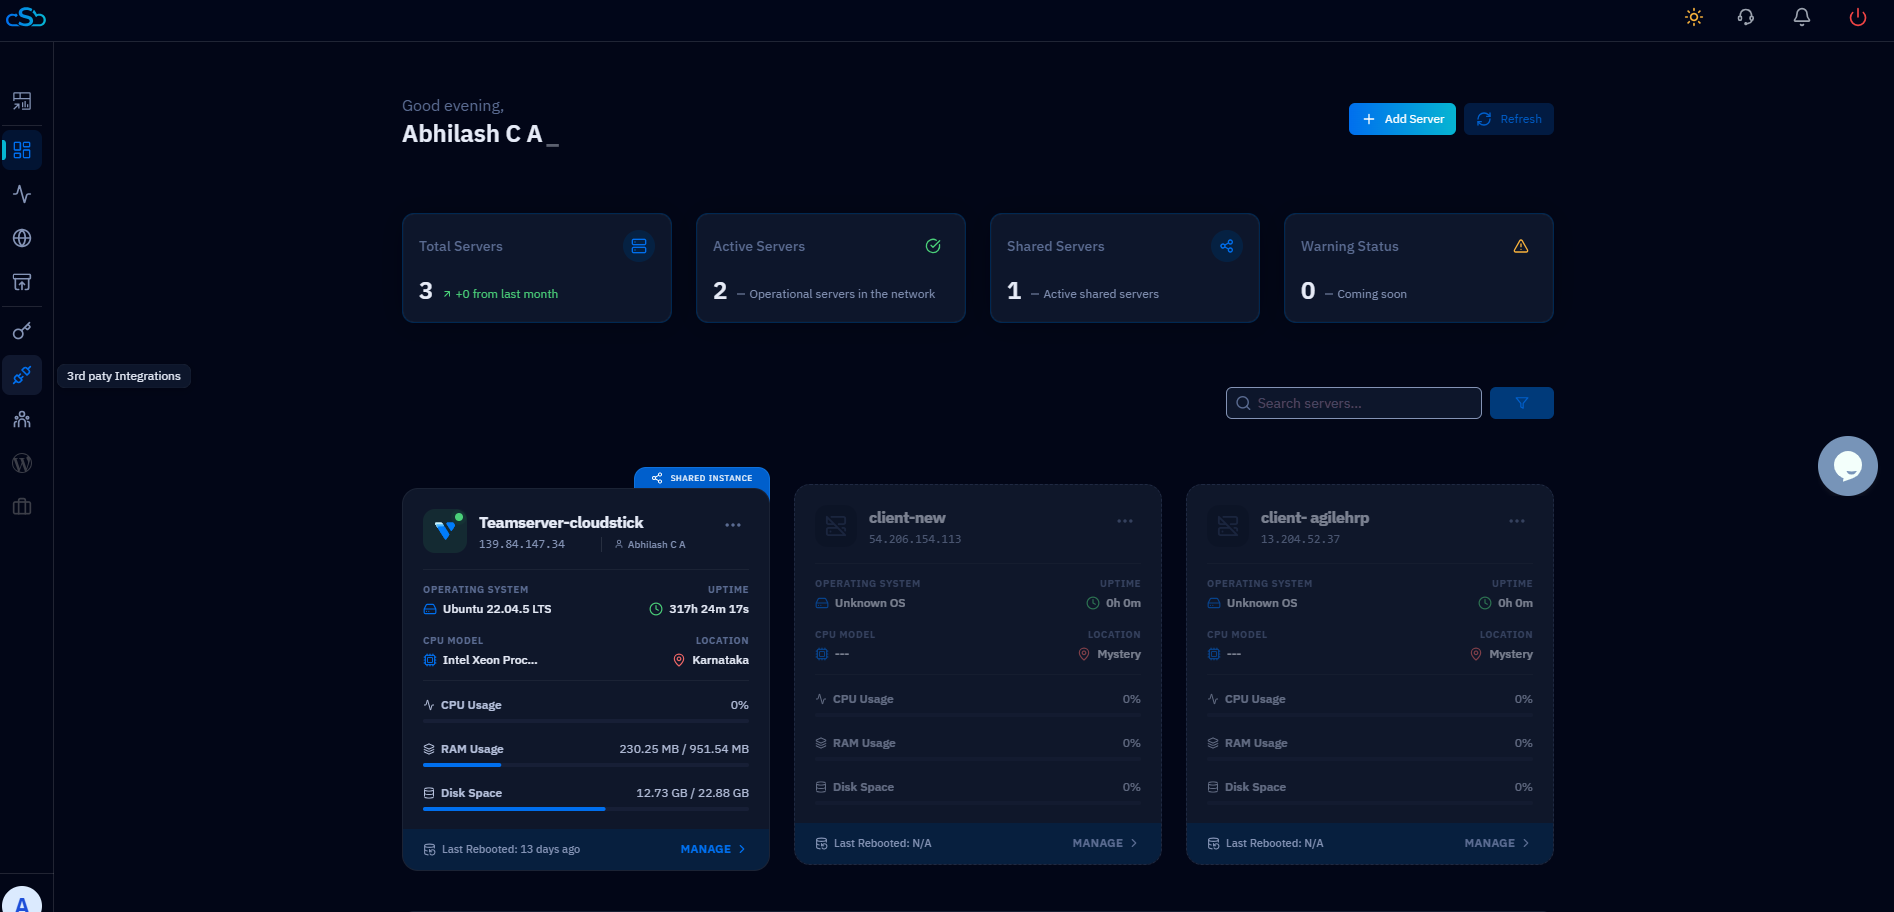
Fig. 07 — CloudStick dashboard showing the 3rd Party Integration section.
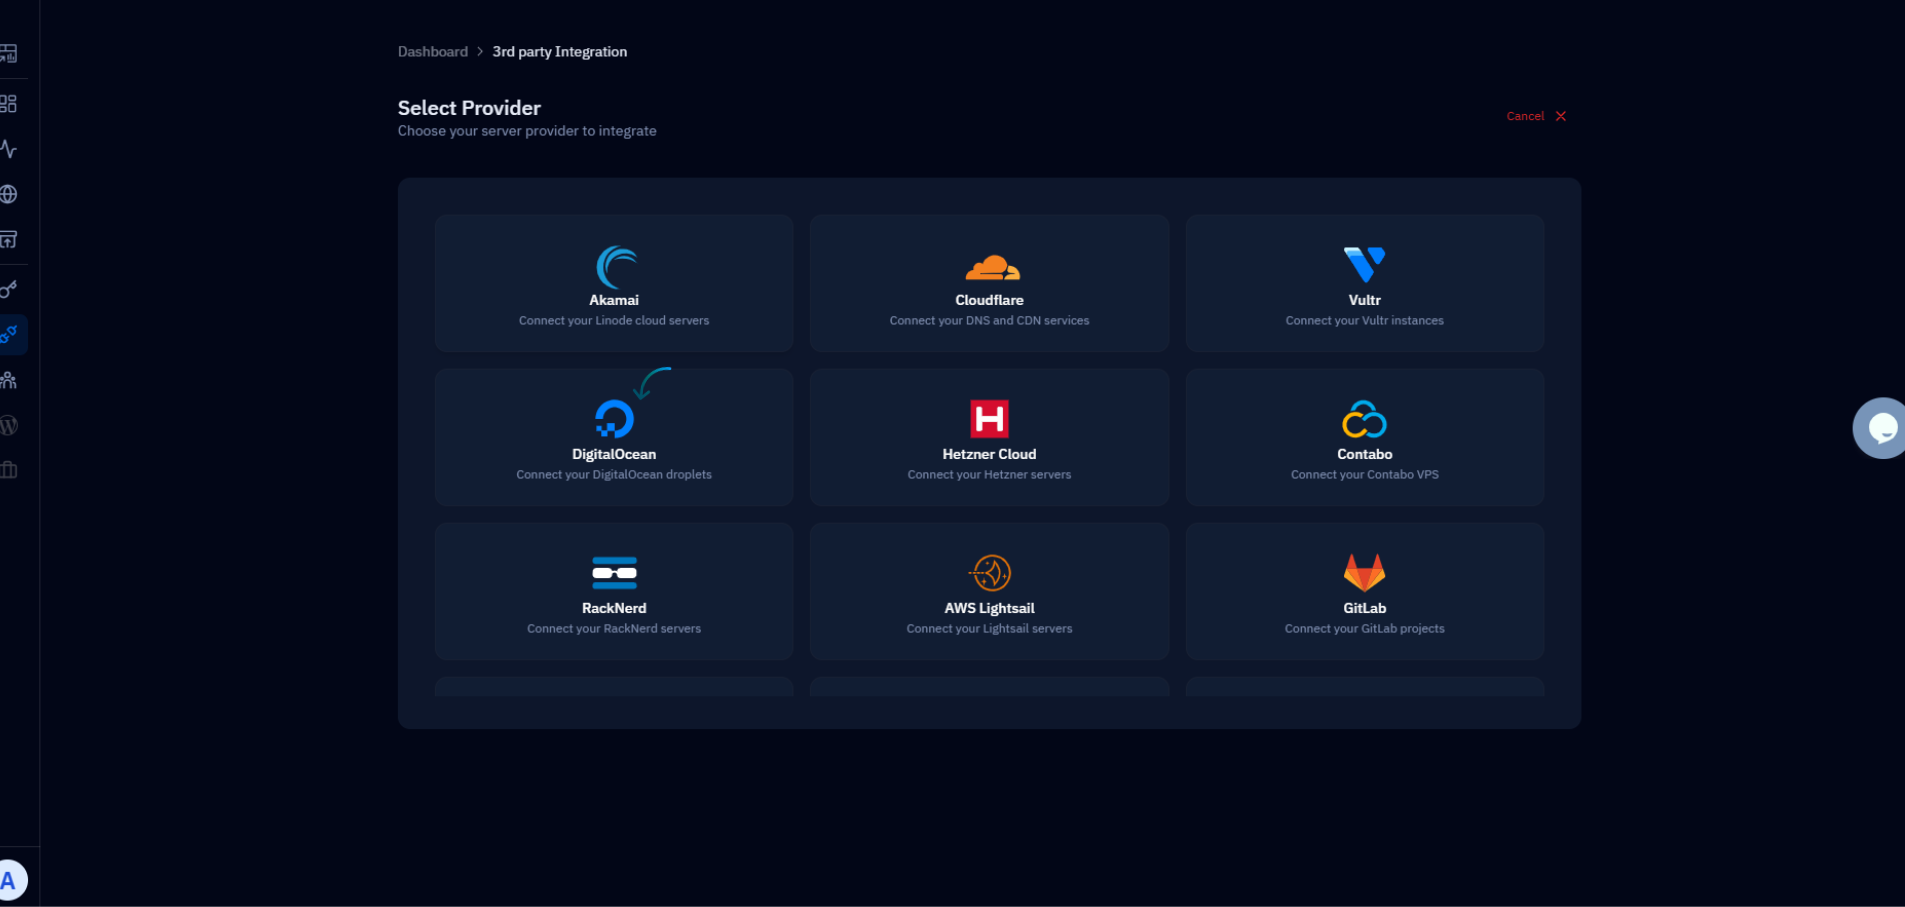
Fig. 08 — 3rd Party Integrations page listing all available provider integrations.
2. Fill in all the required fields, paste the access token you copied from DigitalOcean into the Secret field, then click Add API to complete the integration.
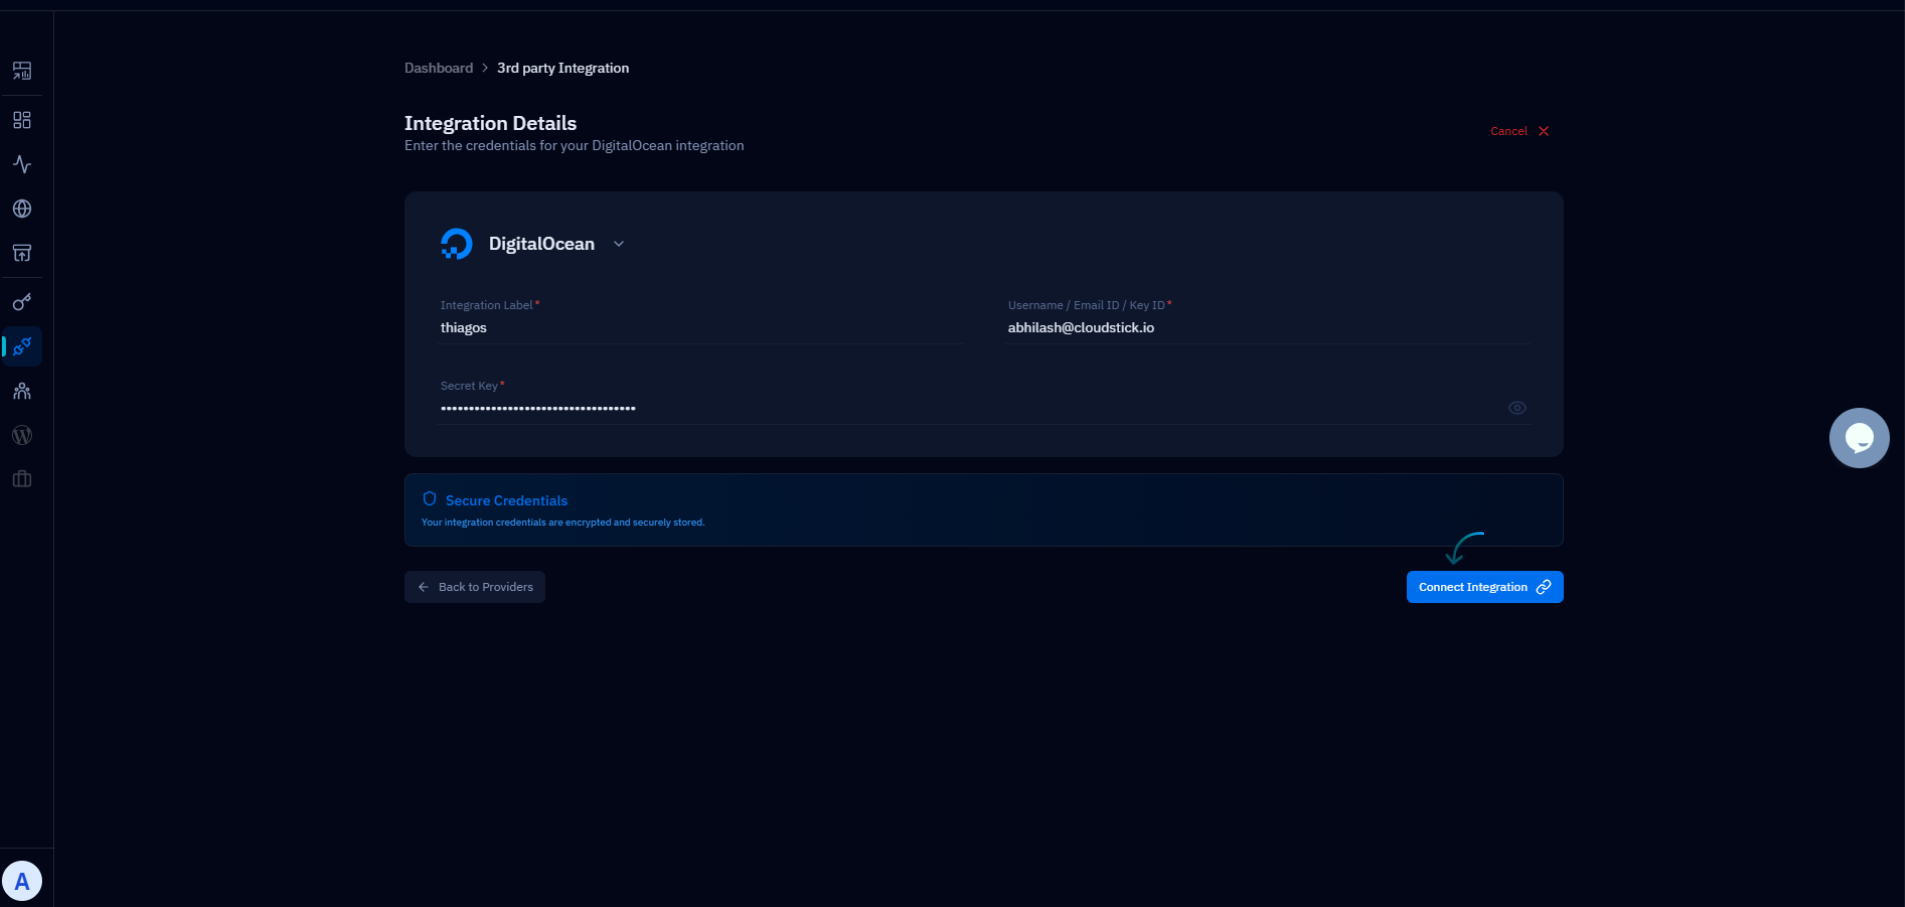
Fig. 09 — Integration form with the Secret field filled and the Add API button to confirm.
Your DigitalOcean account is now seamlessly integrated with CloudStick, enabling you to manage and monitor your DigitalOcean resources directly from the CloudStick dashboard.