How to Create a Support Ticket in CloudStick
Overview
CloudStick includes a built-in support ticketing system that lets you reach the support team without leaving your dashboard. Whether you're troubleshooting a server issue, asking a billing question, or reporting unexpected behavior, you can create a ticket, attach screenshots or log files, and monitor its progress — all from one place.
This guide walks you through the complete process: logging in, navigating to the Support Center, filling in the ticket form, and tracking your request after submission.
You must be logged in to your CloudStick account to access the Support Center and create a ticket. If you do not have an account yet, see How to Deploy Your Own Server to get started.
Step 1: Log In to Your CloudStick Account
Before you can open a ticket, you need to be authenticated. Log in so that CloudStick can associate the ticket with your account and the correct servers.
1. Navigate to the dashboard: Go to app.cloudstick.io and sign in with your registered email and password.
2. Confirm you are on the Dashboard: After a successful login, you will land on the main Dashboard showing your connected servers, their status, and key metrics.
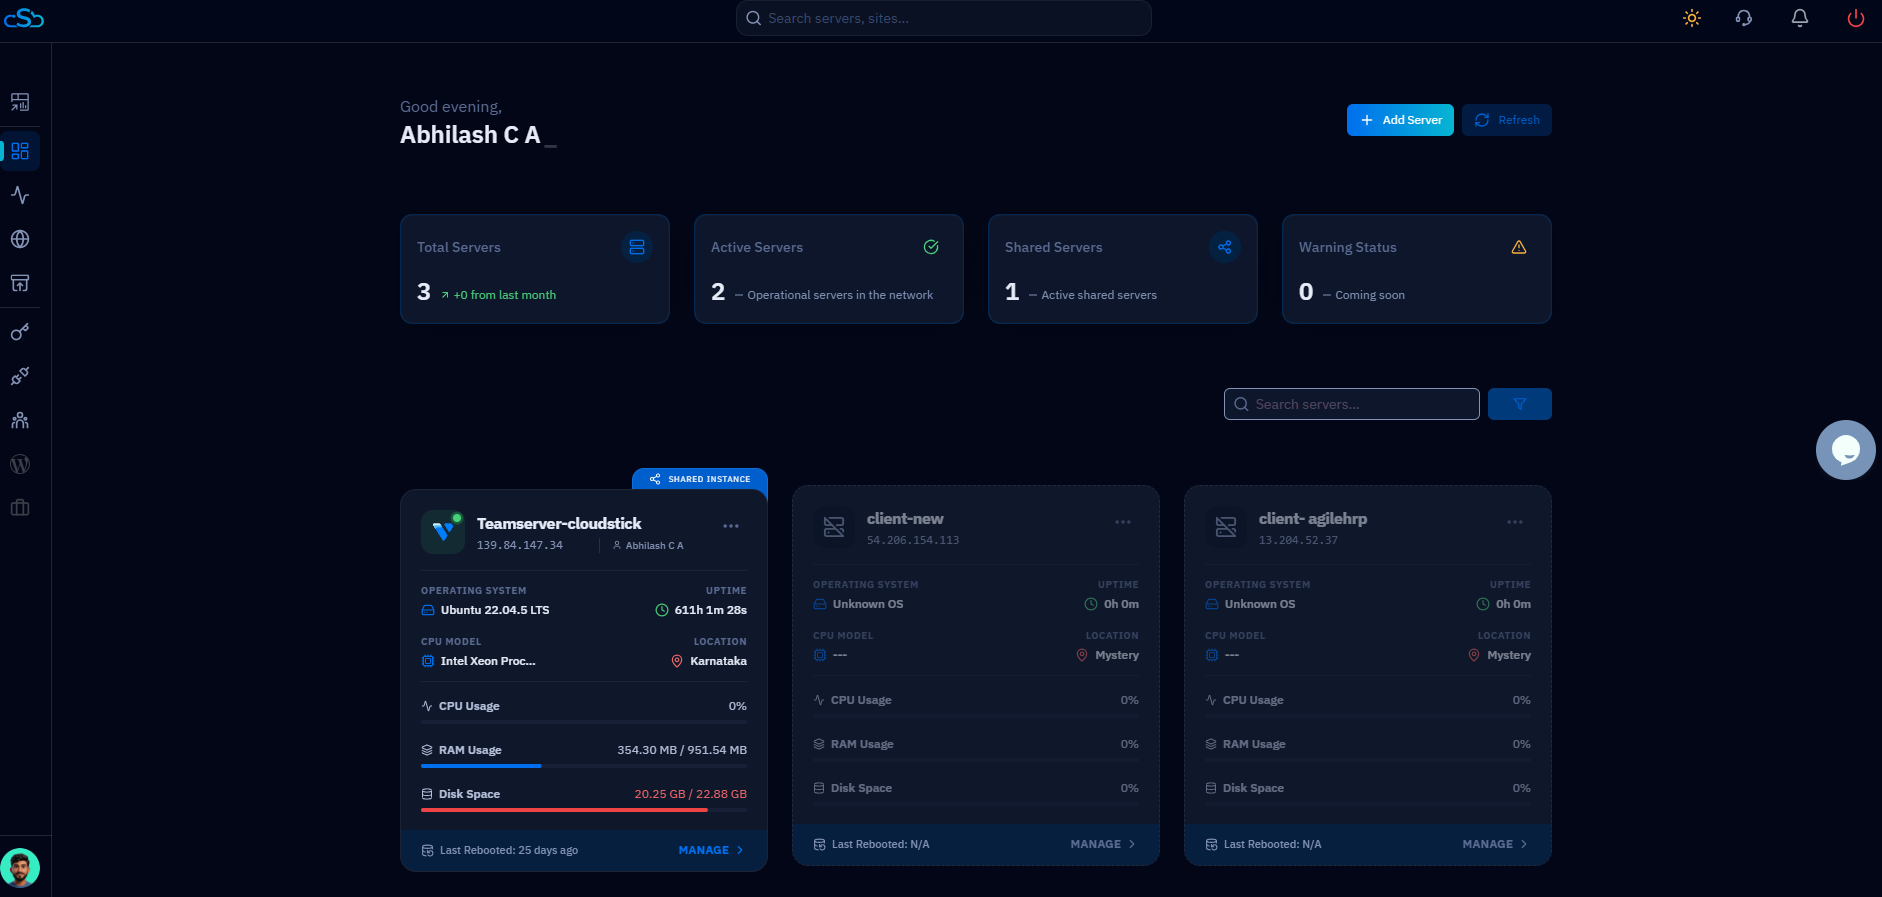
Fig. 01 — The CloudStick main Dashboard showing connected servers after a successful login.
Step 2: Open the Support Center
The Support Center is accessible directly from the top navigation bar — no need to visit a separate website or email address. Opening it from within your account ensures the support team already has context about your plan and servers.
1. Locate the Support Icon
Find the Support icon: In the top navigation bar of the CloudStick dashboard, click the headset (Support) icon. It is located alongside other account icons at the top right of the screen.
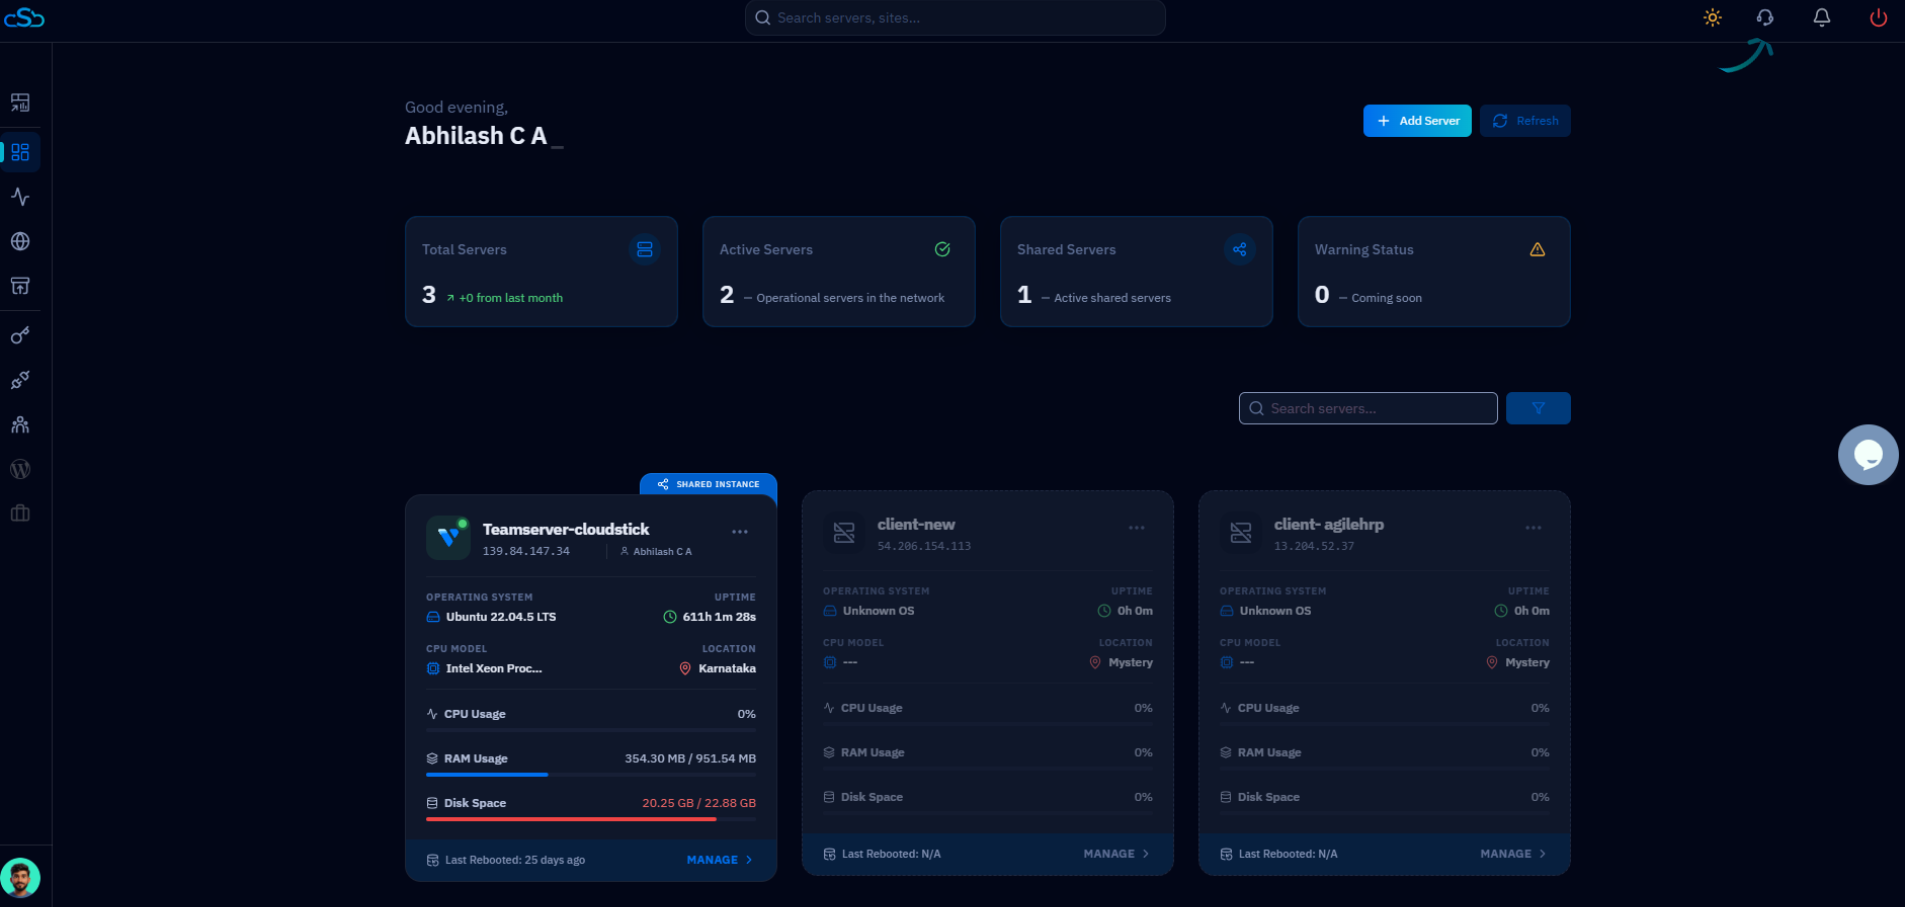
Fig. 02 — The CloudStick Dashboard highlighting the top navigation bar where the Support icon is located.
2. Open the Support Page
View your ticket history: Clicking the Support icon opens the Support section, which lists all your previous tickets along with their status, ID, department, and last update date.
Create a new ticket: Click the blue + New Ticket button in the top right corner of the Support page to open the ticket creation form.
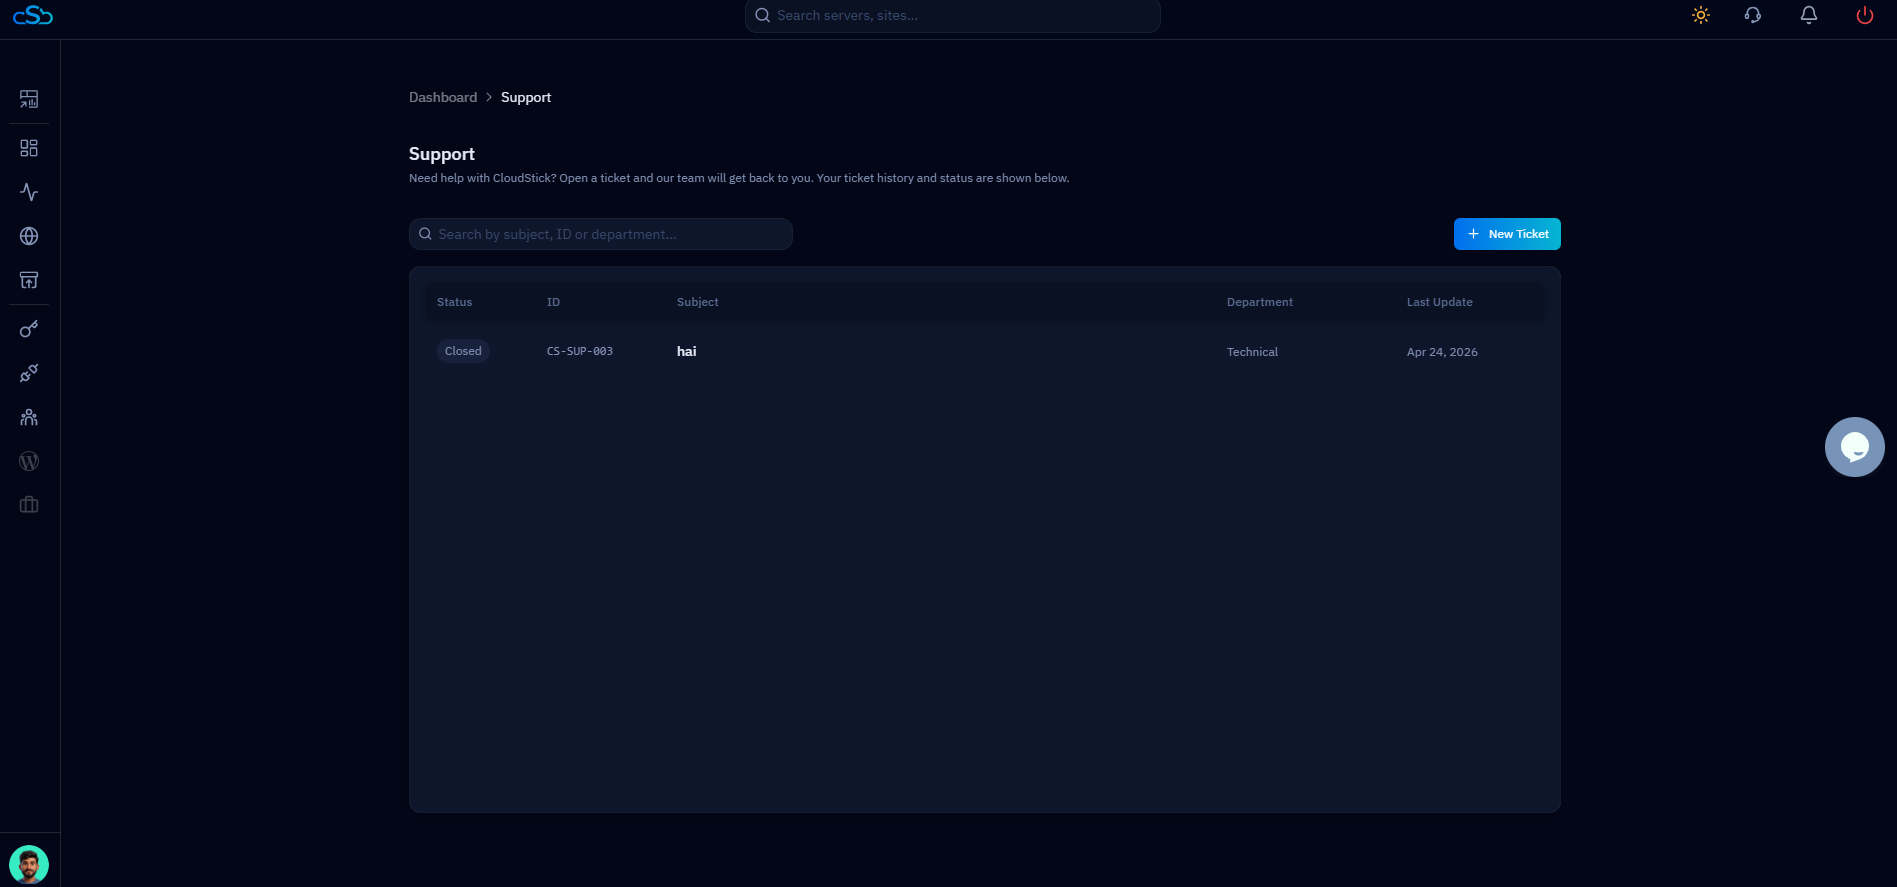
Fig. 03 — The Support Center page showing existing ticket history and the "+ New Ticket" button.
Step 3: Fill in the Ticket Details
Providing complete and accurate information in the ticket form helps the support team route your request to the right team and resolve it faster. The form includes the following fields:
Required Fields
Department: Select the team best suited to handle your issue — for example, Technical, Billing, or General.
Subject: Enter a concise summary of your issue so the support agent understands the request at a glance.
Priority: Choose the urgency level — Low, Medium, or High — to help the team triage appropriately.
Description: Describe the problem in as much detail as possible. Include what you were doing when the issue occurred, any error messages you saw, and steps you have already tried.
Optional Fields
Server: If the issue relates to a specific connected server, select it from the dropdown so the agent has direct context.
Website: If the issue is scoped to a particular web application on your server, select it here.
Attachments: Click the upload area to attach screenshots, log files, or any other relevant files (PDF, PNG, JPG, ZIP accepted). Visual evidence significantly speeds up diagnosis.
The more detail you provide in the Description field — including error messages, affected server names, and reproduction steps — the faster the support team can identify and resolve your issue.
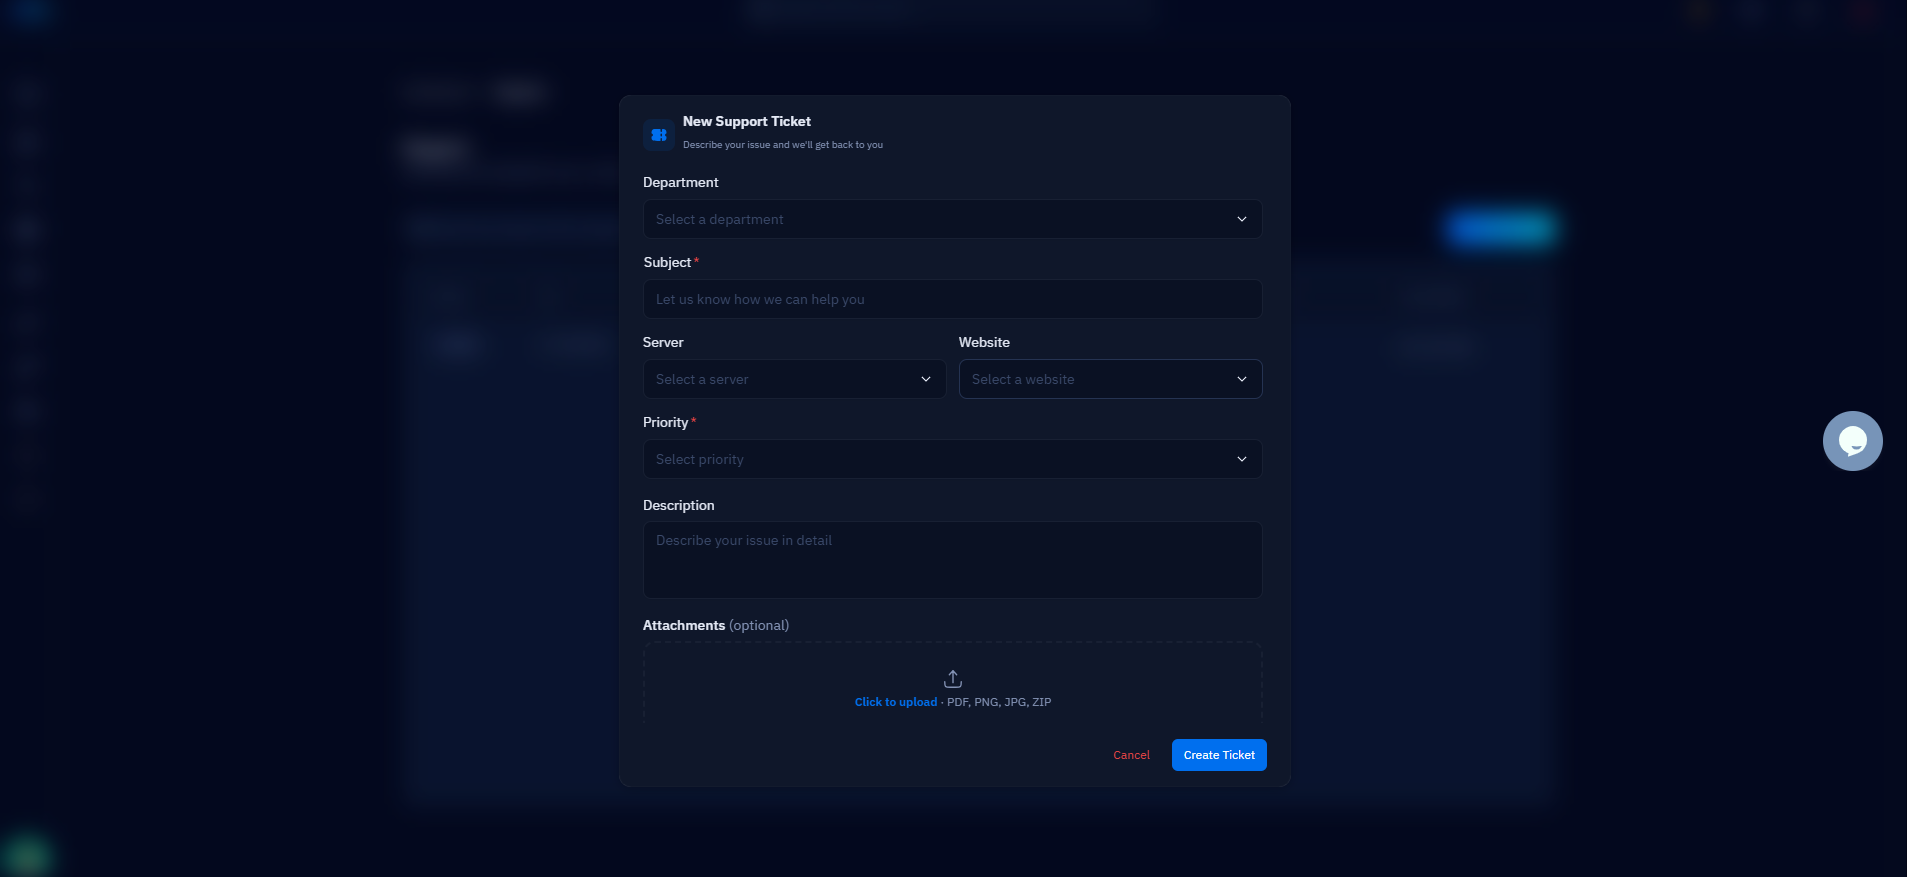
Fig. 04 — The New Support Ticket form showing all fields: Department, Subject, Server, Website, Priority, Description, and Attachments.
Step 4: Submit and Track Your Ticket
Once you have filled in all the required fields and attached any relevant files, you are ready to submit. CloudStick will immediately route your ticket to the appropriate department and keep you updated on its progress.
1. Submit the Ticket
Review all the information you have entered to make sure it is accurate and complete.
Click the blue Create Ticket button at the bottom right of the form to submit your request.
CloudStick will assign a unique ticket ID (e.g., CS-SUP-004) to your submission and route it to the selected department.
2. Track Your Ticket
Navigate back to the Support section from the top navigation bar at any time.
Your ticket will appear in the list with its current Status (Open, In Progress, or Closed), the assigned department, and a timestamp for the last update.
All responses from the support team will be visible within the ticket thread — no separate email client needed.
Including detailed information and relevant screenshots when you first submit significantly reduces back-and-forth and helps the team resolve your issue in fewer exchanges.