How to Install CloudStick Manually
Overview
Manual installation is the most flexible way to connect any server to CloudStick. Instead of handing over your root password for a direct SSH handshake, you log into your server yourself and run a single curl command that CloudStick generates for you. The script downloads and installs the CloudStick management agent in the background — you can monitor progress from the dashboard in real time.
This guide walks you through every step: opening the add-server flow, selecting your provider, entering server details, running the install command, and verifying the agent is active.
Prerequisites: Your server must run Ubuntu 20, 22, or 24 LTS (64-bit), have at least 1 GB of RAM, more than 2 GB of free disk space, and a public IPv4 address. NAT VPS configurations are not supported. Ensure ports 80/TCP, 443/TCP, 443/UDP (optional), and 22/TCP are open before you begin.
Step 1: Click "+ Add Server" on the Dashboard
Start from the main CloudStick dashboard. This is the screen you land on after logging in — it lists all your connected servers.
Log in to your CloudStick dashboard at dash.cloudstick.io.
Click the blue + Add Server button in the top-right corner of the screen.
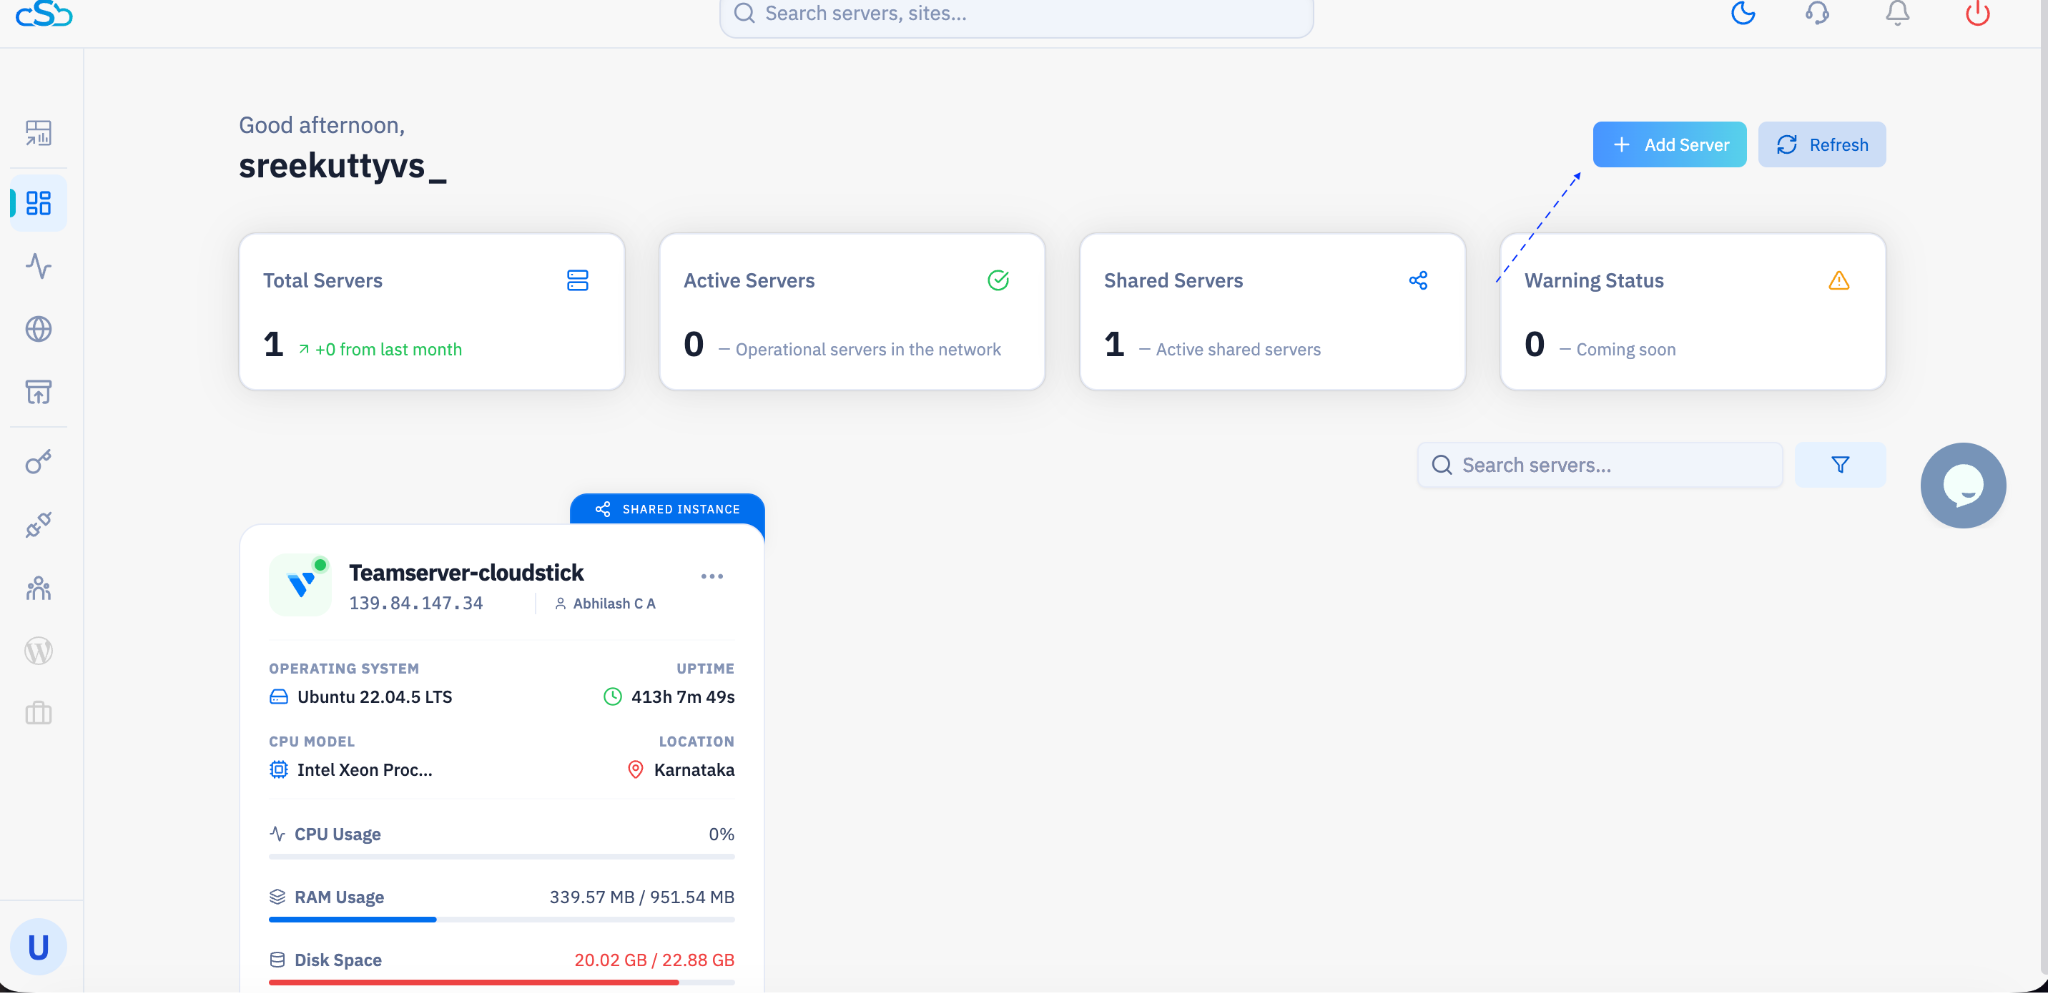
Fig. 01 — CloudStick dashboard with the '+ Add Server' button in the top-right corner.
Step 2: Choose to Connect Your Own Server
After clicking + Add Server, you land on the Purchase Server page. This page lets you either buy a new server through CloudStick or connect one you already own.
Since you already have a server provisioned, look for the Connect your server → link in the top-right area of the page.
Click it to proceed with connecting your existing server.
If you do not yet have a server, you can purchase one directly through this page from CloudStick, Vultr, DigitalOcean, or another listed provider.
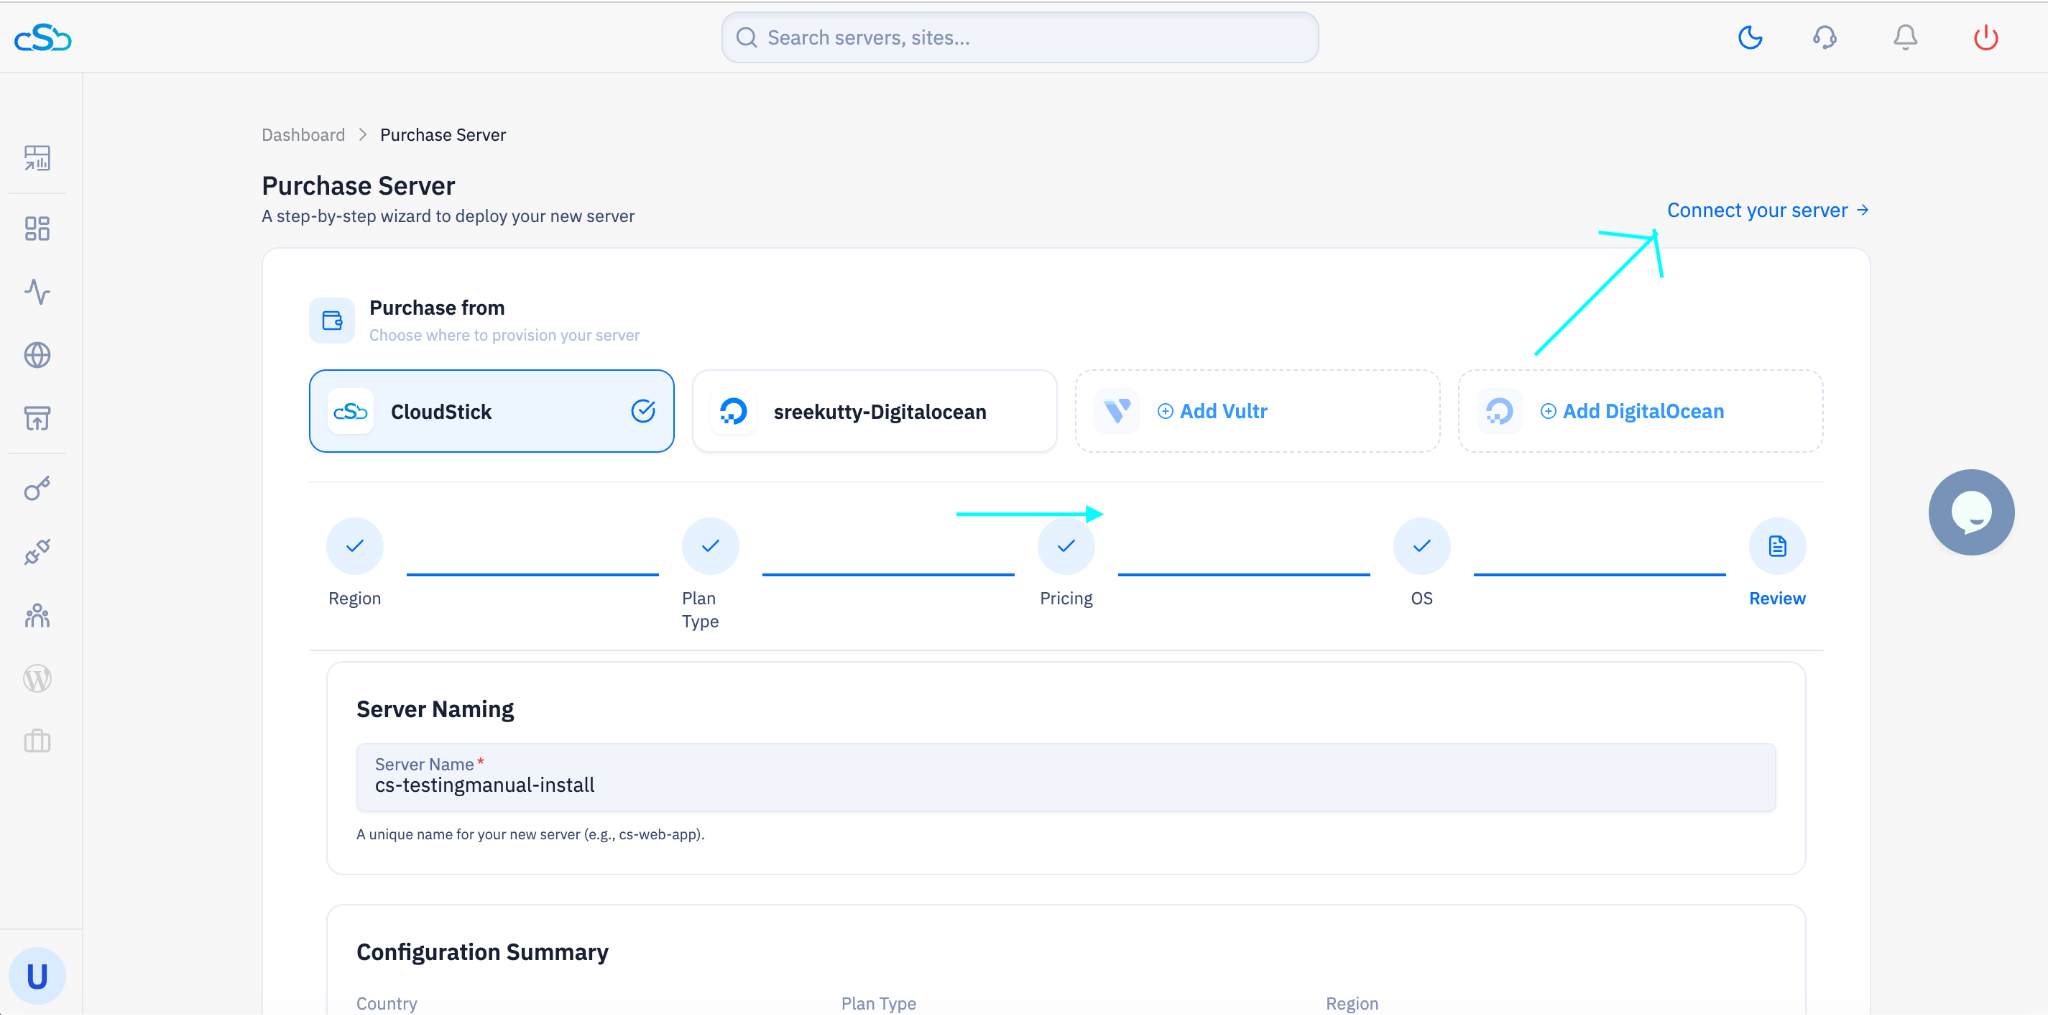
Fig. 02 — Purchase Server page with the 'Connect your server →' link highlighted.
Step 3: Select Your Server Provider
This is Step 1 of 3 in the connection wizard. CloudStick shows a grid of supported providers. Selecting the correct provider lets CloudStick optimize the installation for your infrastructure.
Choose the provider from which you purchased your server — for example, Vultr, DigitalOcean, Hetzner Cloud, Contabo, or RackNerd.
If your provider is not listed, click Other Provider.
Click the blue Next → button to continue.
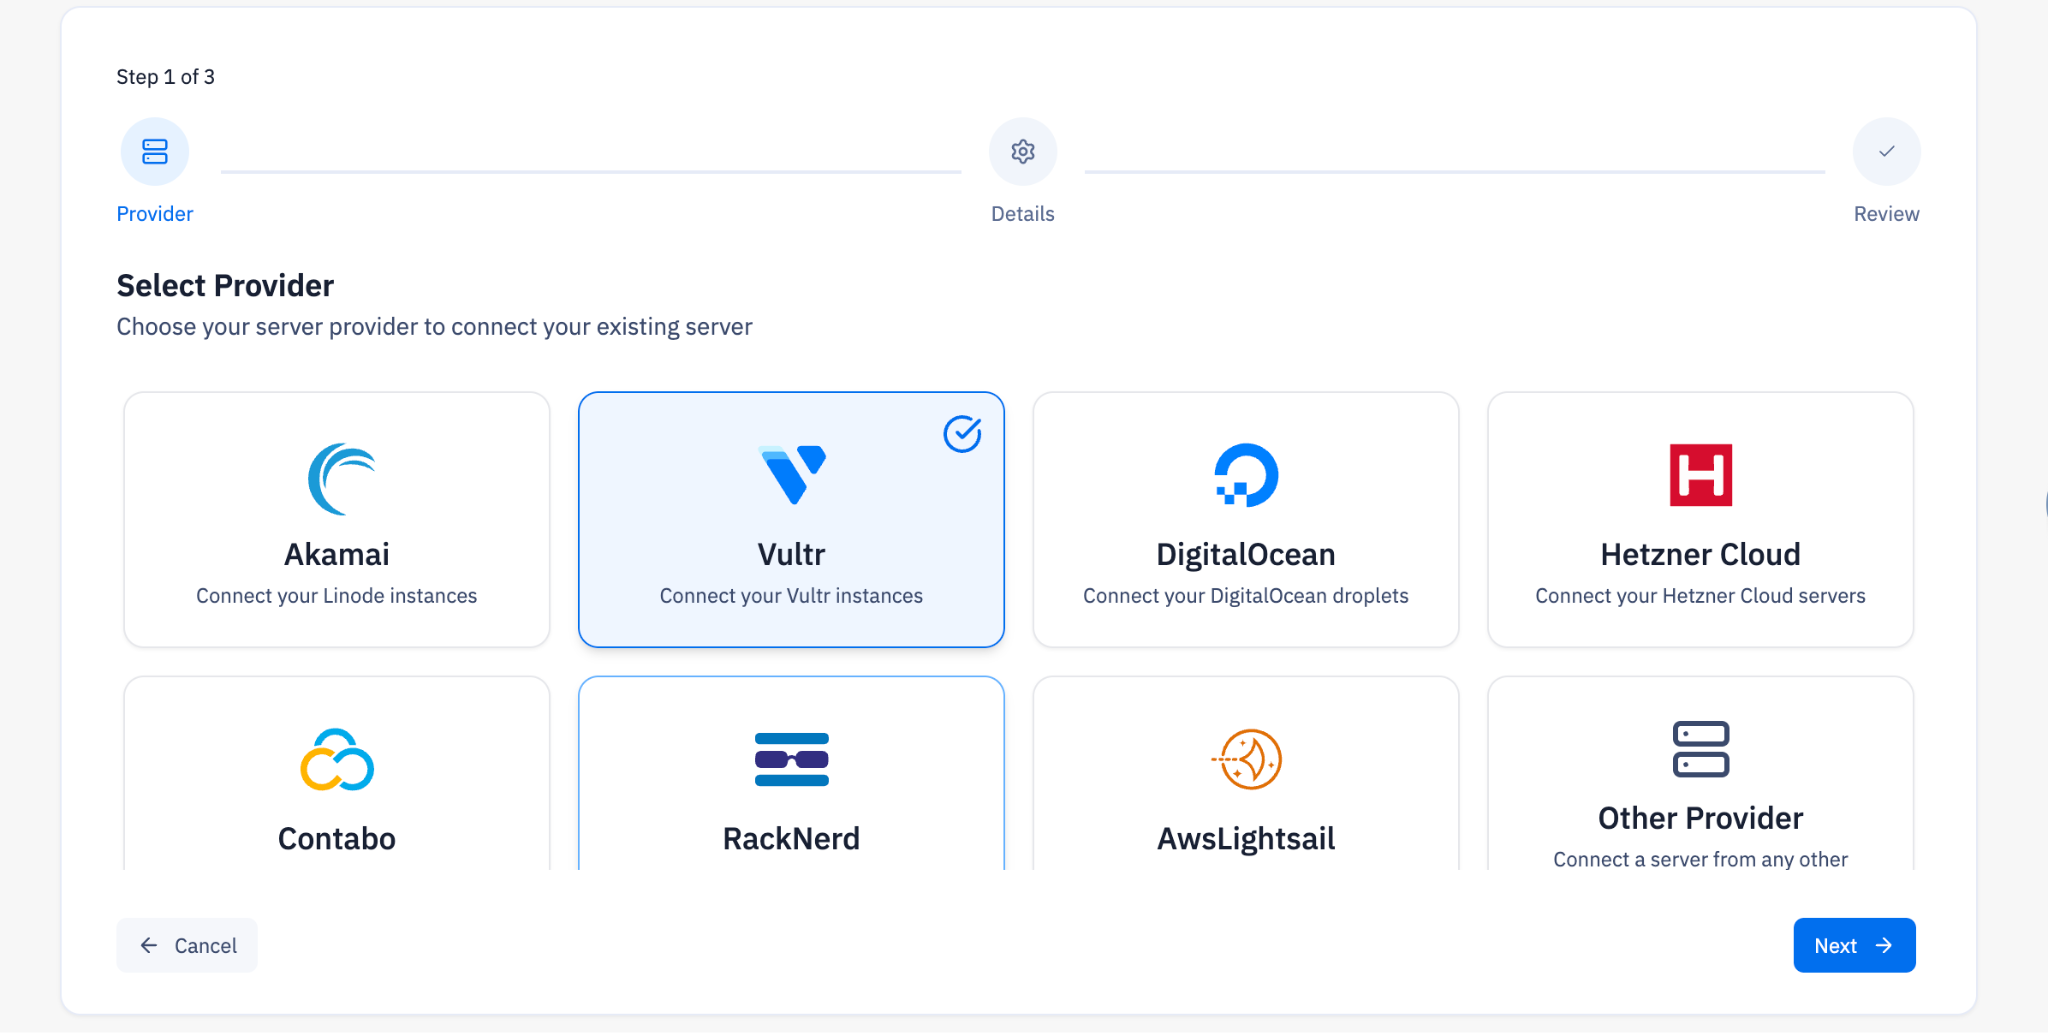
Fig. 03 — Provider selection grid (Step 1 of 3) showing available server providers.
Step 4: Enter Server Details & Select Manual Installation
This is Step 2 of 3. Fill in your server's information and choose Manual Installation as the installation type — this is what generates the curl command rather than requiring your root password.
Fill in the server form
Server IP Address: Enter the public IPv4 address of your server.
Server Name: Give your server a recognisable label (e.g. my-production-server).
Select installation type
Direct Installation: CloudStick connects via SSH automatically using your root password.
Manual Installation: You run the command yourself. Select this option for the manual flow.
Select Manual Installation and click Next →.
After installation CloudStick disables password login and uses SSH keys for all future connections — your credentials are only used for this initial setup.
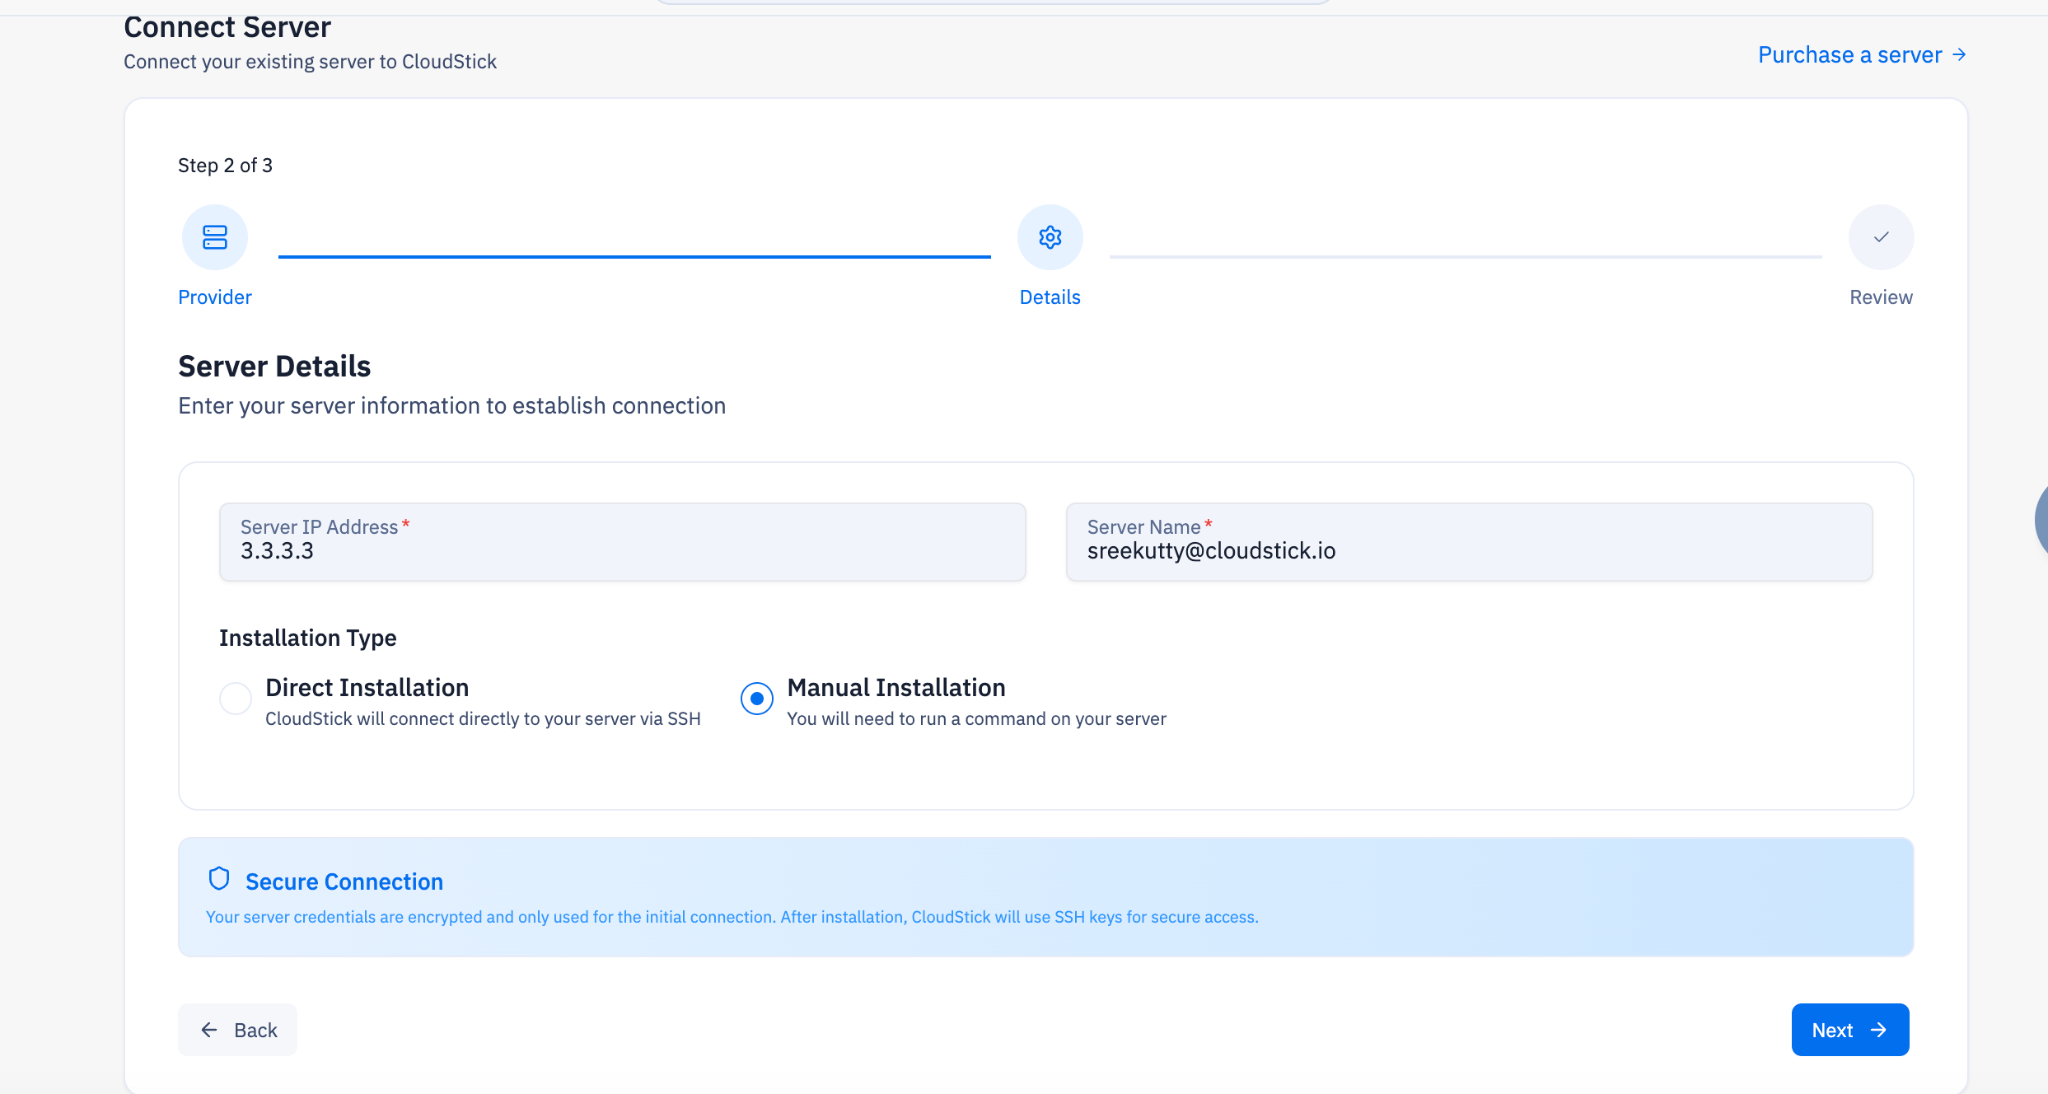
Fig. 04 — Server Details form (Step 2 of 3) with Manual Installation selected.
Step 5: Get the Installation Command
CloudStick now generates a unique curl command for your server. This command downloads the CloudStick agent installer and runs it with the correct permissions.
On the Manual Server Installation screen, locate the Your Installation Command box.
Click the copy icon to copy the full command to your clipboard.
The command includes a unique token tied to your server. Do not share it — anyone with this command could connect a server to your account.
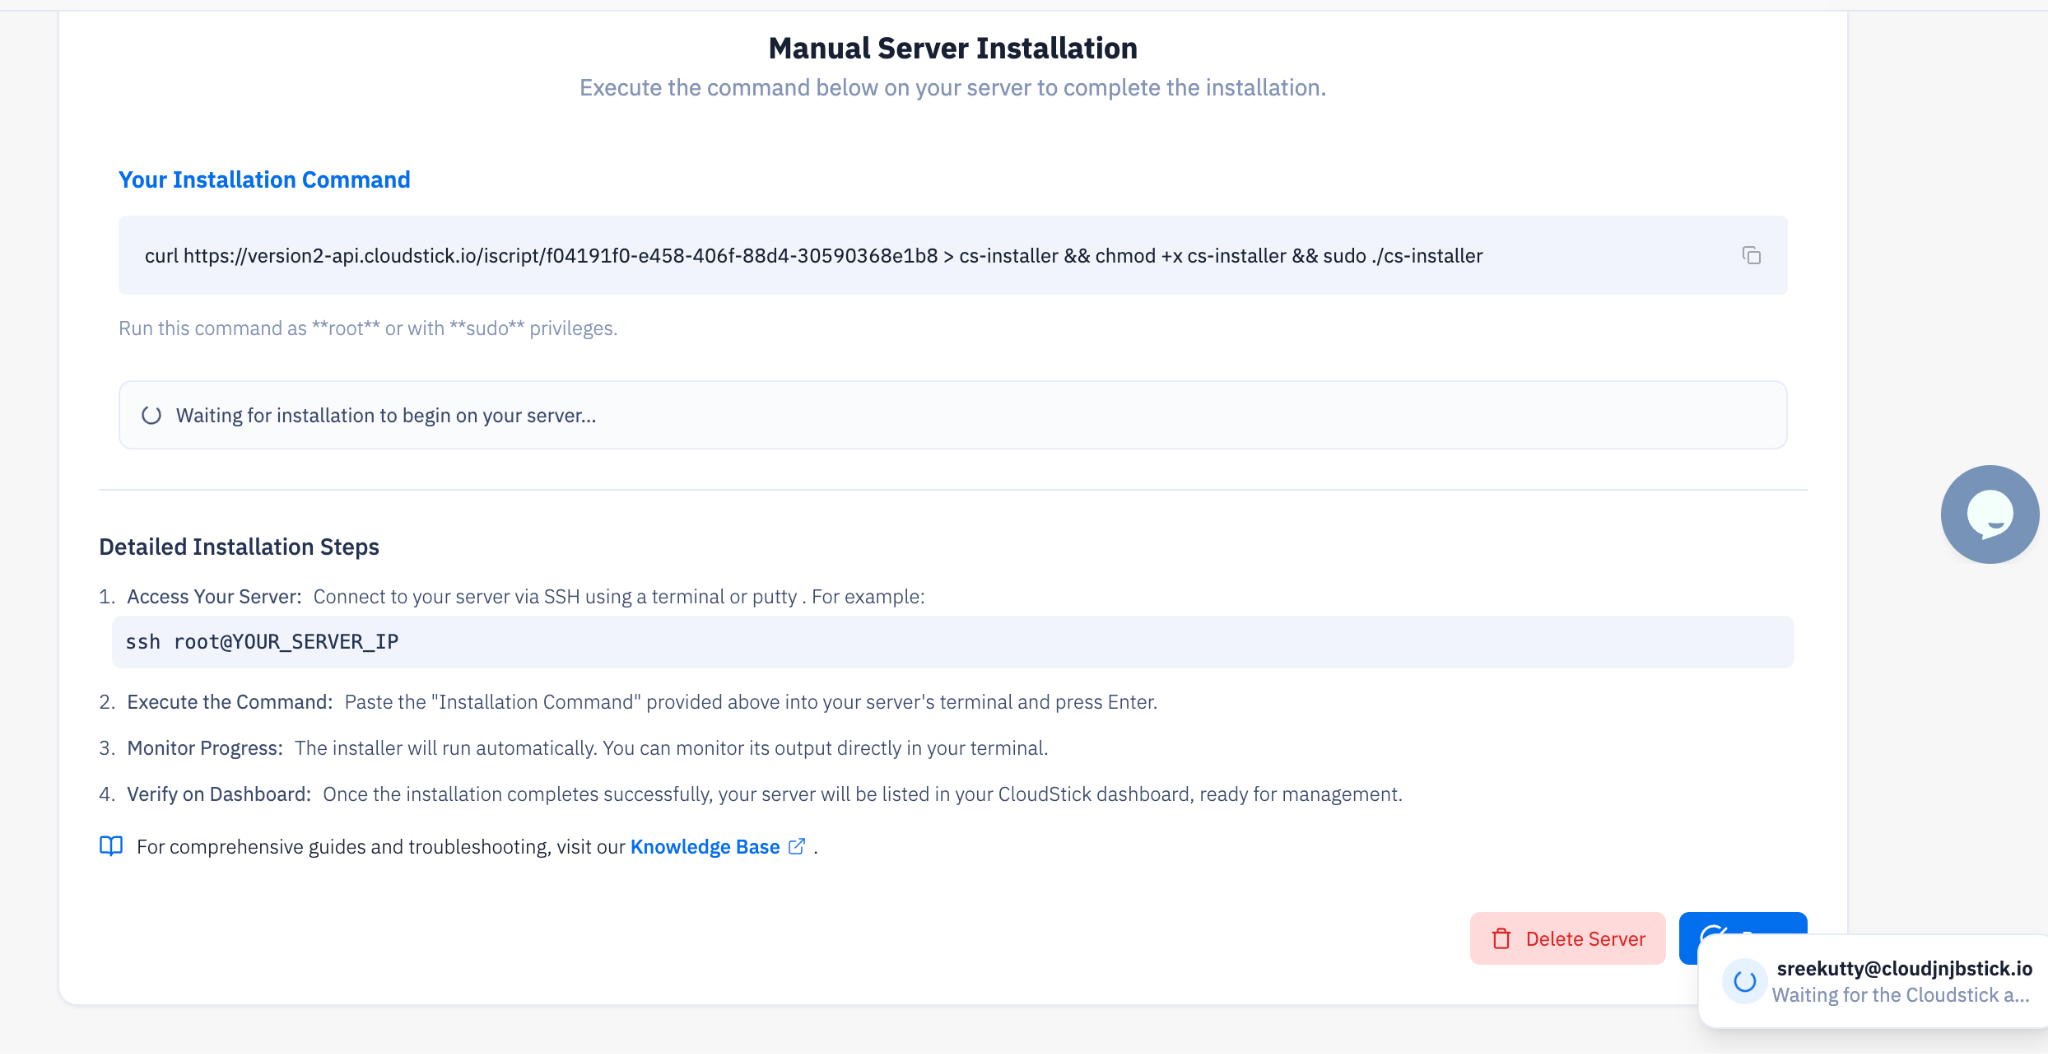
Fig. 05 — Manual Server Installation page showing the generated curl command ready to copy.
Step 6: Run the Command on Your Server
With the command copied, open a terminal and SSH into your server as root. Then paste and run the command.
Connect to your server: ssh root@YOUR_SERVER_IP
Paste the copied curl command and press Enter.
The script will download and begin the installation. Your terminal will return to the prompt quickly — the agent installs in the background.
You do not need to keep the SSH session open once the command has started running.
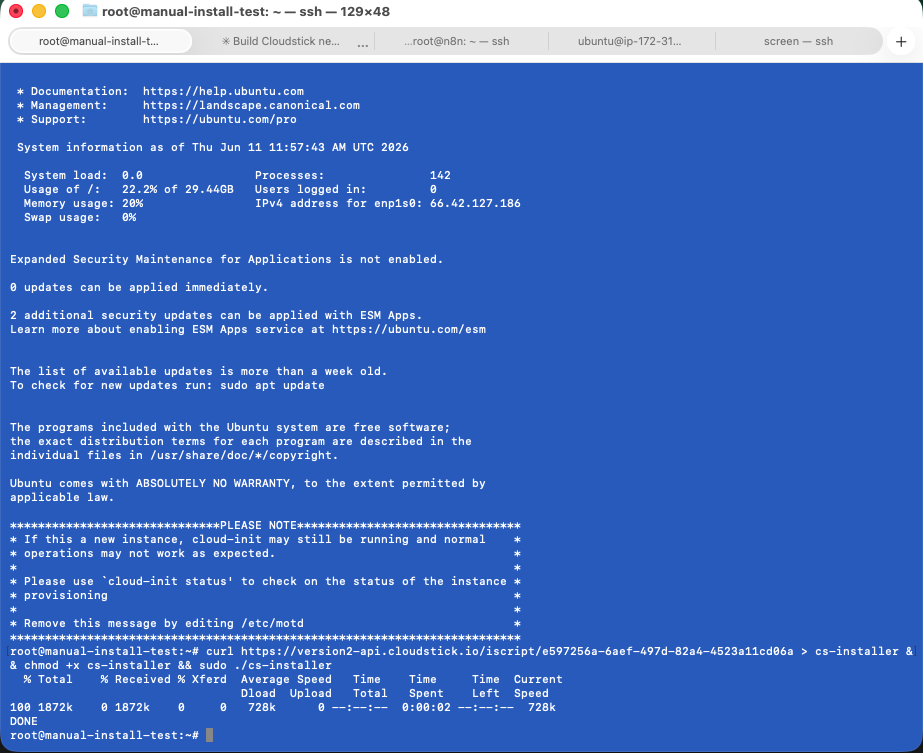
Fig. 06 — Terminal session showing the curl command executing and the installer downloading successfully.
Step 7: Monitor Installation Logs
Return to the CloudStick dashboard. A real-time Installation Logs panel will appear, showing every step the agent is performing on your server — package updates, web server configuration, firewall setup, and more.
Click on the Installation Logs panel to expand it.
Watch the live output as CloudStick installs and configures Nginx or OpenLiteSpeed, the CSF Firewall, and system optimizations.
Wait until you see the final confirmation line in the logs indicating the installation is complete.
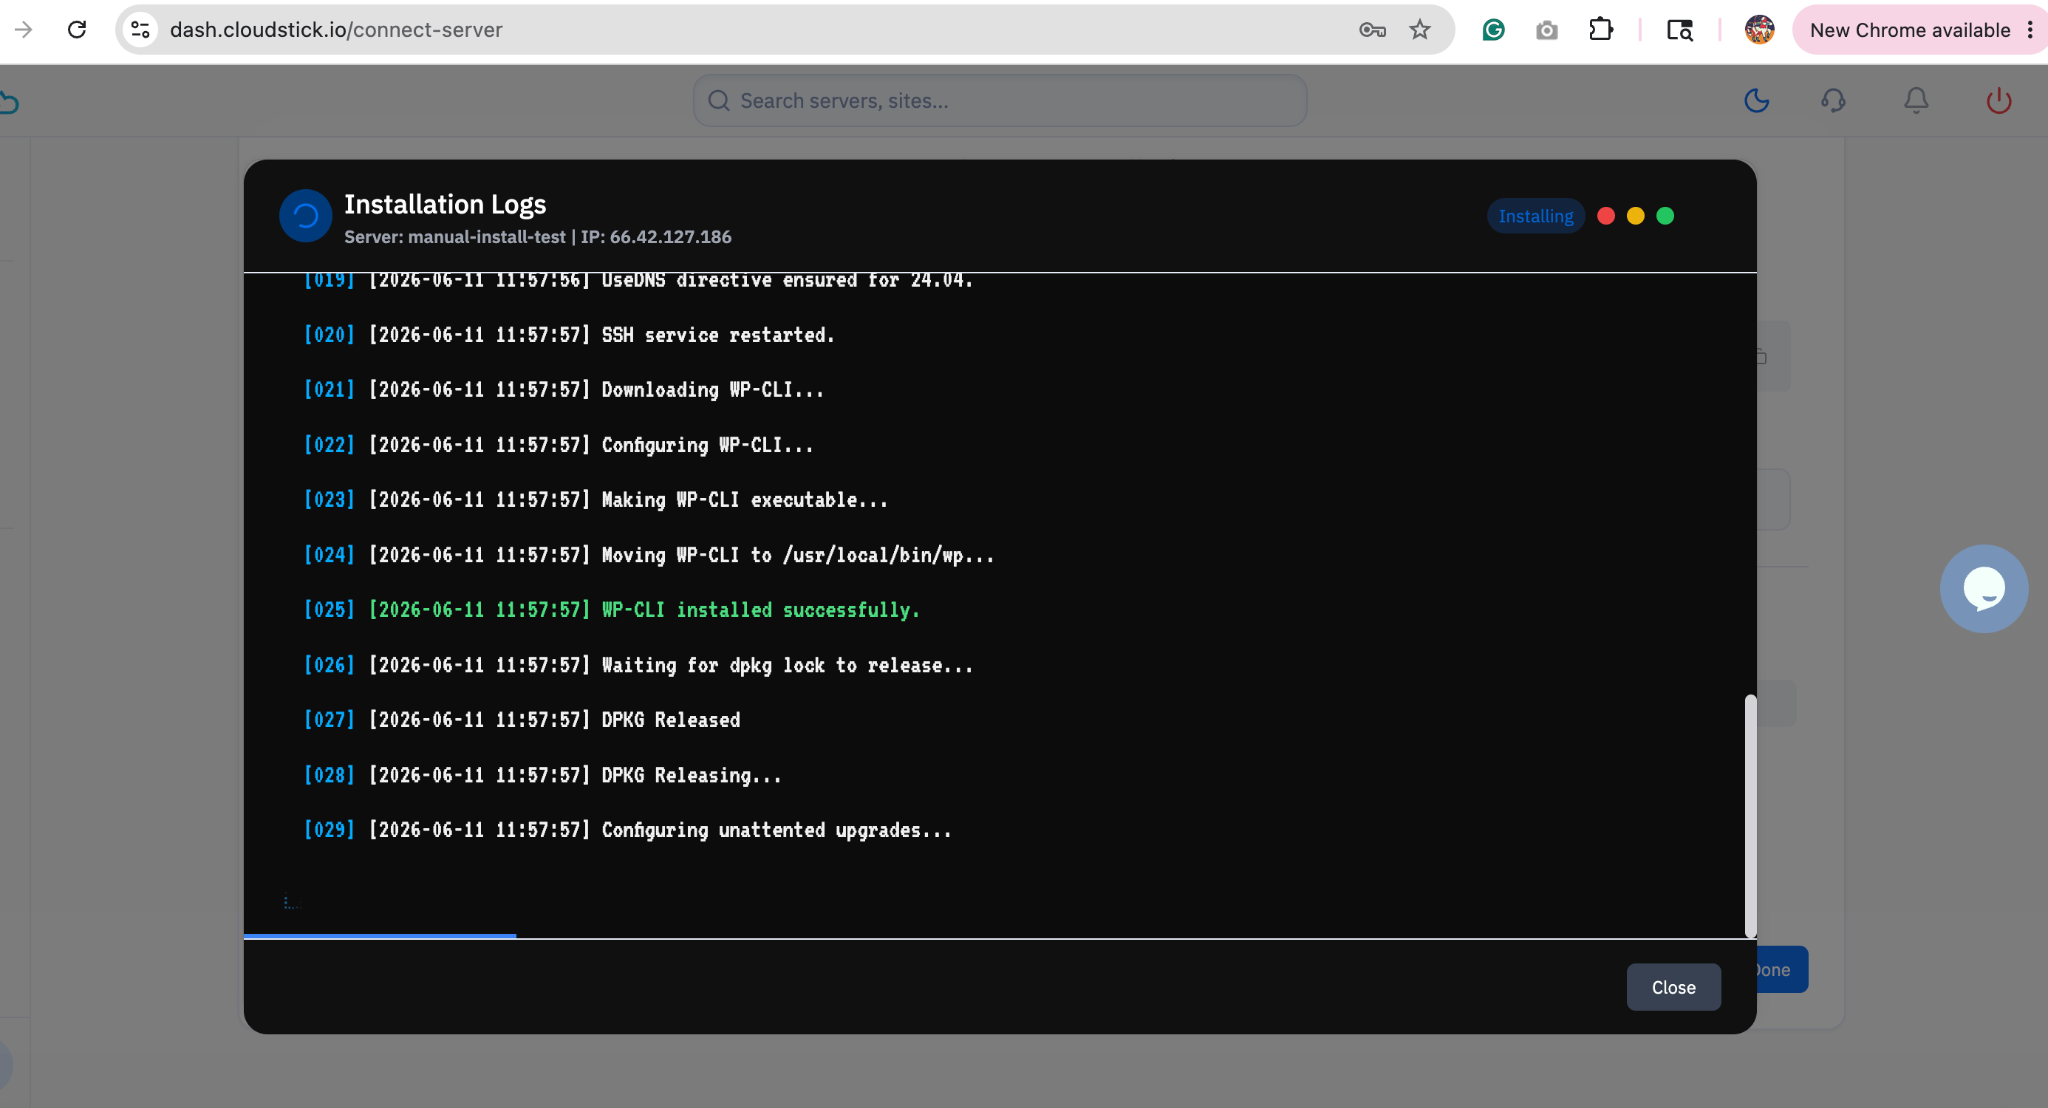
Fig. 07 — Installation Logs panel showing real-time output as the CloudStick agent is installed.
Step 8: Verify Your Server is Active
Once installation completes, your server will appear in the CloudStick dashboard with an Active status. You can now manage websites, databases, SSL certificates, firewalls, and more — all from the dashboard without needing SSH.
Navigate back to the main dashboard.
Confirm your server card shows the correct IP address, operating system, and an active uptime indicator.
Click Manage on the server card to open the server panel and begin managing your server.
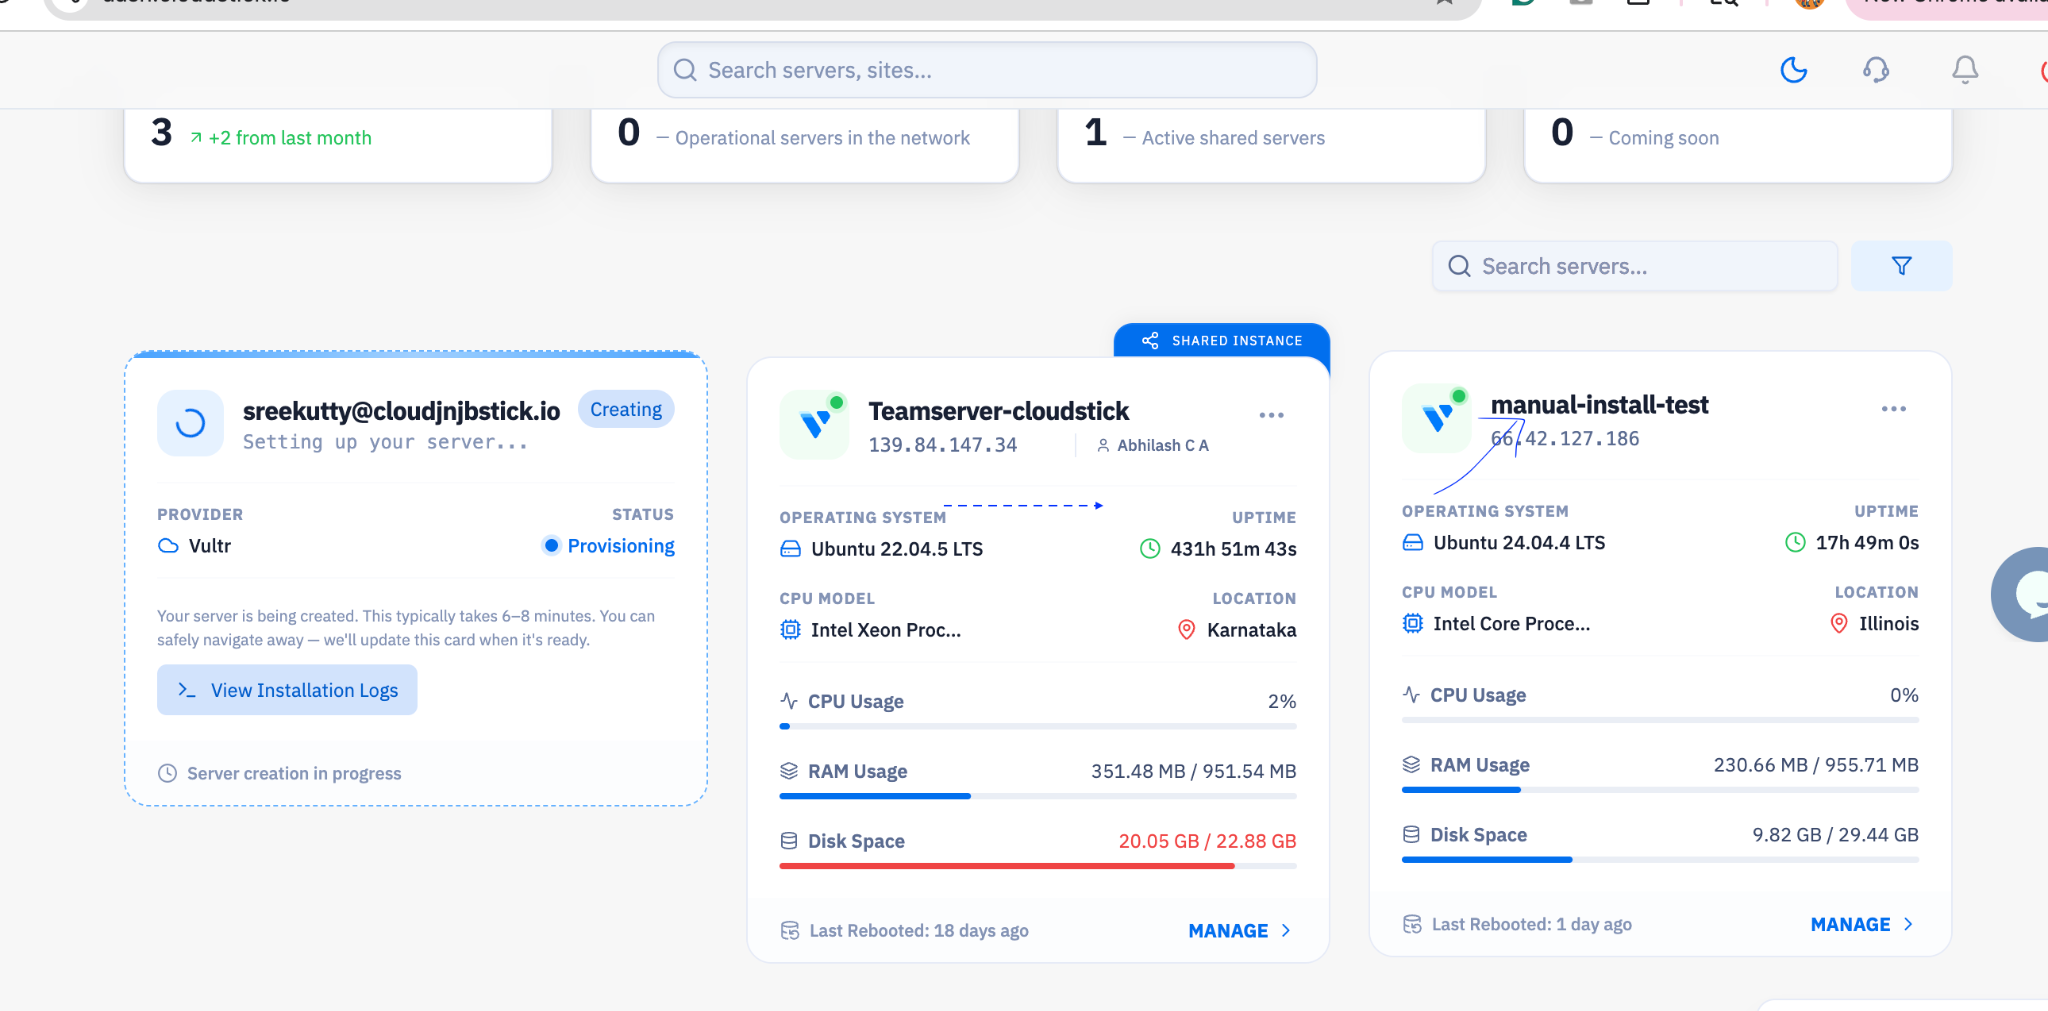
Fig. 08 — CloudStick dashboard showing the newly connected server with active status and server details.