How to Blacklist Email Address
Overview
This guide explains how to blacklist an email address or an entire domain in CloudStick. CloudStick Spam Protection allows you to block unwanted senders and domains using the Blacklist feature, which sits alongside a matching whitelist and a filtering sensitivity control as part of the server-wide spam configuration.
You can add a specific email address or an entire domain to the server-level blacklist — this helps prevent unwanted senders from delivering mail to any mailbox on the server, regardless of the spam score Exim/SpamAssassin would otherwise assign it.
This blacklist applies server-wide — across every website and email account hosted on the server — rather than to a single mailbox. Blocking a shared domain will stop its mail for every account on the server, so use it for senders you're certain should never reach any inbox. If you need to trust a sender instead, see how to whitelist an email address or domain.
Step 1: Select Your Server
Spam Protection blacklisting is configured per server, so start by opening the server you want to manage from your CloudStick dashboard.
Log in to your CloudStick Dashboard: Sign in with your account credentials.
Locate the server: From the server list, find the server where you want to configure Spam Protection.
Click Manage: Click Manage on the required server to open its server panel.
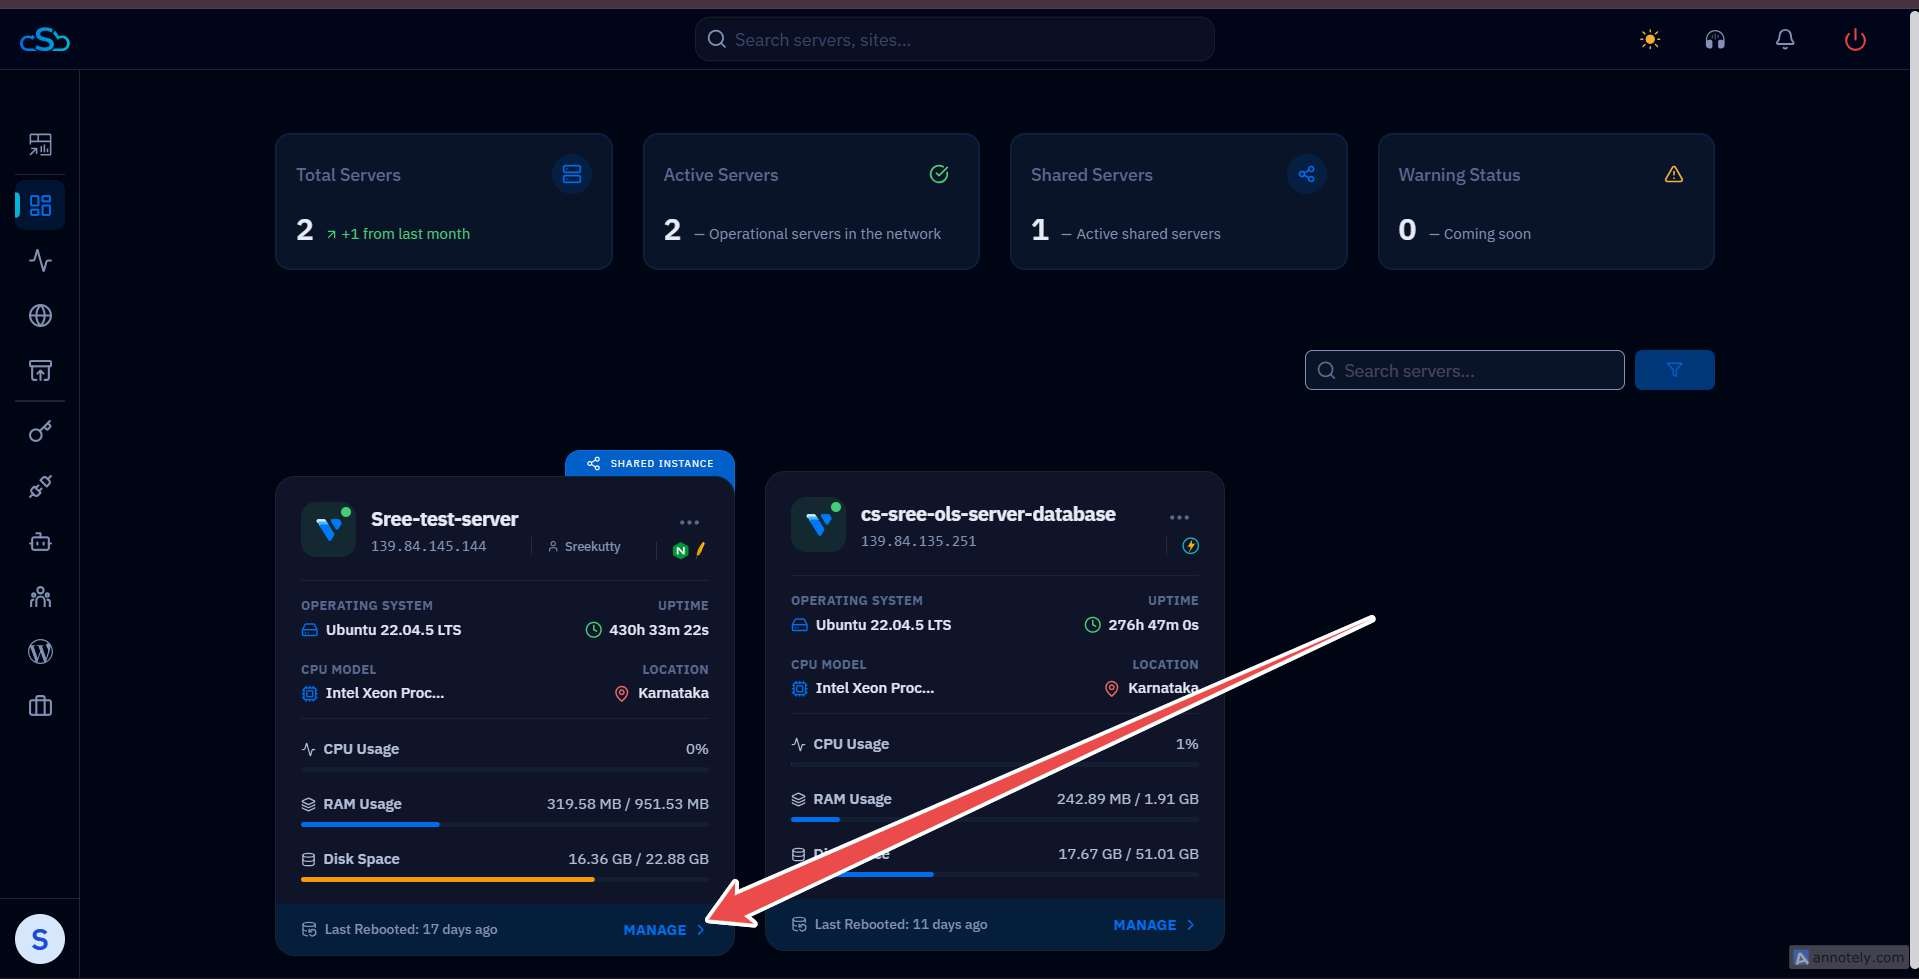
Fig. 01 — CloudStick server list showing the available servers and the Manage option.
Step 2: Open Server Settings
After opening the server management page, scroll down to the Server Settings section, where Spam Protection sits alongside options like Change PHP CLI Version, Auto Update, and Change Provider.
Scroll down to the Server Settings section: This groups every server-level configuration option in one place.
Locate Spam Protection: Find the Spam Protection card — it controls how aggressively Exim/SpamAssassin tags incoming mail as spam, and lets you block or trust specific senders and domains server-wide.
Click Manage: Click Manage on the Spam Protection card to open its settings.
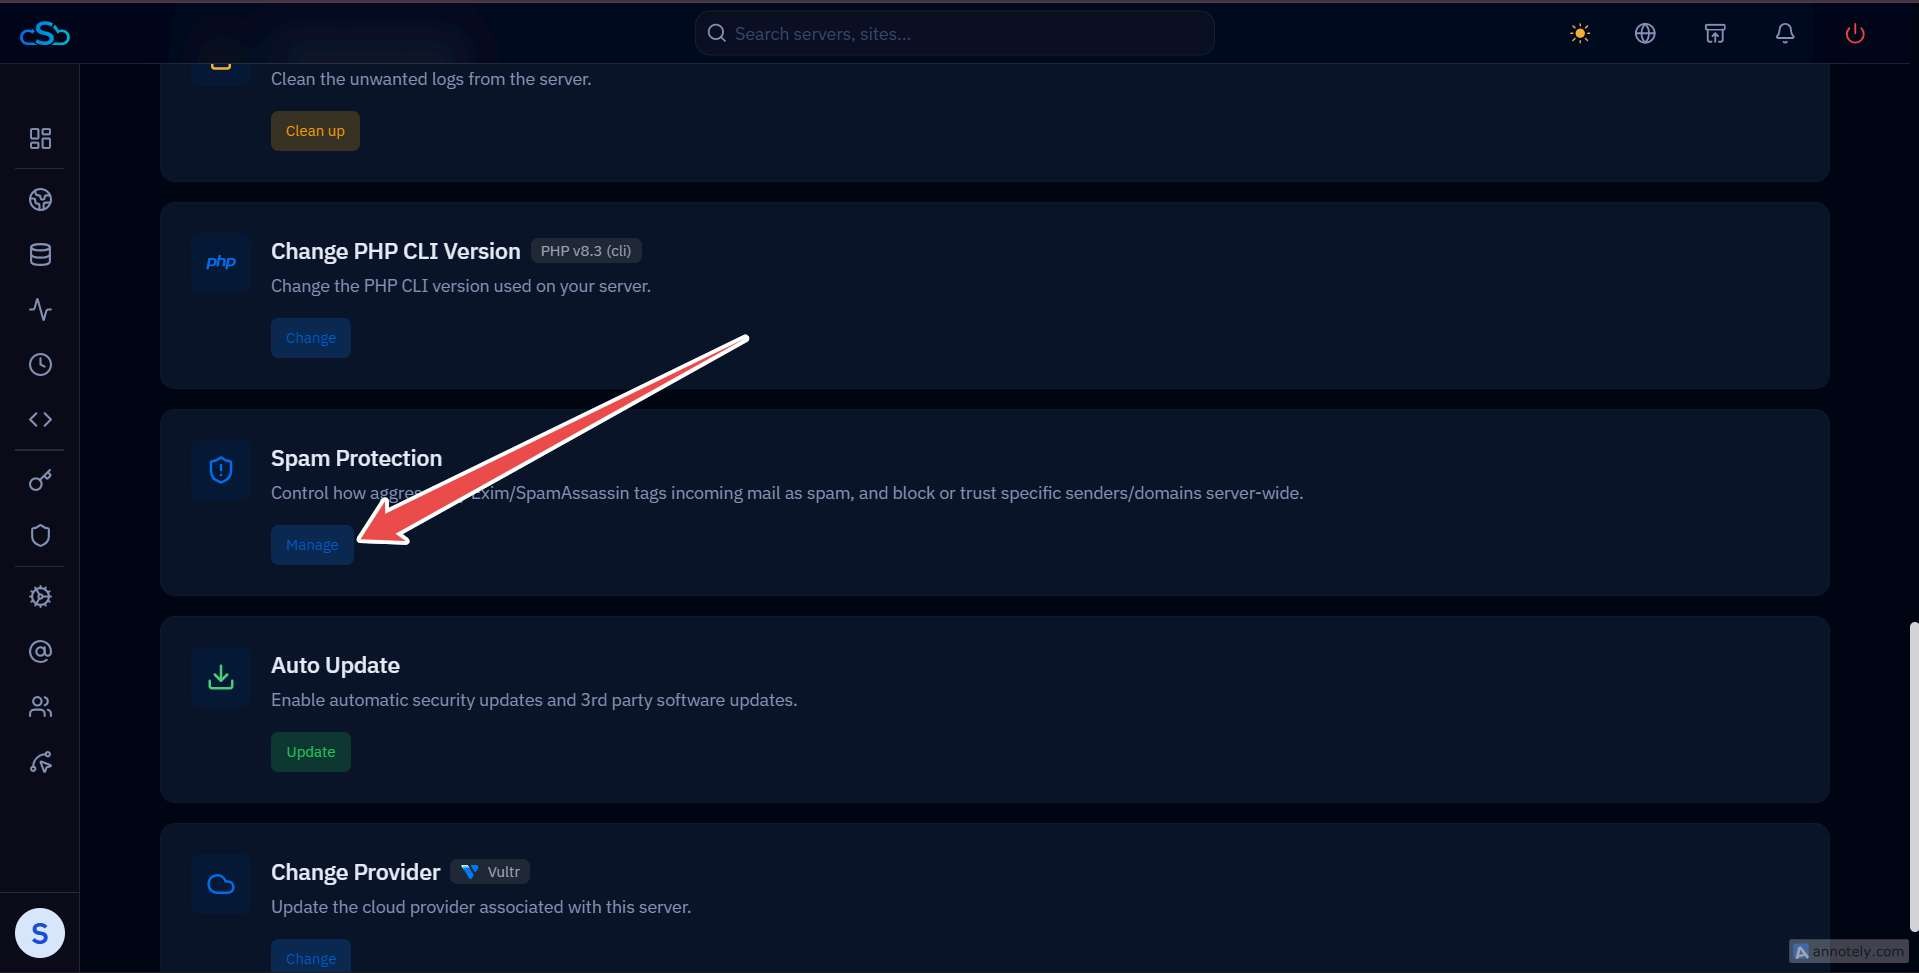
Fig. 02 — Server Settings showing the Spam Protection option and Manage button.
Step 3: Add the Address to the Blacklist
The Spam Protection panel groups Filtering Sensitivity, Blacklist, and Whitelist controls together. The Blacklist field is where you add senders that should always be blocked.
Locate the Blacklist section: Scroll to the Blacklist field, used for adding blocked email addresses or domains.
Enter the address or domain: You can add either a specific email address or a domain, then press Enter to add it.
Click Block: Click the Block button next to the field to confirm the entry.
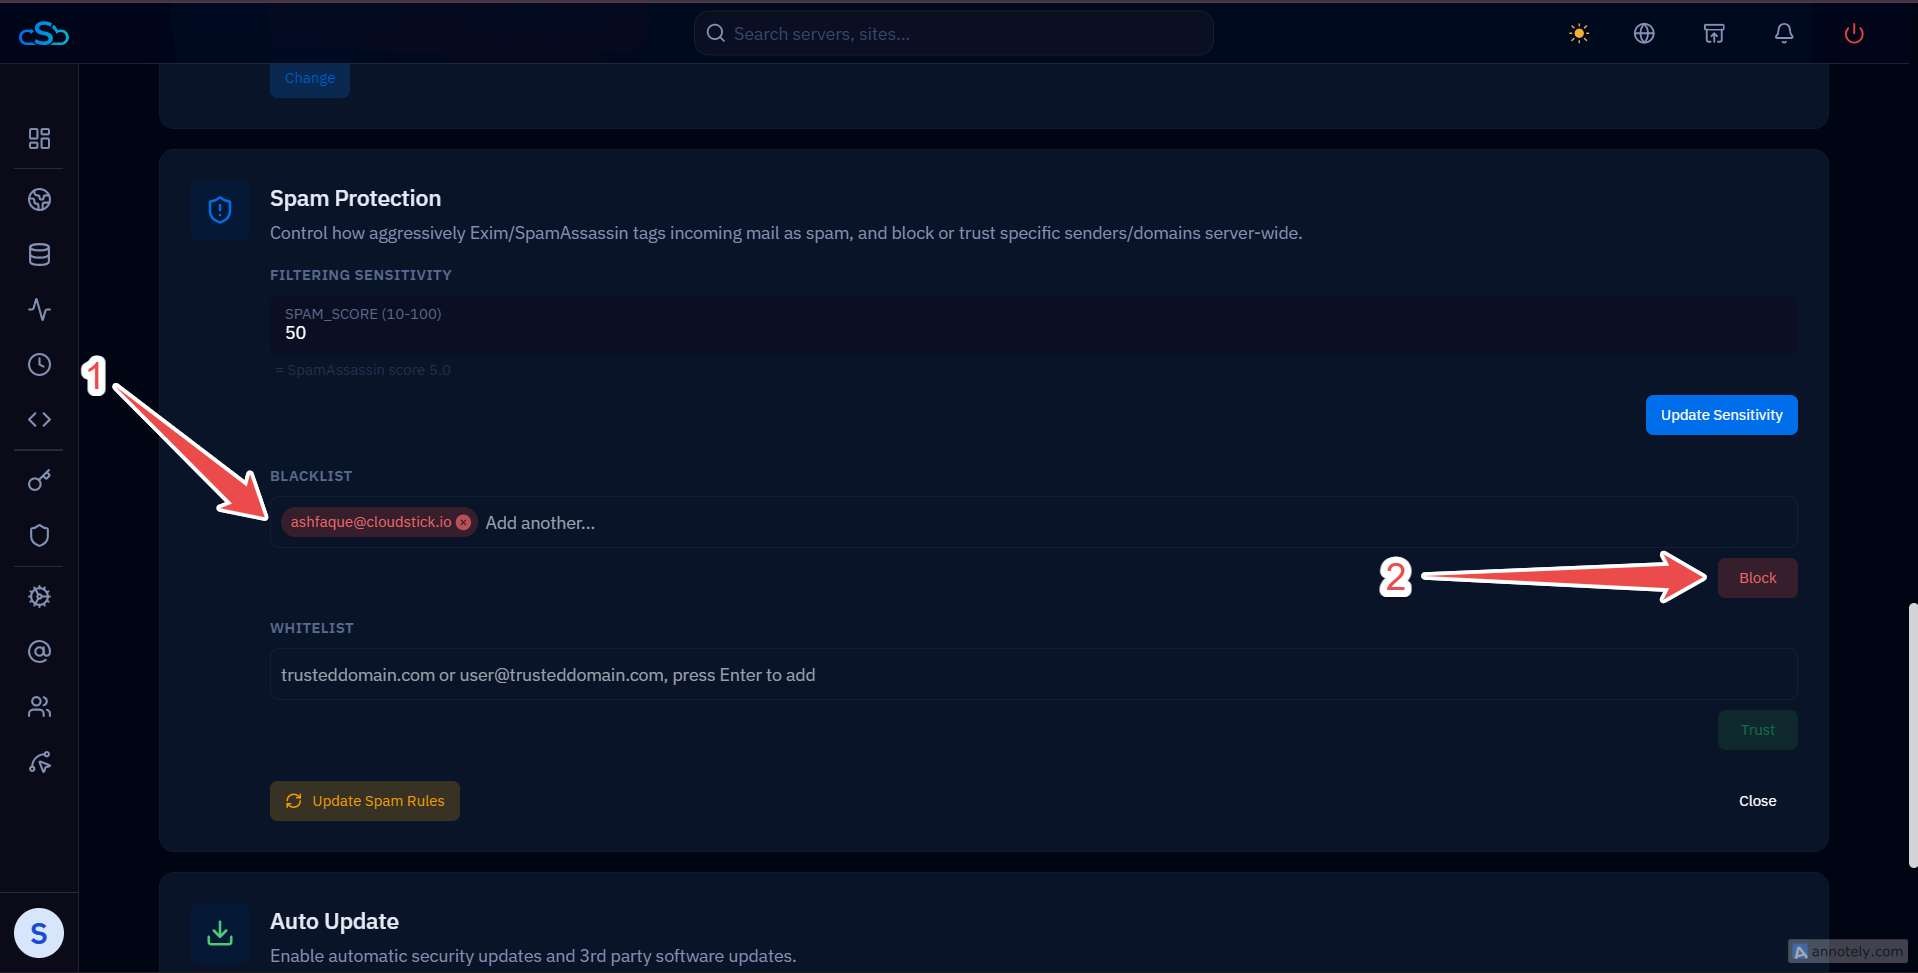
Fig. 03 — Spam Protection panel with the Blacklist field and Block button highlighted.
Step 4: Apply the Updated Spam Rules
After adding the required blacklist entries, the change needs to be applied before it takes effect on incoming mail.
Review the added entries to confirm the correct addresses and domains are listed.
Click Update Spam Rules to apply the change.
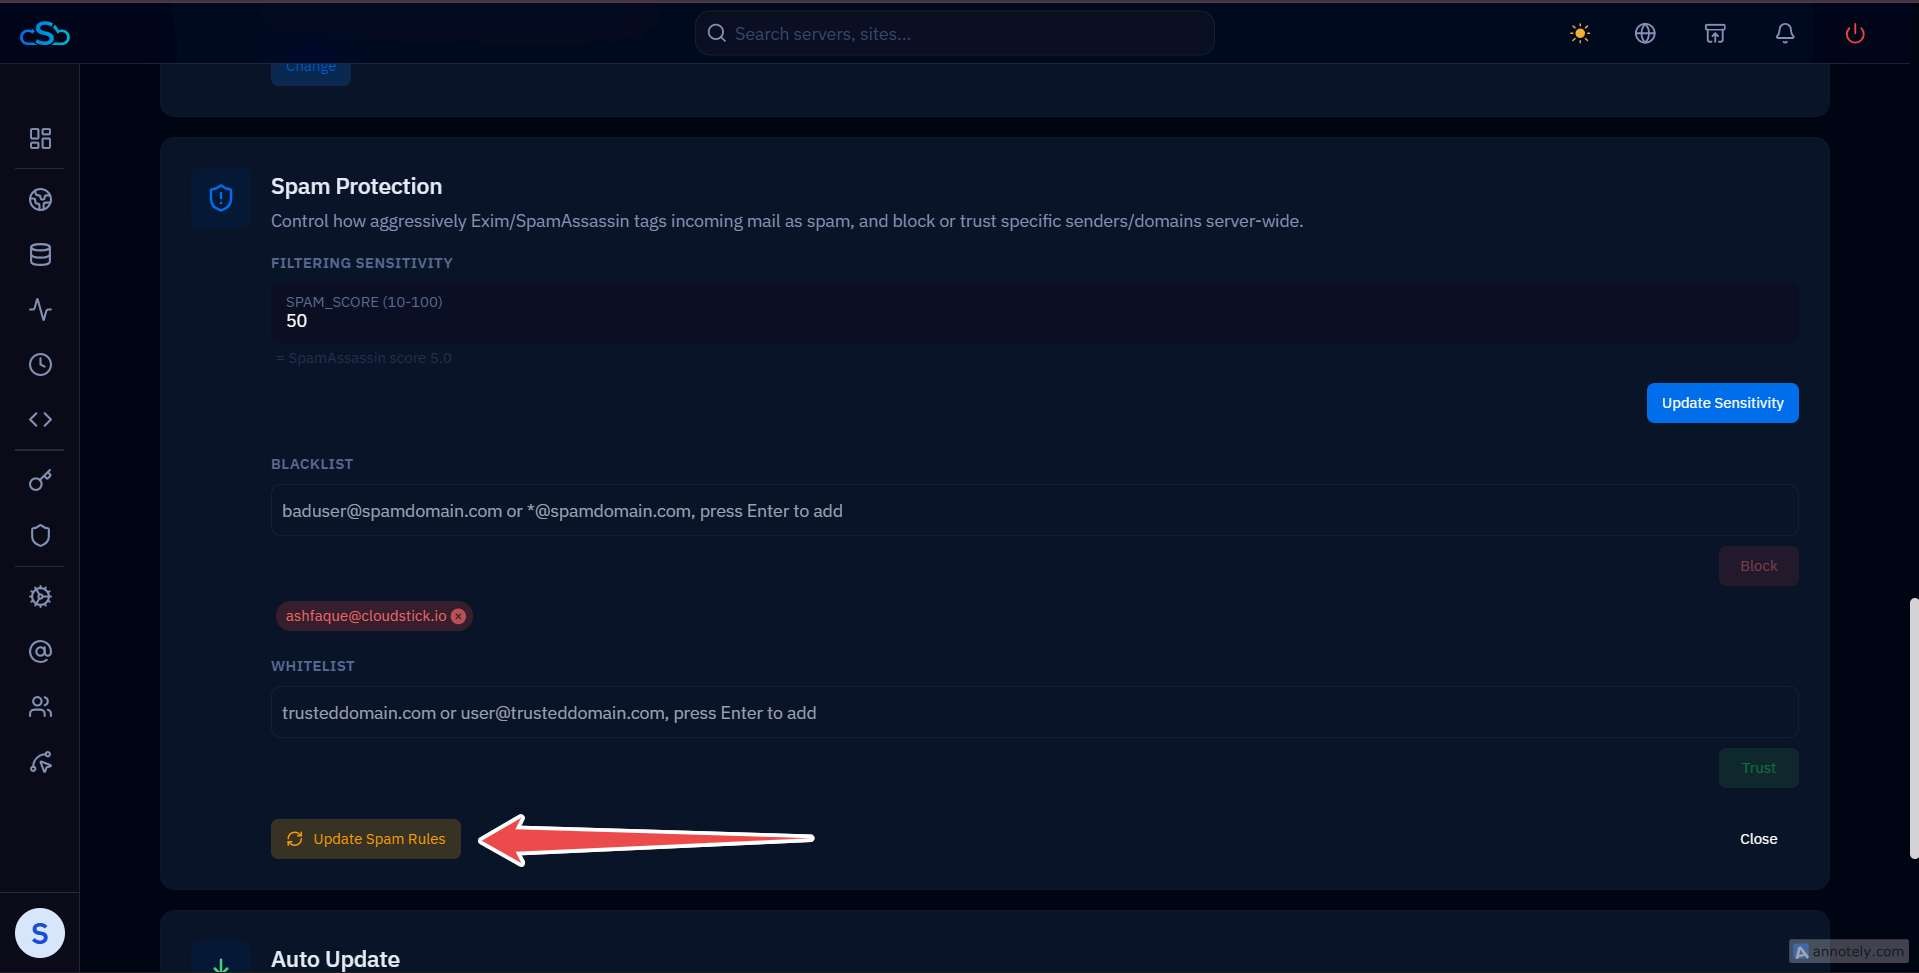
Fig. 04 — Update Spam Rules button used to apply the updated blacklist configuration.
This applies the updated Spam Protection rules to the server. Mail from any blacklisted address or domain will now be blocked, regardless of the score Exim/SpamAssassin would otherwise assign it.