How to Enable Spam Protection of a Website
Overview
This guide explains how to enable spam protection of a website in CloudStick. Spam is one of the most common problems facing any email account hosted on a live website, and CloudStick makes it easy to cut down on unwanted messages without installing or configuring anything yourself. CloudStick bundles SpamAssassin, an industry-standard content filter, directly into every website's Email Accounts settings — so protection can be switched on per website in a couple of clicks.
This guide walks through enabling Spam Protection for a website's email accounts: locating the right server and website, opening the Spam Protection panel, turning on spam checking, and optionally rejecting high-scoring spam outright instead of just tagging it.
Spam Protection is configured per website, not per individual mailbox — enabling it applies SpamAssassin filtering to every email account under that website's domain. Make sure you've already created an email account for the website before proceeding.
Step 1: Select Your Server
Start from your CloudStick dashboard, which lists every server connected to your account. Spam Protection is managed at the website level, so the first step is opening the server that hosts the site in question.
Log in to your CloudStick Dashboard: Sign in with your account credentials to see all connected servers.
Locate the server: Find the server containing the website whose email accounts you want to protect.
Click Manage: Click the Manage button on the required server card to open its server panel.
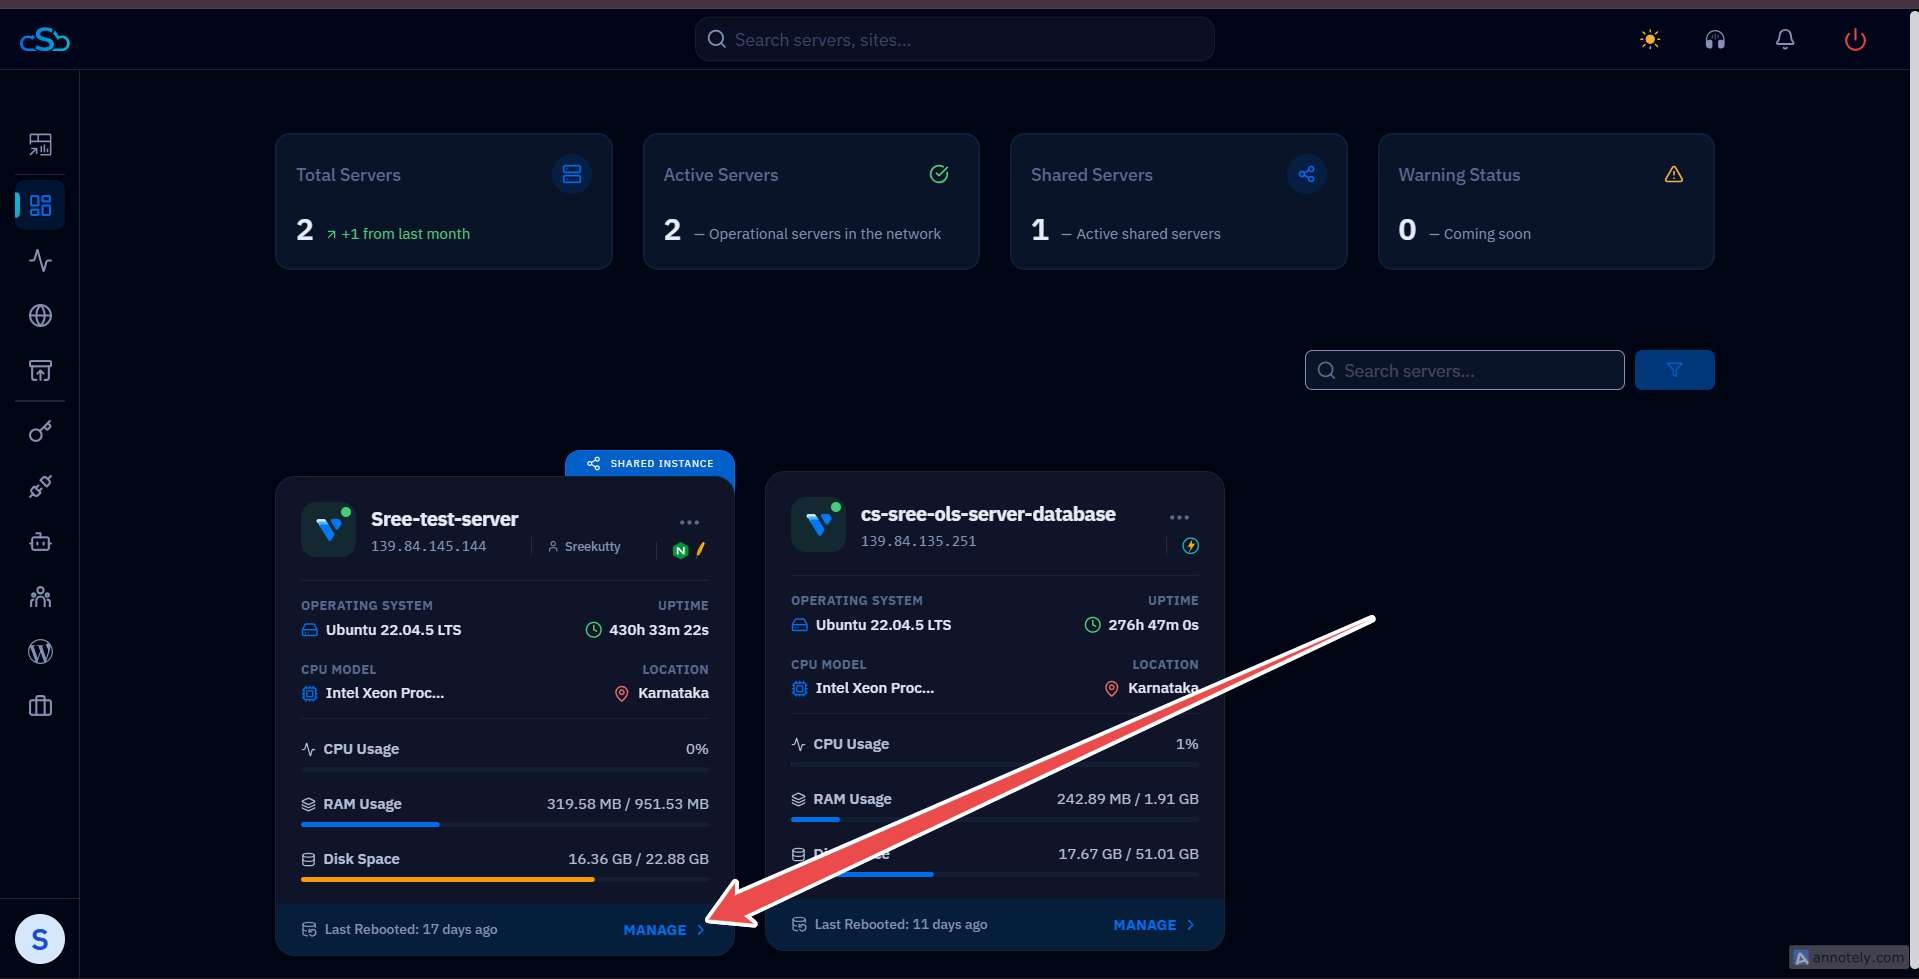
Fig. 01 — CloudStick server list showing the available servers and the Manage option.
Step 2: Open the Websites List
Once inside the server panel, the server summary groups every managed resource — including websites, databases, and cron jobs — under Server Resources.
Locate Server Resources: On the server summary page, find the Server Resources section.
Click Websites: Click the Websites card to open the list of websites hosted on this server.
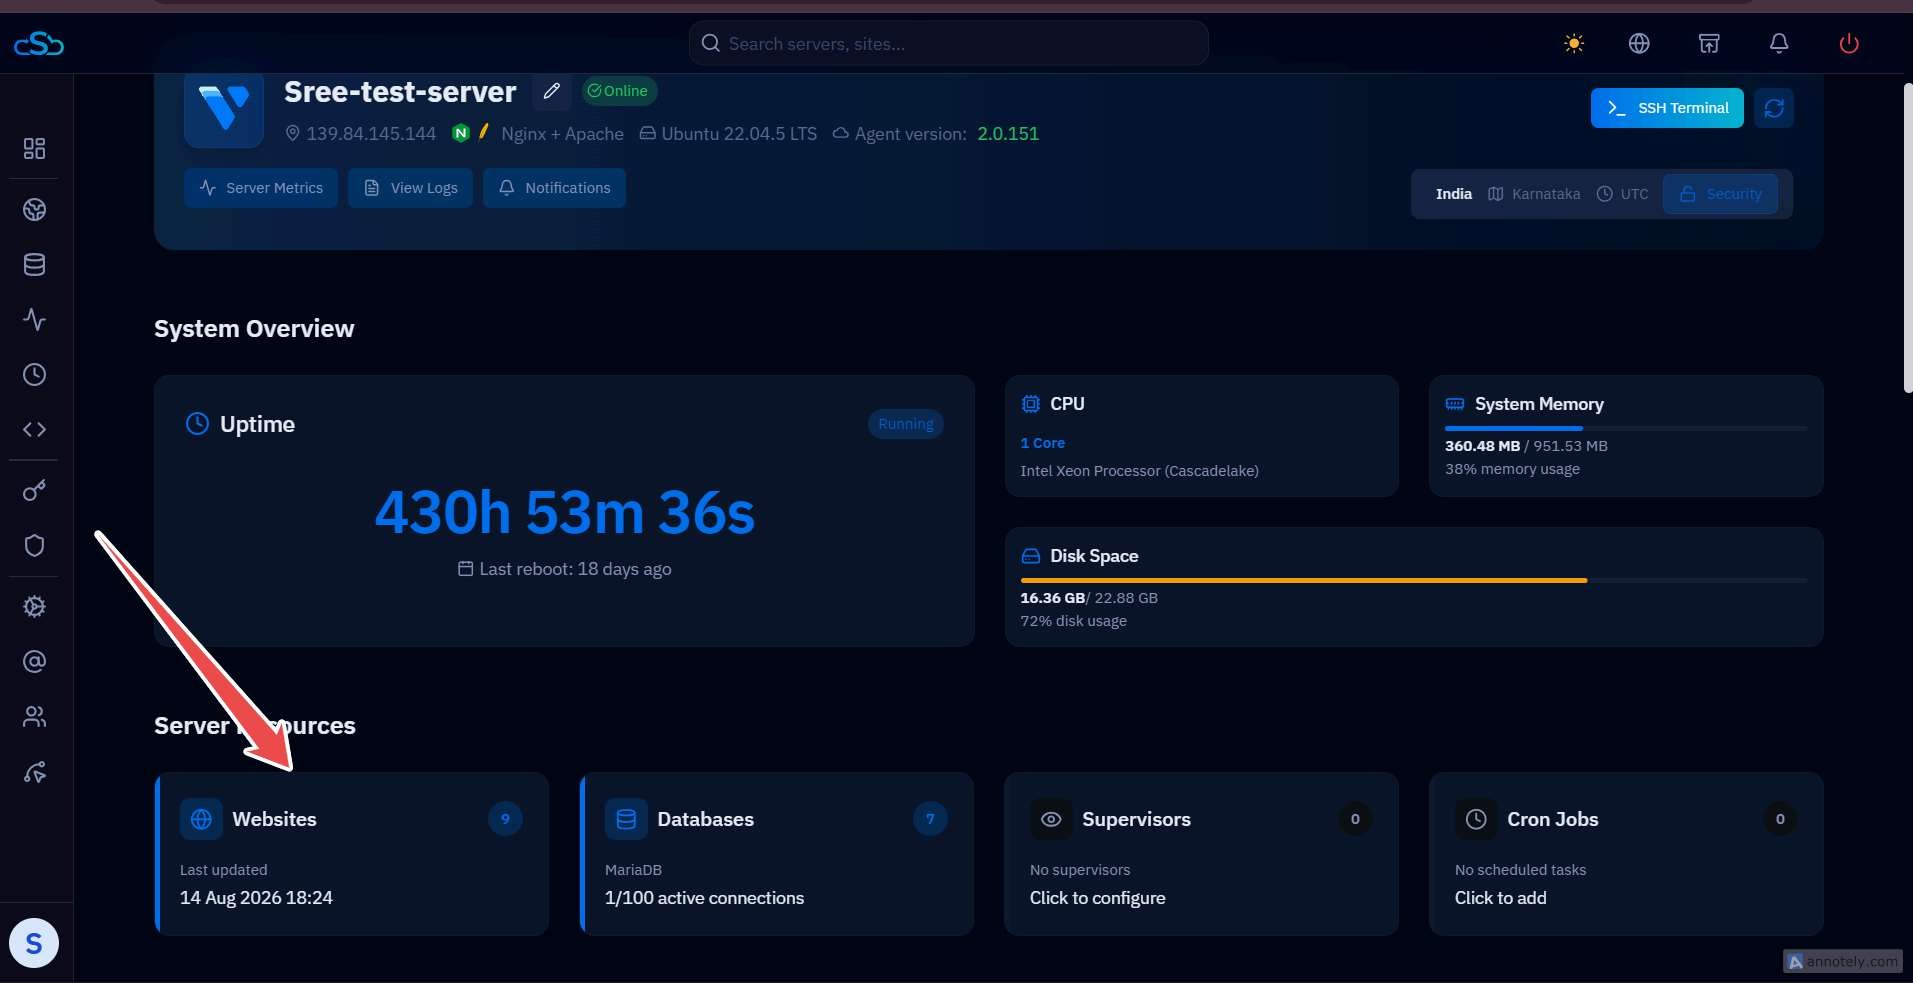
Fig. 02 — Server Summary page showing the Websites resource under Server Resources.
Step 3: Select the Website
The Websites List shows every site hosted on the server, along with its domain, PHP version, and web stack. Choose the specific site whose email accounts need spam filtering.
Locate the website: From the Websites List, find the website for which you want to enable Spam Protection.
Click the website name: Click the site — for example, testashsite — to open its website management page.
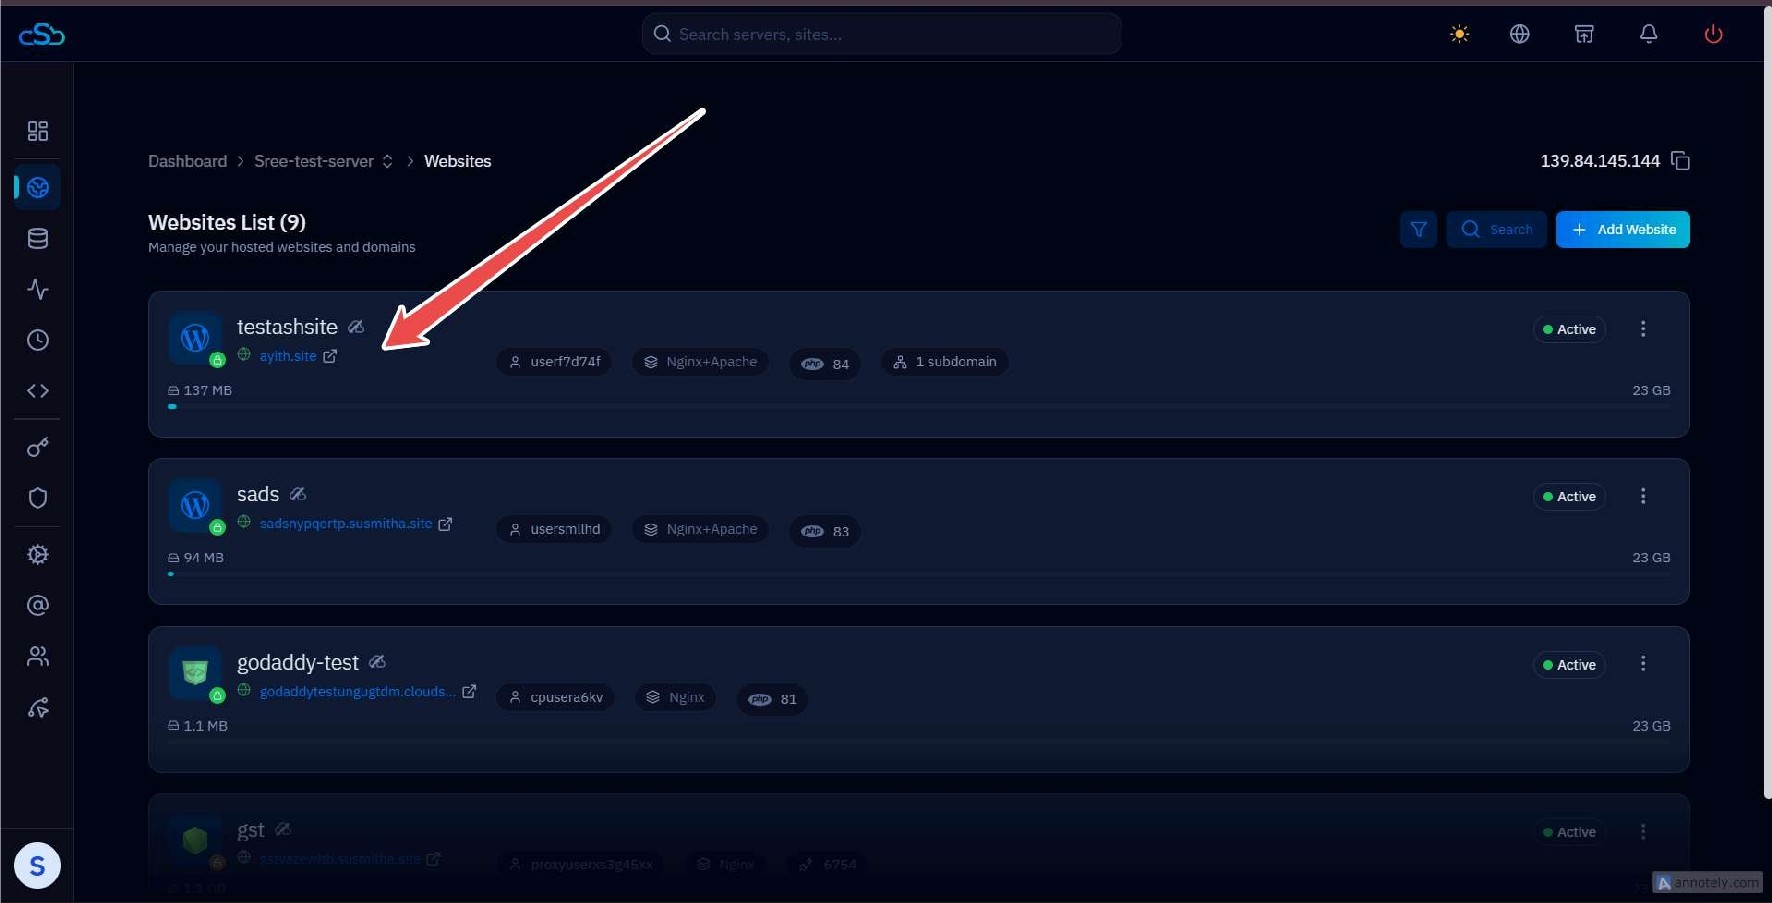
Fig. 03 — Websites List showing a website selected to open its management page.
Step 4: Open Email Accounts
Every website management page has a top navigation bar for its individual tools — file manager, databases, SSL, and email. Spam Protection lives inside the Email Accounts section.
Locate the navigation menu: Find the tab bar at the top of the website management page.
Click Email Accounts: Select Email Accounts to open the mailboxes associated with the selected website.
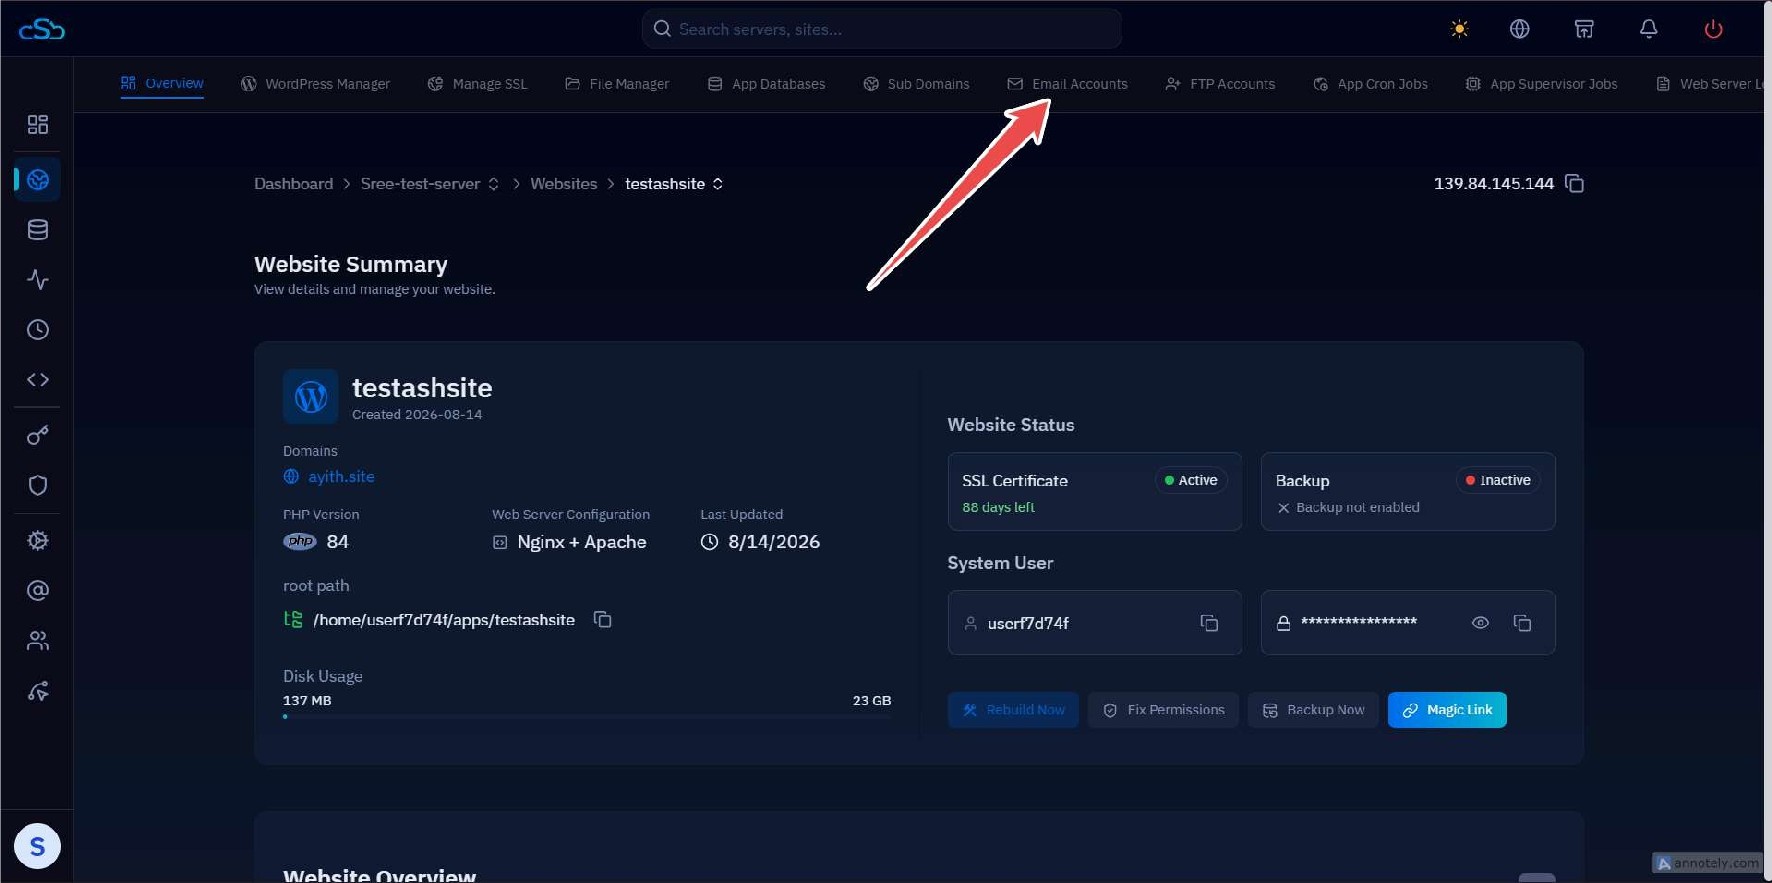
Fig. 04 — Website Summary page showing the Email Accounts option in the top navigation.
Step 5: Open Spam Protection
The Email Accounts page lists every mailbox on the domain along with quick actions for authentication, webmail, and spam filtering — all scoped to the website as a whole.
Locate the Spam Protection button: On the Email Accounts page, find the Spam Protection button in the top-right action bar.
Click Spam Protection: Click it to open the spam filtering settings for the website.
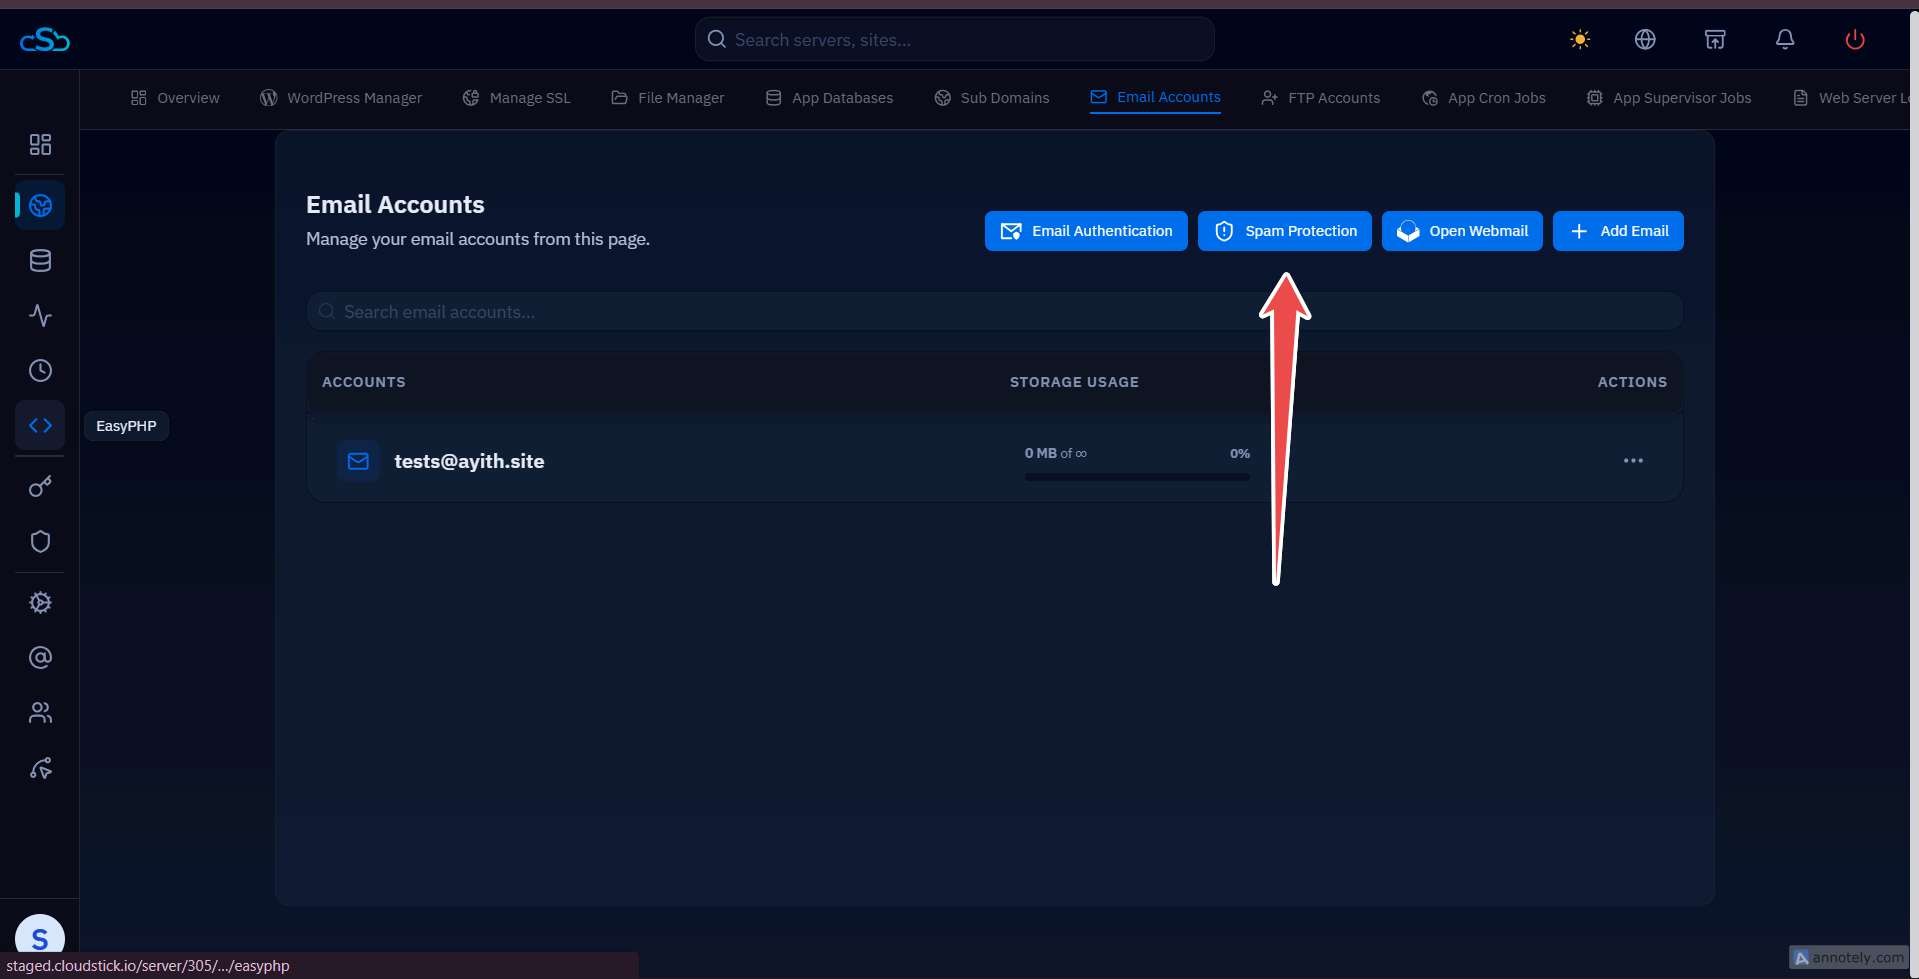
Fig. 05 — Email Accounts page showing the Spam Protection button alongside Email Authentication, Open Webmail, and Add Email.
Step 6: Enable Spam Checking
The Spam Protection window offers two independent toggles that control how strictly SpamAssassin treats suspected spam for this domain.
Enable spam checking: Turn this on to have SpamAssassin scan incoming email and add spam-related headers to messages it flags as suspicious.
Reject high-scoring spam: Turn this on if you want messages that score highly for spam to be rejected outright, rather than simply tagged. This option requires spam checking to be enabled first.
Select the combination of options that matches how strict you want filtering to be.
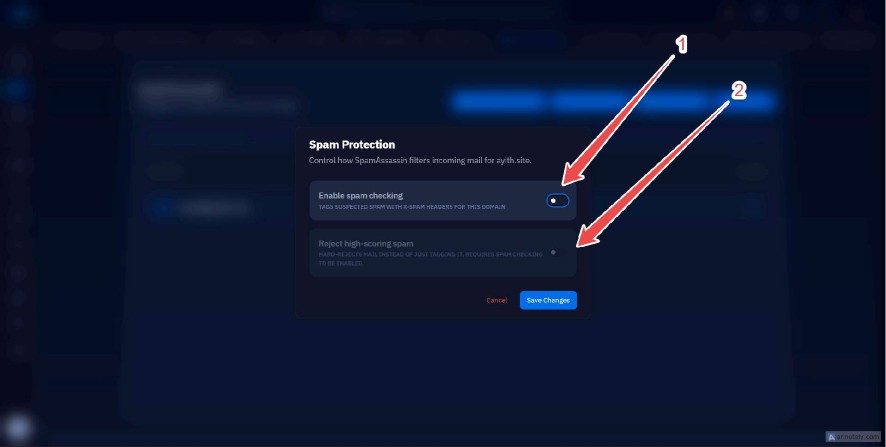
Fig. 06 — Spam Protection settings showing the Enable spam checking and Reject high-scoring spam toggles.
Step 7: Save the Changes
Once the desired Spam Protection options are selected, saving applies the configuration to the website immediately.
Review the selected settings to confirm they match what you want.
Click Save Changes to apply the Spam Protection configuration to the website.
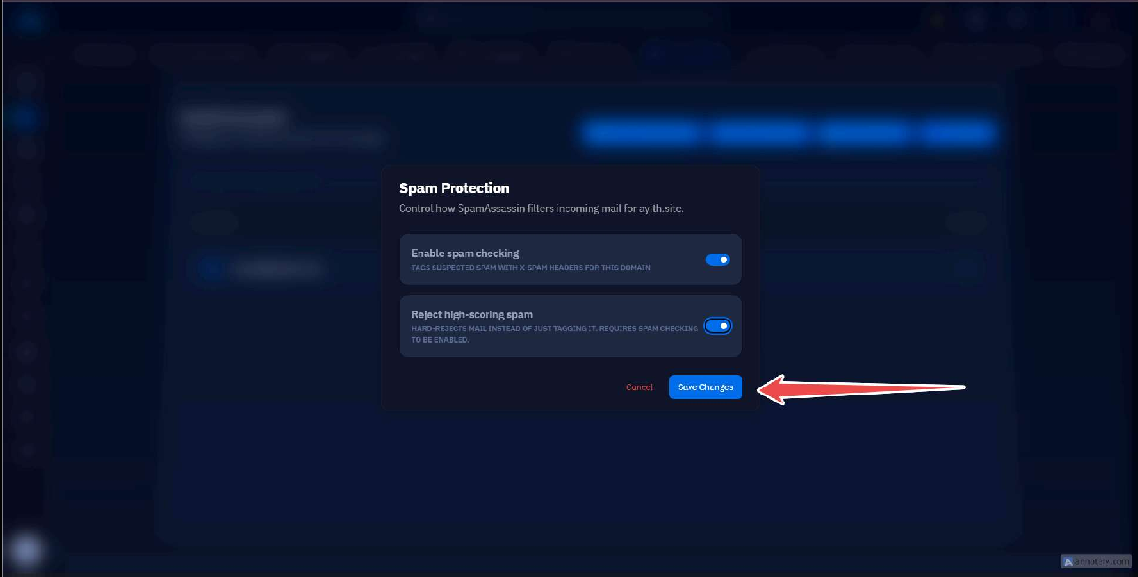
Fig. 07 — Spam Protection settings with both options enabled and the Save Changes button highlighted.
Spam Protection is now active for every email account under this website. Incoming mail will be scanned by SpamAssassin, and — if you enabled it — high-scoring spam will be rejected instead of delivered.