How to Create Email Accounts in CloudStick
Overview
CloudStick lets you create and manage professional email accounts directly from the website panel — no separate mail server setup required. Once an email account is created, you can configure DNS authentication records to protect your domain's sending reputation, then access your inbox through the built-in Roundcube webmail interface.
This guide covers creating an email account, adding DNS authentication records via Cloudflare, and opening webmail — along with common troubleshooting scenarios.
Prerequisites: A website must already exist on your server before you can create email accounts. You will also need a Cloudflare account with your domain added if you want CloudStick to configure DNS records automatically. If Cloudflare is not yet integrated, you can still add the DNS records manually in your provider's dashboard.
Step 1: Create an Email Account
Navigate to the website where you want to add email, then open the Email Accounts section to create your first address.
Open your website: From the server panel, click the website name to open its management view, then navigate to the Email Accounts tab.
Click + Add Email: In the top right corner of the Email Accounts page, click the + Add Email button.
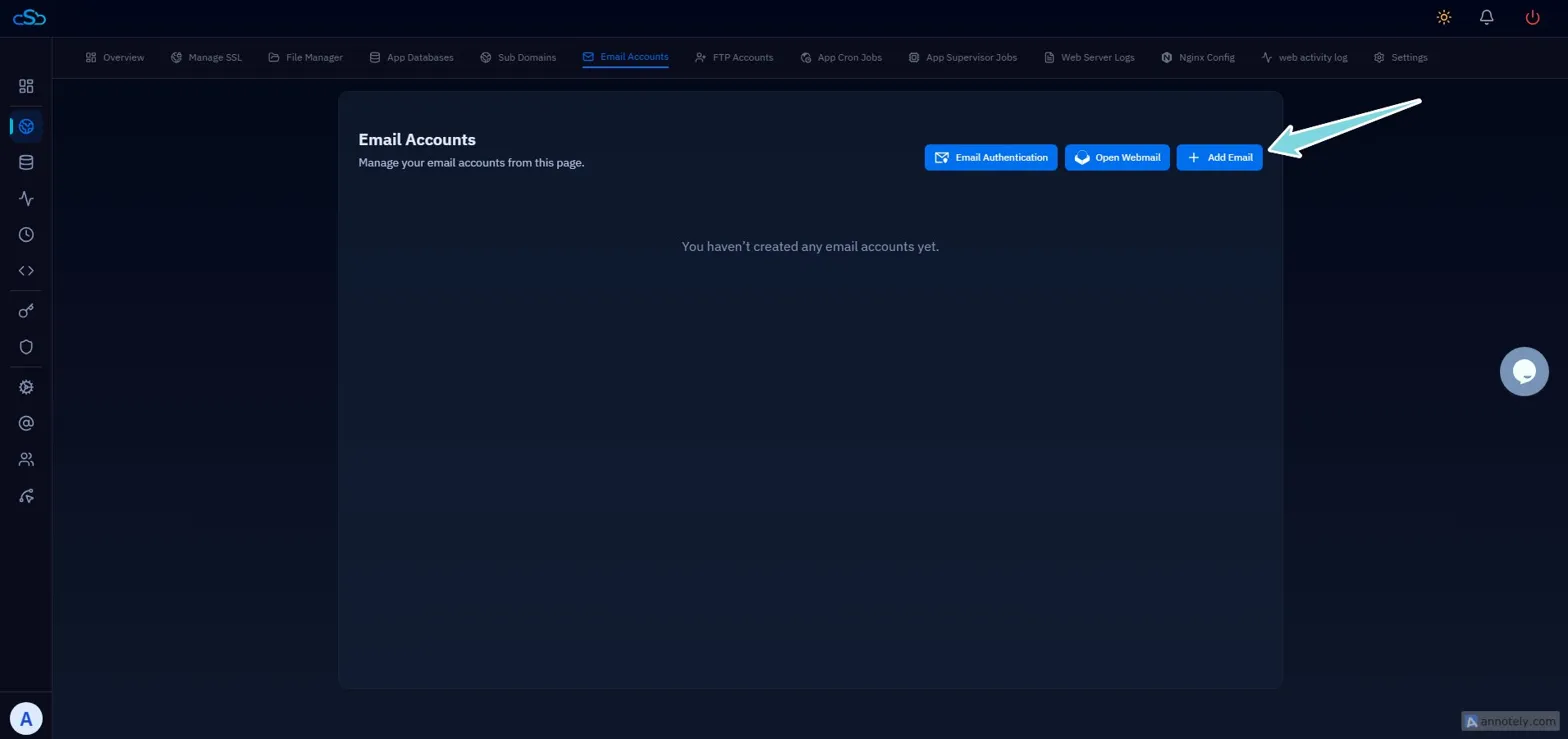
Fig. 01 — Email Accounts page with the + Add Email button highlighted.
The Create New Email Address form will appear. Fill in the following fields:
User Name: Enter the username for the address — for example, enter info to create info@yourdomain.com.
Password: Enter a password of at least 8 characters, or click Generate to have one created automatically.
Authorisation Method: Select Unlimited for no sending restrictions, or Limited to cap the number of outgoing emails.
Click Create Email to save the account.

Fig. 02 — Create New Email Address form showing the User Name, Password, and Authorisation Method fields.
Step 2: Set Up Email Authentication
Email authentication records (A, MX, SPF, DKIM, DMARC) tell receiving mail servers how to verify that messages from your domain are legitimate. Setting these up prevents your emails from being flagged as spam.
Click Email Authentication: From the Email Accounts page, click the Email Authentication button.
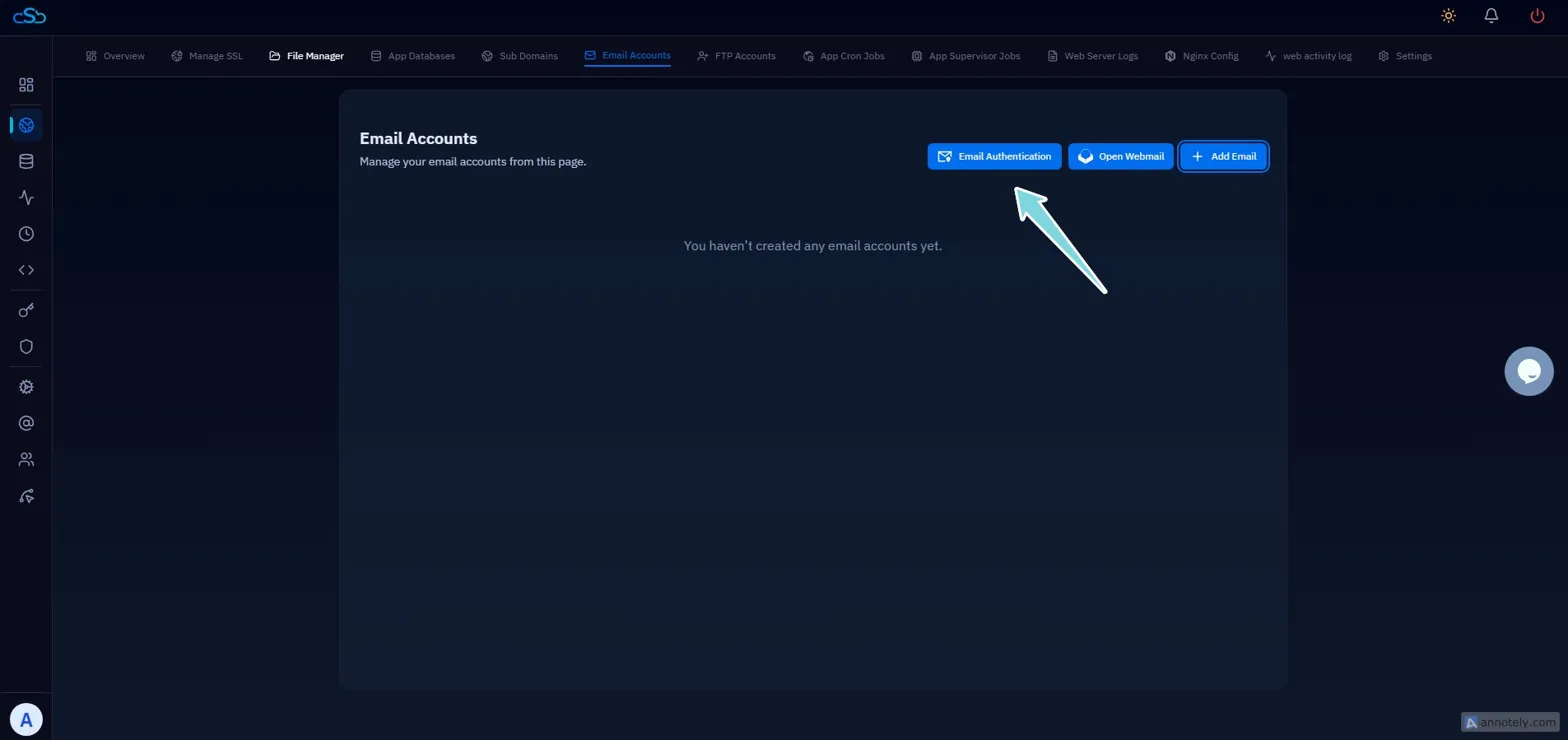
Fig. 03 — Email Accounts page with the Email Authentication button highlighted.
The Email Authentication popup will display the required DNS records for your domain.
Select your Cloudflare account: Choose the connected Cloudflare account from the Select Cloudflare Account dropdown.
Click Add DNS Records: CloudStick will add all required DNS records to Cloudflare automatically.
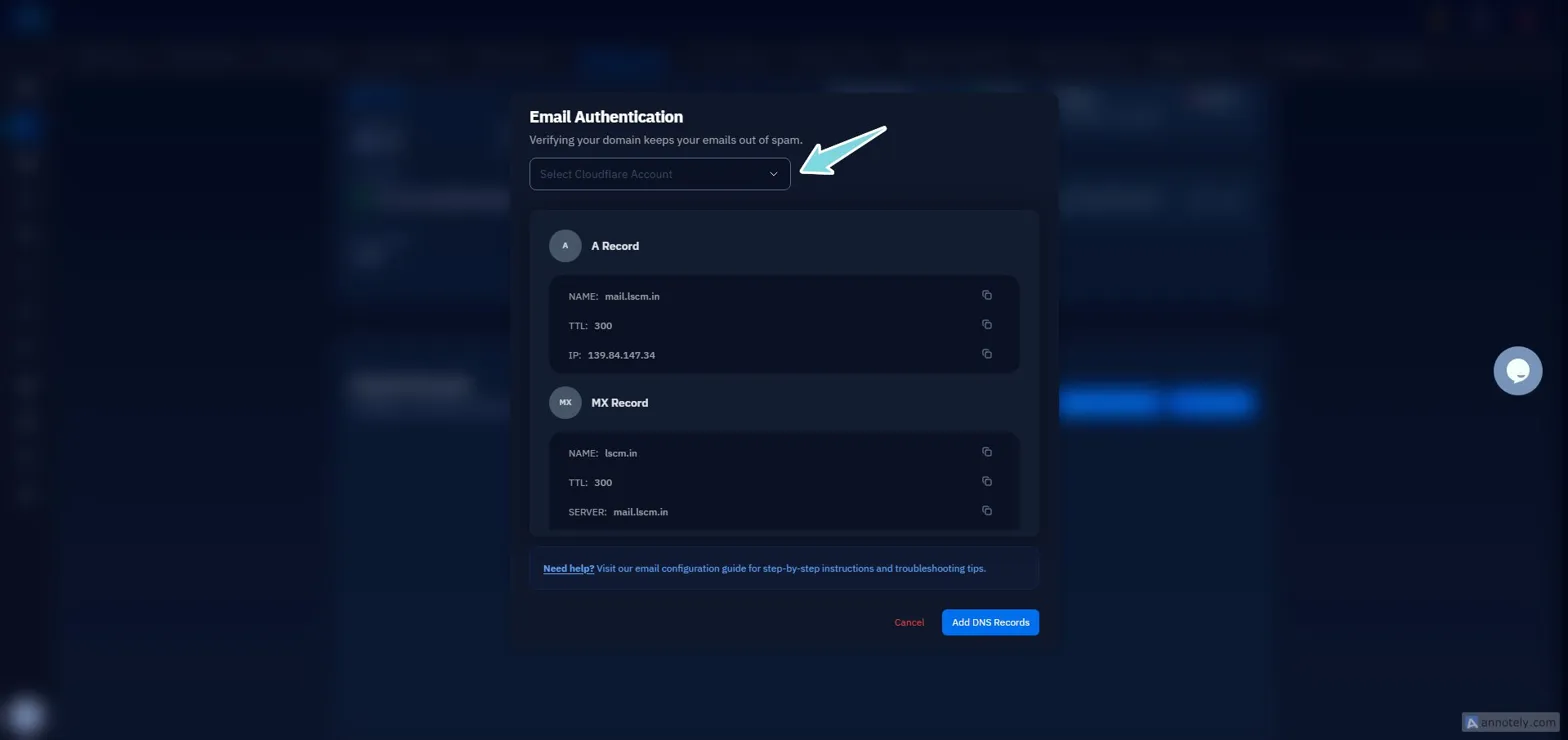
Fig. 04 — Email Authentication popup showing A Record and MX Record details with the Add DNS Records button.
If you are not using Cloudflare, copy the record values shown in the popup and add them manually in your DNS provider's dashboard.
Step 3: Open Webmail
Once DNS records have been added, your Roundcube webmail interface is ready to use. You can access it directly from the Email Accounts page.
Click Open Webmail: From the Email Accounts page, click the Open Webmail button. Roundcube will open in a new browser tab.
Log in: Use the full email address (e.g., info@yourdomain.com) and the password you set in Step 1.
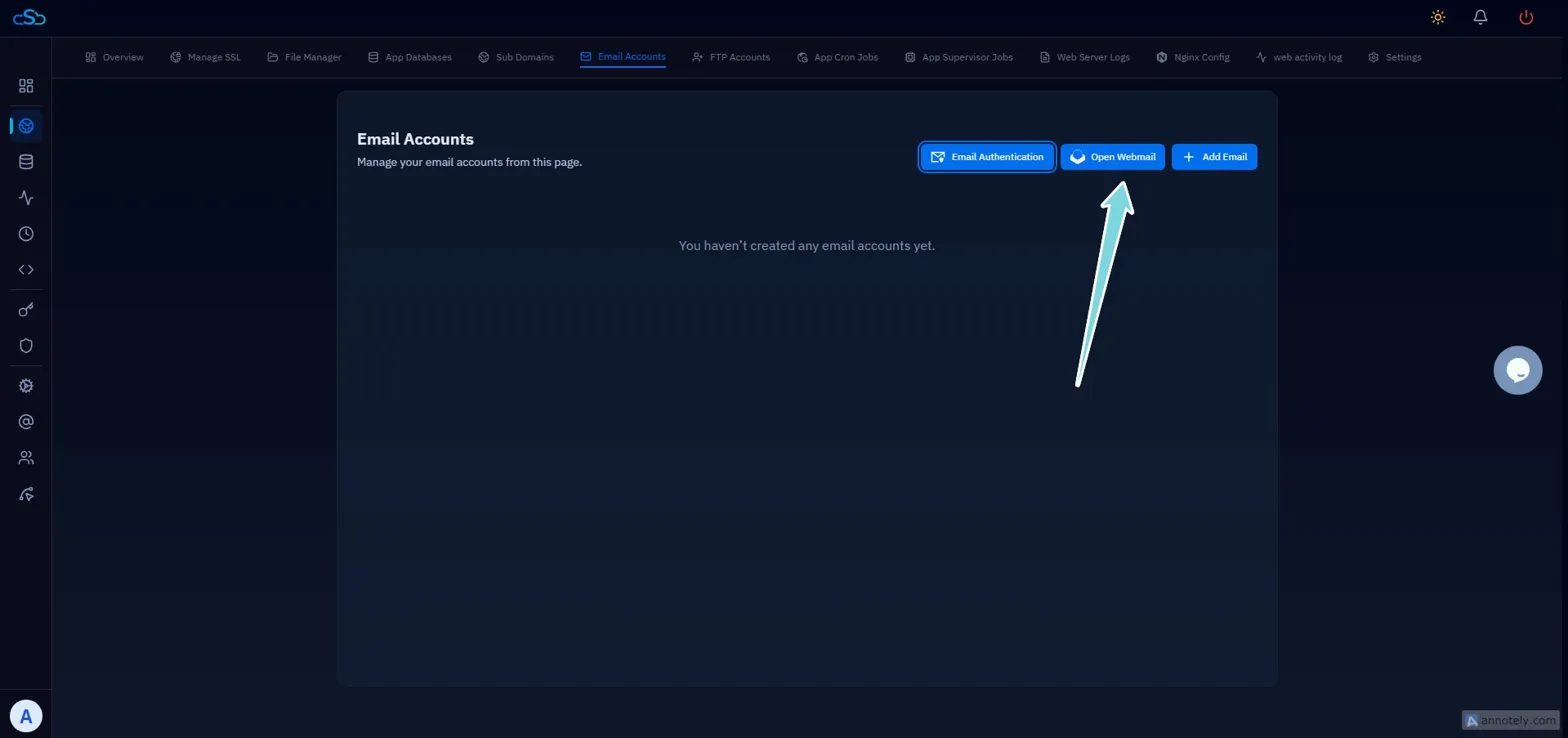
Fig. 05 — Email Accounts page with the Open Webmail button highlighted.
Your email account is now active, DNS authentication is configured, and the webmail interface is accessible. DNS propagation can take up to 48 hours — if email is not working immediately, wait and test again.
Troubleshooting Common Issues
If you run into problems during or after setup, the scenarios below cover the most common causes.
Emails going to spam after setup
DNS records may not have propagated yet — this can take 24–48 hours. Verify the A and MX records are correctly added in your DNS provider and wait before testing again.
Cannot log in to Roundcube
Make sure you are using the full email address (e.g., info@yourdomain.com) as the username, not just the prefix.
SSL installation failed
Go to Manage SSL → Deploy New SSL, select Roundcube, choose HTTP or DNS as the authorization method, select Only HTTPS, and click Deploy SSL.
Cloudflare account not showing in dropdown
The Cloudflare integration has not been connected to CloudStick. Complete the Cloudflare integration from the server panel before returning to this step.
Keep your email password stored securely — there is no password recovery option inside the Roundcube webmail interface itself. The Cloudflare proxy for your mail subdomain should be set to DNS only (grey cloud) to avoid connection errors.