How to Set Up SendGrid as an SMTP Relay in CloudStick
Overview
Sending email directly from your server's IP is convenient, but unreliable — new server IPs have no reputation, and messages frequently end up in spam. Configuring an SMTP relay routes all outgoing mail through a trusted third-party provider like SendGrid, Postmark, or Mailjet, dramatically improving deliverability for transactional emails sent by your web applications.
This guide walks through configuring Exim4 — the mail transfer agent that ships with CloudStick by default — as an SMTP relay. All commands can be run from the CloudStick browser-based SSH terminal without needing an external SSH client.
About Exim4
Exim4 is a highly flexible Mail Transfer Agent (MTA) that handles all outgoing and incoming mail on your CloudStick server. It is Sendmail-compatible, has broad community support, and scales well for complex routing configurations. The three blocks you will add to its config file — authenticator, router, and transport — tell it exactly how to connect to and authenticate with your chosen SMTP provider.
Prerequisites: Root or sudo SSH access to your CloudStick server. Exim4 installed (ships with CloudStick by default — Step 1 covers verification). SMTP credentials from your email provider: for SendGrid this is an API key, for Postmark it is the Server API Token found in your Postmark account dashboard, for Mailjet it is your API key and secret.
Step 1: Verify Exim4 Is Installed
Before editing any configuration, confirm that Exim4 is present on your server. Run the following command in the SSH Terminal:
dpkg -l | grep eximIf Exim4 is installed, you will see it listed in the output. If nothing appears, install it before continuing — though on all standard CloudStick servers it ships pre-installed.
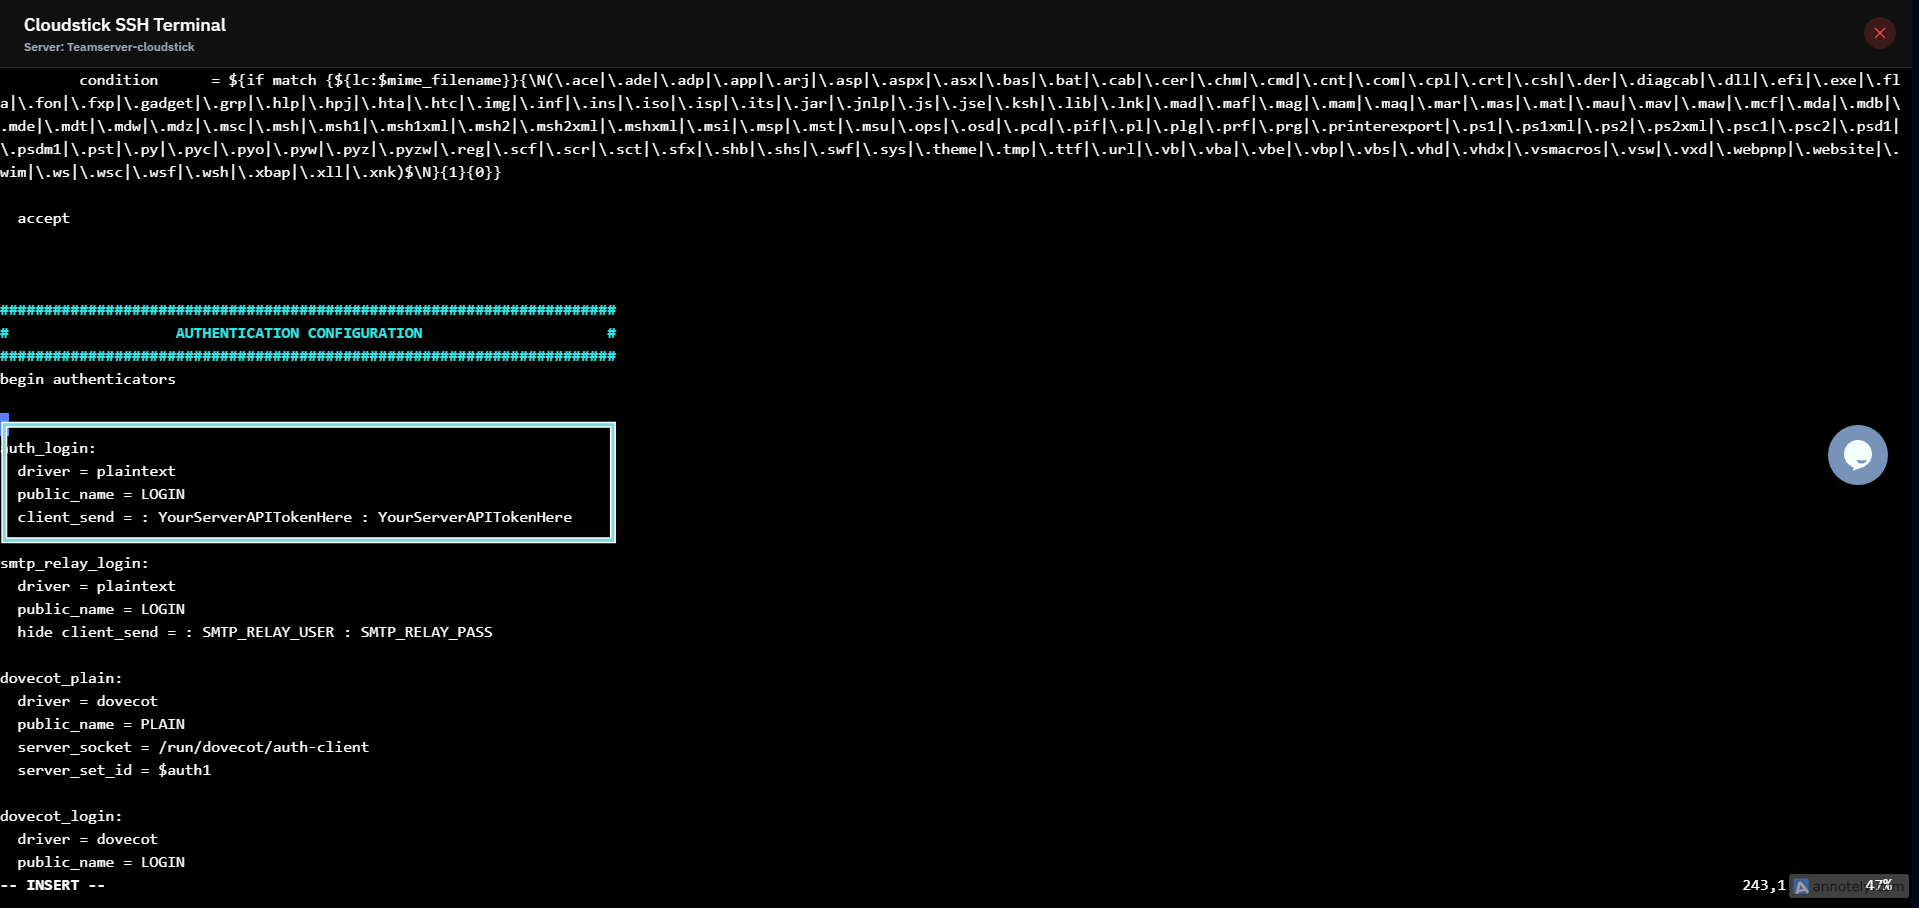
Fig. 01 — SSH Terminal output confirming Exim4 is installed on the server.
Step 2: Back Up the Config File
Always create a backup before editing Exim's configuration. A single syntax error will prevent Exim4 from restarting and break all outgoing mail — the backup lets you restore instantly.
cp -r /etc/exim4/exim4.conf.template /etc/exim4/exim4.conf.template-bakKeep this backup in place until you have confirmed mail is routing correctly through your SMTP provider.
Step 3: Open the Config File
Open the Exim4 configuration template in the vim editor. You will add the authenticator, router, and transport blocks in the steps that follow.
vim /etc/exim4/exim4.conf.template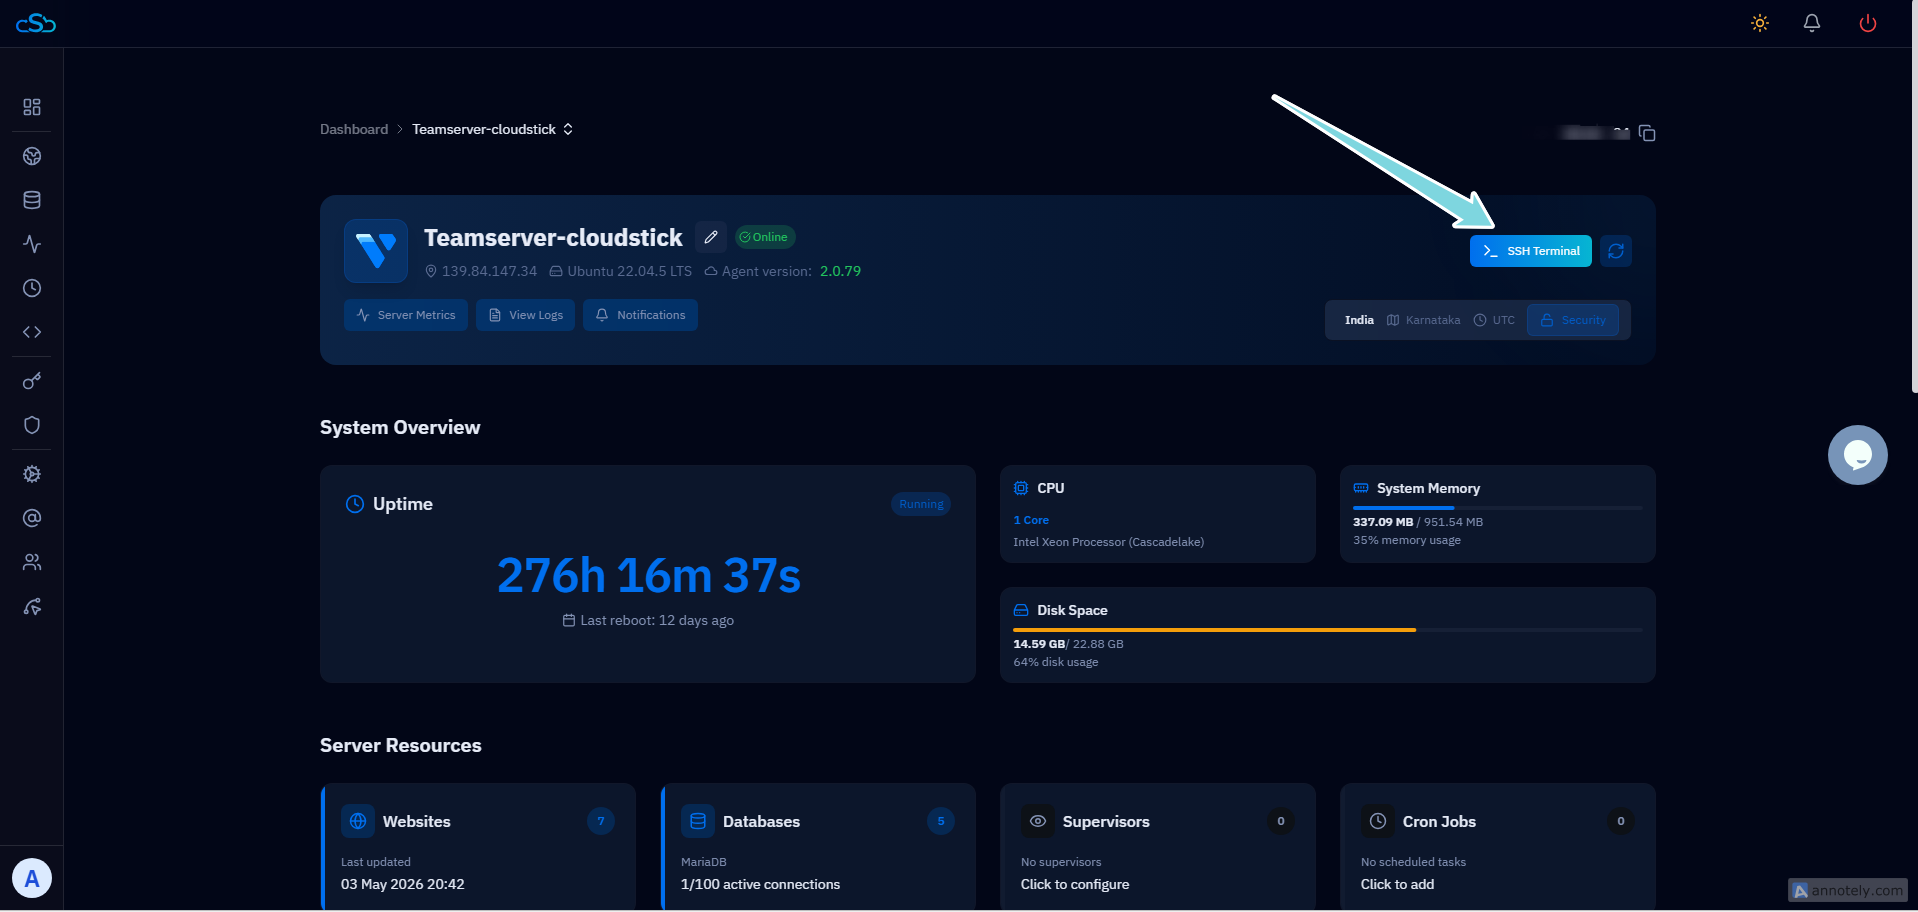
Fig. 02 — Exim4 configuration file open in vim, ready for the relay blocks to be added.
Step 4: Add the Authenticator
The authenticator block defines how Exim4 proves your identity to the SMTP provider's server. It uses the plaintext LOGIN method with your API token as the credential.
Locate the authenticators section: Scroll to the line that reads begin authenticators.
Add the following block immediately after that line:
auth_login:
  driver = plaintext
  public_name = LOGIN
  client_send = : YourServerAPITokenHere : YourServerAPITokenHere
Replace both instances of YourServerAPITokenHere with your actual API token or credentials from your provider. For Postmark, use the Server API Token from your Postmark dashboard. For SendGrid, use your API key. For Mailjet, use APIKey : SecretKey format.
Step 5: Add the Router
The router block tells Exim4 to direct all outgoing mail for non-local domains through your SMTP relay, rather than attempting direct delivery from your server's IP.
Locate the routers section: Scroll to the line that reads begin routers.
Add the following block immediately after that line:
smart_route:
  driver = manualroute
  domains = ! +local_domains
  ignore_target_hosts = 127.0.0.0/8
  transport = auth_relay
  route_list = * your.provider.smtp.host
no_moreReplace the route_list hostname with the correct SMTP endpoint for your provider:
| Provider | route_list value |
|---|---|
| Postmark | * smtp.postmarkapp.com |
| Mailjet | * in.mailjet.com:587 |
| SendGrid | * smtp.sendgrid.net::587 byname |
Fig. 03 — Exim4 config with the authenticator and router blocks added in their respective sections.
Step 6: Add the Transport
The transport block sets the connection parameters Exim4 uses when it actually connects to the relay — port, TLS enforcement, and authentication requirement.
Locate the transports section: Scroll to the line that reads begin transports.
Add the following block immediately after that line:
auth_relay:
  driver = smtp
  port = 587
  hosts_require_auth = $host_address
hosts_require_tls = $host_addressPort 587 is the standard SMTP submission port used by SendGrid, Postmark, and Mailjet.
hosts_require_tls ensures the connection is always encrypted before credentials leave your server.
Step 7: Save and Restart Exim4
Save the file, then restart Exim4 to apply all three blocks. If Exim4 fails to restart, there is likely a syntax error — use the verification command below before restarting.
Save and exit vim: Press Esc, then type :wq and press Enter.
Optional — verify config syntax before restarting:
exim4 -C /etc/exim4/exim4.conf.template -bVRestart Exim4:
systemctl restart exim4.serviceIf Exim4 fails to restart, restore the backup immediately: cp /etc/exim4/exim4.conf.template-bak /etc/exim4/exim4.conf.template then systemctl restart exim4.service.
Step 8: Send a Test Email
With Exim4 restarted, send a quick test message to confirm mail is routing through your SMTP provider correctly.
Run the test command:
mail -s "Exim Test" yourname@yourdomain.com < /dev/nullReplace yourname@yourdomain.com with a real email address you can check.
Monitor the mail log: Watch for a handoff confirmation to your SMTP endpoint:
tail -f /var/log/exim4/mainlogIf the email arrives within a few minutes and the log shows delivery to your provider's SMTP host, the relay is working correctly.
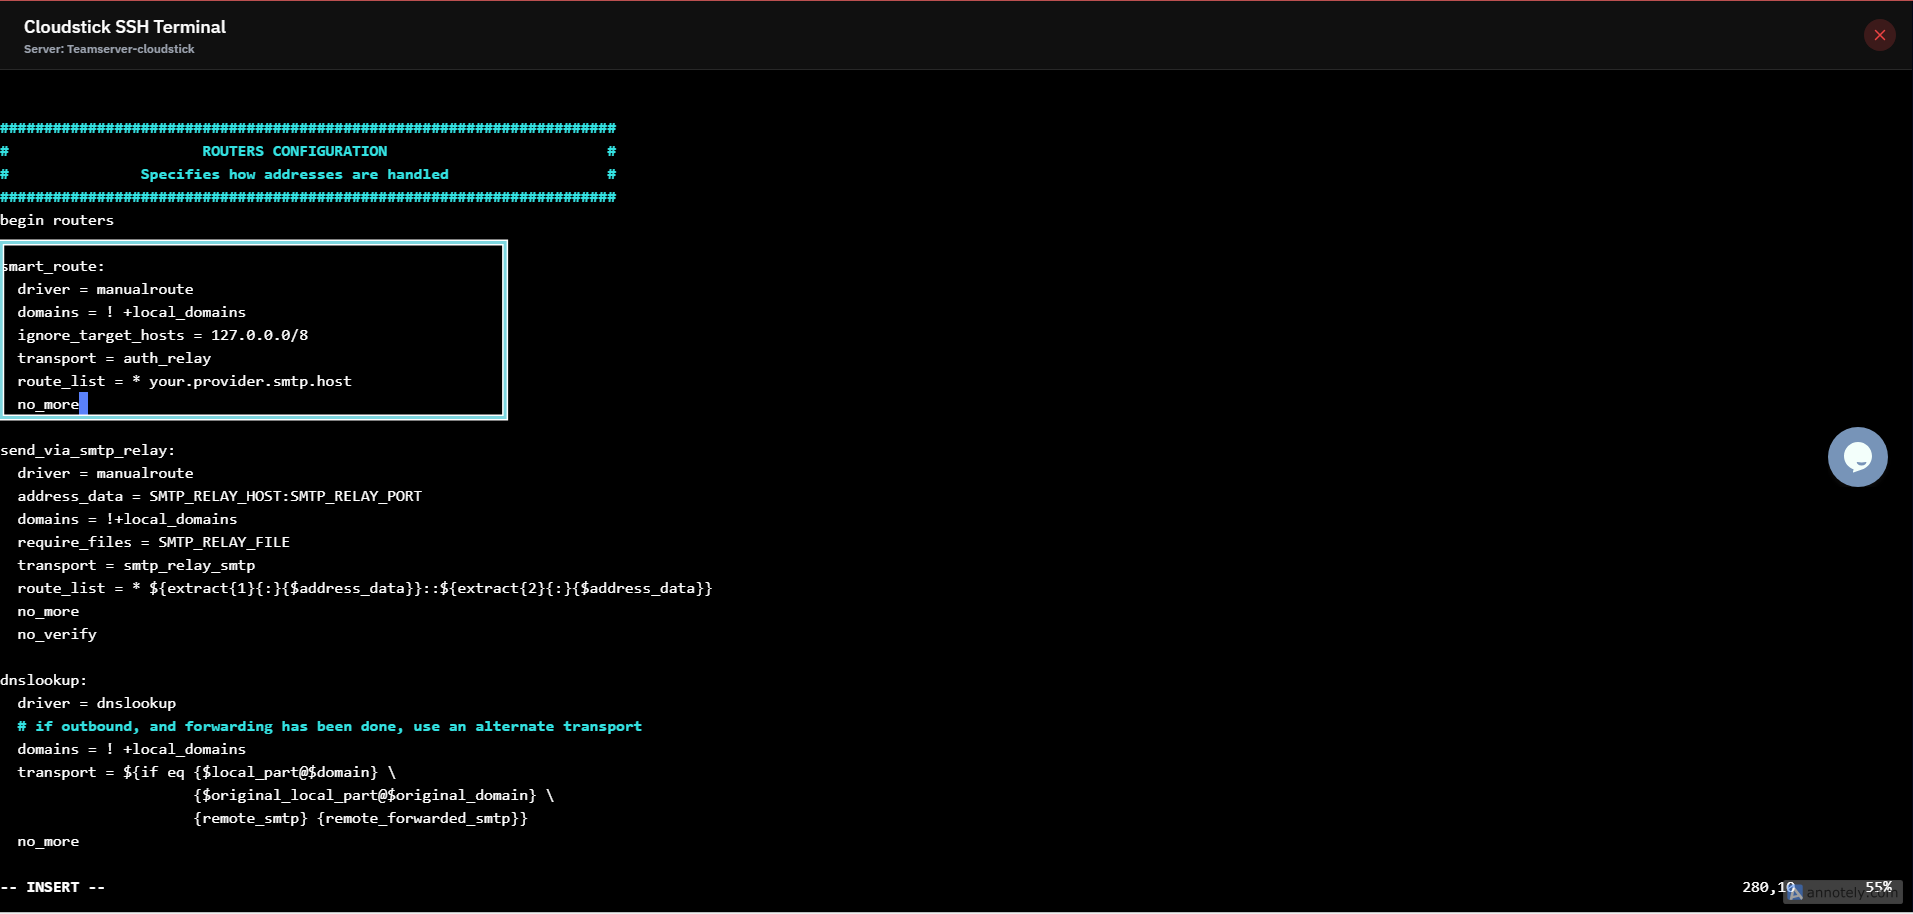
Fig. 04 — Exim4 mainlog confirming the test email was handed off to the configured SMTP relay.
Common failures: Authentication failed — double-check both instances of the API token in the client_send line. Mail not routing — verify the route_list endpoint matches your provider exactly (see the table in Step 5). TLS or connection error — port 587 may be blocked by your firewall; check your CSF rules in the CloudStick Firewall section.