How to Set Up Amazon SES as a Mail Relay in CloudStick
Overview
By default, your CloudStick server sends outgoing email directly from its own IP address. This works, but unverified IPs are frequently flagged as spam by recipient mail servers — especially on newer servers without an established sending reputation. Routing mail through Amazon SES solves this: your messages leave via Amazon's trusted infrastructure, which significantly improves deliverability and keeps your server's IP clean.
This guide walks through adding three blocks to Exim's configuration file — the mail transfer agent CloudStick uses — to direct all outgoing mail through your Amazon SES SMTP endpoint. All steps can be completed from the CloudStick browser-based SSH terminal without needing a separate SSH client.
How It Works
You will add three blocks to the Exim config file, each serving a specific purpose:
Authenticator — defines how Exim logs in to Amazon SES using your SMTP credentials.
Router — directs all outgoing non-local mail through SES instead of attempting direct delivery.
Transport — sets the connection parameters: port 587, TLS requirement, and authentication enforcement.
Prerequisites: You need root or sudo SSH access to your CloudStick server. Your domain must be verified in Amazon SES — emails will not send until verification is complete. You also need your SES SMTP credentials (generated in the SES Console under SMTP Settings → Create SMTP Credentials) and your regional SES SMTP endpoint (e.g. email-smtp.us-east-1.amazonaws.com). SES SMTP credentials are separate from your AWS account login.
Step 1: Back Up the Config File
Before editing anything, create a backup of the existing Exim configuration. This gives you a clean restore point if a syntax error causes Exim to fail on restart.
Open the SSH Terminal: In your CloudStick dashboard, navigate to your server and click the SSH Terminal button in the top right corner to open a browser-based terminal session.
Run the backup command:
cp /etc/exim4/exim4.conf.template /etc/exim4/exim4.conf.template-backKeep this backup intact until you have confirmed that outgoing mail is routing through SES correctly. If anything goes wrong, you can restore it instantly.
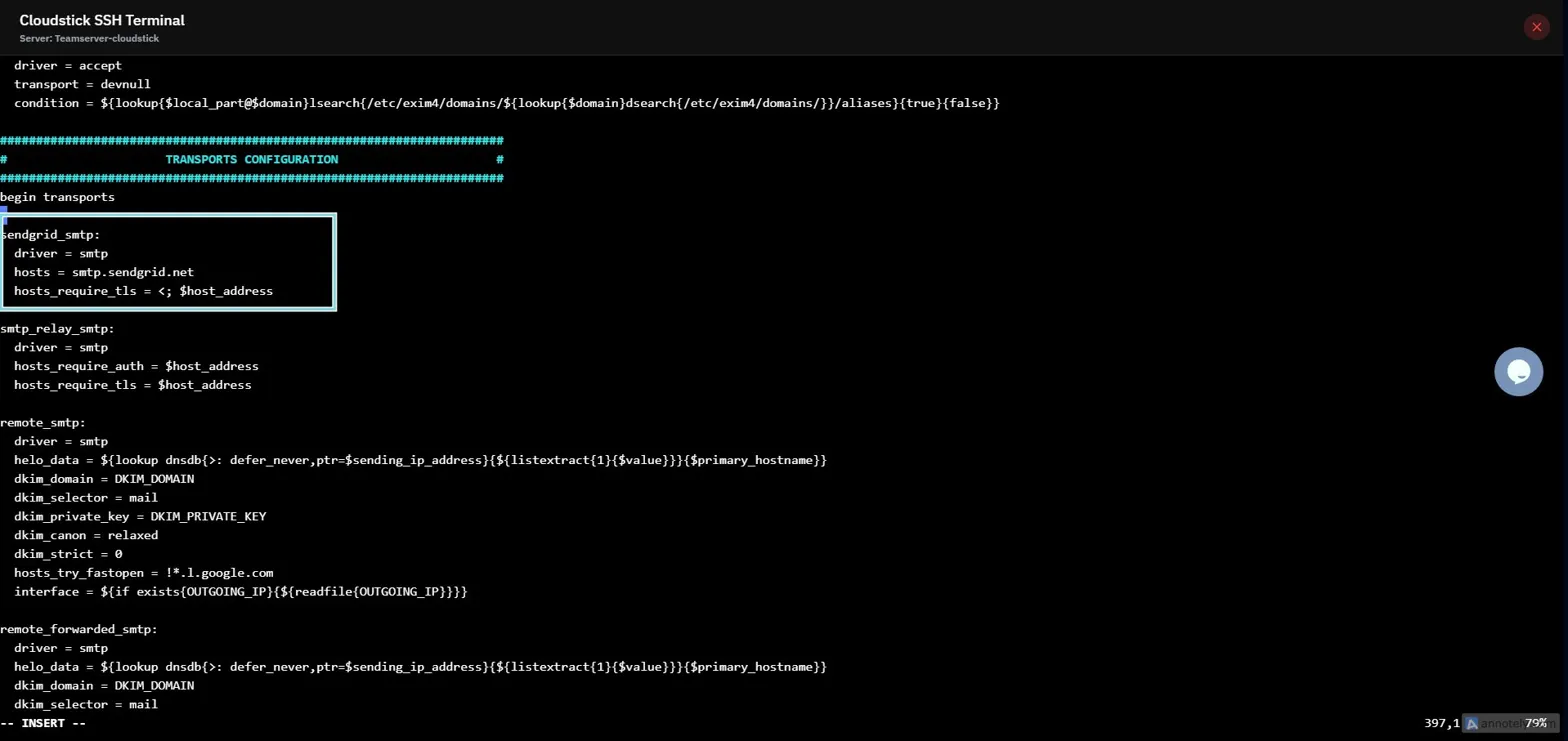
Fig. 01 — CloudStick SSH Terminal with the config backup command ready to run.
Step 2: Open the File for Editing
Open the Exim configuration template in the vi editor. You will add the three configuration blocks in the steps that follow.
vi /etc/exim4/exim4.conf.template
Fig. 02 — Exim4 configuration file open in vi, ready for editing.
Step 3: Add the Authenticator
The authenticator block tells Exim how to prove your identity to the SES SMTP server. It uses the plaintext LOGIN method with your SES SMTP credentials.
Locate the authenticators section: Scroll to the line that reads begin authenticators.
Add the following block immediately after that line:
ses_login:
  driver = plaintext
  public_name = LOGIN
  client_send = : user : password
Replace user and password with your actual SES SMTP credentials — not your AWS console username and password. Generate these from the SES Console under SMTP Settings → Create SMTP Credentials.
Step 4: Add the Router
The router block instructs Exim to send all outgoing mail destined for non-local domains through your SES SMTP endpoint, rather than attempting direct delivery.
Locate the routers section: Scroll to the line that reads begin routers.
Add the following block immediately after that line:
send_via_ses:
  driver = manualroute
  domains = ! +local_domains
  transport = ses_smtp
route_list = * email-smtp.your-region.amazonaws.comReplace the endpoint: Substitute email-smtp.your-region.amazonaws.com with your actual SES regional endpoint, for example:
email-smtp.us-east-1.amazonaws.com (US East)
email-smtp.eu-west-1.amazonaws.com (EU West)
email-smtp.ap-southeast-1.amazonaws.com (Asia Pacific)
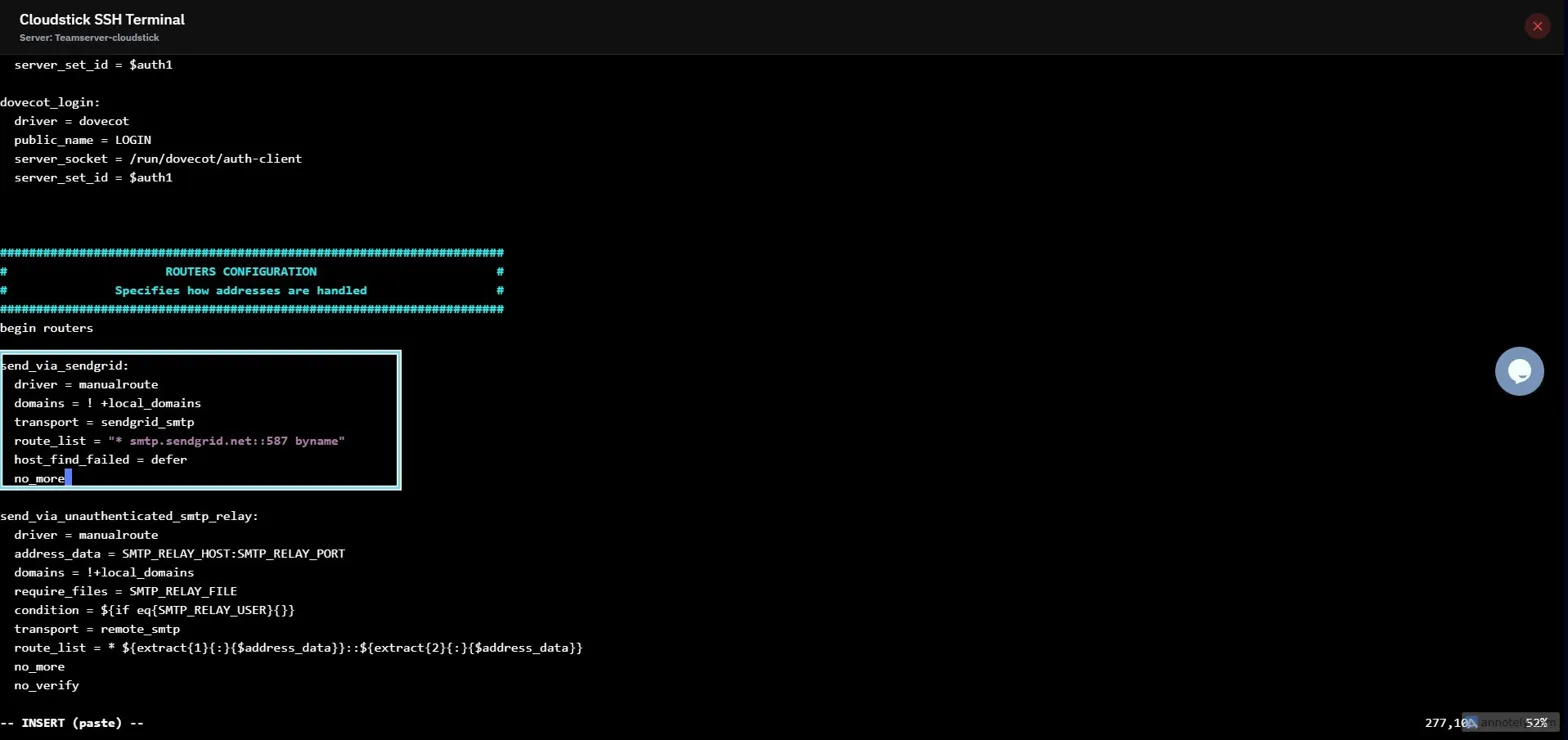
Fig. 03 — Exim4 config showing the authenticator and router blocks added in the correct sections.
Step 5: Add the Transport
The transport block defines the connection settings used when Exim actually connects to SES — specifically the port, TLS requirement, and authentication enforcement.
Locate the transports section: Scroll to the line that reads begin transports.
Add the following block immediately after that line:
ses_smtp:
  driver = smtp
  port = 587
  hosts_require_auth = *
hosts_require_tls = *Port 587 is the standard SMTP submission port used by Amazon SES.
hosts_require_tls = * ensures the connection is always encrypted before credentials are transmitted.
Step 6: Save and Restart Exim
Save the configuration file, then restart Exim to apply all three blocks. After restarting, send a test email to confirm mail is routing through SES.
Save and exit vi: Press Esc, then type :wq and press Enter.
Restart Exim:
service exim4 restartVerify delivery: Send a test email and monitor the Exim log to confirm it was handed off to your SES endpoint:
tail -f /var/log/exim4/mainlogA successful relay will show a log entry confirming the message was delivered to your SES SMTP host.
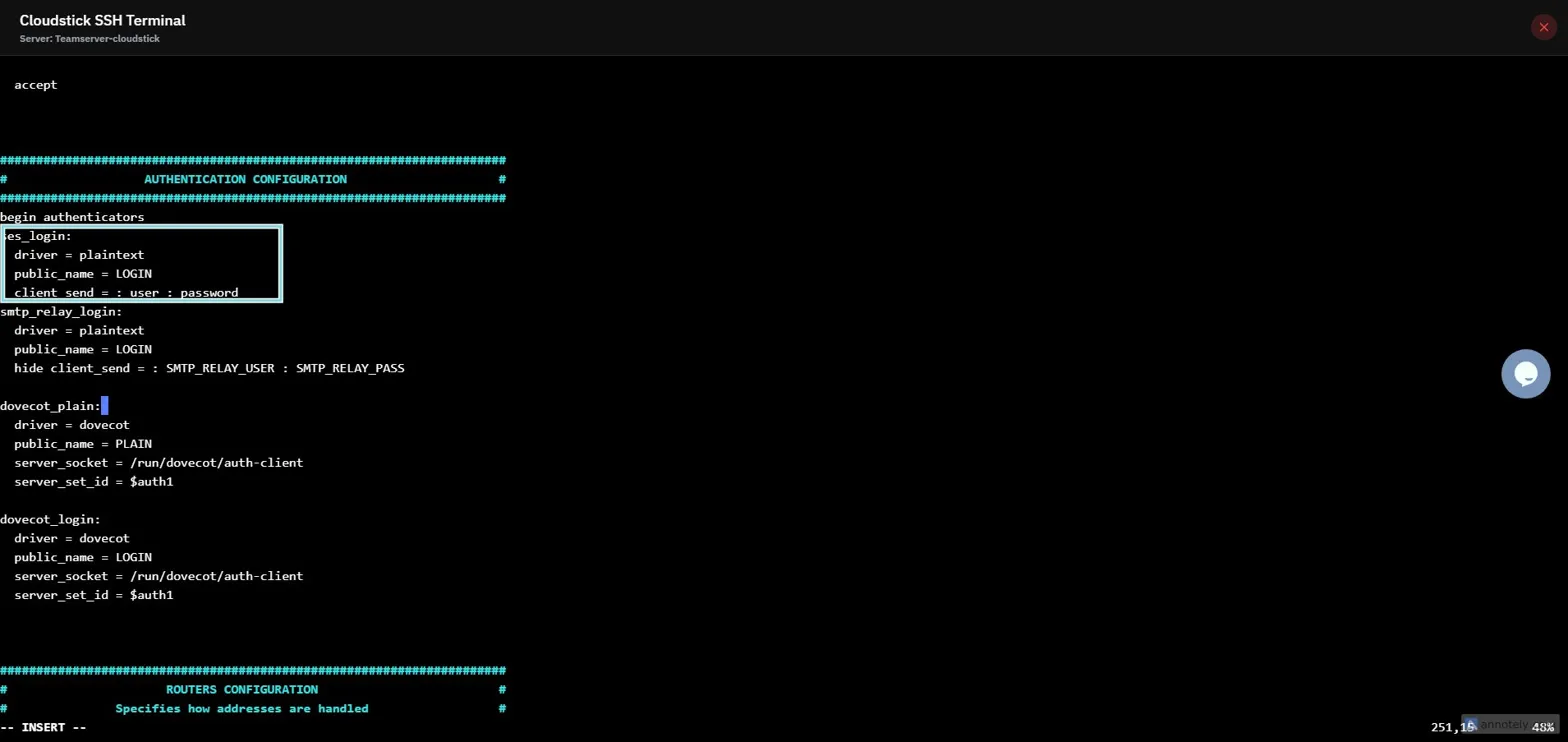
Fig. 04 — Exim4 mainlog showing a successful handoff to the Amazon SES SMTP endpoint.
Common failures: Authentication failed — you may be using your AWS console login instead of SES SMTP credentials; regenerate them from the SES Console. Emails not sending — your domain may not be verified in SES, or your account is still in sandbox mode (request production access from the SES Console). Exim won't restart — there is a syntax or indentation error in the config; restore the backup with cp /etc/exim4/exim4.conf.template-back /etc/exim4/exim4.conf.template then service exim4 restart and start over.