How to Install Roundcube Webmail in CloudStick
Overview
Roundcube is an open-source, browser-based webmail client that gives your users a polished email experience without requiring a separate mail application. Installing it through CloudStick takes only a few clicks — the dashboard handles subdomain provisioning, SSL certificate generation, and Cloudflare DNS configuration automatically.
This guide walks you through enabling webmail on an existing website, configuring the subdomain, completing the Roundcube installation, and understanding common setup issues.
Prerequisites: A website must already exist on your server before you can install Roundcube. You will also need a subdomain (e.g., mail.yourdomain.com) and a Cloudflare account with your domain added. If you have not set up the Cloudflare integration yet, complete that first before continuing.
Step 1: Open Your Website and Enable Webmail
The first step is to navigate to the website where you want webmail and activate the Roundcube installer from within the CloudStick control panel.
Navigate to your website: From the server panel, click on the website name to open its management view.
Scroll to Email Accounts: Within the website settings, scroll down until you reach the Email Accounts section.
Click Enable Webmail: Click the Enable Webmail button to launch the Roundcube installation popup.
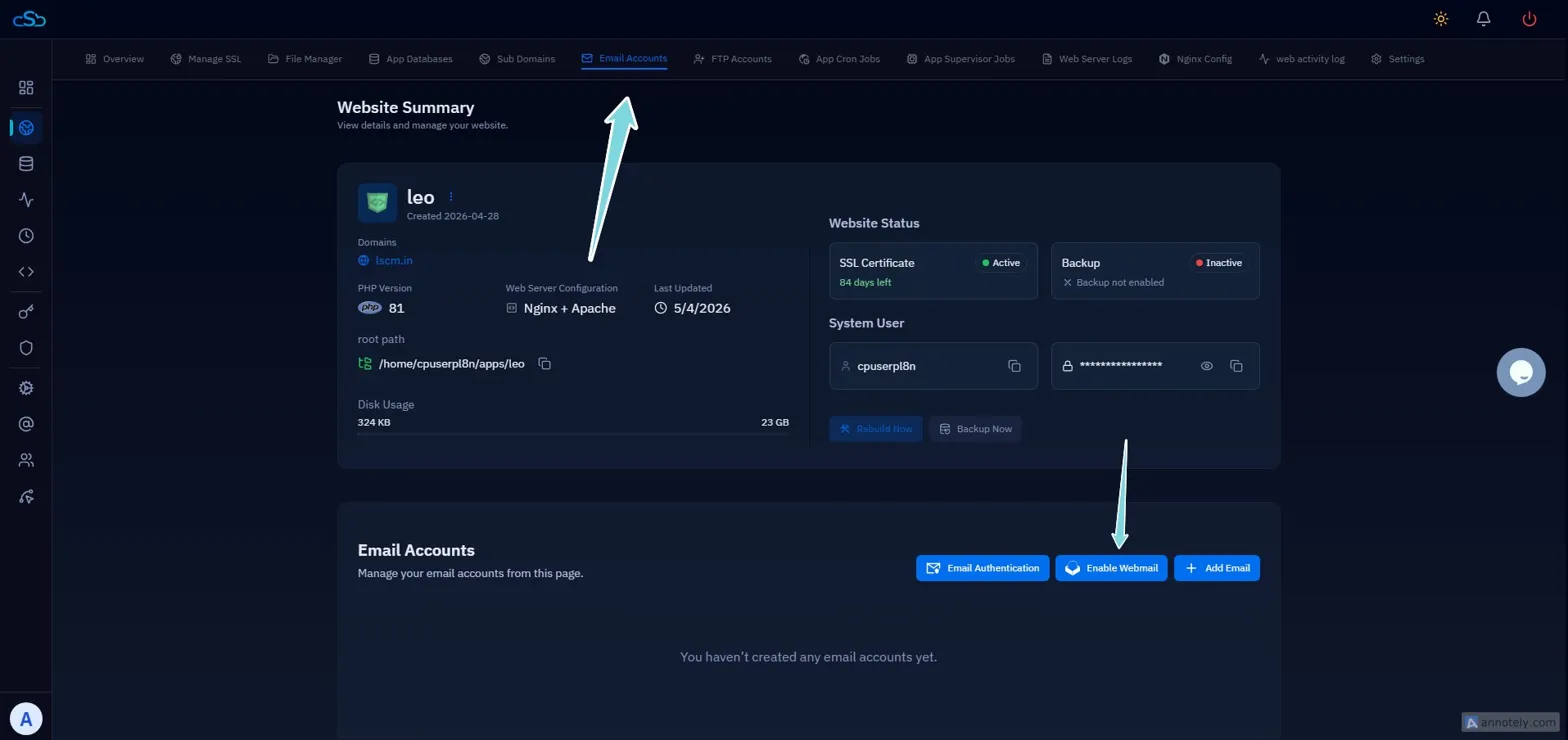
Fig. 01 — Website Summary page showing the Email Accounts section with the Enable Webmail button highlighted.
Step 2: Configure the Subdomain and Install Roundcube
The installation popup collects the subdomain prefix and your Cloudflare account details. CloudStick then provisions SSL and configures DNS automatically on your behalf.
Enter the subdomain prefix: In the Domain Name field, enter only the prefix — for example, to create mail.yourdomain.com, enter only mail.
Select your Cloudflare account: Choose the connected Cloudflare account from the Cloudflare Account dropdown.
Click Install Roundcube: CloudStick will begin the installation, provision an SSL certificate, and update your DNS records automatically.
Wait for the confirmation log: Once all steps complete, a log screen will confirm the installation is finished.
Click Complete: Close the installer by clicking the Complete button to return to the website panel.
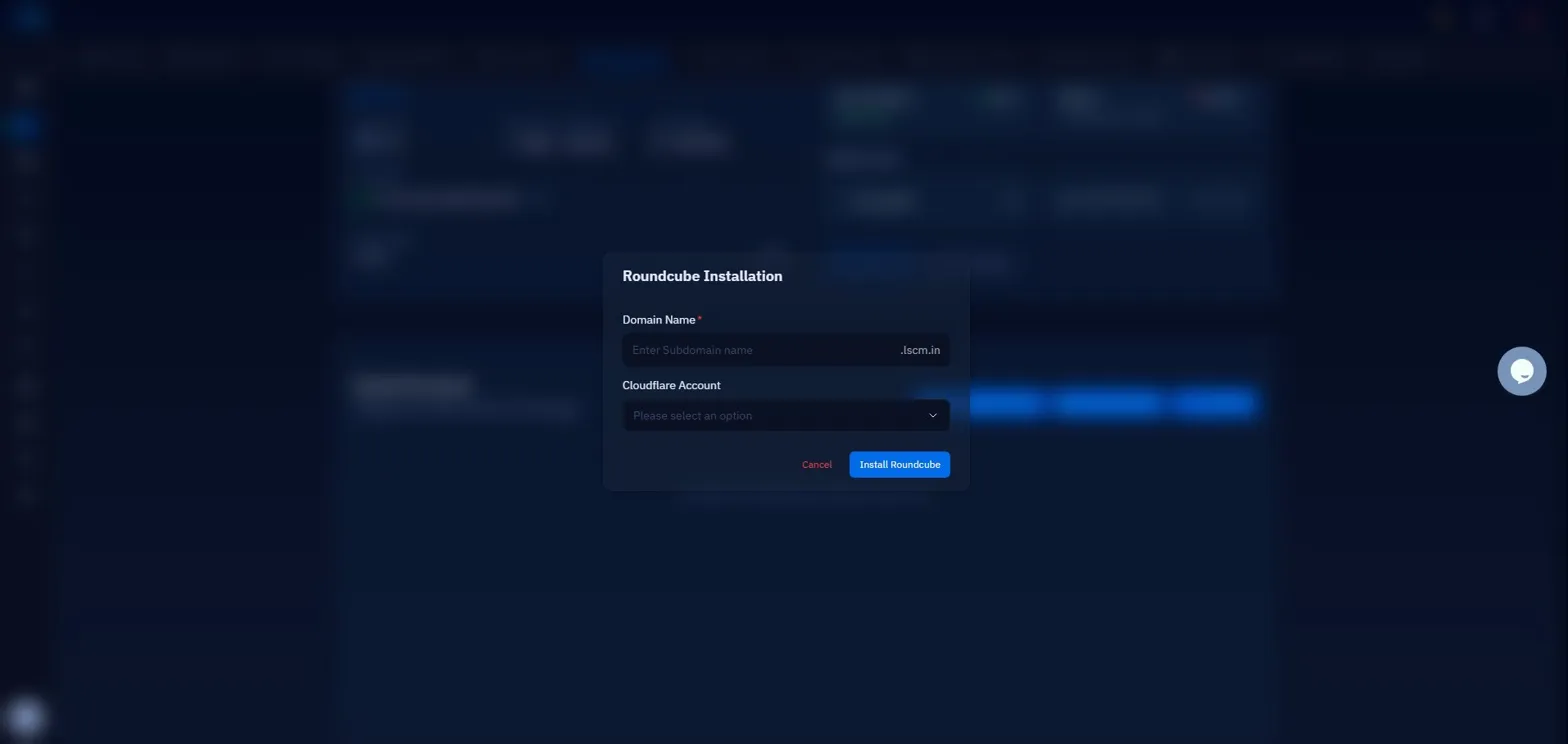
Fig. 02 — Roundcube Installation popup with the Domain Name field and Cloudflare Account dropdown.
Once the installer finishes, your webmail interface will be accessible at the subdomain you configured (e.g., mail.yourdomain.com). SSL is provisioned automatically — no manual certificate steps are needed.
Step 3: Troubleshooting Common Issues
If the installation does not complete as expected, the following known issues cover the most common causes and their solutions.
Enable Webmail option not visible
The Enable Webmail button only appears after a website has been created on the server. If you do not see it, create the website first and then return to this step.
Cloudflare account not showing in dropdown
If no Cloudflare account appears in the dropdown, the Cloudflare integration has not been connected to CloudStick. Complete the Cloudflare integration from the server panel before attempting the Roundcube installation.
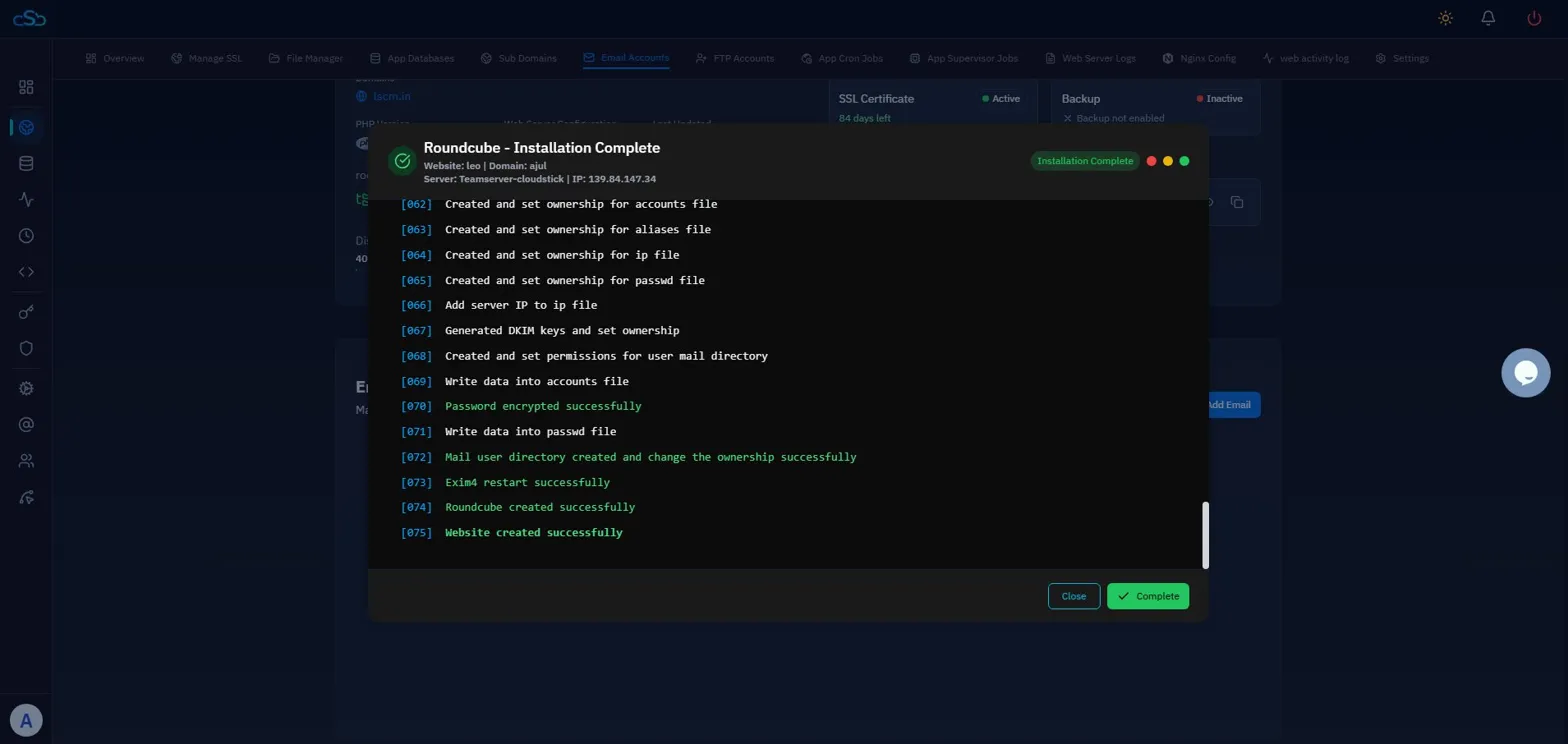
Fig. 03 — Installation Complete log showing all provisioning steps finished successfully, with the Complete button to close the installer.
DNS propagation can take up to 48 hours. If email is not working immediately after installation, wait and test again before making further changes. Additionally, ensure your mail subdomain's Cloudflare proxy is set to DNS only (grey cloud) — using the orange proxy cloud for mail subdomains can cause connection errors.