How to Access the Server Terminal
Overview
Traditional server administration requires you to open a separate SSH client, track down the server's IP address, and authenticate with a password or key every single time you need to run a command. CloudStick removes that friction entirely with a built-in, browser-based SSH Terminal — giving you secure, passwordless shell access to any connected server straight from the dashboard.
This guide walks you through opening the SSH Terminal, working inside the terminal window, and using it alongside the rest of the dashboard so you can run commands without ever leaving CloudStick.
The SSH Terminal is available on all plans, including the Free plan. Your server must be connected and showing an Online status before the terminal can authenticate.
Step 1: Log In to CloudStick
Everything starts from the CloudStick dashboard, which lists every server connected to your account.
1. Sign in: Go to app.cloudstick.io and log in with your CloudStick account credentials.
2. Open the Dashboard: After logging in, you land on the Dashboard, where all of your connected servers are displayed.
Step 2: Select Your Server
Choose which server you want to open a terminal session on.
1. Find your server: On the Dashboard, locate the server card for the machine you want to access.
2. Open the server panel: Click the server card (or its Manage link) to open the server details page for that machine.
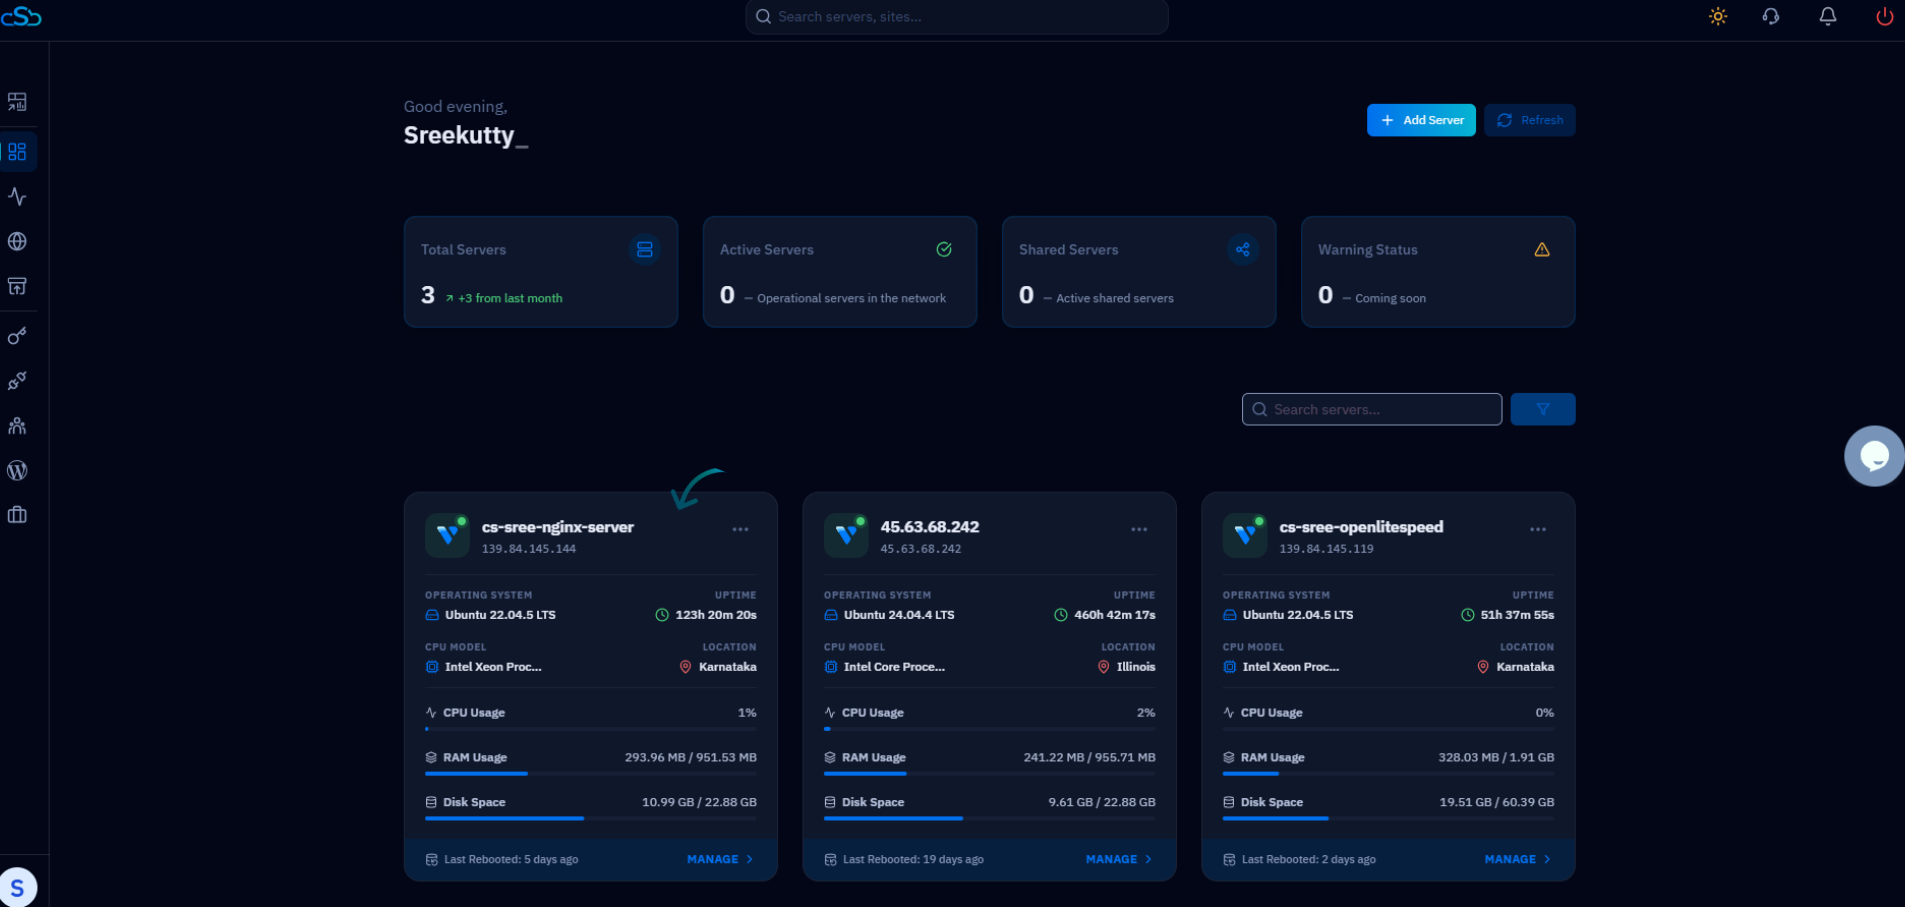
Fig. 01 — The CloudStick Dashboard listing connected servers; select the server you want to access.
Step 3: Open the SSH Terminal
CloudStick places the terminal launcher in the header of the server details page for quick access.
1. Locate the icon: At the top-right corner of the server page, find the SSH Terminal button.
2. Click SSH Terminal: Click the button to launch a terminal session for this server.
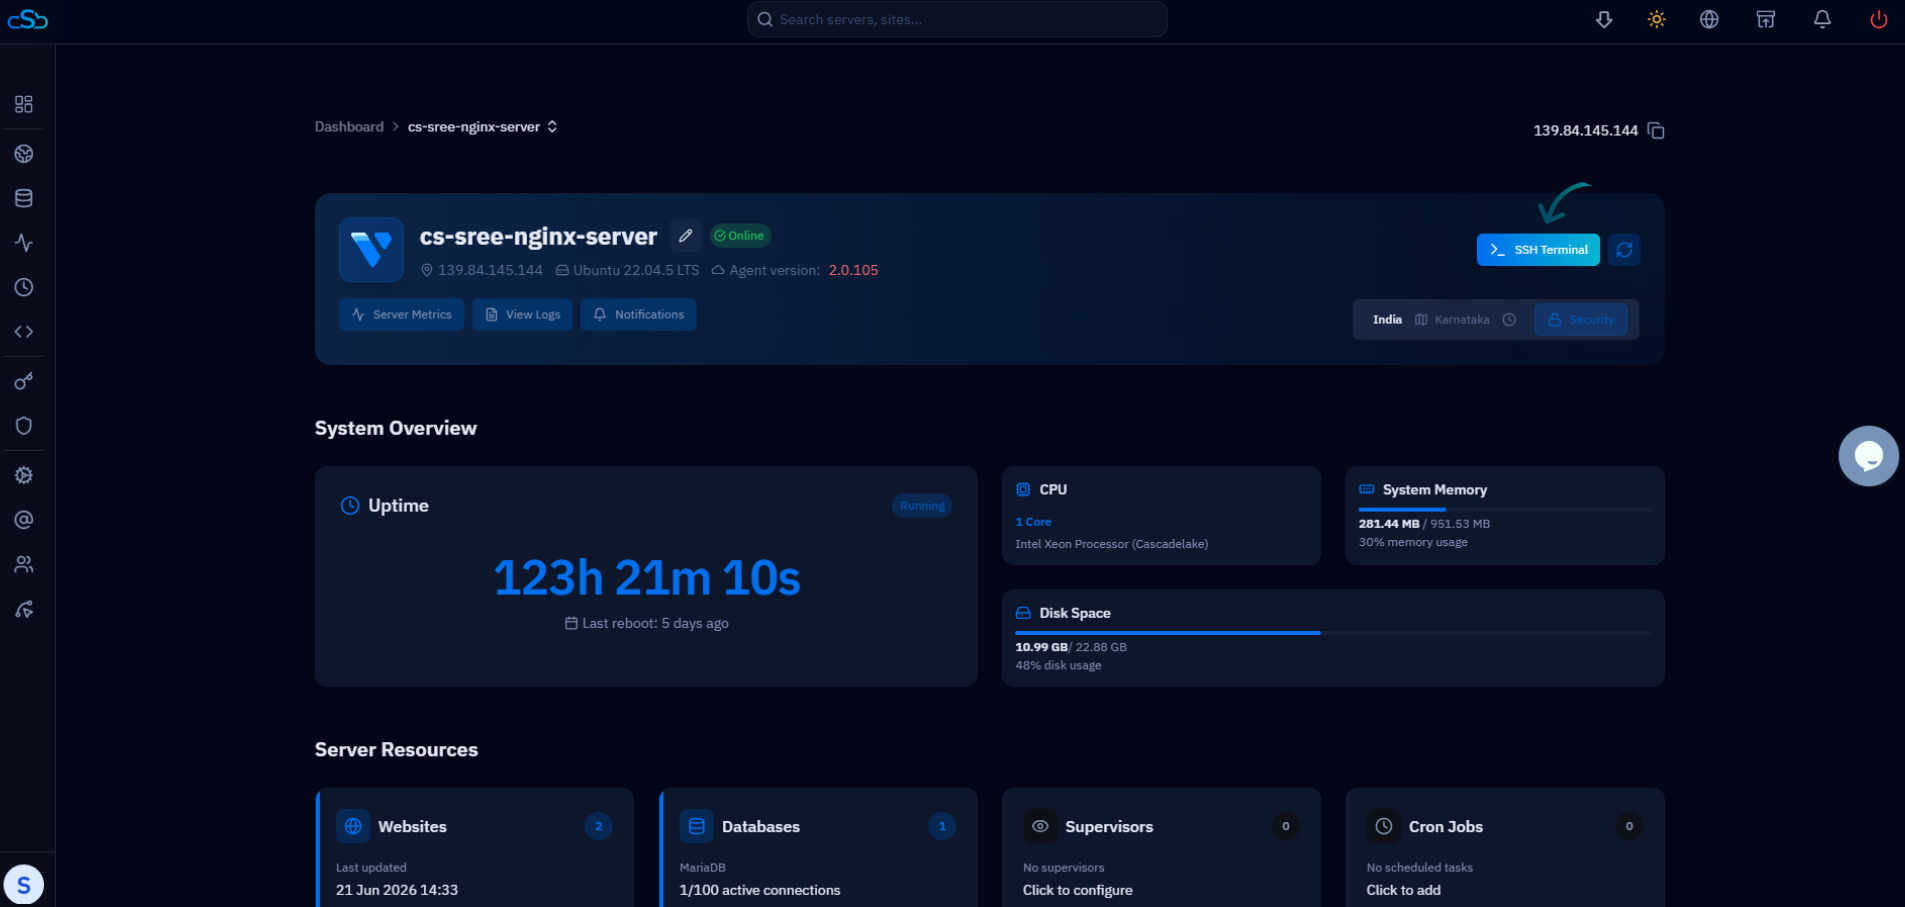
Fig. 02 — The SSH Terminal button in the top-right corner of the server details page.
Step 4: Use the Terminal Window
A terminal window opens automatically and CloudStick authenticates you to the server — no password or SSH key entry required.
Run commands: Type and execute server commands directly inside the terminal window.
Minimize: Collapse the terminal window when you don't need it, then reopen it instantly.
Move it freely: Drag the window and reposition it anywhere on the page to suit your workflow.
Keep it open while you browse: Continue viewing other sections such as Websites, Databases, and Settings while the terminal stays open.
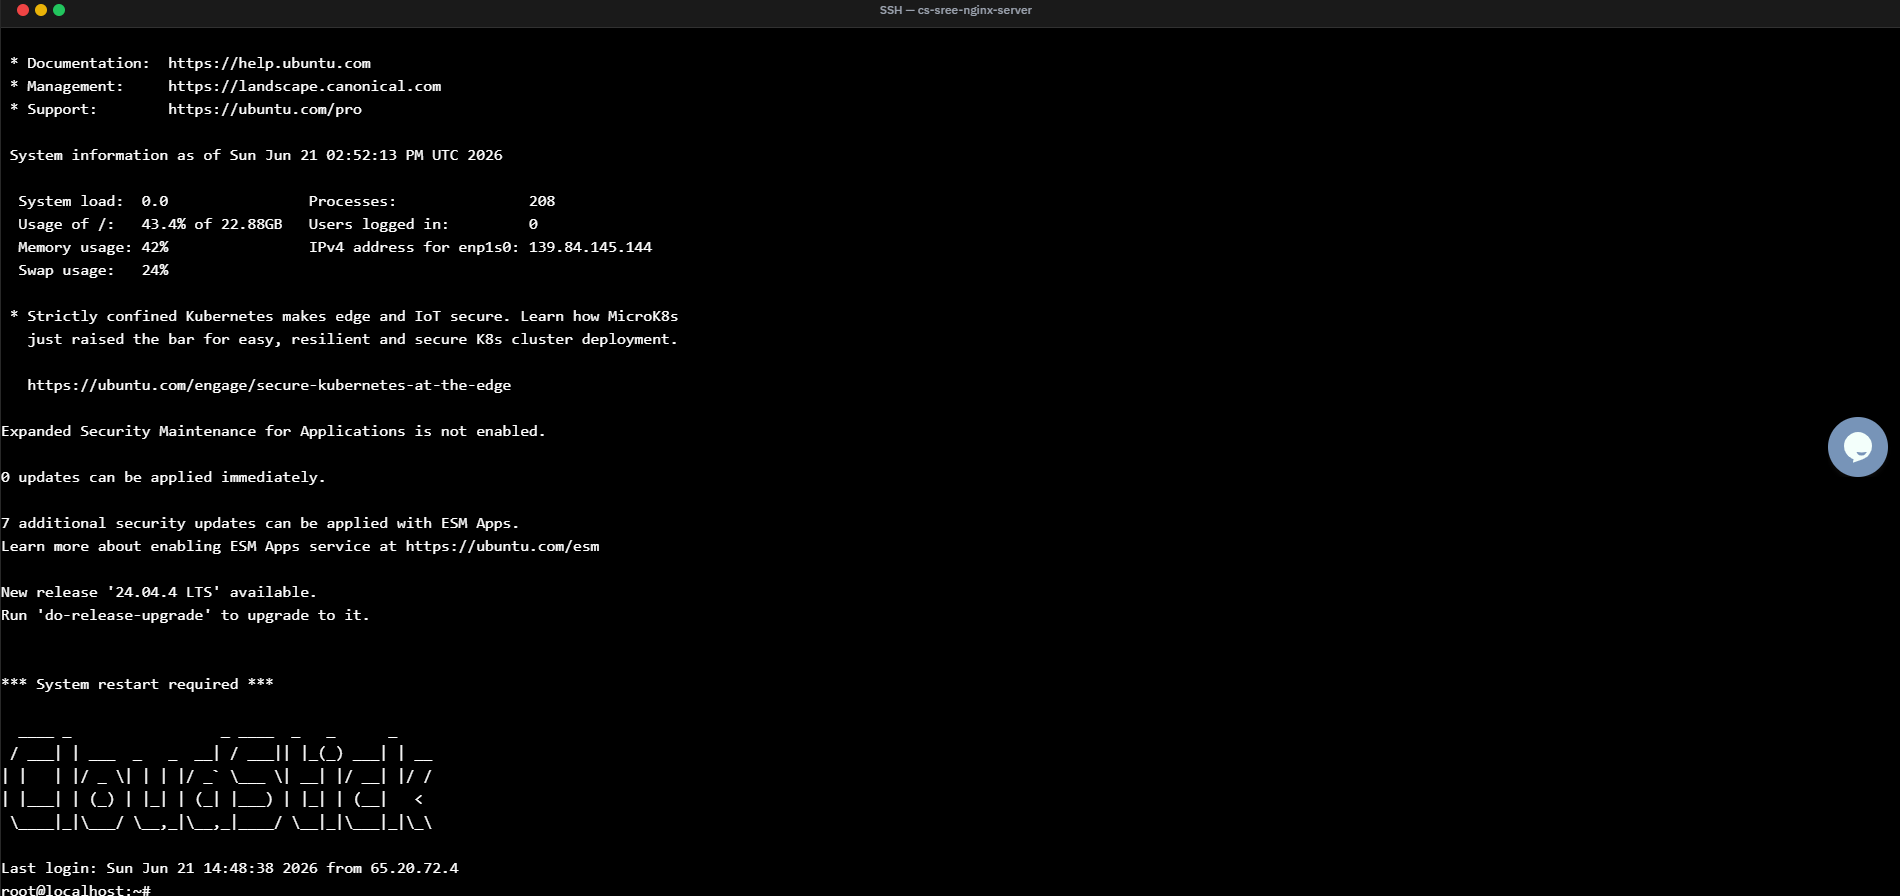
Fig. 03 — The terminal window opens and authenticates you automatically, ready to accept commands.
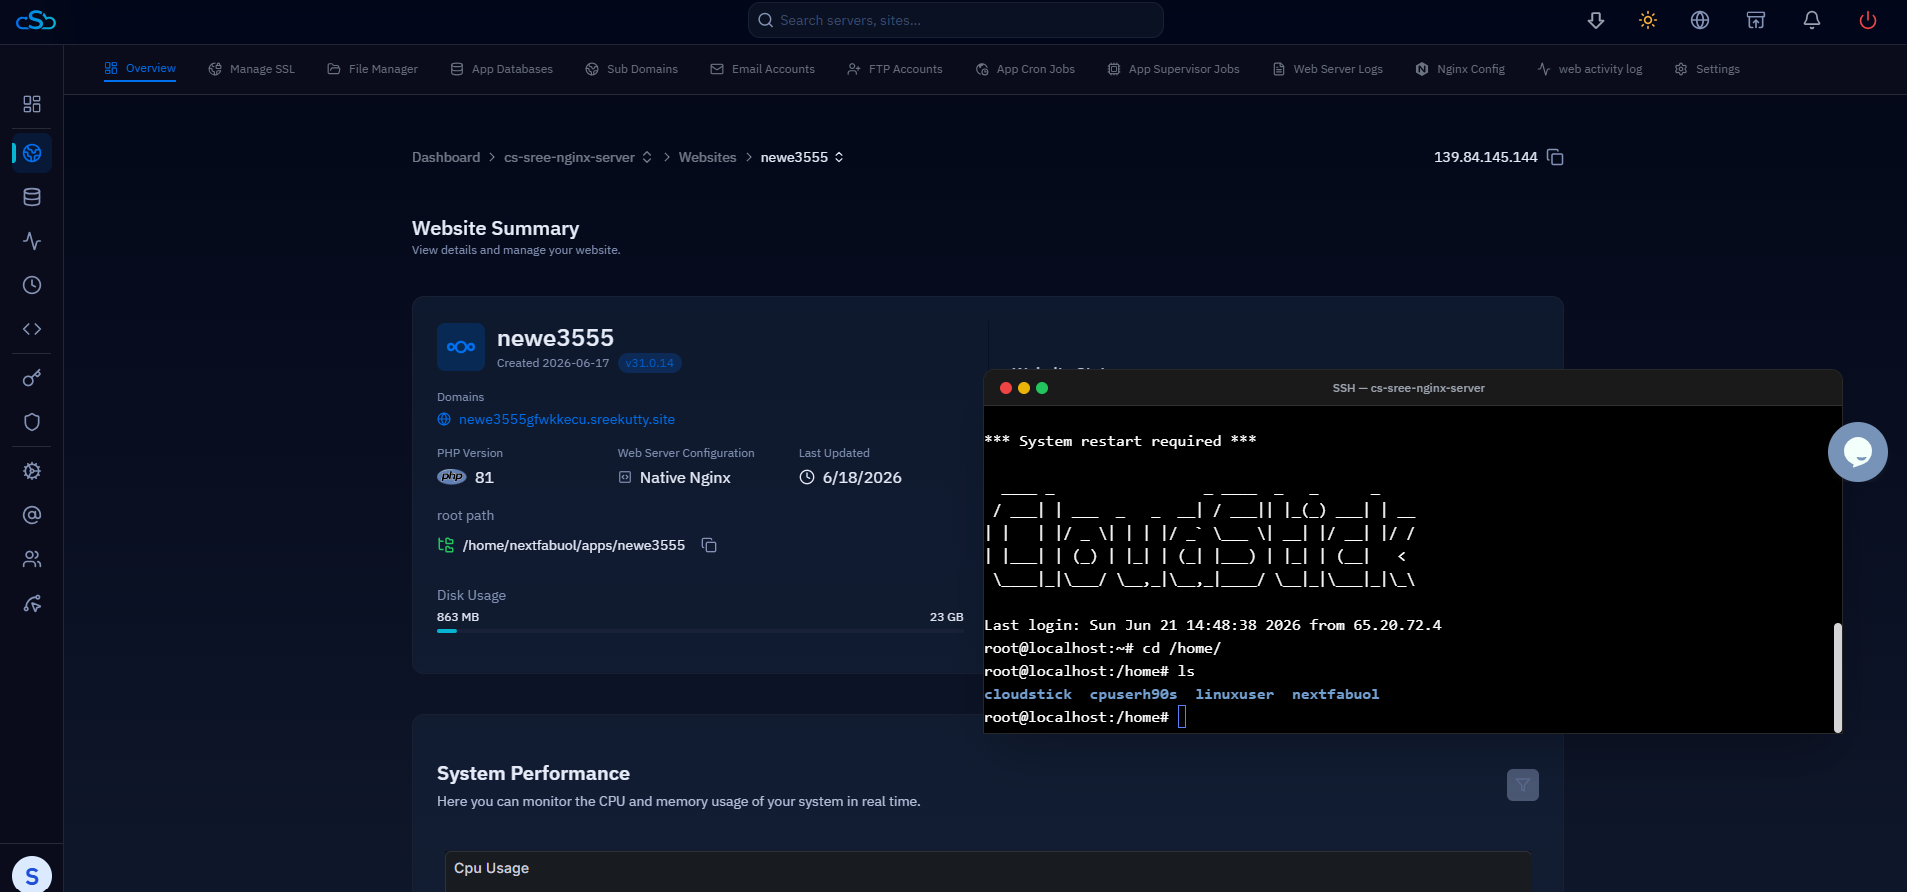
Fig. 04 — The terminal minimized to the corner of the screen while you continue managing the server.
Step 5: Manage Your Server
With the terminal connected, you can perform server administration tasks right from your browser.
1. Run admin tasks: Use the terminal to manage services, edit files, check logs, or run any command-line operation your server supports.
2. Multitask: Minimize the terminal to the corner of the screen and keep working in other dashboard sections, then bring it back whenever you need the shell again.
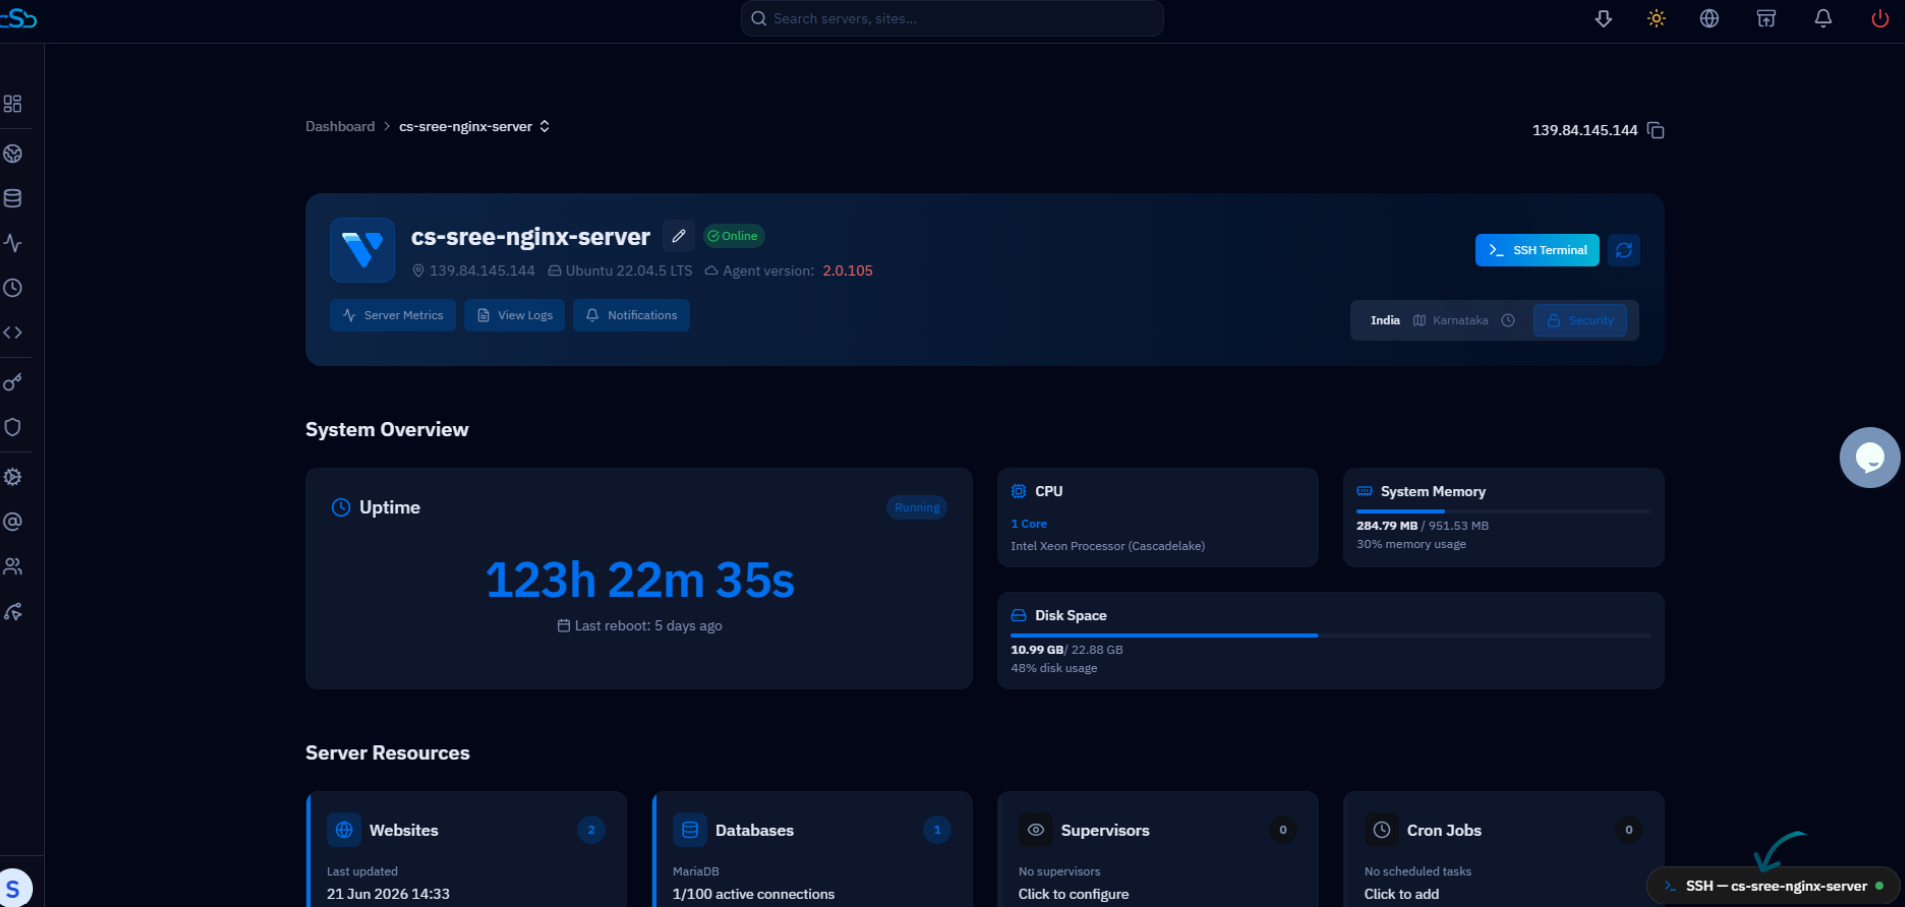
Fig. 05 — The terminal stays open and movable while you navigate other dashboard sections such as the Website Summary.
CloudStick provides secure passwordless access to the server terminal, so you can manage your server without manually entering SSH credentials each time. The terminal window can remain open while you navigate through other areas of the dashboard.