How to Update the CloudStick Agent Version
Overview
The CloudStick Agent is the lightweight management service installed on each connected server — it is what lets you control websites, databases, backups, the firewall, and every other server operation from the CloudStick dashboard without touching the command line. From time to time CloudStick releases a new agent version that delivers new features, security patches, bug fixes, and performance improvements.
Keeping the agent current ensures your server stays compatible with the latest dashboard functionality. The best part is that updating is fully automated — CloudStick downloads and installs the new version for you with a single click, so there are no manual commands and no SSH or terminal access required. This guide shows you how to update the CloudStick Agent on a server from the dashboard.
When an update is available, the Agent version shown on the server page is highlighted to alert you. The update runs entirely in the background and does not take your websites offline.
Step 1: Log In to CloudStick
Start from the CloudStick Dashboard, where all of your connected servers are listed.
1. Log in: Sign in to your CloudStick account to open the Dashboard.
2. Locate your servers: The Dashboard displays every server you have connected, along with its current status and details.
Step 2: Select Server
Choose the server on which you want to update the CloudStick Agent.
1. Pick a server: From the Dashboard, find the server you want to update.
2. Open the server panel: Click the server card (or Manage) to open its server details page, where the agent version and update controls are shown.
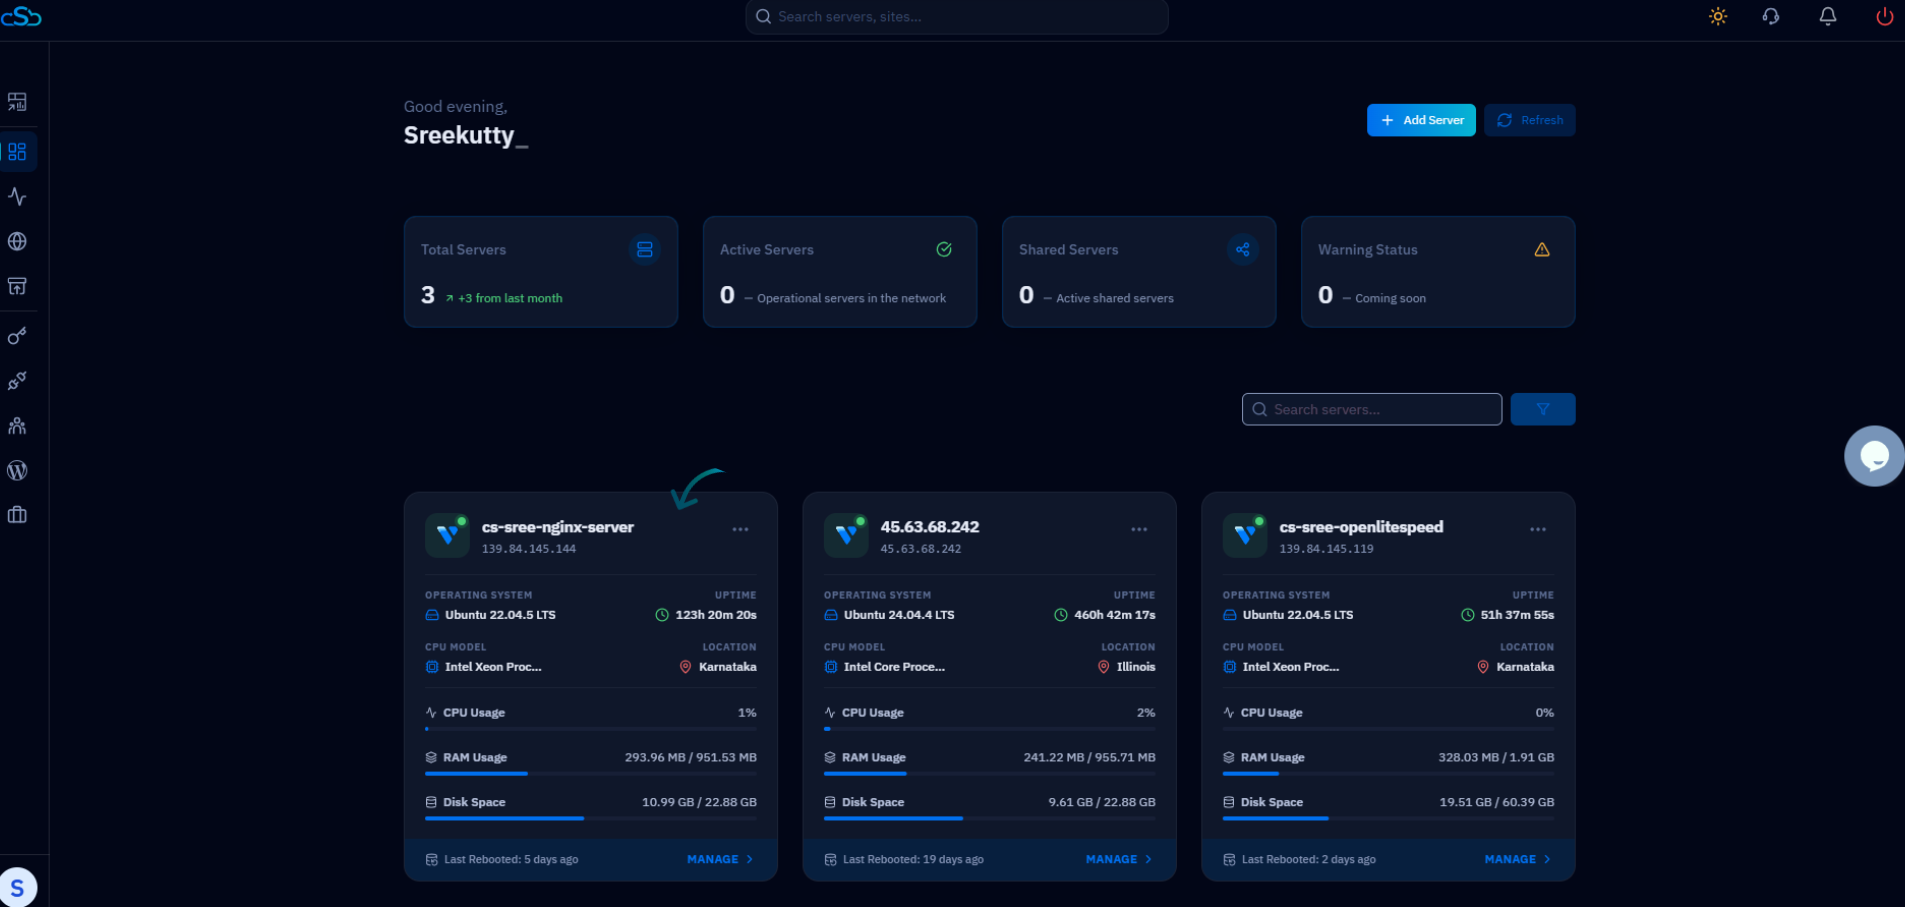
Fig. 01 — The CloudStick Dashboard listing all connected servers; click the server you want to update.
Step 3: Click the Update Icon
When a newer agent version is available, the server page surfaces an update control at the top of the page.
1. Find the Update Agent icon: At the top of the server page you will see the Update Agent (download) icon.
2. Note the current version: The Agent version is displayed in the server header — a highlighted version number indicates that an update is available.
3. Start the update: Click the Update Agent (download) icon to begin the update process.
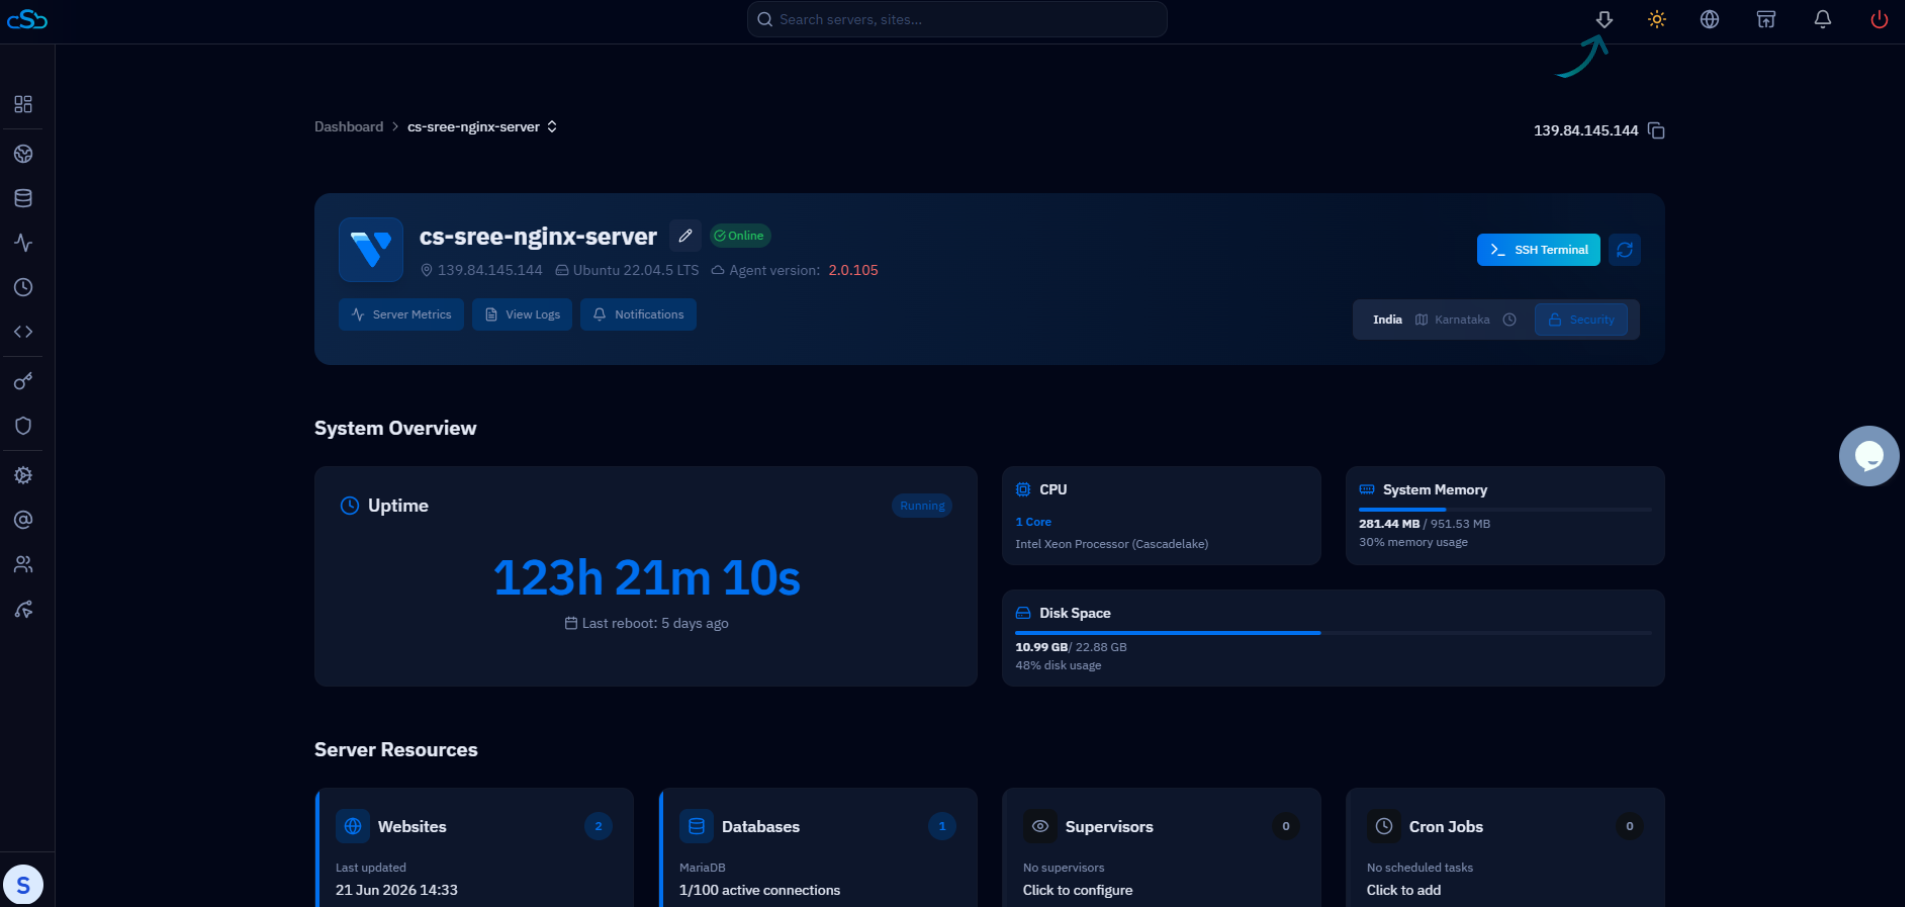
Fig. 02 — The Update Agent (download) icon in the top bar of the server page.
Step 4: Wait for the Update to Complete
CloudStick handles the entire update automatically — there is nothing to install by hand.
1. Automatic download & install: CloudStick downloads and installs the latest agent version on the server for you.
2. No manual steps: No manual commands or terminal access are required — simply allow the process to finish.
The update typically completes within a few moments. Your websites and services continue running normally while the agent is upgraded in the background.
Step 5: Verify the Update
Once the process finishes, confirm that the server is running the newest agent build.
1. Check the Agent version: On the server page, the Agent version now reflects the latest release and is no longer highlighted.
2. You're done: The server is now running the latest CloudStick Agent version, with all the newest features and fixes applied.
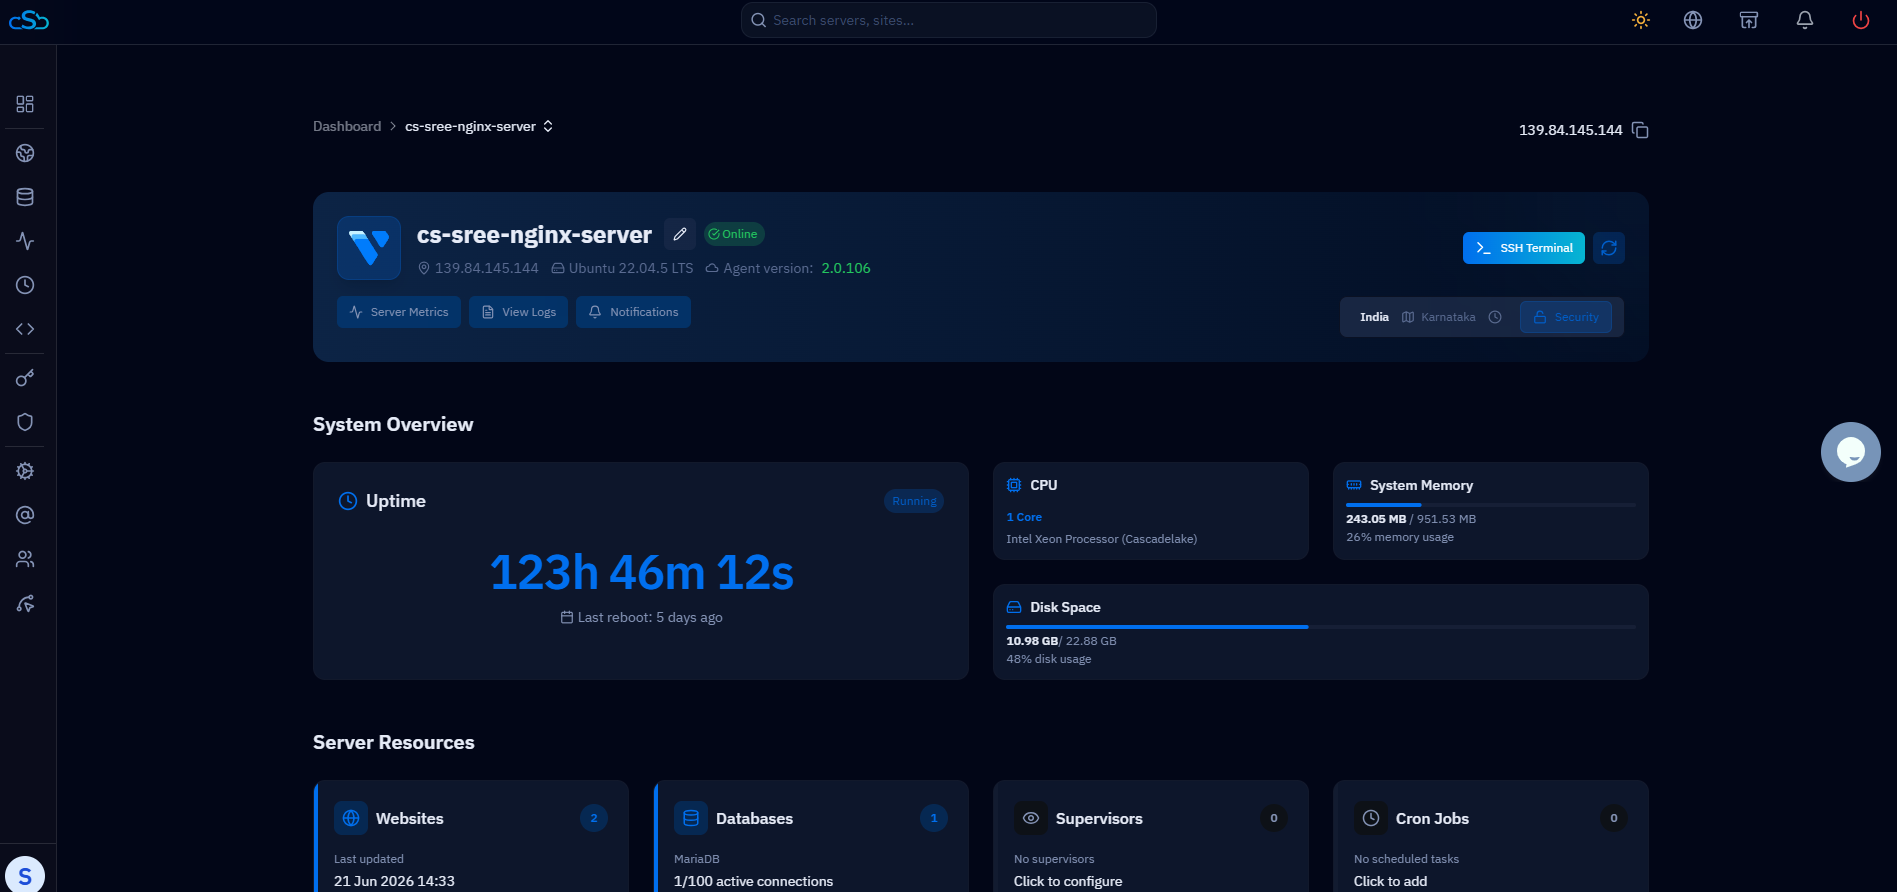
Fig. 03 — After the update, the server header shows the updated Agent version (e.g. 2.0.106).
If the version does not change immediately, refresh the server page. The dashboard updates the displayed Agent version once the new build is confirmed on the server.