How to Create a DNS Record via CloudStick
Overview
CloudStick's built-in DNS Manager gives you full control over your domain's DNS records without leaving the dashboard. Once your Cloudflare account is connected to CloudStick, all your domains are automatically fetched and accessible in one place — no need to switch between tools or log into Cloudflare separately.
This guide walks you through creating a new DNS record for any domain managed via your Cloudflare integration. You will also learn how to edit and delete existing records using the Actions menu.
Prerequisites: You must have a Cloudflare account integrated with CloudStick before using the DNS Manager. If you have not done this yet, follow the How to integrate a Cloudflare account into CloudStick guide first.
Step 1: Log In to Your CloudStick Account
Start by signing in to your CloudStick dashboard, where all your connected servers and integrated services are managed from one place.
Visit the CloudStick dashboard: Go to dash.cloudstick.io and sign in with your CloudStick credentials.
Confirm your dashboard loads: You should see your connected servers listed on the main Dashboard page.
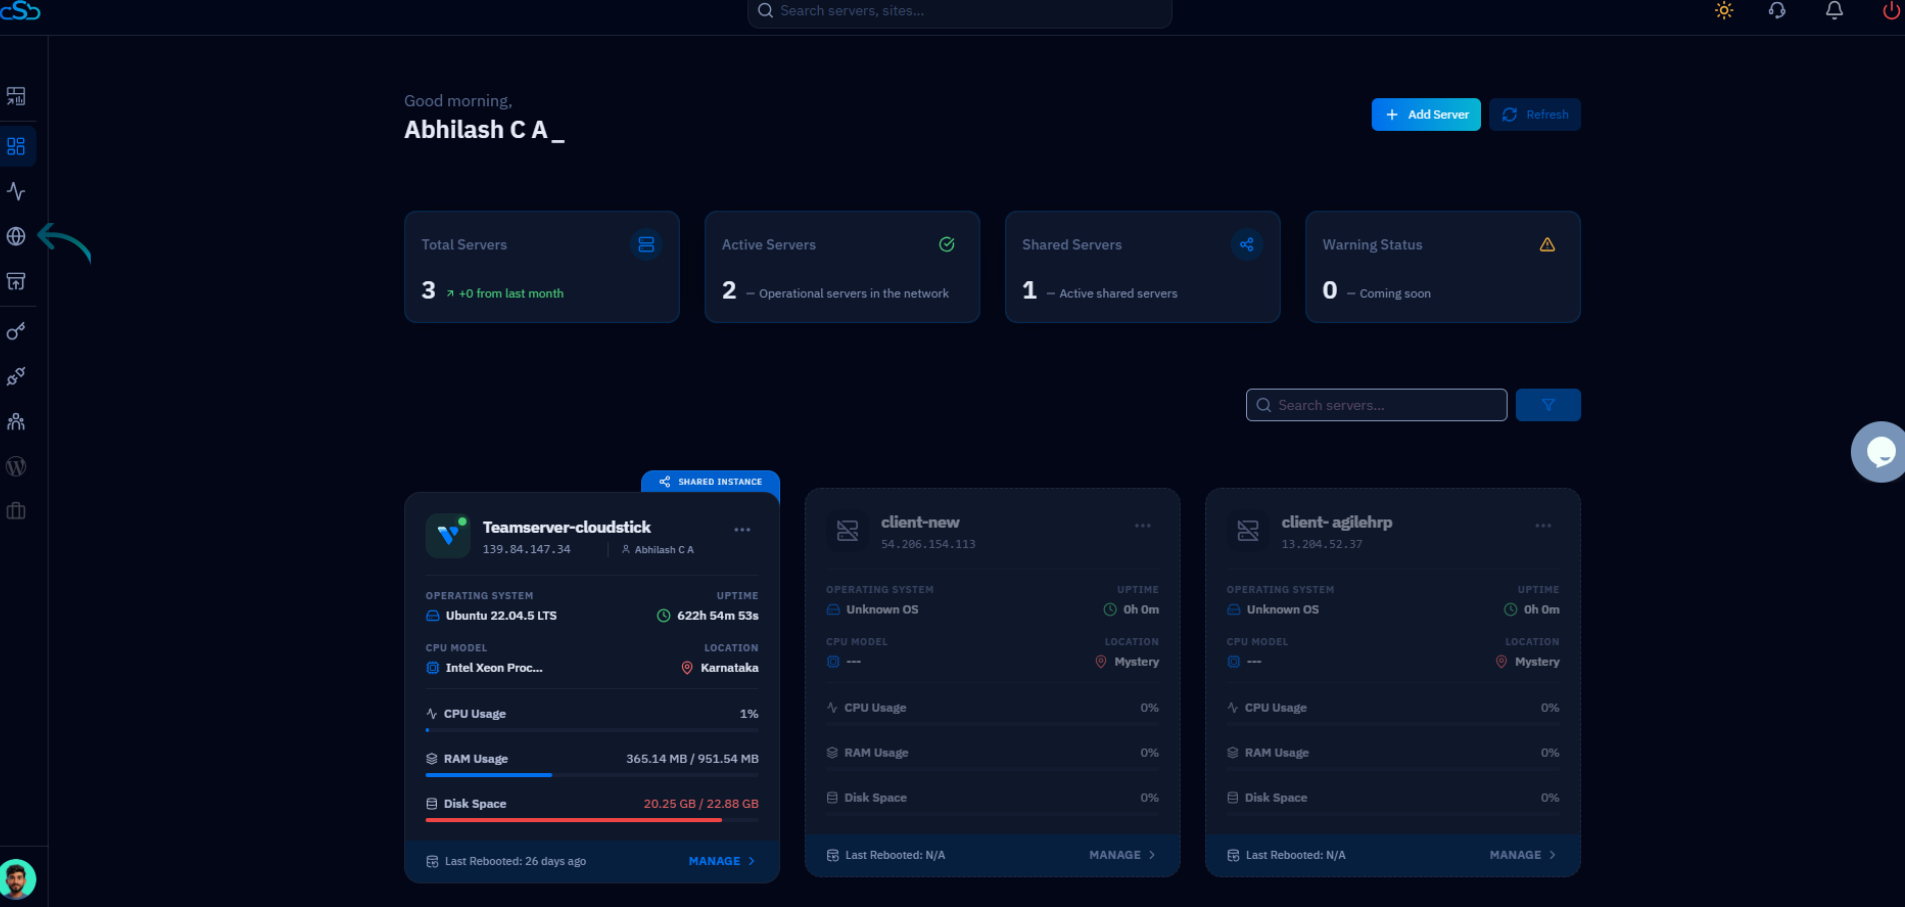
Fig. 01 — CloudStick main dashboard showing connected servers after a successful login.
Step 2: Open the DNS Manager and Select a Domain
The DNS Manager is accessible directly from the left-hand navigation and lists all domains pulled from your connected Cloudflare account.
Click DNS in the left-hand navigation: Look for the globe icon in the sidebar — this opens the DNS Manager.
Select your Cloudflare integration: Use the dropdown at the top of the DNS Manager to choose the Cloudflare account whose domains you want to manage.
Choose a domain: Your domains will appear as cards. Click the domain for which you want to create a DNS record.
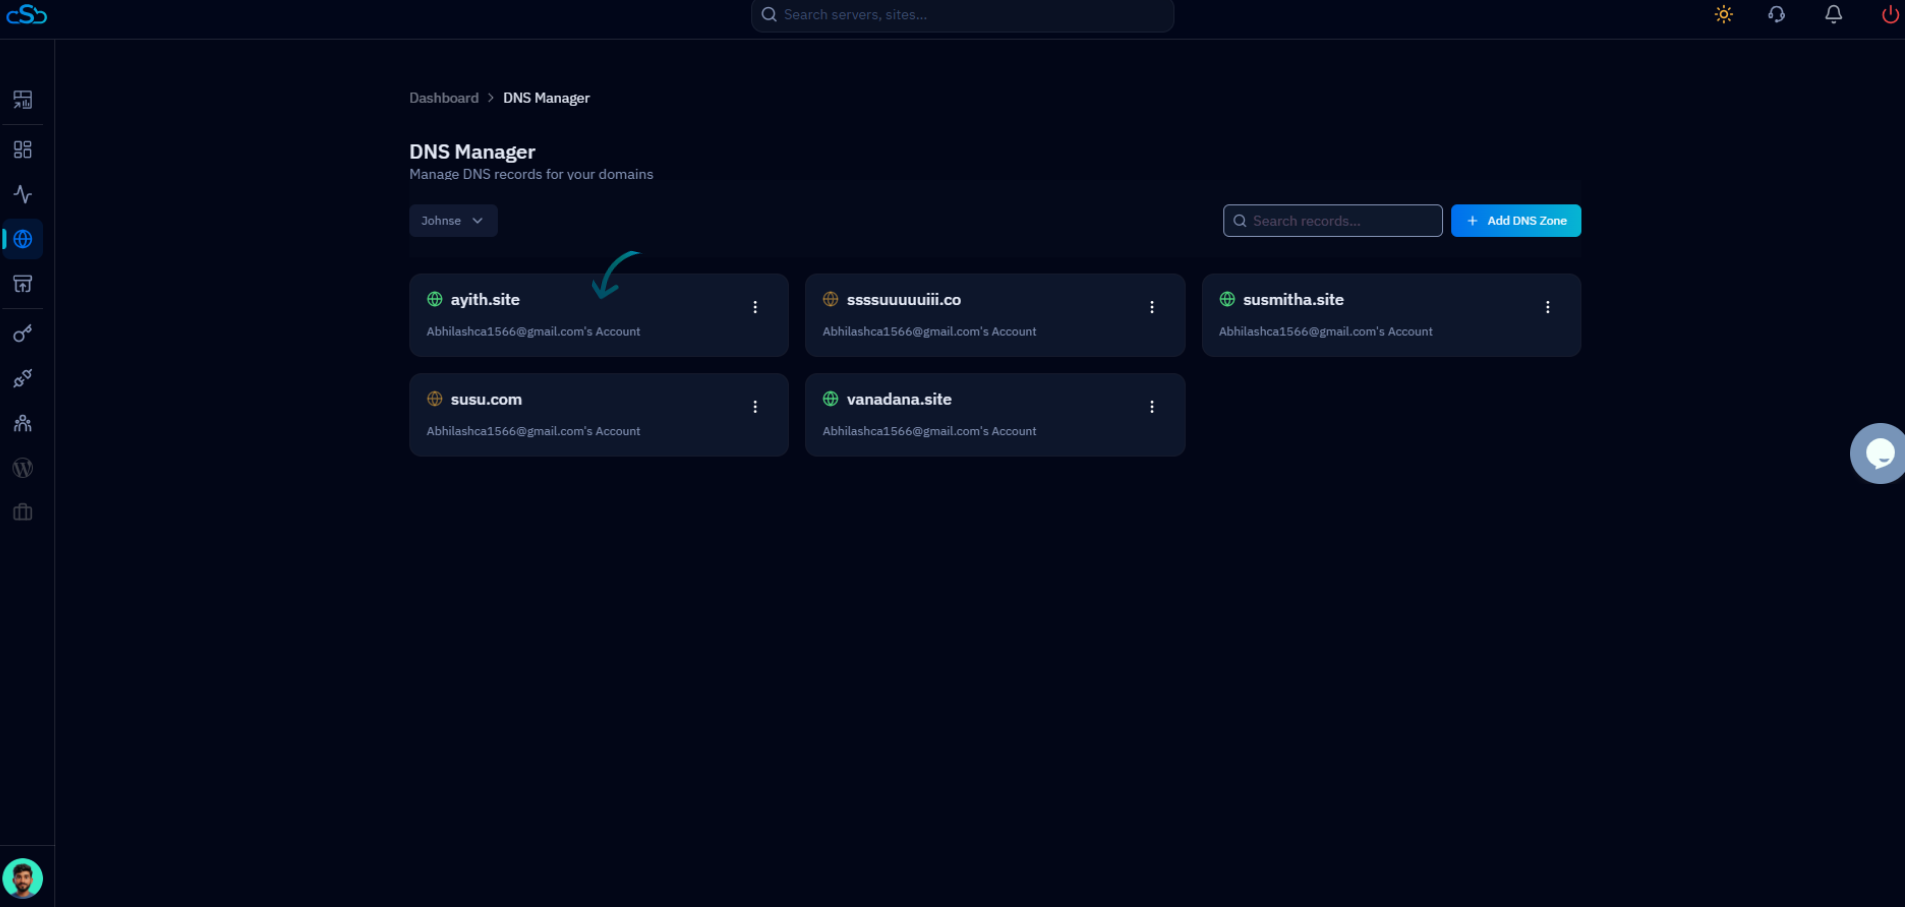
Fig. 02 — DNS Manager page showing all domains associated with the connected Cloudflare account.
Step 3: Add a New DNS Record
Once you are inside a domain's DNS record list, you can create a new record by clicking the dedicated button in the top-right corner of the page.
Review existing records: The DNS records table shows all current entries for the domain, including Type, Name, Content, TTL, and Proxy status.
Click + Add DNS Record: This button is located in the top-right corner of the domain's DNS records page. Clicking it opens the Add New DNS Record modal.
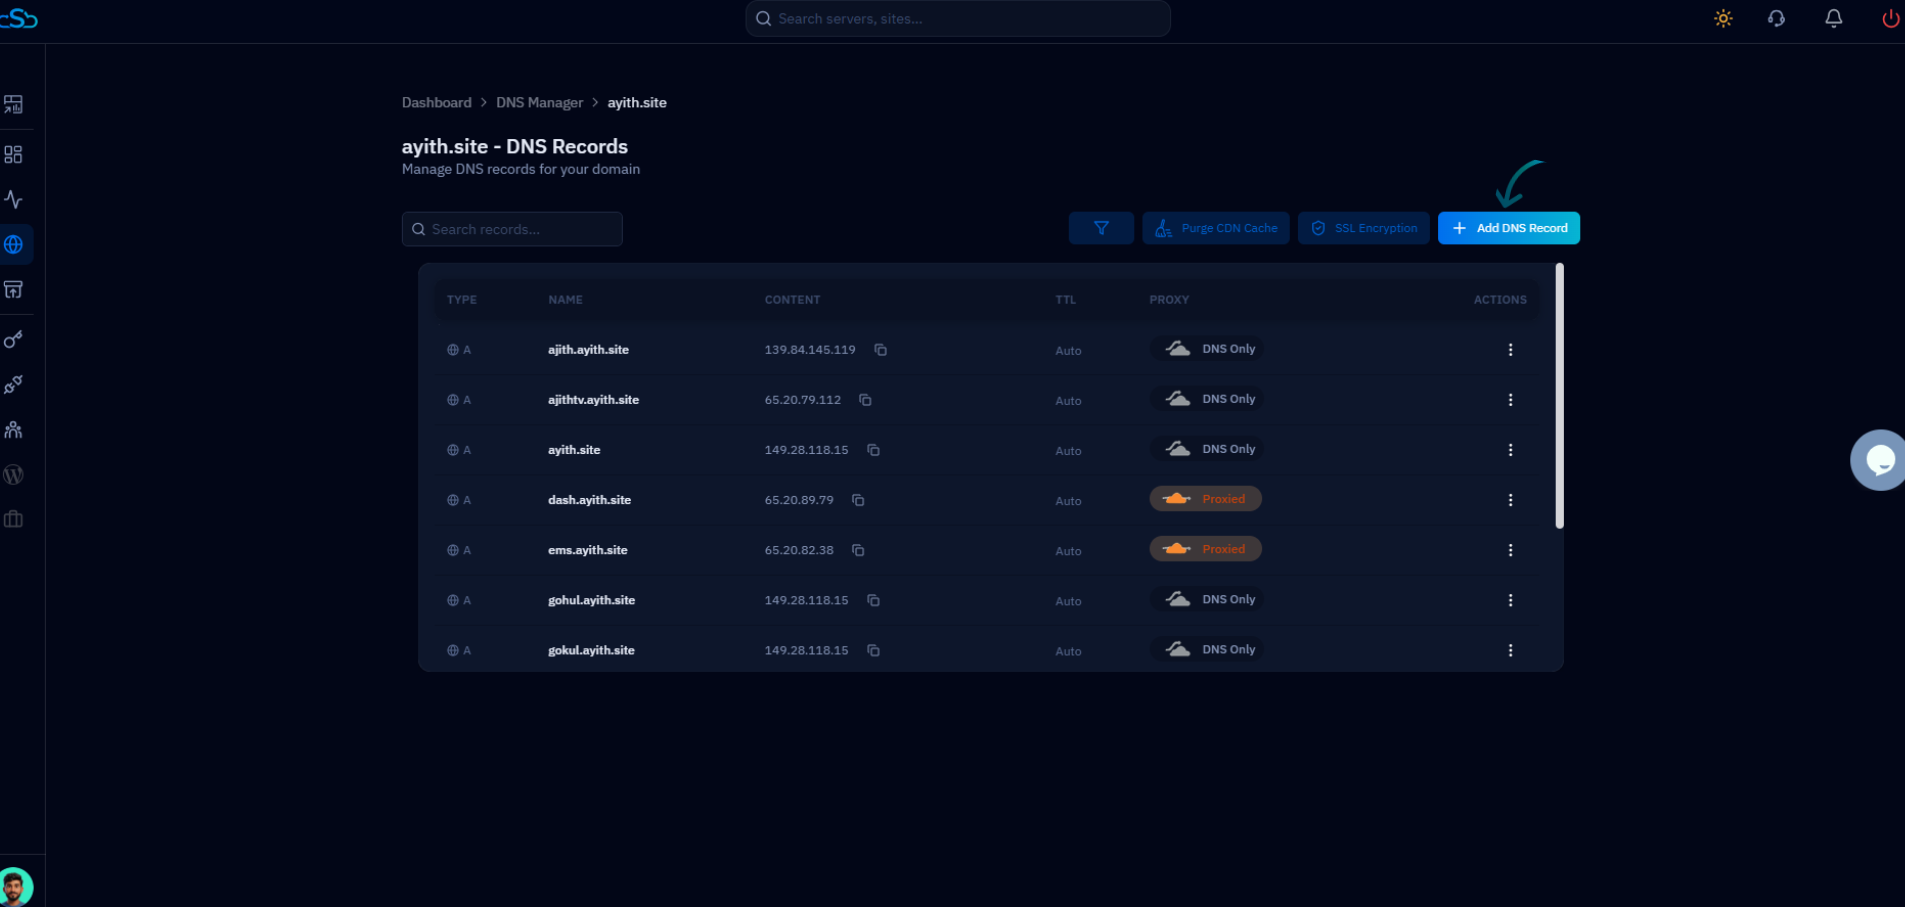
Fig. 03 — Domain DNS records page with the + Add DNS Record button highlighted in the top-right corner.
Step 4: Enter DNS Record Details
The Add New DNS Record modal lets you configure every aspect of the record before saving. Fill in all required fields carefully — incorrect values can affect how your domain resolves.
Type: Select the record type from the dropdown — A, AAAA, CNAME, MX, TXT, and others are supported.
Name: Enter the hostname or subdomain for this record (e.g., www, mail, or @ for the root domain).
Content (IPv4 Address / Value): Enter the target value — an IP address for A records, a hostname for CNAME, a mail server for MX, or a string for TXT records.
Proxy Status: Toggle this on to route traffic through Cloudflare's CDN and DDoS protection (Proxied), or leave it off for DNS-only resolution.
TTL (Time to Live): Set how long DNS resolvers should cache this record, in seconds. Lower values mean faster propagation of changes.
Once all fields are filled, click the Add Record button to save.
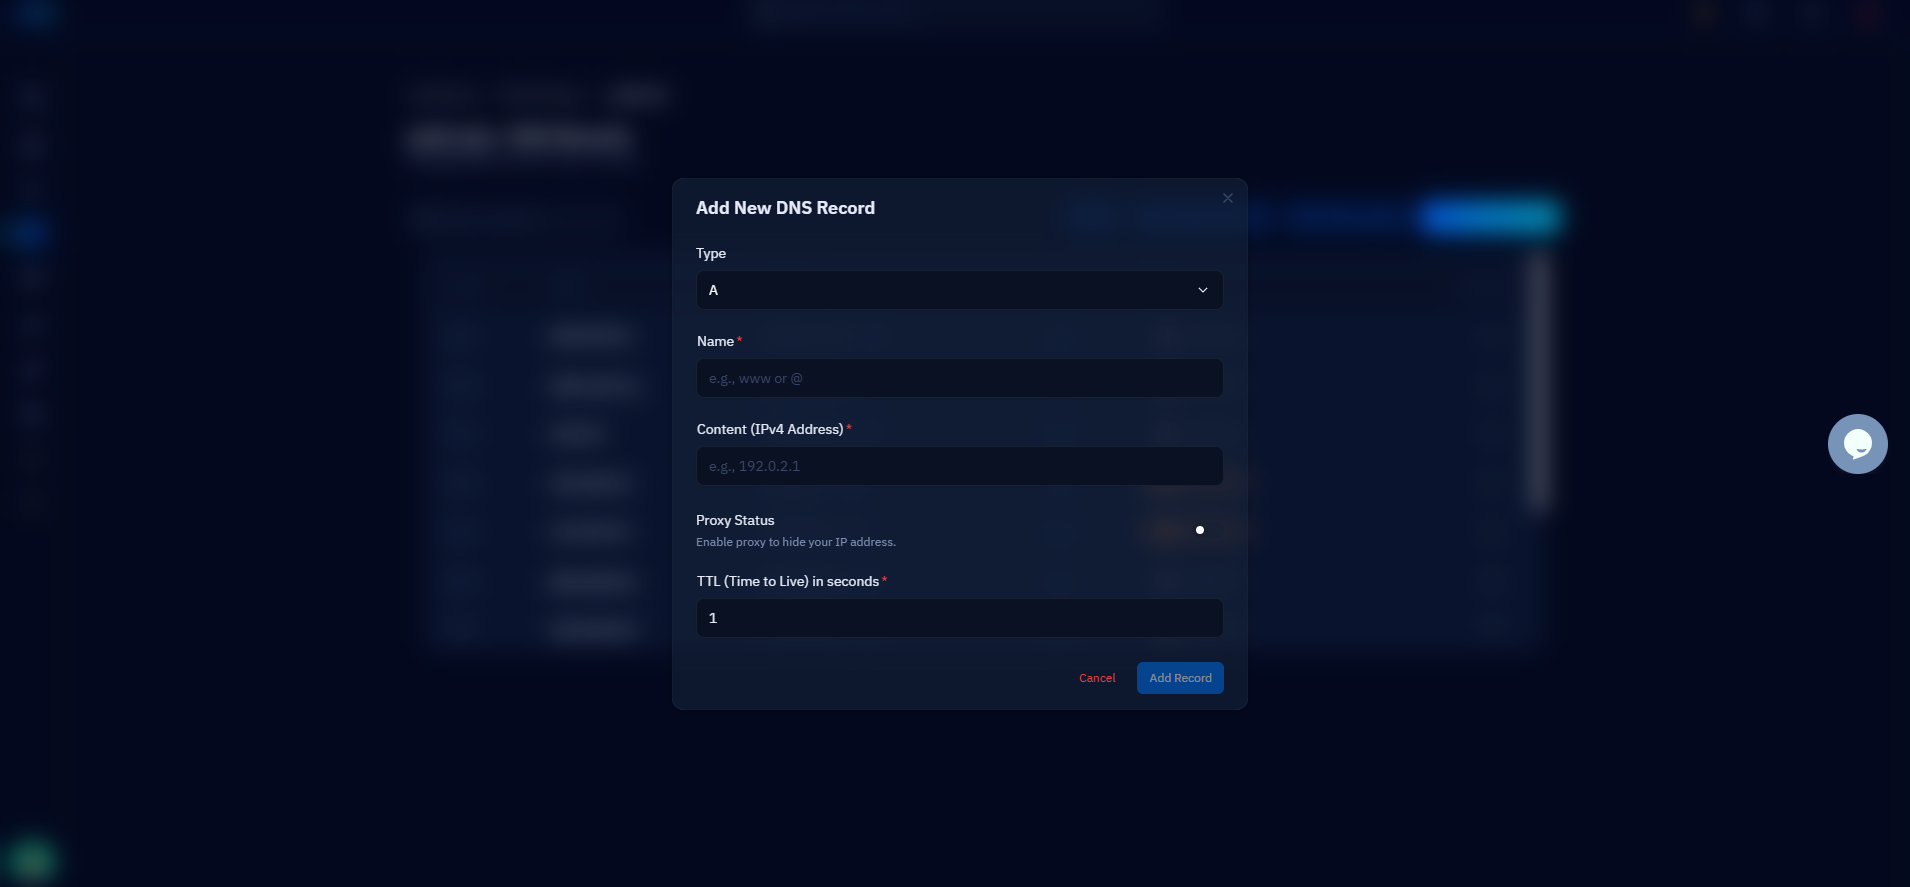
Fig. 04 — Add New DNS Record modal with Type, Name, Content, Proxy Status, and TTL fields.
Step 5: Verify, Edit, or Delete DNS Records
After saving, your new record appears immediately in the DNS records list and begins propagating across DNS servers. You can also modify or remove existing records at any time.
Verify the new record: Scroll through the DNS records table to confirm your new entry appears with the correct Type, Name, and Content.
To edit a record: Click the three-dot menu (⋮) in the Actions column next to the record, then select Edit Record. Update the fields and save.
To delete a record: Click the three-dot menu (⋮) and select Delete Record. Confirm the deletion when prompted.
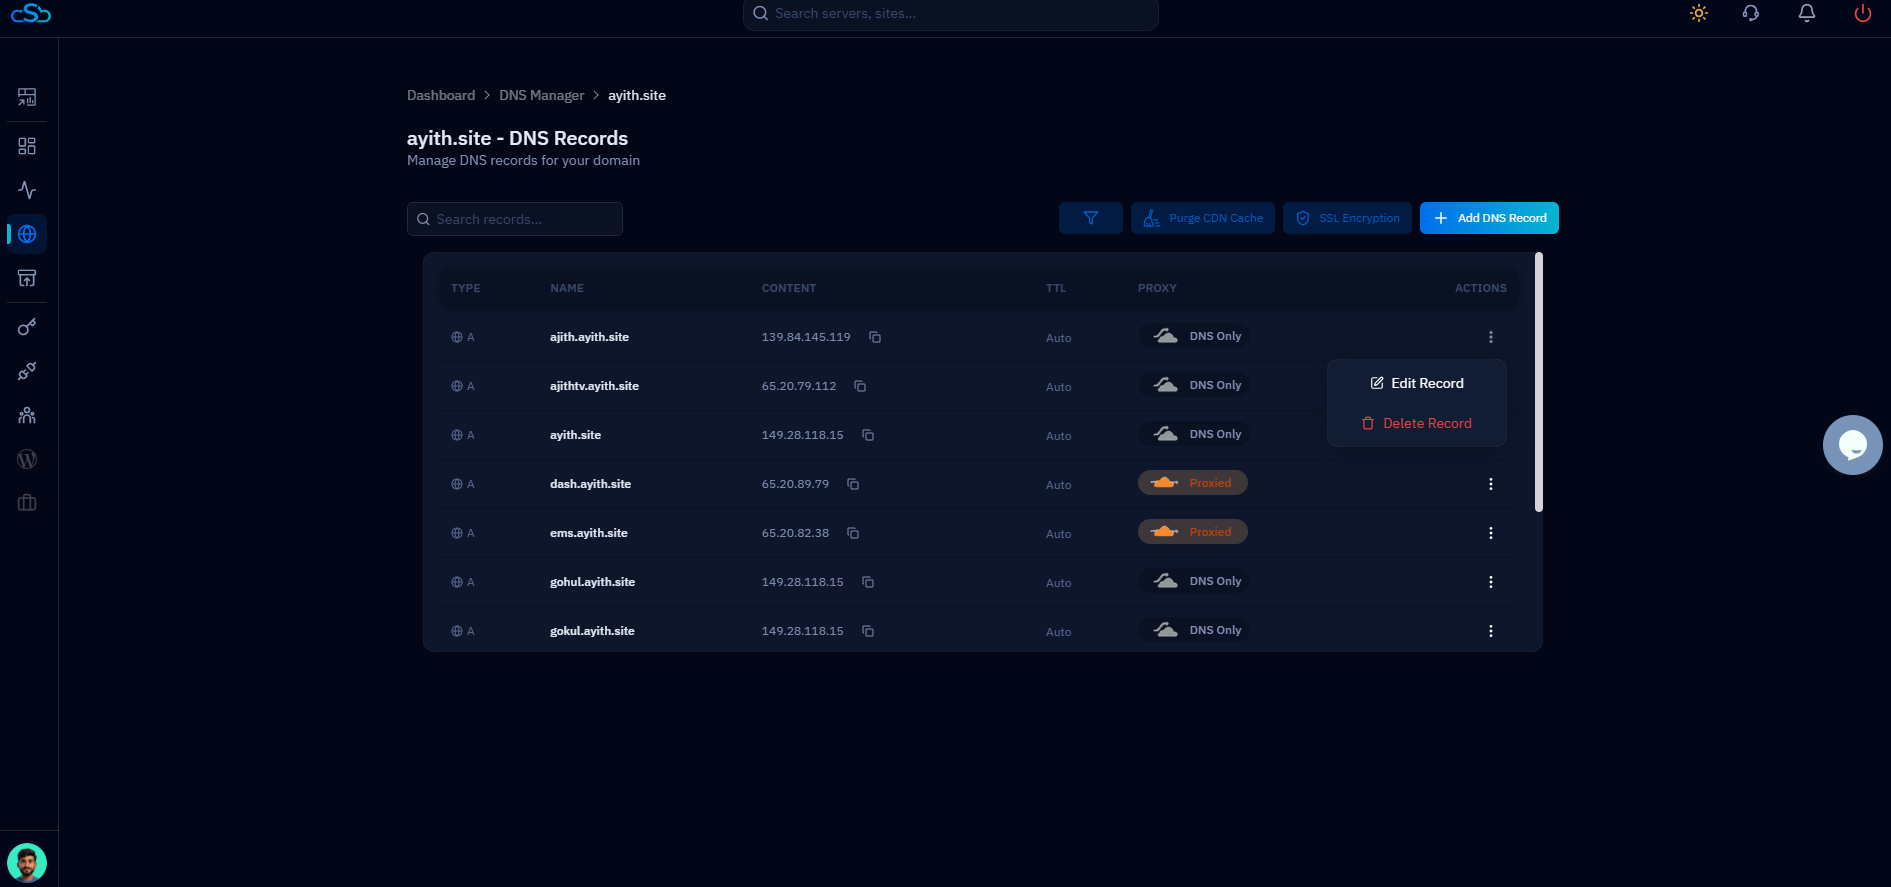
Fig. 05 — DNS records list showing the Actions menu with Edit Record and Delete Record options.
DNS changes may take some time to propagate globally, depending on the TTL value and your DNS provider's refresh interval. For faster propagation, use a lower TTL before making changes.