How to enable maintenance mode in CloudStick WordPress Manager
Overview
Maintenance mode lets you take your WordPress site offline for visitors while you make updates, apply migrations, or perform routine maintenance — without showing a broken or half-updated page. With CloudStick's WordPress Manager, you can toggle Maintenance Mode on and off directly from the control panel, without logging into the WordPress admin dashboard.
This guide walks you through the complete process — from navigating to your server to enabling the Maintenance Mode toggle under the Visibility & Tools section in WordPress Manager General settings.
Your server must be connected to CloudStick and the target website must be a WordPress installation. Maintenance Mode is available on all paid CloudStick plans via WordPress Manager.
Step 1: Navigate to Your Server
Start from the CloudStick Dashboard, where all your connected servers are listed with their real-time status and resource usage.
1. Log in to CloudStick: Go to app.cloudstick.io and sign in with your credentials.
2. Locate your server: Find the server hosting your WordPress website on the Dashboard. Click the Manage button on its card to open the server panel.
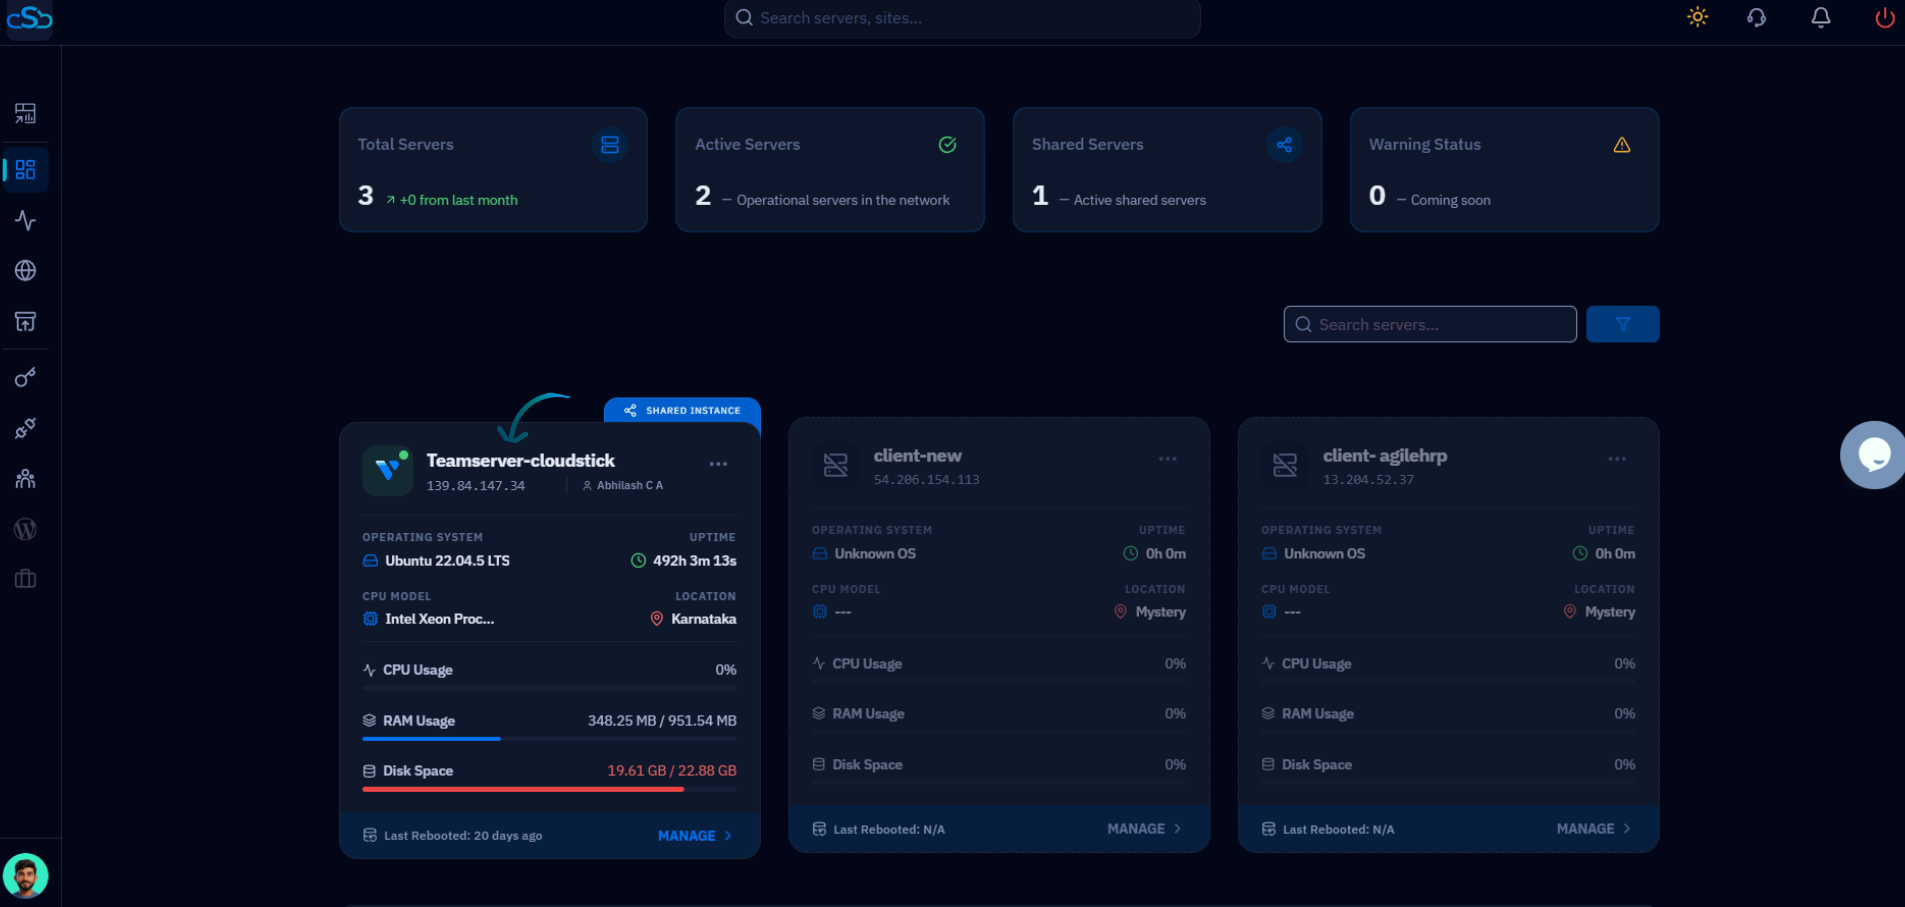
Fig. 01 — CloudStick Dashboard showing connected servers with CPU, memory, and disk stats. Click Manage to open the server panel.
Step 2: Select Your WordPress Website
Once inside the server panel, navigate to the Websites section to find the WordPress site you want to put into maintenance mode.
1. Open Websites: In the left-hand navigation of the server panel, click the Websites icon to open the WebApp List.
2. Select your WordPress site: Find your WordPress website in the list and click on it to open the site management view.
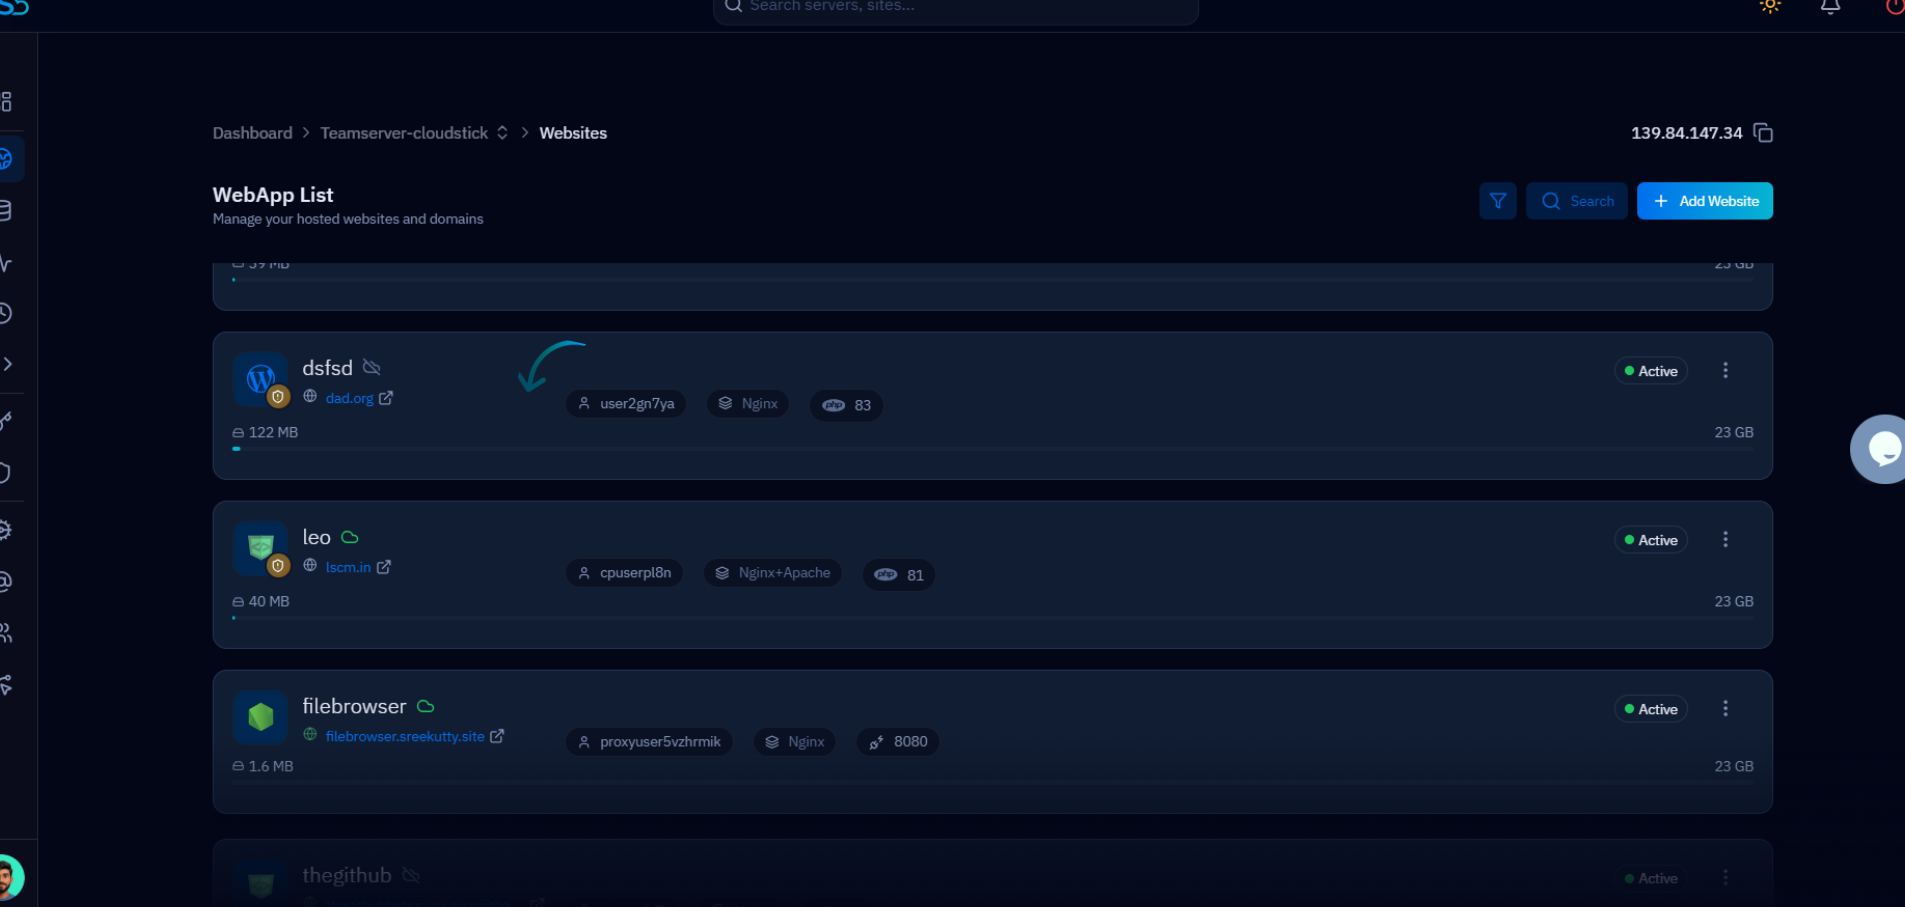
Fig. 02 — WebApp List showing all websites hosted on the server. Click the WordPress site to open its management view.
Step 3: Open WordPress Manager
The Website Summary page gives you a full overview of your site. From here, open WordPress Manager to access WordPress-specific controls.
1. Find WordPress Manager: Scroll down on the Website Summary page to the WordPress Manager section, or click the WordPress Manager tab at the top of the page.
2. Open General settings: Inside WordPress Manager, the General tab opens by default — this is where Maintenance Mode is located.
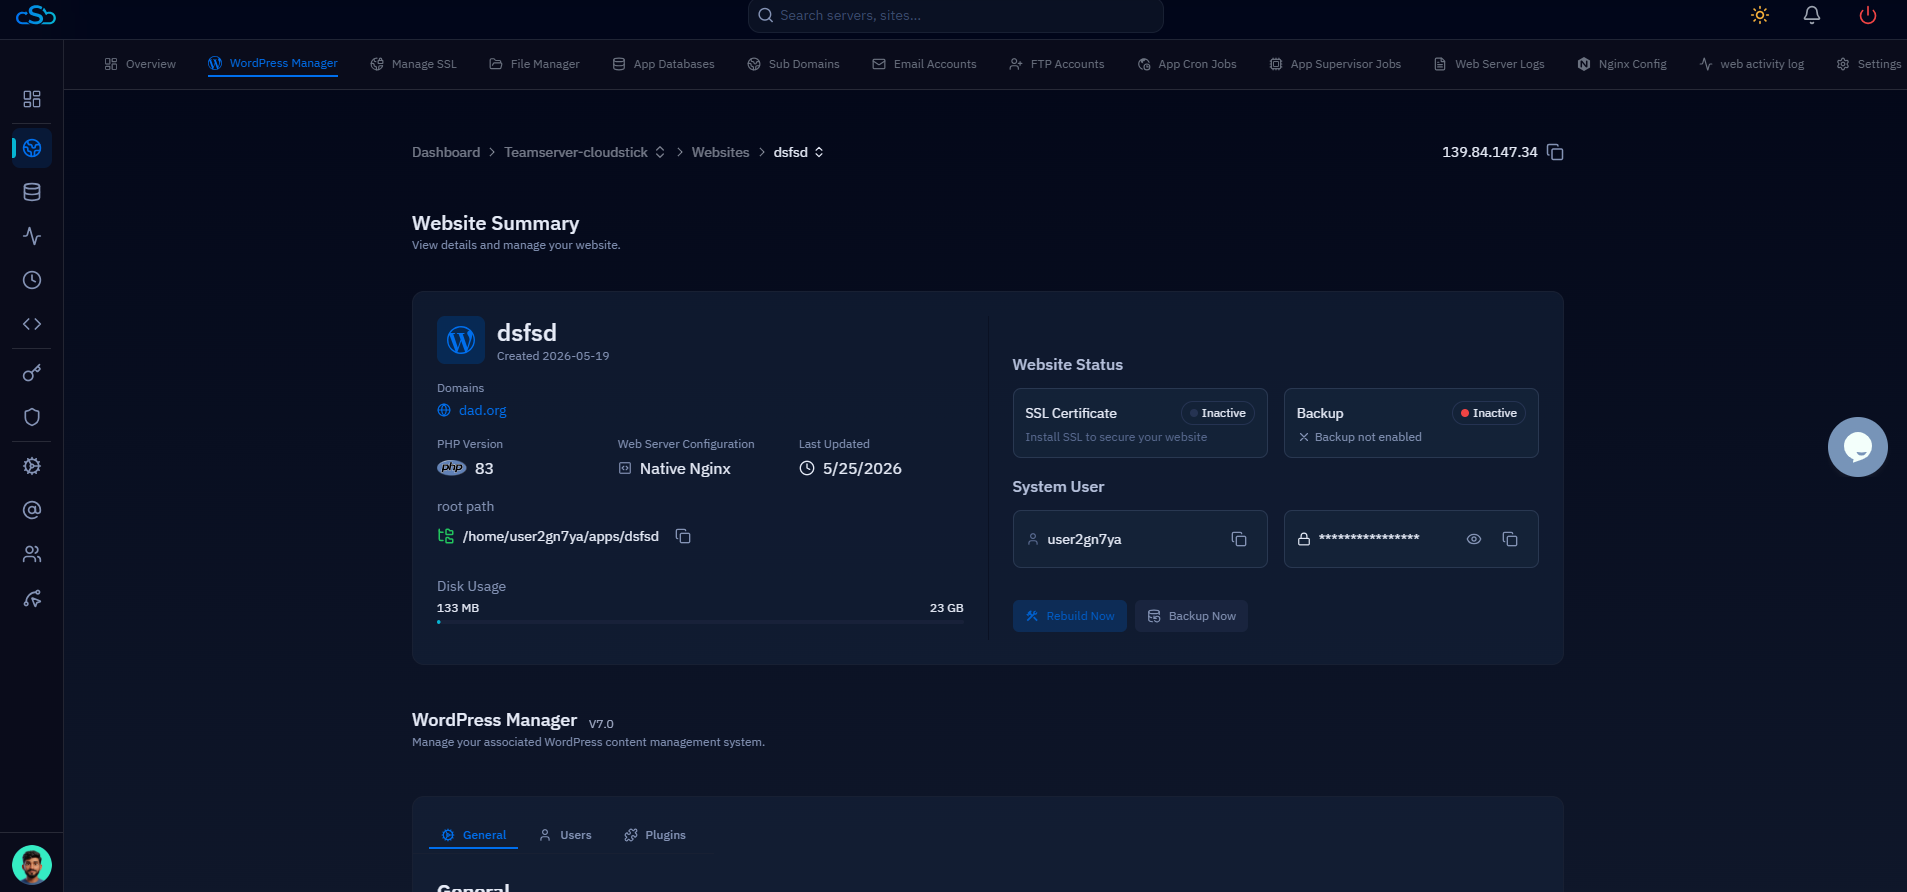
Fig. 03 — Website Summary page showing the WordPress Manager section. Click WordPress Manager to access site-level WordPress controls.
Step 4: Enable Maintenance Mode
Scroll down the General settings page to the Visibility & Tools section, where you can control how your site is seen and managed by visitors and search engines.
1. Scroll to Visibility & Tools: In the WordPress Manager General tab, scroll past the Site URL, Home URL, and Site Status sections to reach the Visibility & Tools section.
2. Toggle Maintenance Mode on: Find the Maintenance Mode row — labelled "Turn on maintenance mode to restrict site access." — and click the toggle to enable it.
3. Confirm: The toggle turns blue when active. Visitors will now see a maintenance page instead of your live site until you disable the toggle.
To bring your site back online, return to the same Visibility & Tools section and toggle Maintenance Mode off. The change takes effect immediately — no restart or cache clear needed.
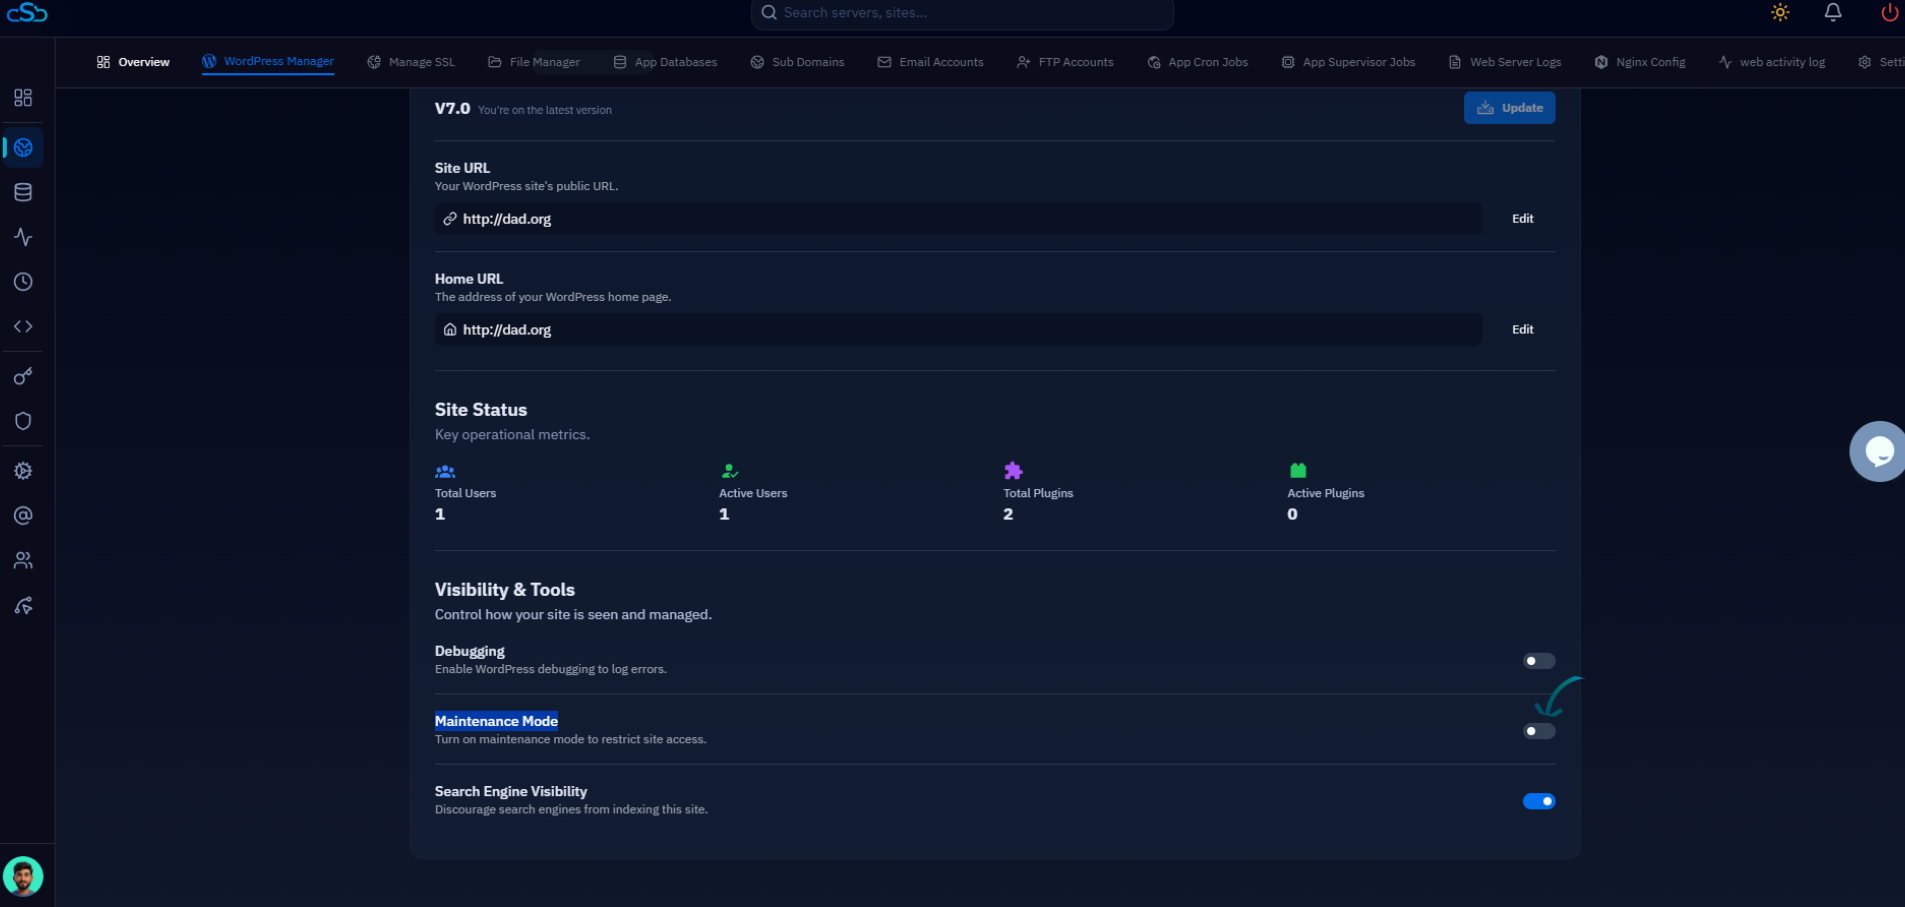
Fig. 04 — WordPress Manager General tab showing the Visibility & Tools section with the Maintenance Mode toggle highlighted.