How to Enable LiteSpeed Cache Plugin in WordPress Using Redis
Overview
The LiteSpeed Cache plugin is the official caching solution for OpenLiteSpeed servers, and when combined with Redis as the object cache backend, it delivers one of the fastest and most capable WordPress configurations available. Redis is a persistent in-memory data store that caches PHP object computations and database query results in RAM — so repeat requests are served in microseconds instead of triggering repeated MariaDB queries. Unlike Memcached, Redis also supports data persistence and more advanced data structures, making it an excellent choice for WooCommerce stores, membership sites, logged-in user sessions, and any WordPress installation under significant concurrent load.
This guide walks you through the complete setup on a CloudStick OpenLiteSpeed server: enabling the Redis service from the Services page, installing the Redis PHP extension via EasyPHP, installing and activating the LiteSpeed Cache plugin in WordPress, and configuring object caching to use Redis on port 6379 — all from the CloudStick dashboard and WordPress admin, without touching the command line.
Before starting, make sure WordPress is already installed on your OpenLiteSpeed server in CloudStick. If you have not done this yet, refer to the How to Install WordPress on OpenLiteSpeed Server guide first.
Step 1: Login to CloudStick Panel
Start by signing in to your CloudStick account. The main dashboard lists every server connected to your account — you will navigate into the OpenLiteSpeed server that hosts your WordPress site to access its services and PHP settings.
Go to the CloudStick dashboard: Open your browser and sign in to your CloudStick account at dash.cloudstick.io.
Find your OpenLiteSpeed server: Locate the server card for the server running your WordPress site in the server list.
Click Manage: Click the Manage button on the server card to open the server panel for that server.
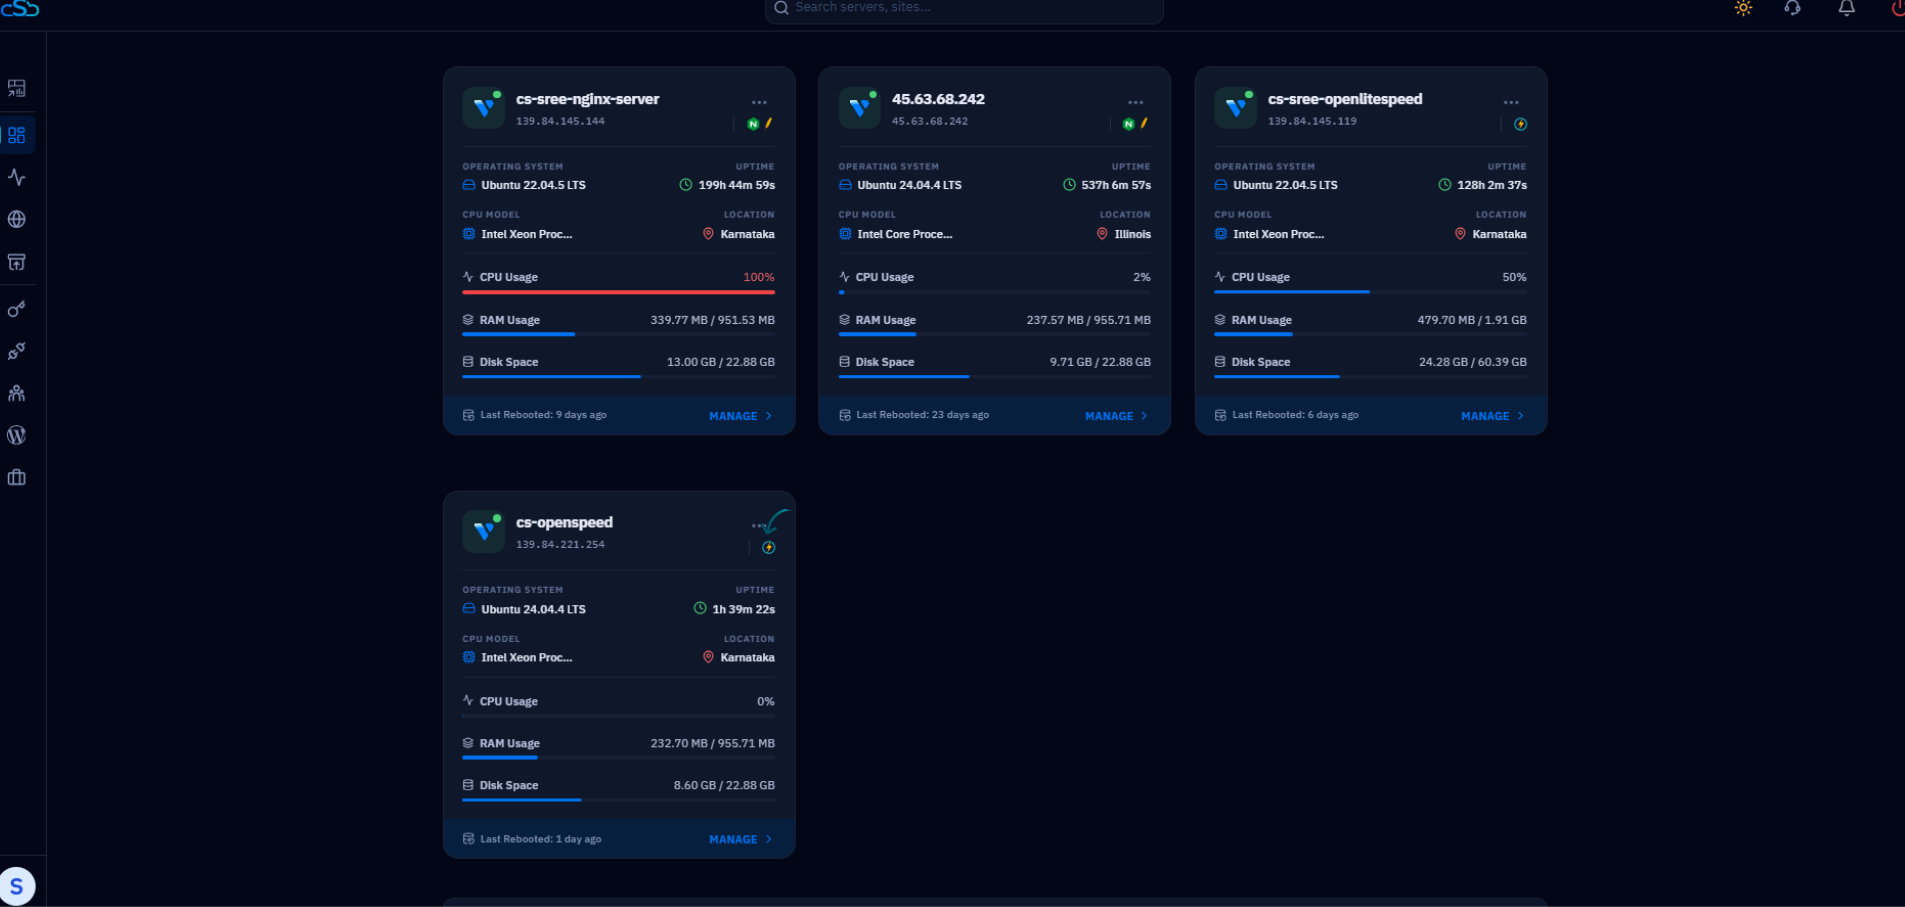
Fig. 01 — The CloudStick dashboard showing all connected servers with the Manage button.

Fig. 02 — The server panel for the selected OpenLiteSpeed server showing system overview and left-hand navigation.
Step 2: Enable Redis Service
Redis is pre-installed on every CloudStick server but ships in a disabled state to conserve RAM until it is needed. Before the LiteSpeed Cache plugin can use it as an object cache backend, you must enable and start the Redis service from the Services page in the server panel.
Click Services: In the left-hand navigation of the server panel, click Services to open the Manage Server Services page.
Locate the Redis card: Find the Redis service card in the services grid — it will show a disabled or stopped status.
Open the action menu (⋮): Click the three-dot menu icon on the Redis card to reveal the available actions.
Click Enable: Select Enable from the dropdown to activate the Redis service on the server.
Click Start: Once enabled, open the action menu again and click Start to bring Redis online immediately.
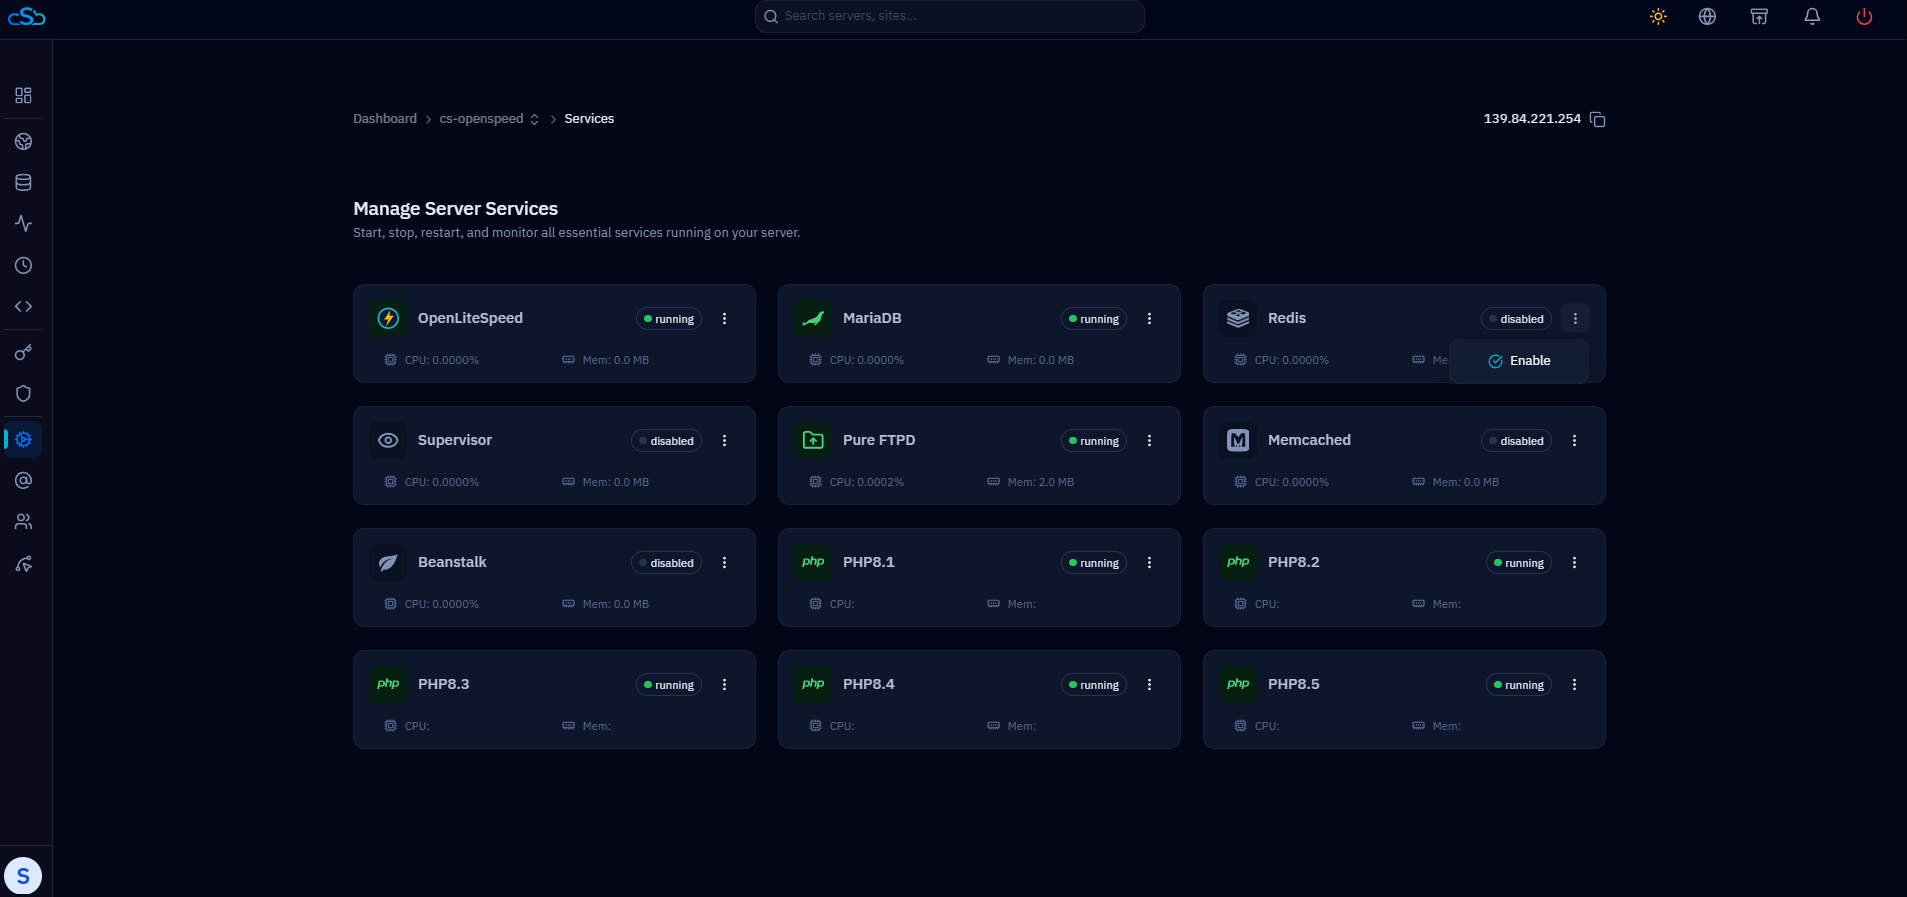
Fig. 03 — The Services page showing the Redis card with the action menu open and the Enable option highlighted.
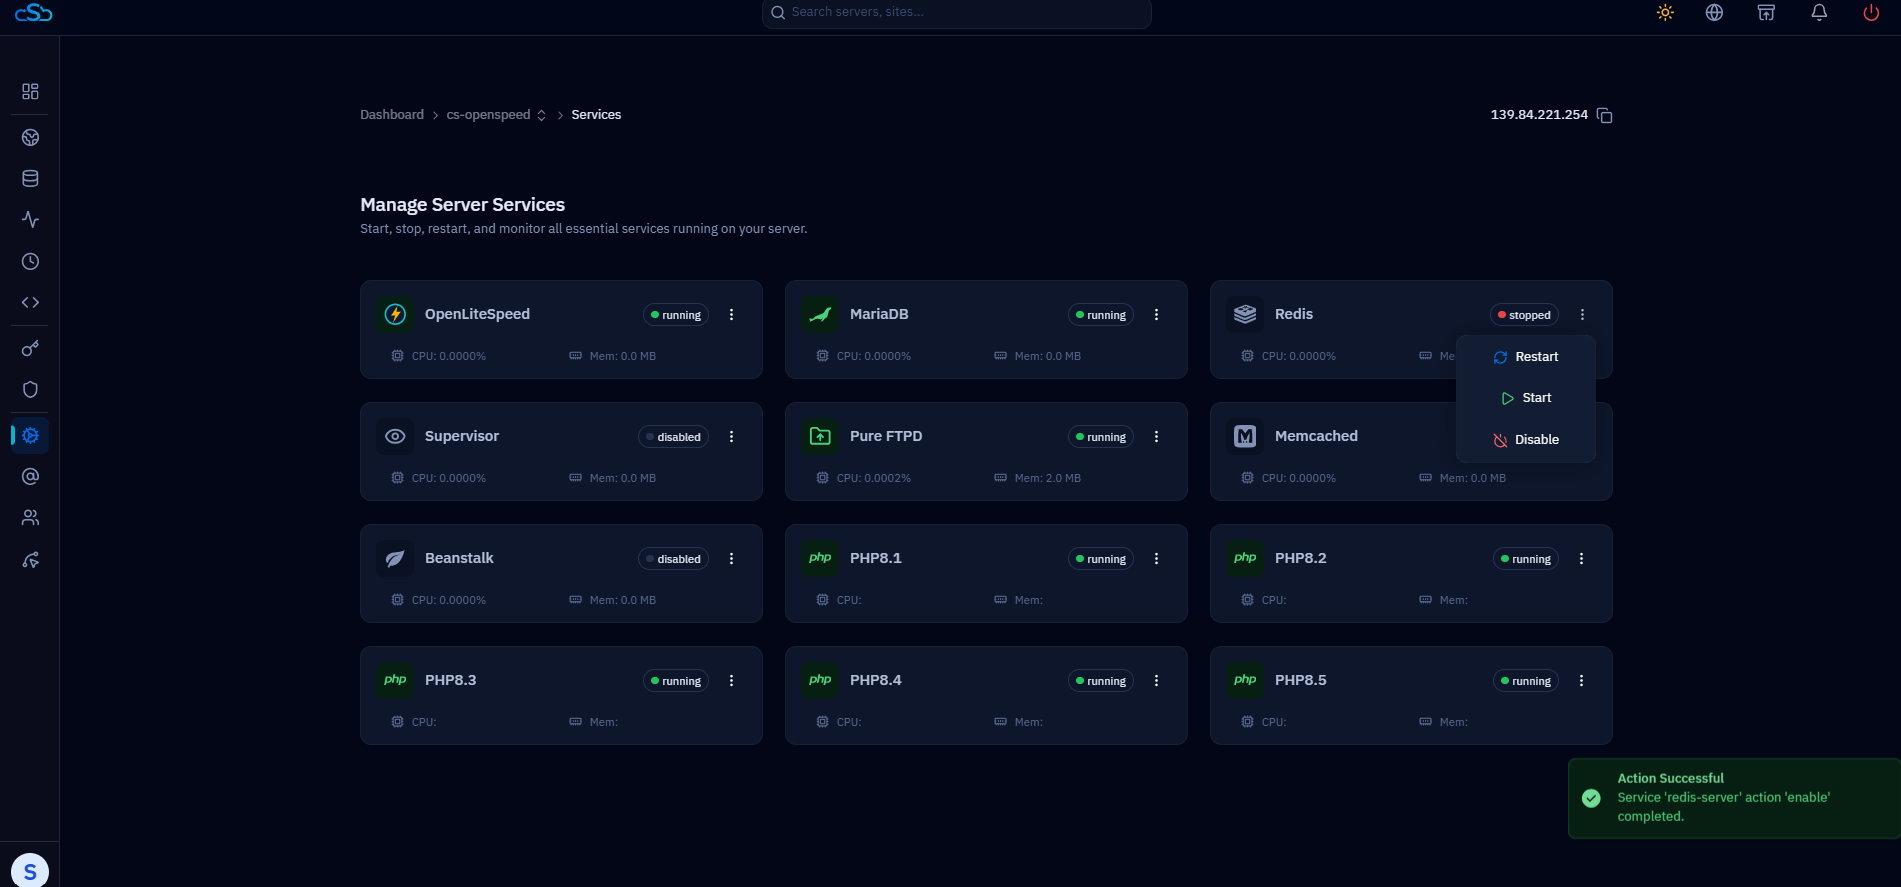
Fig. 04 — The Redis service action menu showing Start, Restart, and Disable options after the service has been enabled.
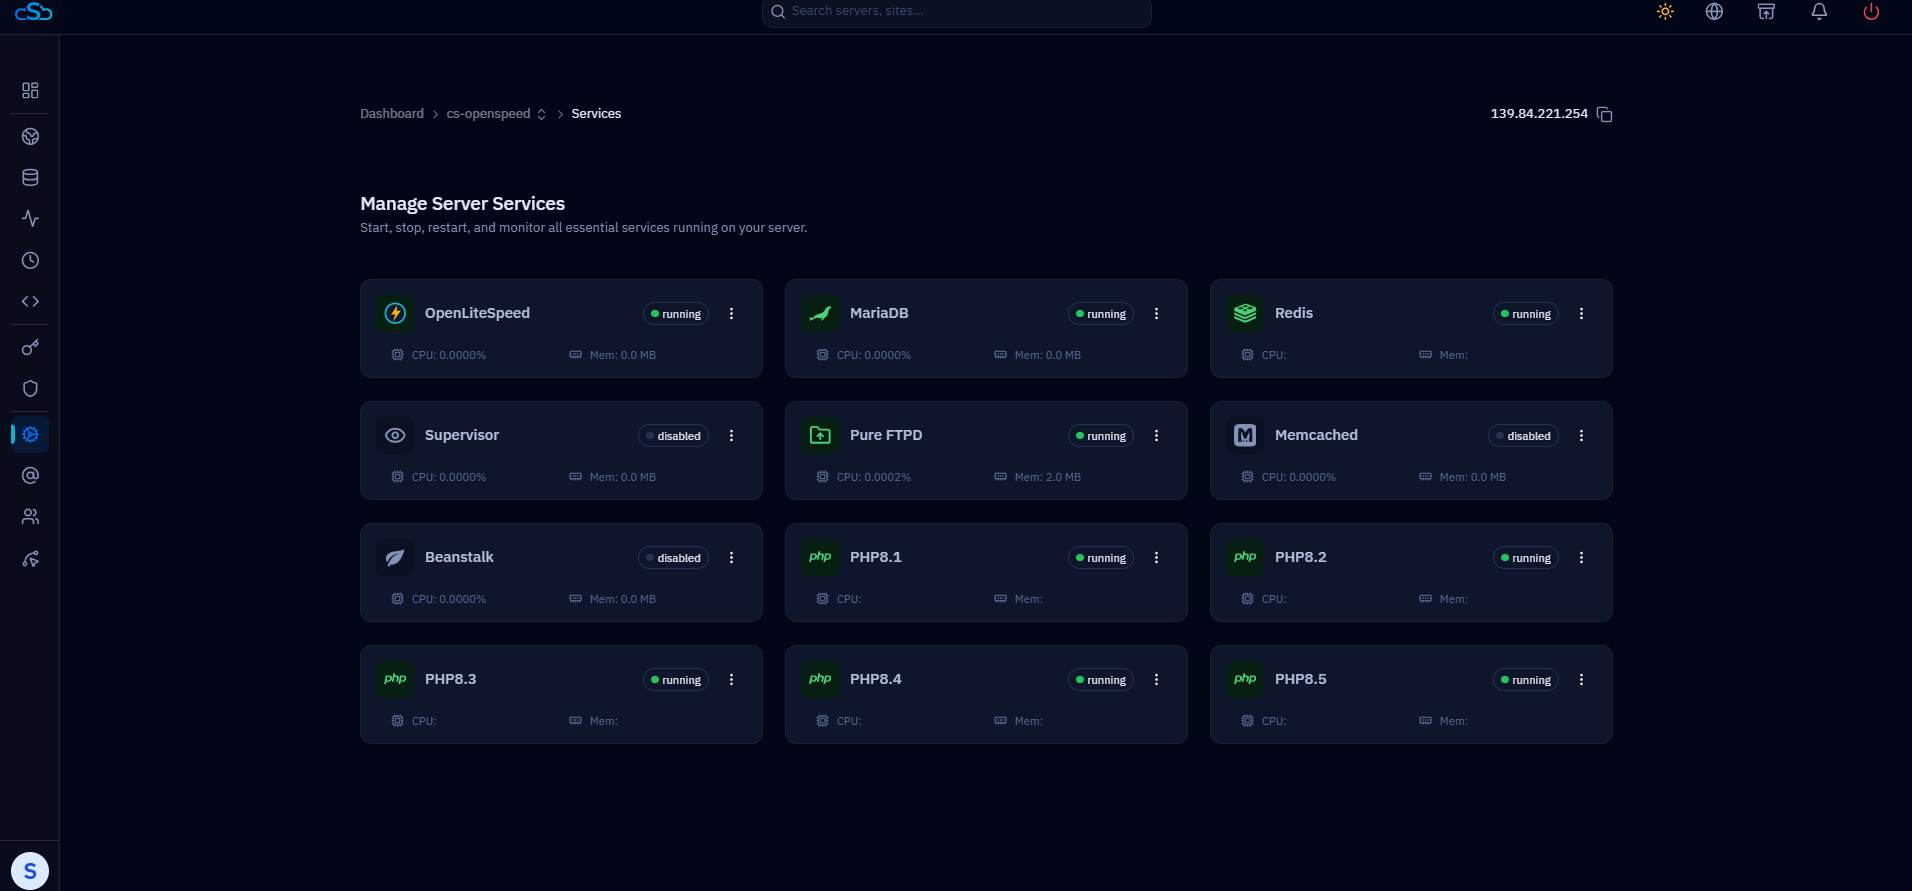
Fig. 05 — The Services page confirming Redis is now running with a green running status indicator.
After clicking Start, the Redis card will display a green running badge. The service listens on localhost:6379 by default — no additional network or firewall configuration is needed for a local WordPress connection.
Step 3: Install Redis PHP Extension via EasyPHP
The Redis service running on the server is only half of the equation — PHP must also have the redis extension loaded so it can communicate with the Redis daemon. Without this extension, the LiteSpeed Cache plugin will not be able to connect to Redis even if the service is running. CloudStick's EasyPHP feature lets you install PHP extensions for any version in one click, directly from the dashboard.
Navigate to EasyPHP: In the left-hand navigation of the server panel, click the EasyPHP icon to open the PHP extension manager.
Select the correct PHP version: Click the PHP version card that matches what your WordPress site is running — for example, PHP 8.3.
Find the redis extension: Scroll through the extensions list and locate the redis extension entry.
Click the install (download) icon: Click the download icon on the right side of the redis extension row to install it for the selected PHP version.
Wait for confirmation: The extension status will update to show it is installed. No server restart is required.

Fig. 06 — The server panel left-hand navigation with the EasyPHP option highlighted.
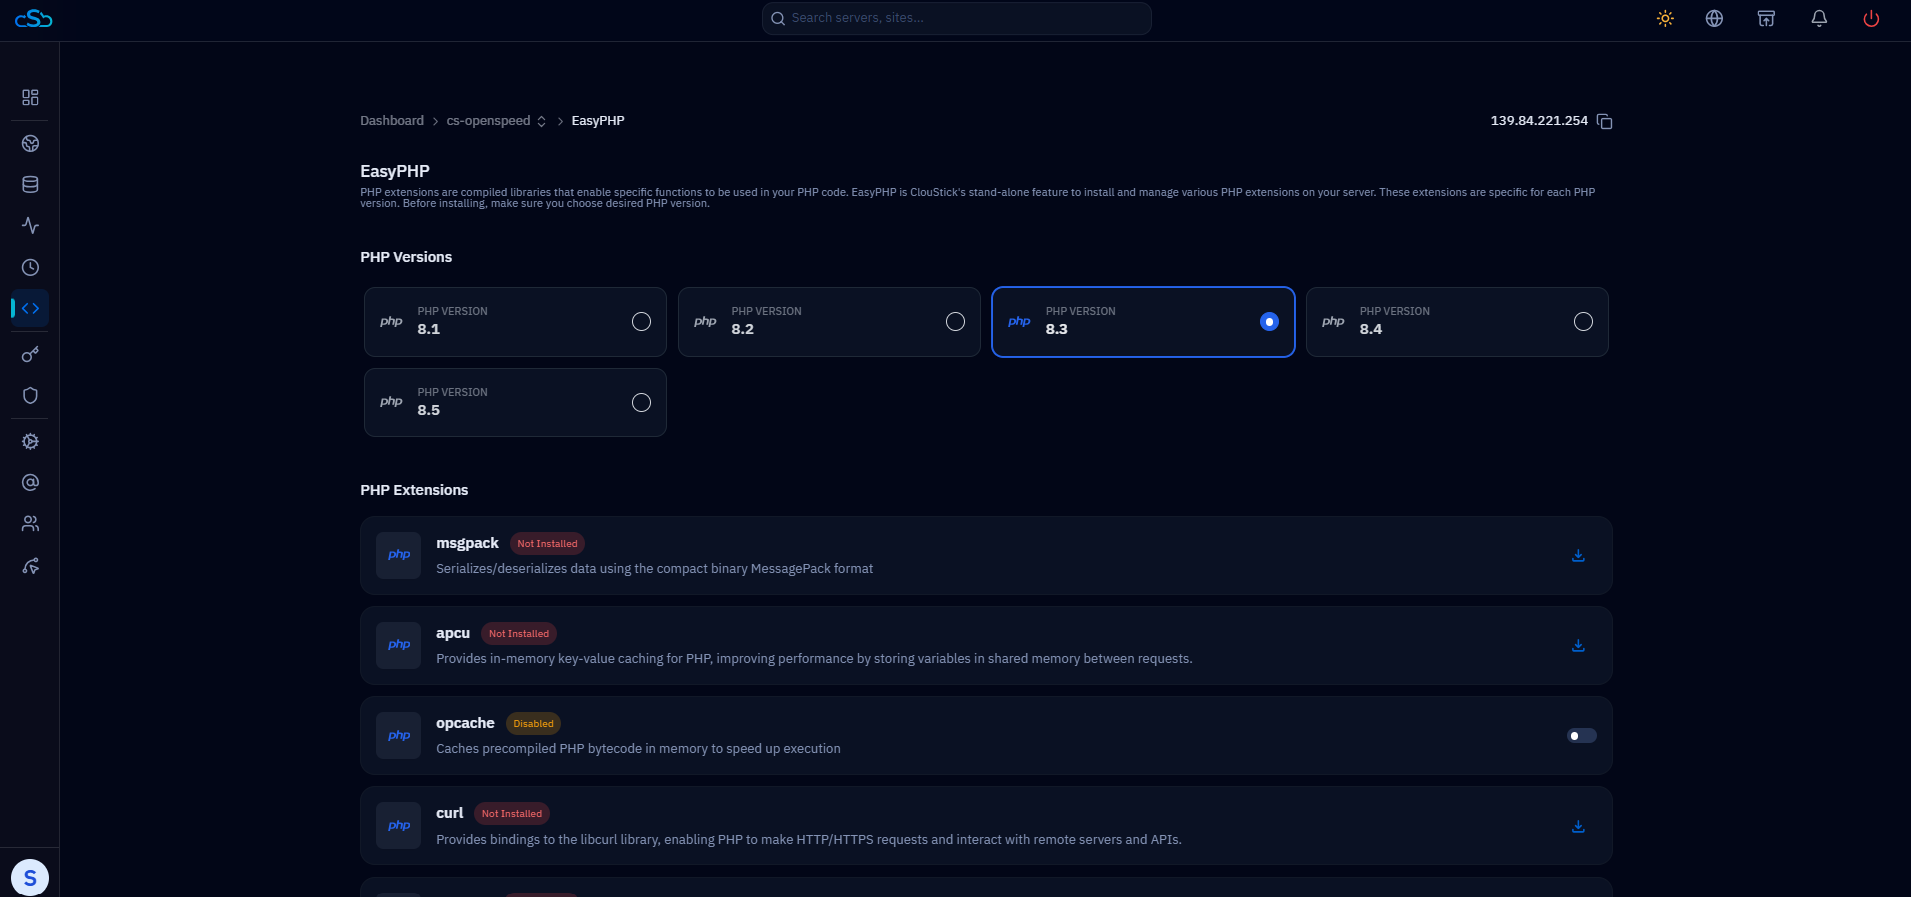
Fig. 07 — The EasyPHP page showing PHP version cards — click the version your WordPress site is using.
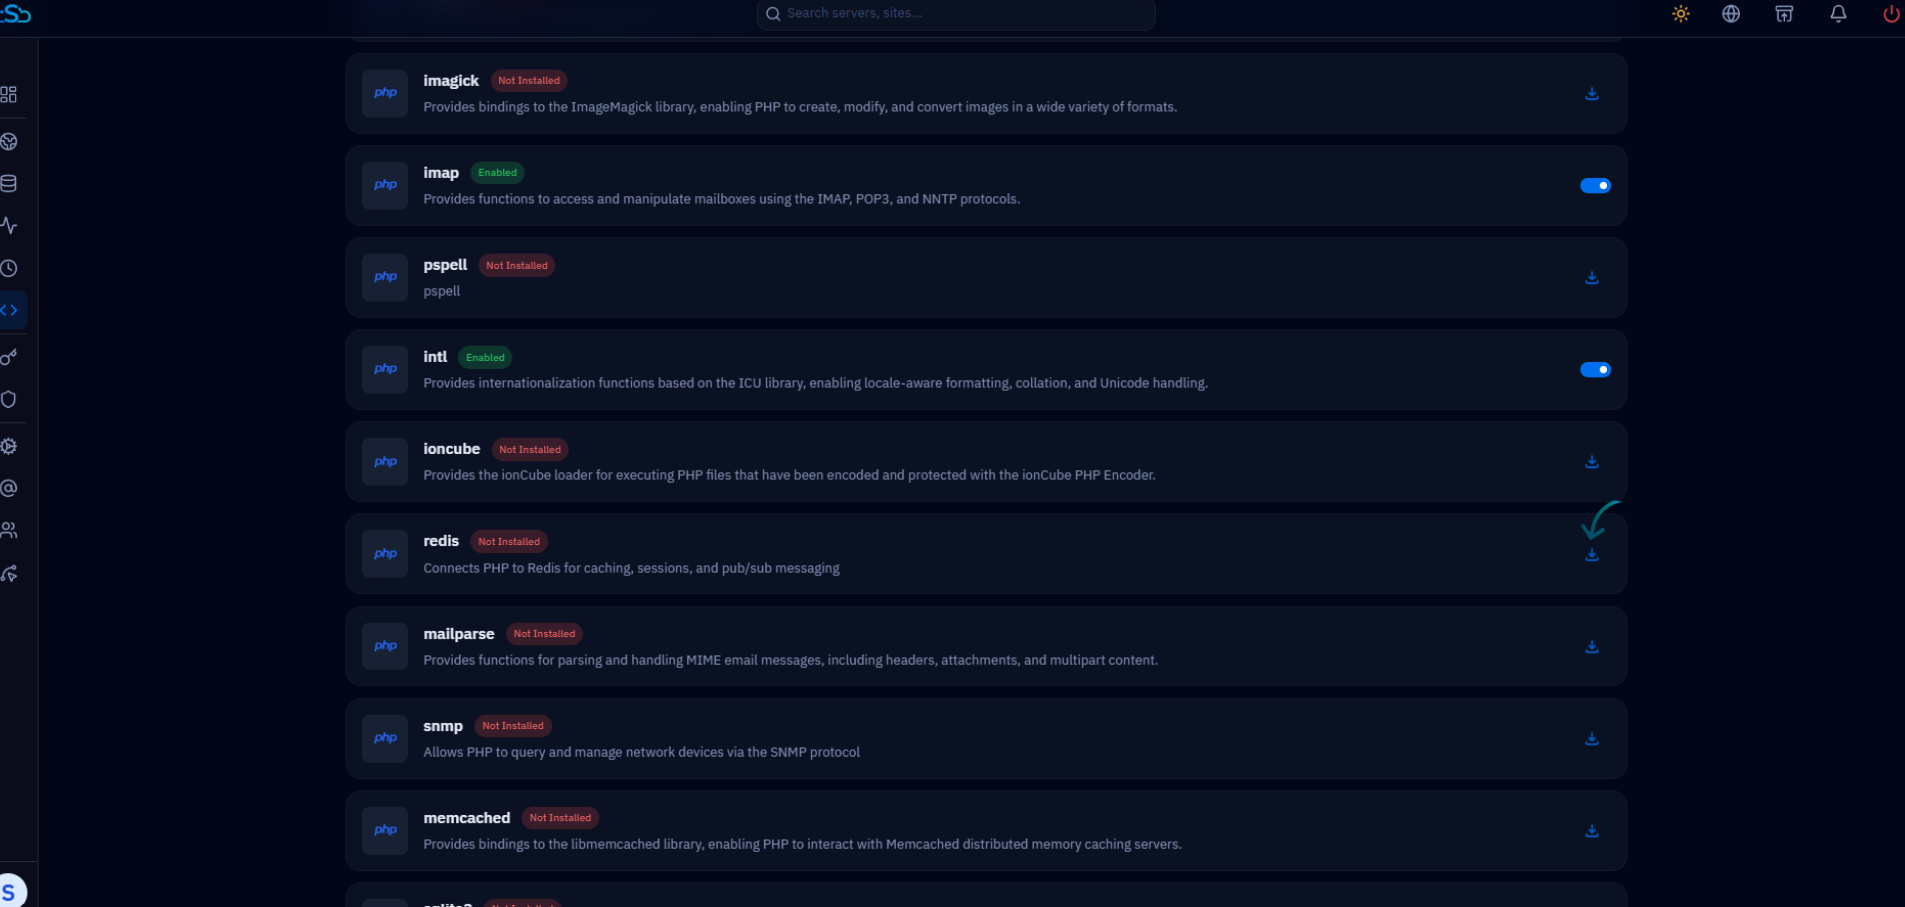
Fig. 08 — The PHP extensions list with the redis extension row and the download icon to install it.
Make sure you select the same PHP version that your WordPress site uses. You can verify the PHP version assigned to your site by going to Websites in the server panel and checking the site settings.
Step 4: Install the LiteSpeed Cache Plugin in WordPress
The LiteSpeed Cache plugin by LiteSpeed Technologies is the recommended — and most capable — caching plugin for any WordPress site running on OpenLiteSpeed. It integrates directly with the OLS server-level cache, supports full-page caching, and provides built-in object cache integration with both Redis and Memcached. If it is not already installed on your WordPress site, add it now from the WordPress plugin directory.
Log in to your WordPress admin: Open your browser and go to yoursite.com/wp-admin, then sign in with your WordPress credentials.
Go to Plugins → Add New Plugin: In the WordPress left-hand menu, click Plugins, then click Add New Plugin at the top.
Search for LiteSpeed Cache: In the search box at the top right of the Add Plugins page, type LiteSpeed Cache.
Click Install Now: Find the LiteSpeed Cache plugin by LiteSpeed Technologies in the search results and click Install Now.
Click Activate: Once installation finishes, click the Activate button to enable the plugin on your WordPress site.
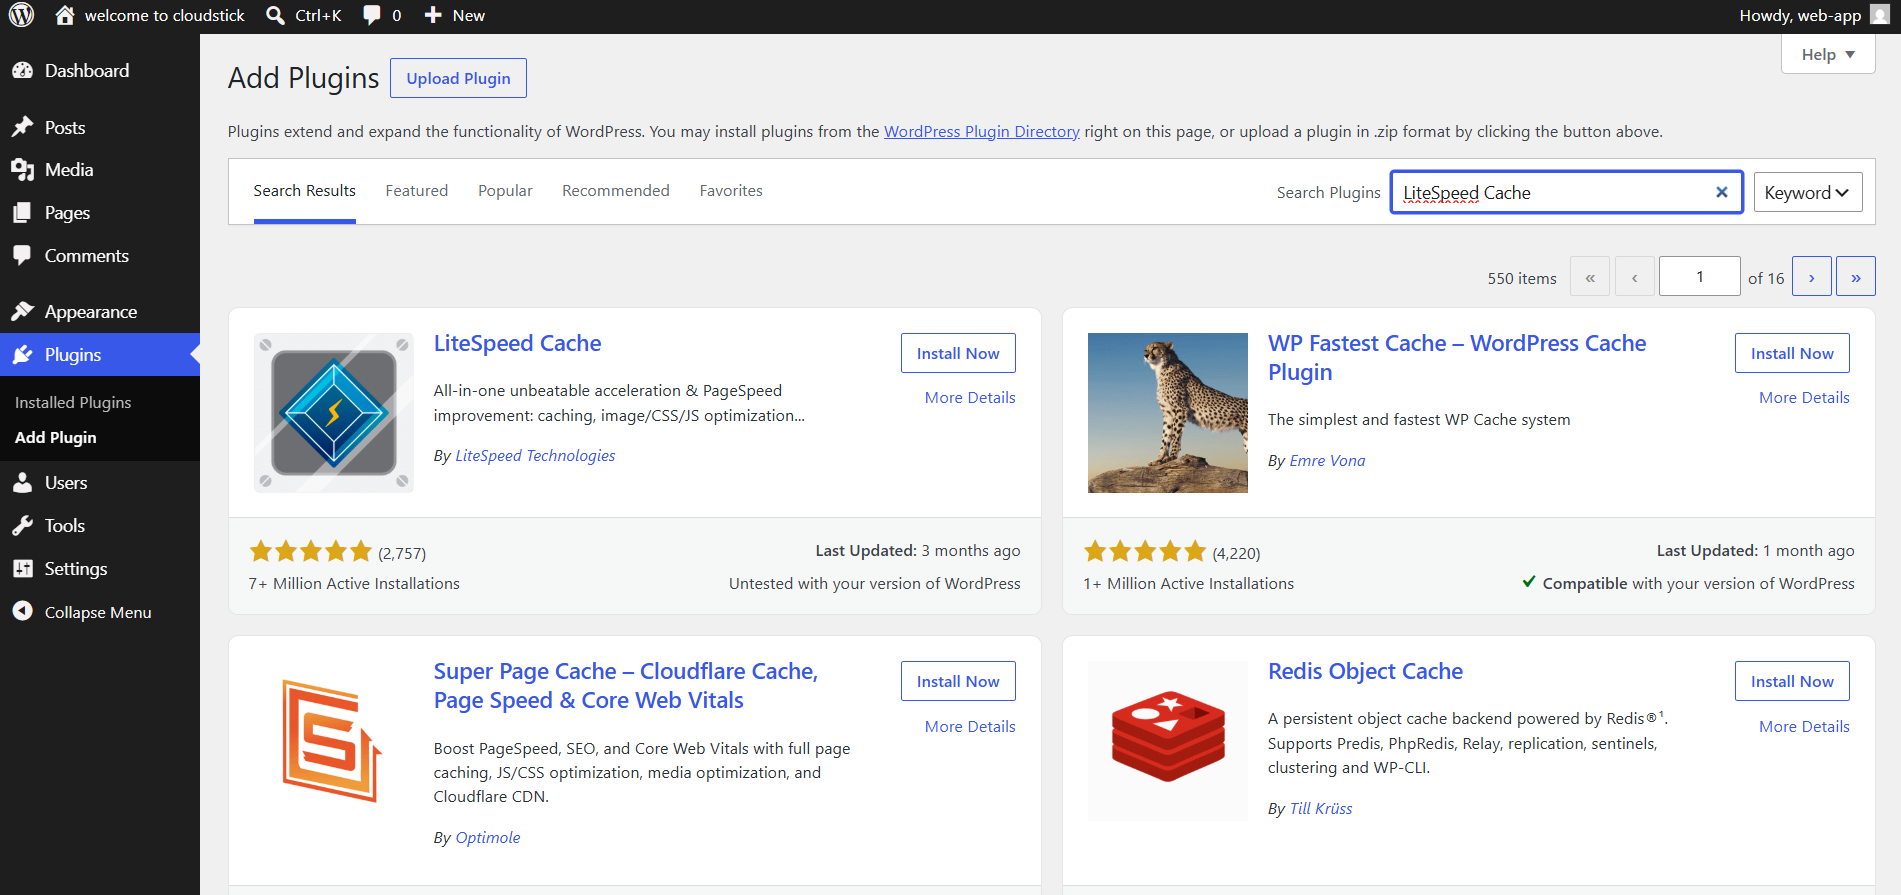
Fig. 09 — The WordPress Add Plugins page with LiteSpeed Cache entered in the search box.
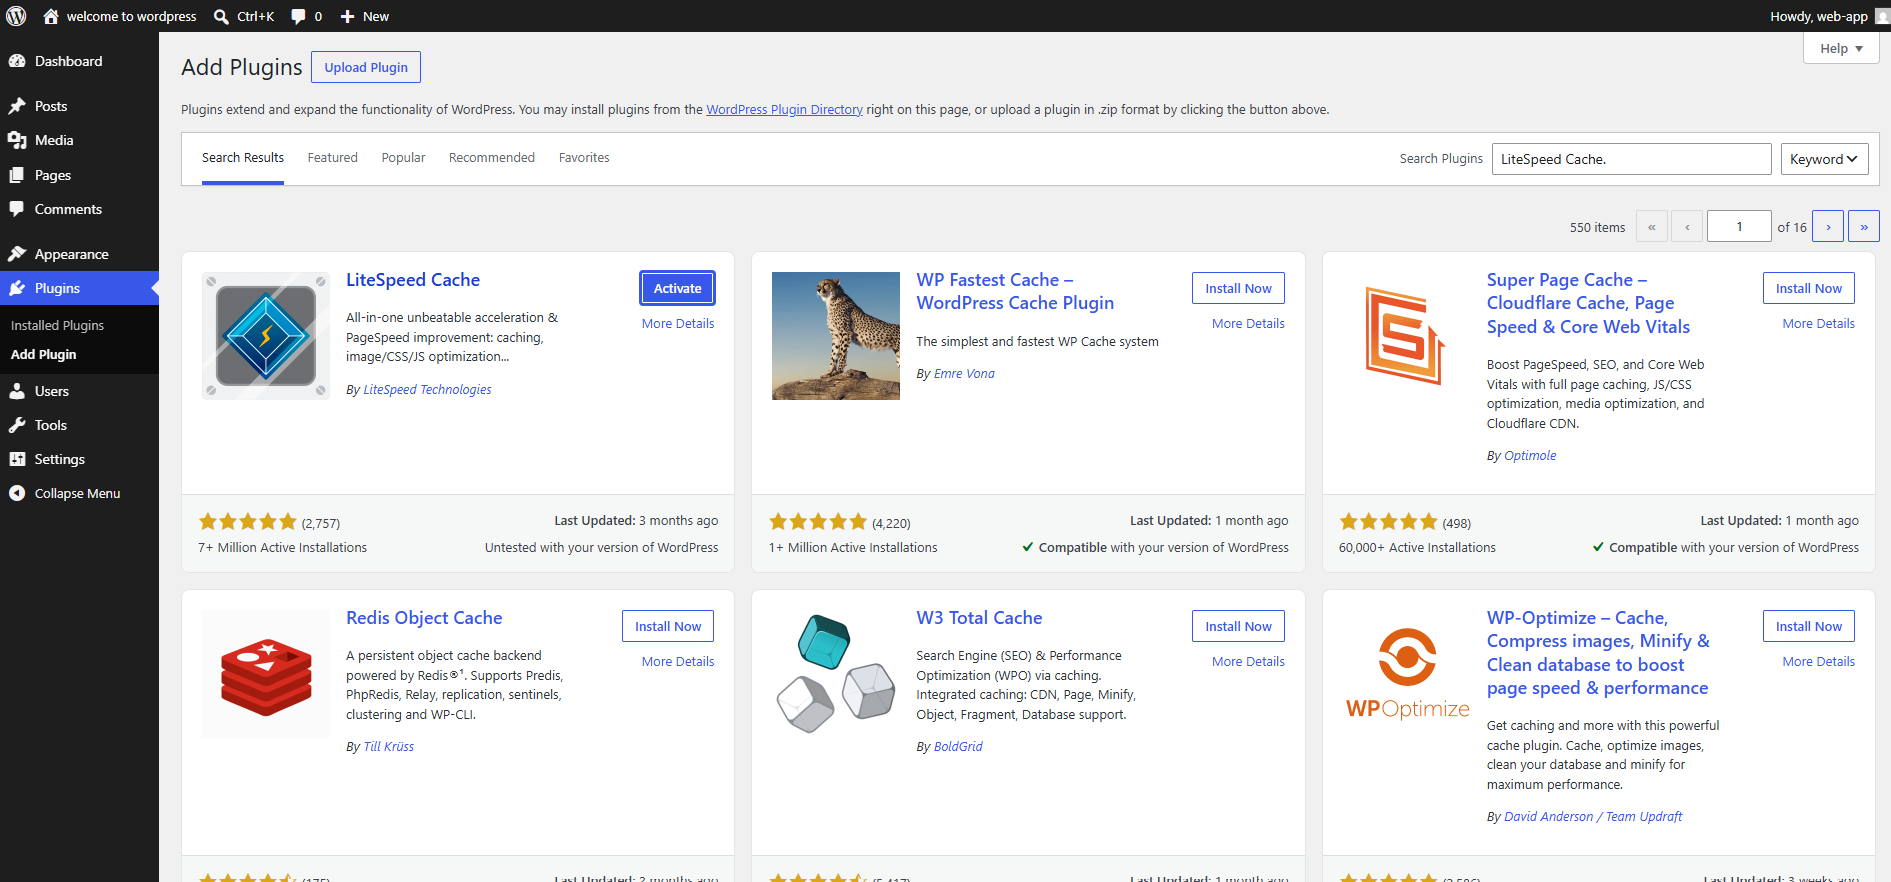
Fig. 10 — The LiteSpeed Cache plugin card in search results showing the Install Now button.
If the LiteSpeed Cache plugin is already installed on your WordPress site, skip directly to Step 5. Just make sure it is activated and up to date before continuing.
Step 5: Configure Redis in LiteSpeed Cache
With the LiteSpeed Cache plugin active and the Redis PHP extension installed, you can now configure WordPress to use Redis as its object cache backend. The entire configuration is handled through the LiteSpeed Cache plugin settings — no manual edits to wp-config.php or server files are needed.
Go to LiteSpeed Cache → Cache: In the WordPress admin left-hand menu, click LiteSpeed Cache, then click Cache from the submenu.
Click the Object tab: On the Cache settings page, click the Object tab to open the object cache configuration section.
Set Object Cache to ON: Toggle the Object Cache switch to ON to enable object caching for your WordPress site.
Set Method to Redis: In the Method dropdown, select Redis as the object cache backend.
Set Host to localhost: Enter localhost in the Host field — Redis is running on the same server as WordPress.
Set Port to 6379: Enter 6379 in the Port field — this is the default port Redis listens on.
Click Save Changes: Click the Save Changes button at the bottom of the page to apply your configuration.
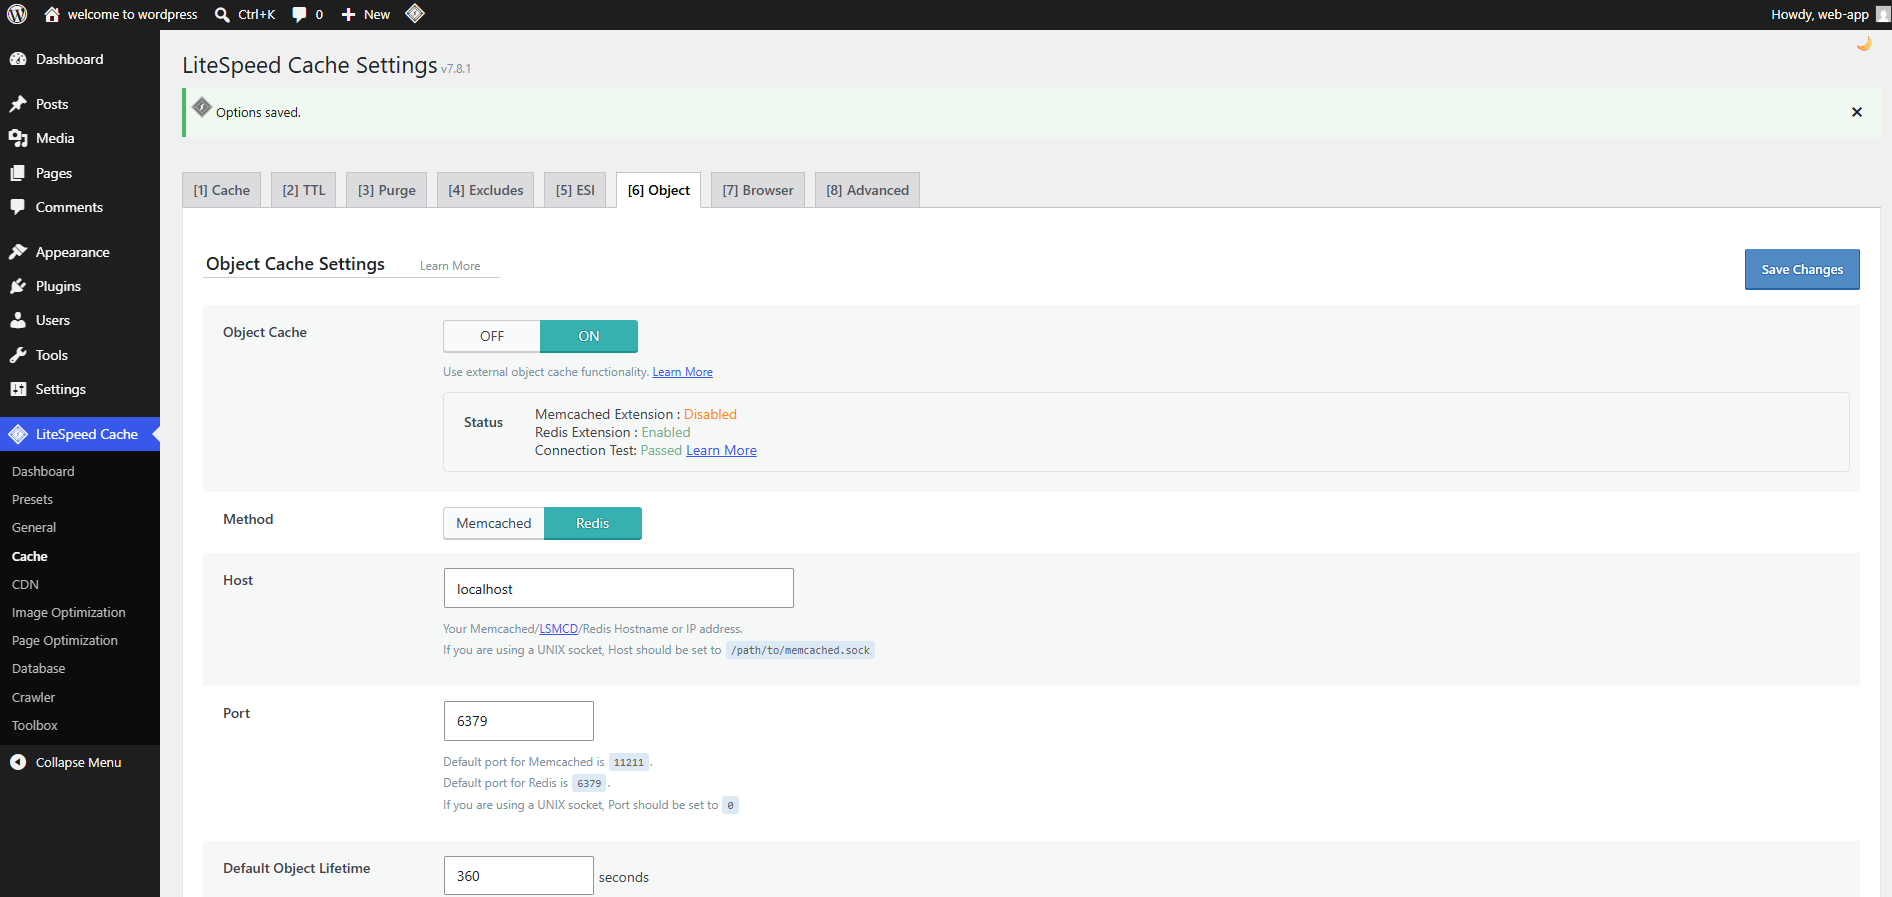
Fig. 11 — LiteSpeed Cache Object settings tab showing Object Cache ON, Method: Redis, Host: localhost, Port: 6379.
After saving, LiteSpeed Cache automatically runs a connection test. If the connection is successful, you will see a Connection Test: Passed indicator on the same page. If the test fails, verify that the Redis service is running (Step 2) and the PHP extension is installed (Step 3).
Step 6: Verify Redis Is Working
After saving the LiteSpeed Cache object settings, the plugin automatically tests the Redis connection and displays a live status summary. Check the following indicators on the Object tab to confirm everything is configured correctly.
Redis Extension: Should show Enabled — confirming the PHP Redis extension you installed via EasyPHP in Step 3 is active for this PHP version.
Connection Test: Should show Passed — confirming the LiteSpeed Cache plugin can reach the Redis daemon on localhost:6379.
Object Cache: Should show Enabled — confirming Redis object caching is live for your WordPress site.
If any status shows as failed or disabled, revisit the corresponding step: check the Redis service status on the Services page, verify the PHP extension is installed for the correct PHP version in EasyPHP, and confirm the host and port settings in LiteSpeed Cache match.
Your WordPress site is now using the LiteSpeed Cache plugin with Redis object caching on OpenLiteSpeed. PHP object computation results and MariaDB query results are stored in RAM and served on repeat requests without hitting the database — improving page rendering speed and reducing server load, particularly on high-traffic, WooCommerce, or membership sites.