How to Disable Search Engine Visibility in WordPress
Overview
When your website is still under development, being rebuilt, or going through maintenance, you usually don't want half-finished pages showing up in Google search results. WordPress solves this with the Search Engine Visibility setting, which asks search engines not to index your site — the same option you would normally find under Settings → Reading in the WordPress admin.
With the CloudStick WordPress Manager, you can flip this setting on or off with a single toggle in the General settings section — no WordPress admin login required. This guide shows you where to find the toggle and how to use it safely.
This guide applies to WordPress websites hosted on a CloudStick-managed server. If you haven't set up your site yet, see How to install WordPress in CloudStick first. Remember to re-enable search engine visibility before launch — a site left hidden will gradually disappear from search results.
Step 1: Log In to CloudStick
Everything starts from the CloudStick dashboard, which lists all the servers connected to your account.
Sign in to CloudStick: Log in to your CloudStick account with your credentials to open the main dashboard.
Step 2: Open Your Server
Each server card on the dashboard shows live stats such as CPU, RAM, and disk usage. Open the server that hosts the WordPress website you want to hide from search engines.
Go to Servers: From the dashboard, locate the server card for the machine hosting your WordPress site.
Select your server: Click the server name (or its Manage link) to open the server panel.
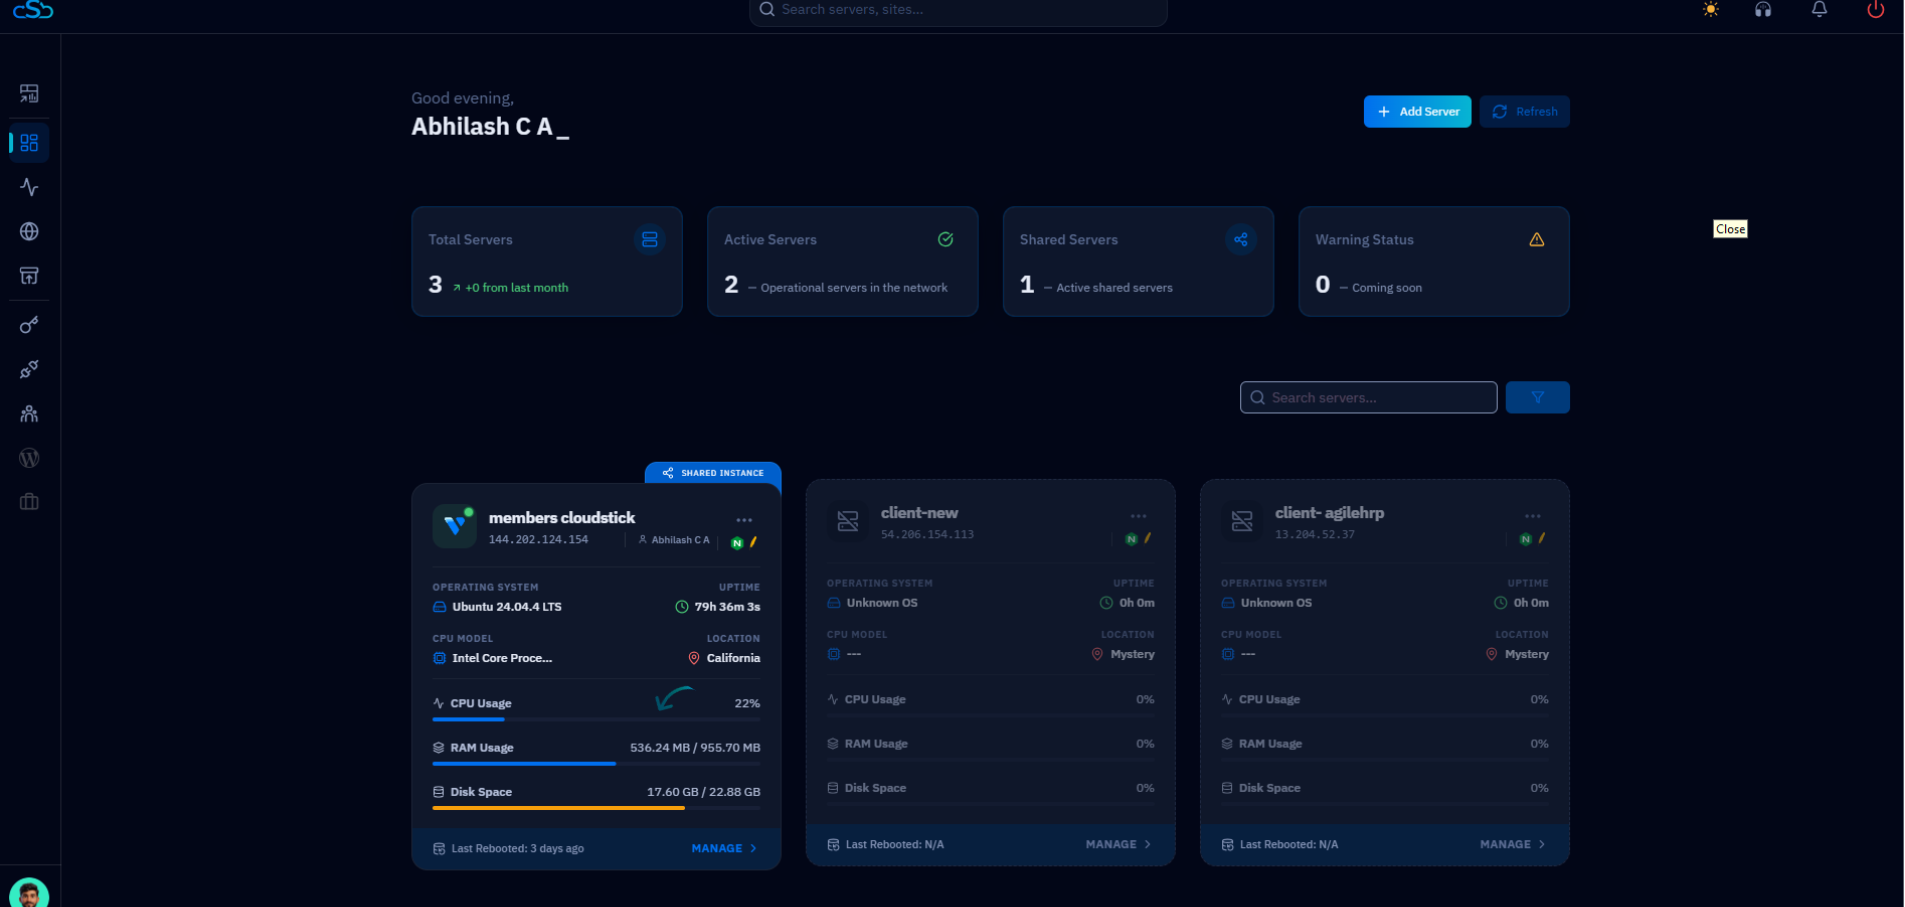
Fig. 01 — The CloudStick dashboard showing connected servers; select the server that hosts your WordPress website.
Step 3: Go to the Websites Section
The server panel opens on the System Overview, showing uptime, CPU, memory, and disk usage. Your hosted sites live in the Websites section.
Open Websites: Click the Websites icon in the left-hand navigation, or the Websites card under Server Resources, to list the sites hosted on this server.
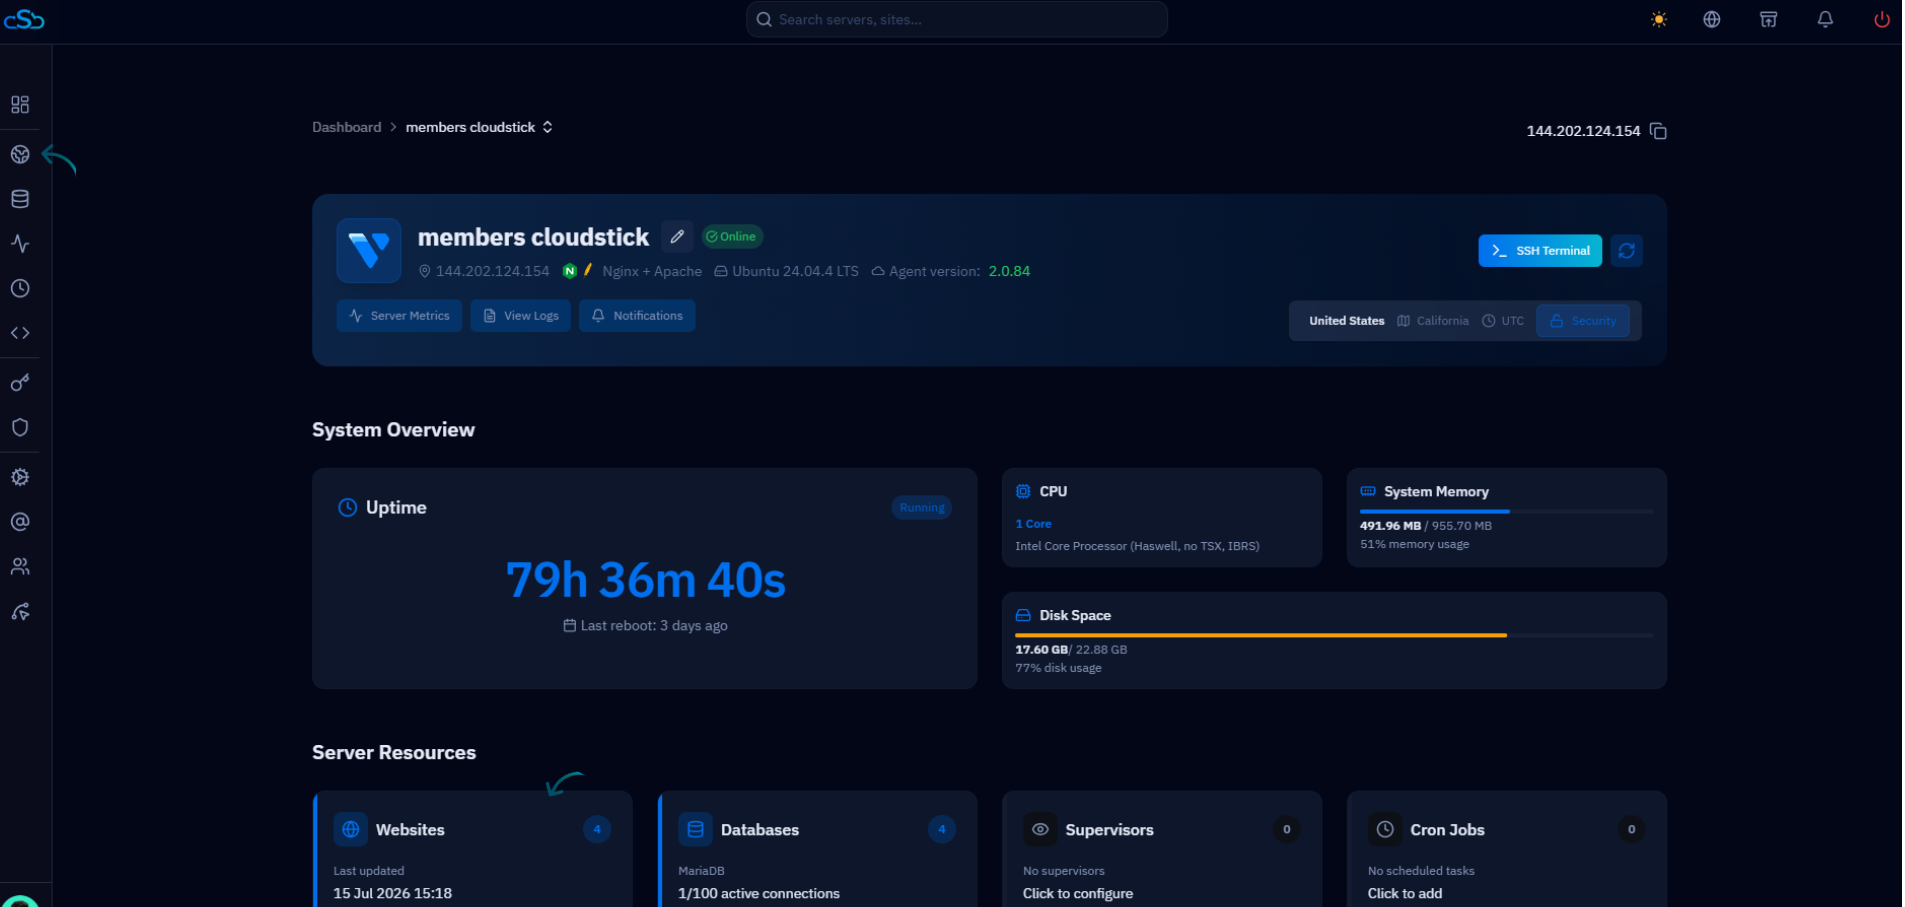
Fig. 02 — The server panel's System Overview with the Websites section highlighted in the left-hand navigation.
Step 4: Select Your WordPress Website
The Websites List shows every application on the server. WordPress sites are easy to spot by the WordPress logo on their card.
Click your WordPress website: Select the site whose search engine visibility you want to change.
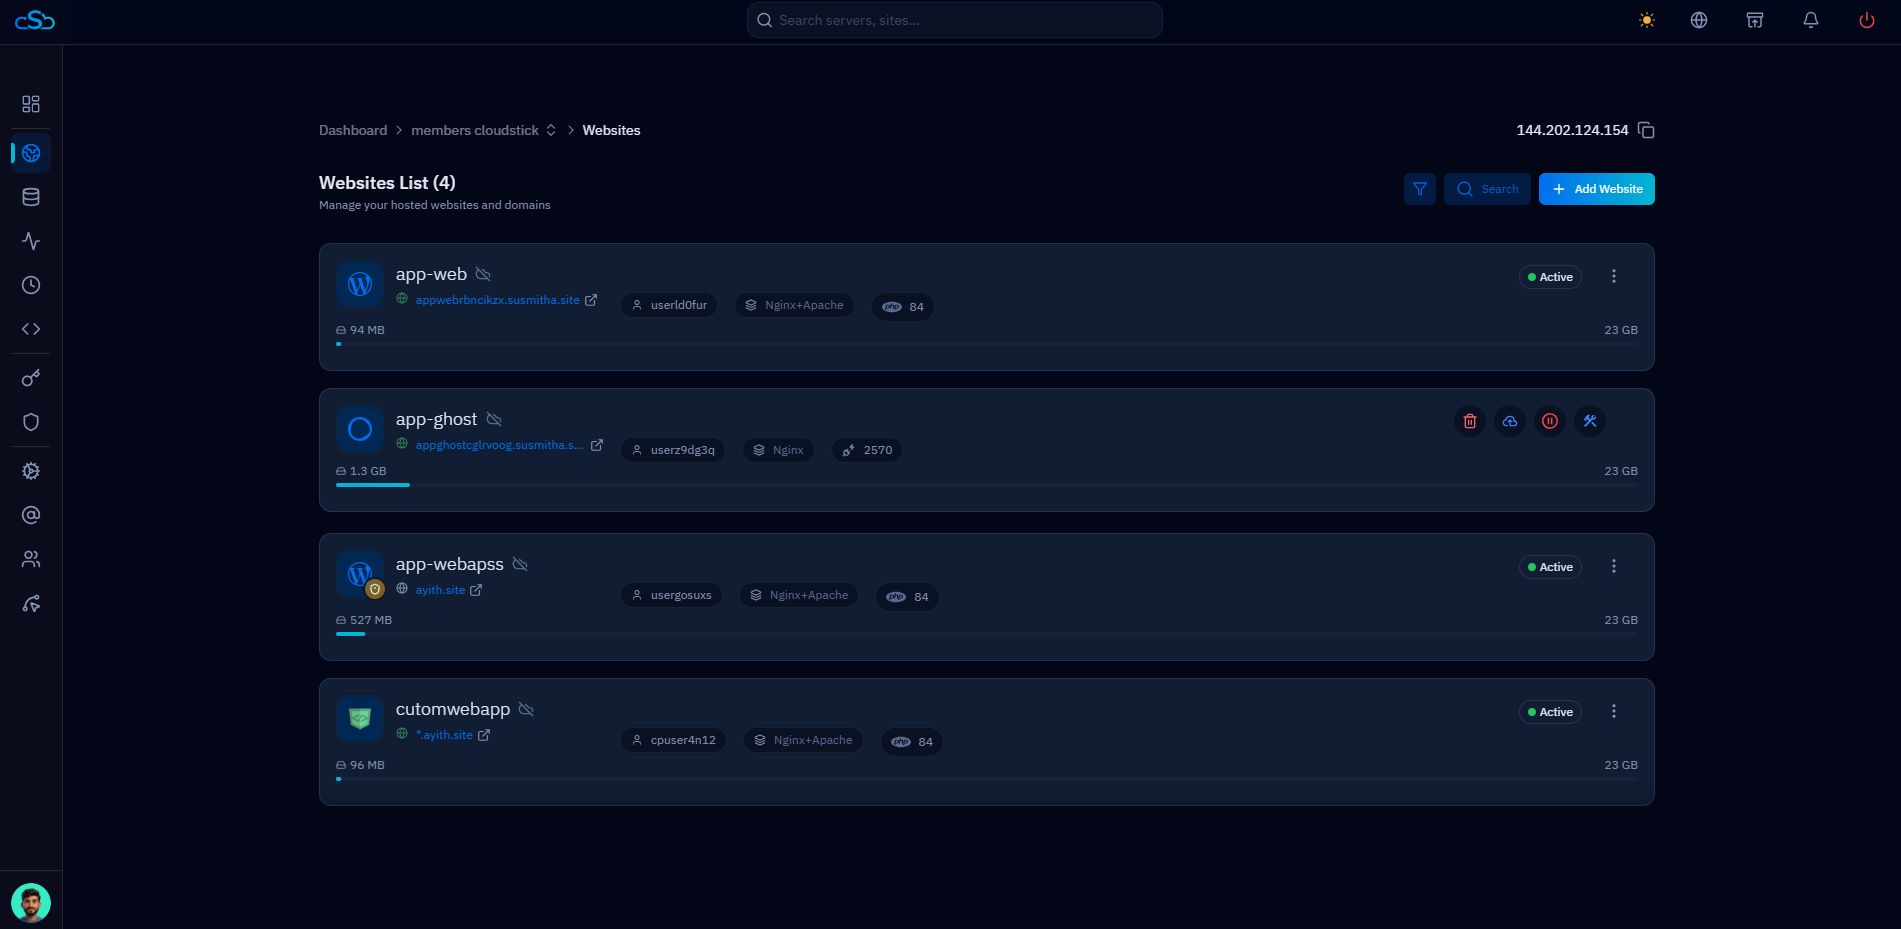
Fig. 03 — The Websites List showing hosted applications; click the WordPress website you want to update.
Step 5: Open the WordPress Manager
The website view opens on the Website Summary, showing your domain, PHP version, and disk usage. The WordPress-specific controls live in the WordPress Manager.
Click the WordPress Manager tab: Select WordPress Manager from the tab bar at the top of the website view to open the management panel for your WordPress installation.
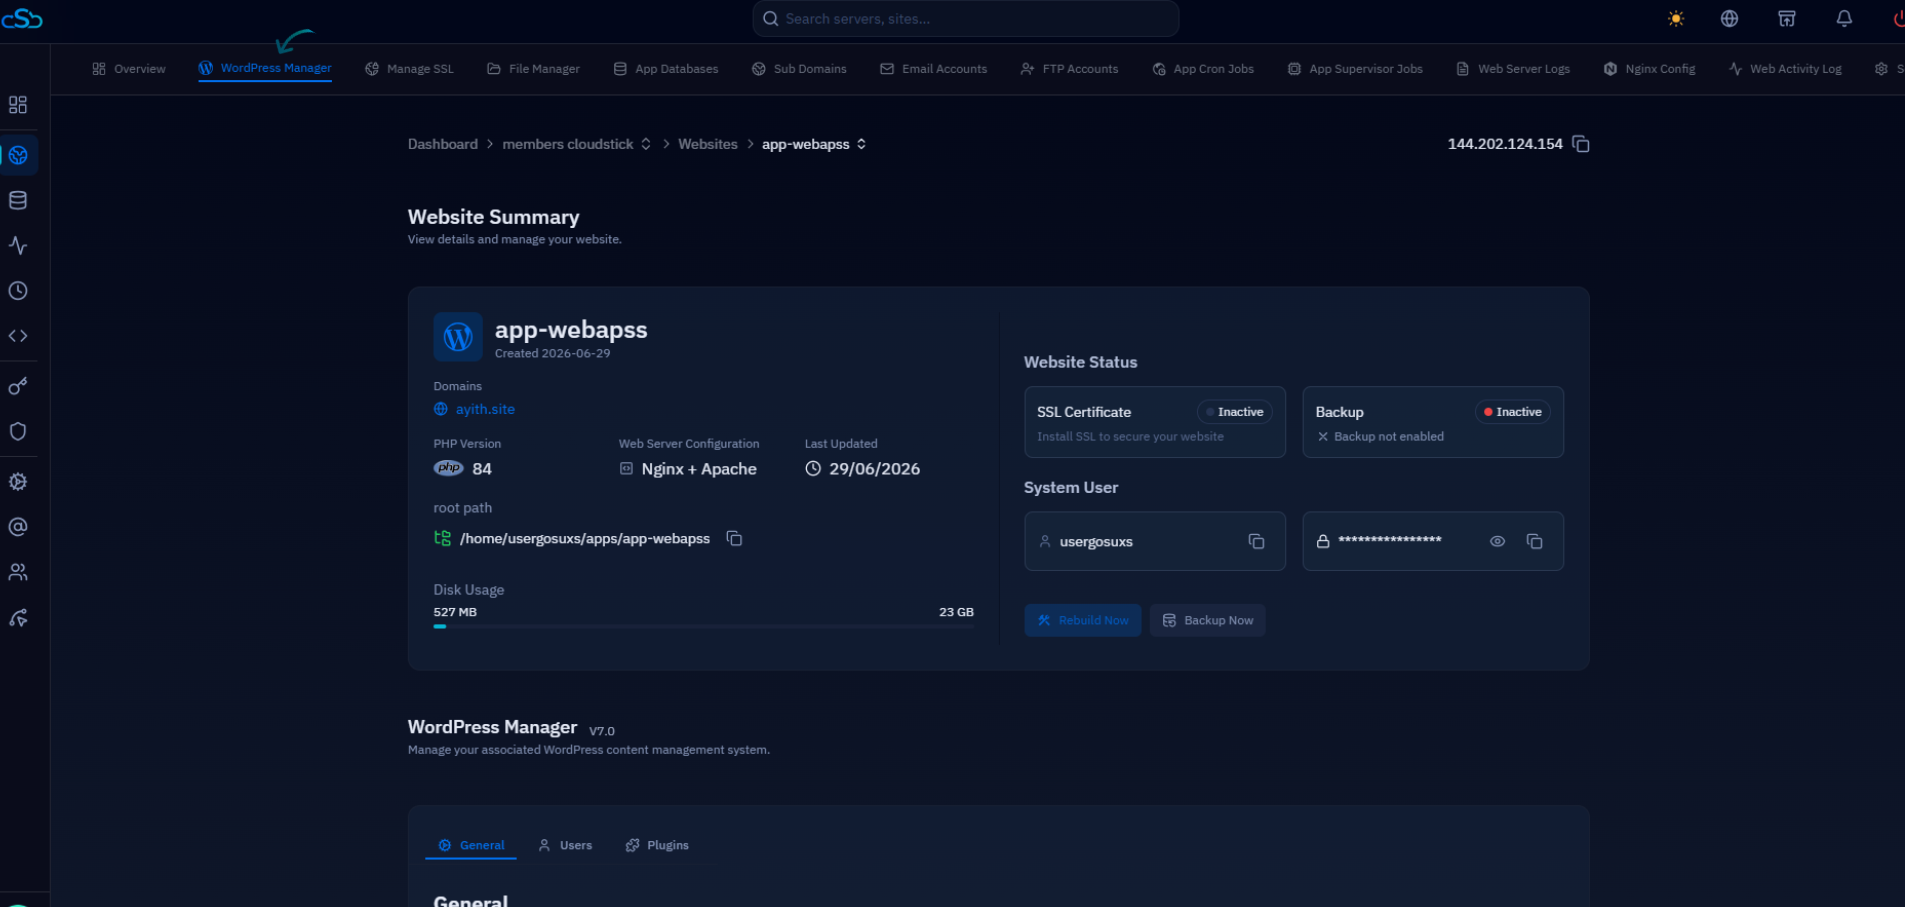
Fig. 04 — The Website Summary with the WordPress Manager tab highlighted at the top of the website view.
Step 6: Go to General Settings
The WordPress Manager is organized into General, Users, and Plugins tabs. Site-wide options, including visibility controls, live under General.
Open the General section: Click the General tab and scroll down to the Visibility & Tools area, which controls how your site is seen and managed.
Step 7: Disable Search Engine Visibility
Under Visibility & Tools you'll find the Search Engine Visibility option, described as "Discourage search engines from indexing this site." Flipping this toggle is equivalent to ticking the same checkbox in the WordPress admin.
Locate Search Engine Visibility: It sits alongside the Debugging and Maintenance Mode toggles in the Visibility & Tools area.
Turn the toggle on: Enable it to discourage search engines from indexing your site while it is under development or maintenance.
To make your site indexable again: Return to this toggle and turn it off once your site is ready for visitors.
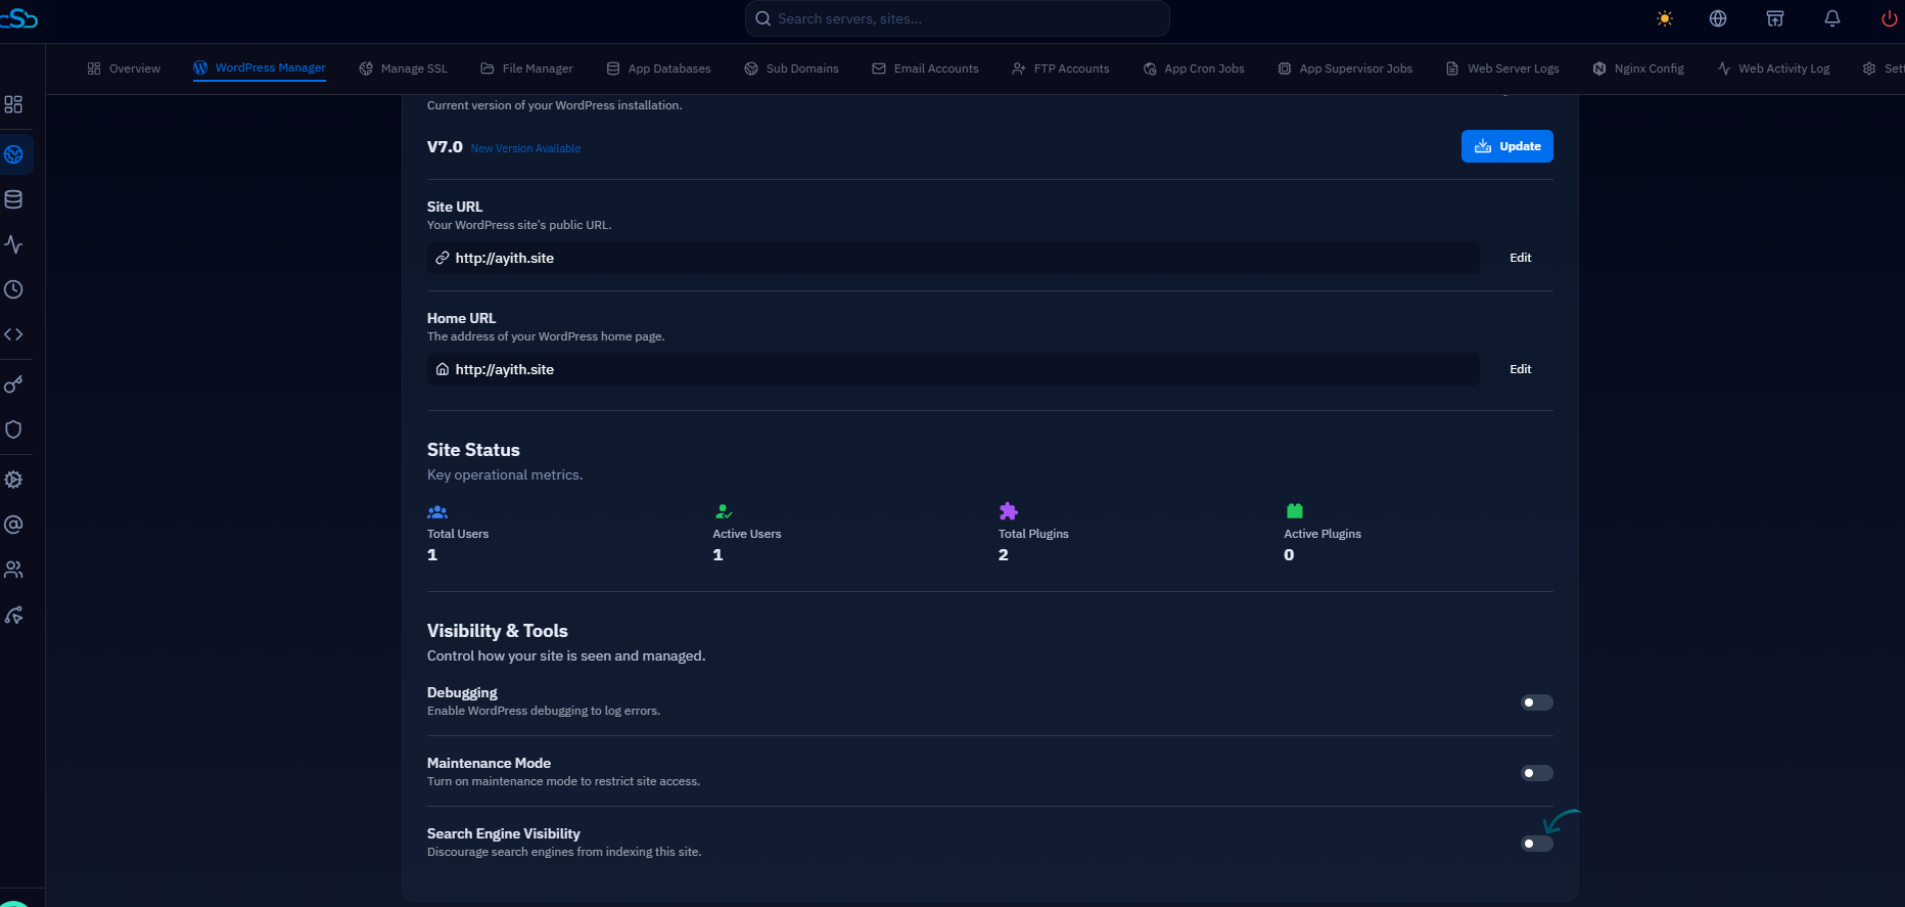
Fig. 05 — The Visibility & Tools area in General settings with the Search Engine Visibility toggle highlighted.
Disabling search engine visibility is a request, not a guarantee — well-behaved crawlers like Google honor it, but it does not password-protect your site. For stricter control while you work, you can also enable Maintenance Mode from the same Visibility & Tools area. Once your site is ready for visitors, re-enable search engine visibility so your content can be indexed.