How to Change WordPress Site URL in CloudStick
Overview
Your WordPress installation stores two important addresses: the Site URL, which points to where your WordPress core files live, and the Home URL, which is the address visitors use to reach your home page. You typically need to update them when you move to a new domain, switch from http to https, or fix a misconfigured address that is breaking links and redirects.
With the CloudStick WordPress Manager, you can view and update both URLs directly from the General settings section — no need to log in to the WordPress admin dashboard or edit wp-config.php by hand. This guide walks you through the entire process in eight quick steps.
This guide applies to WordPress websites hosted on a CloudStick-managed server. If you haven't set up your site yet, see How to install WordPress in CloudStick first. Entering an incorrect URL can make your website and admin area unreachable, so double-check the address before saving.
Step 1: Log In to CloudStick
Everything starts from the CloudStick dashboard, which lists all the servers connected to your account.
Sign in to CloudStick: Log in to your CloudStick account with your credentials to open the main dashboard.
Step 2: Open Your Server
Each server card on the dashboard shows live stats such as CPU, RAM, and disk usage. Open the server that hosts the WordPress website you want to update.
Go to Servers: From the dashboard, locate the server card for the machine hosting your WordPress site.
Select your server: Click the server name (or its Manage link) to open the server panel.
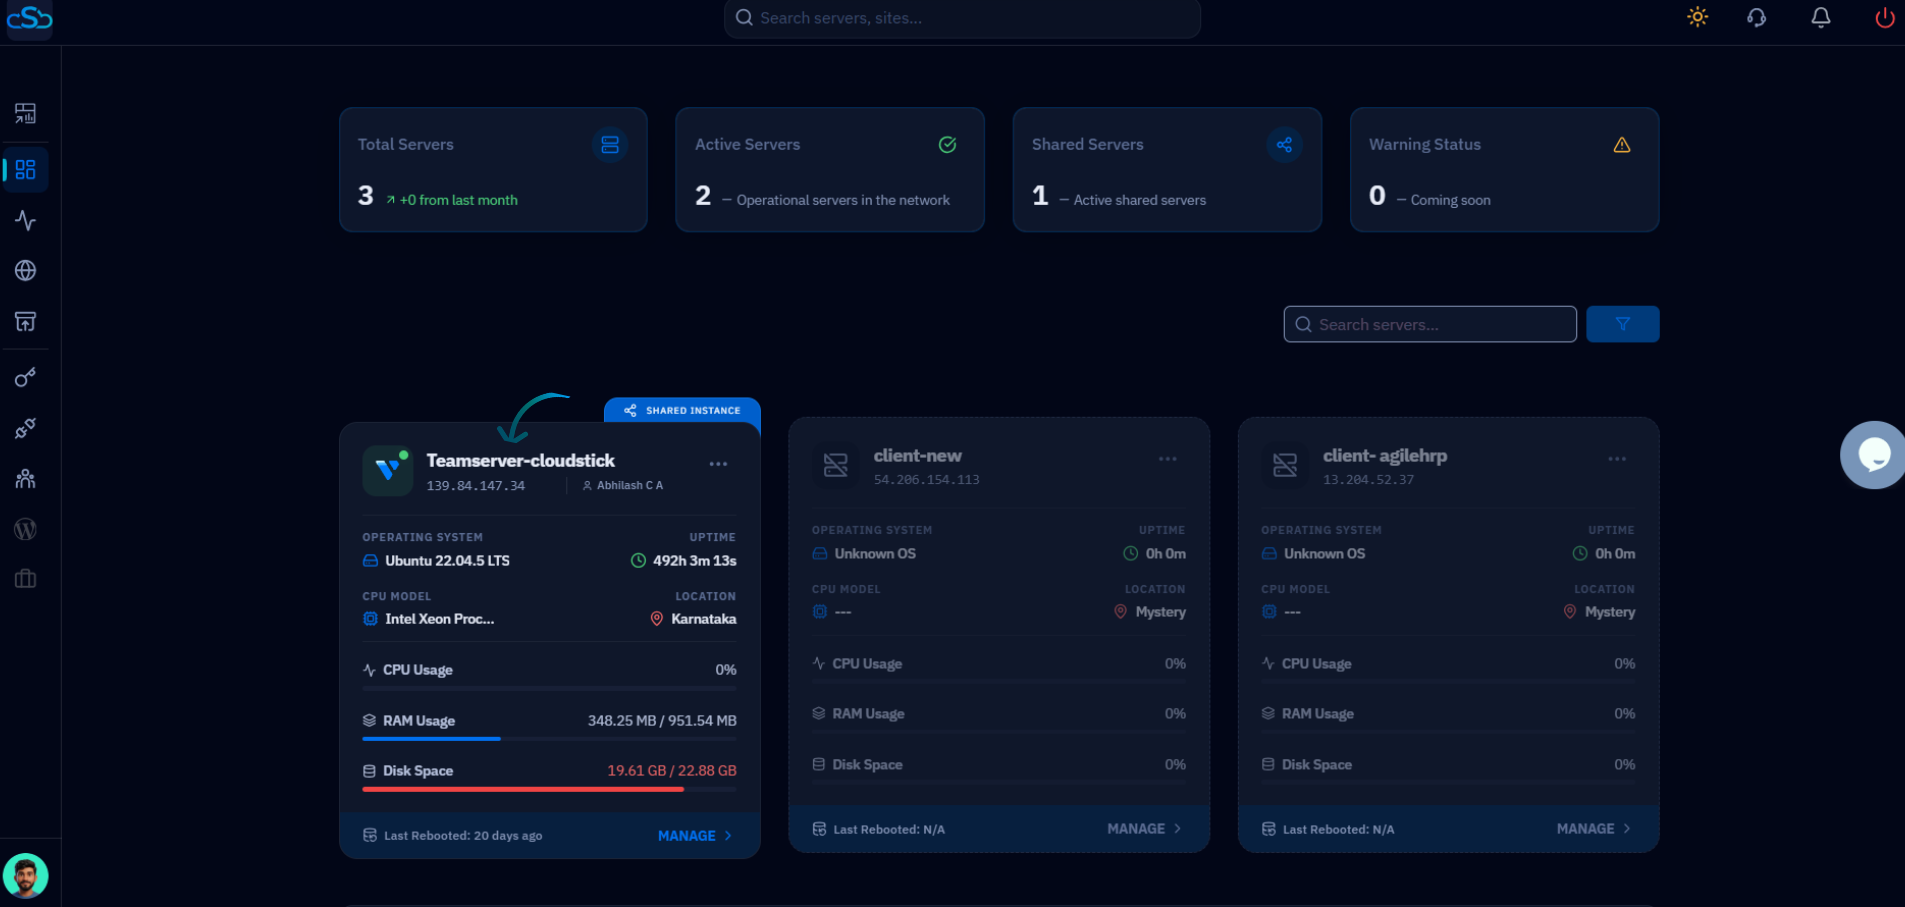
Fig. 01 — The CloudStick dashboard showing connected servers; select the server that hosts your WordPress website.
Step 3: Select Your WordPress Website
Inside the server panel, the WebApp List shows every website hosted on the server. WordPress sites are easy to spot by the WordPress logo on their card.
Open the Websites section: From the left-hand navigation, go to Websites to view the WebApp List.
Click your WordPress website: Select the site whose Site URL or Home URL you want to change.
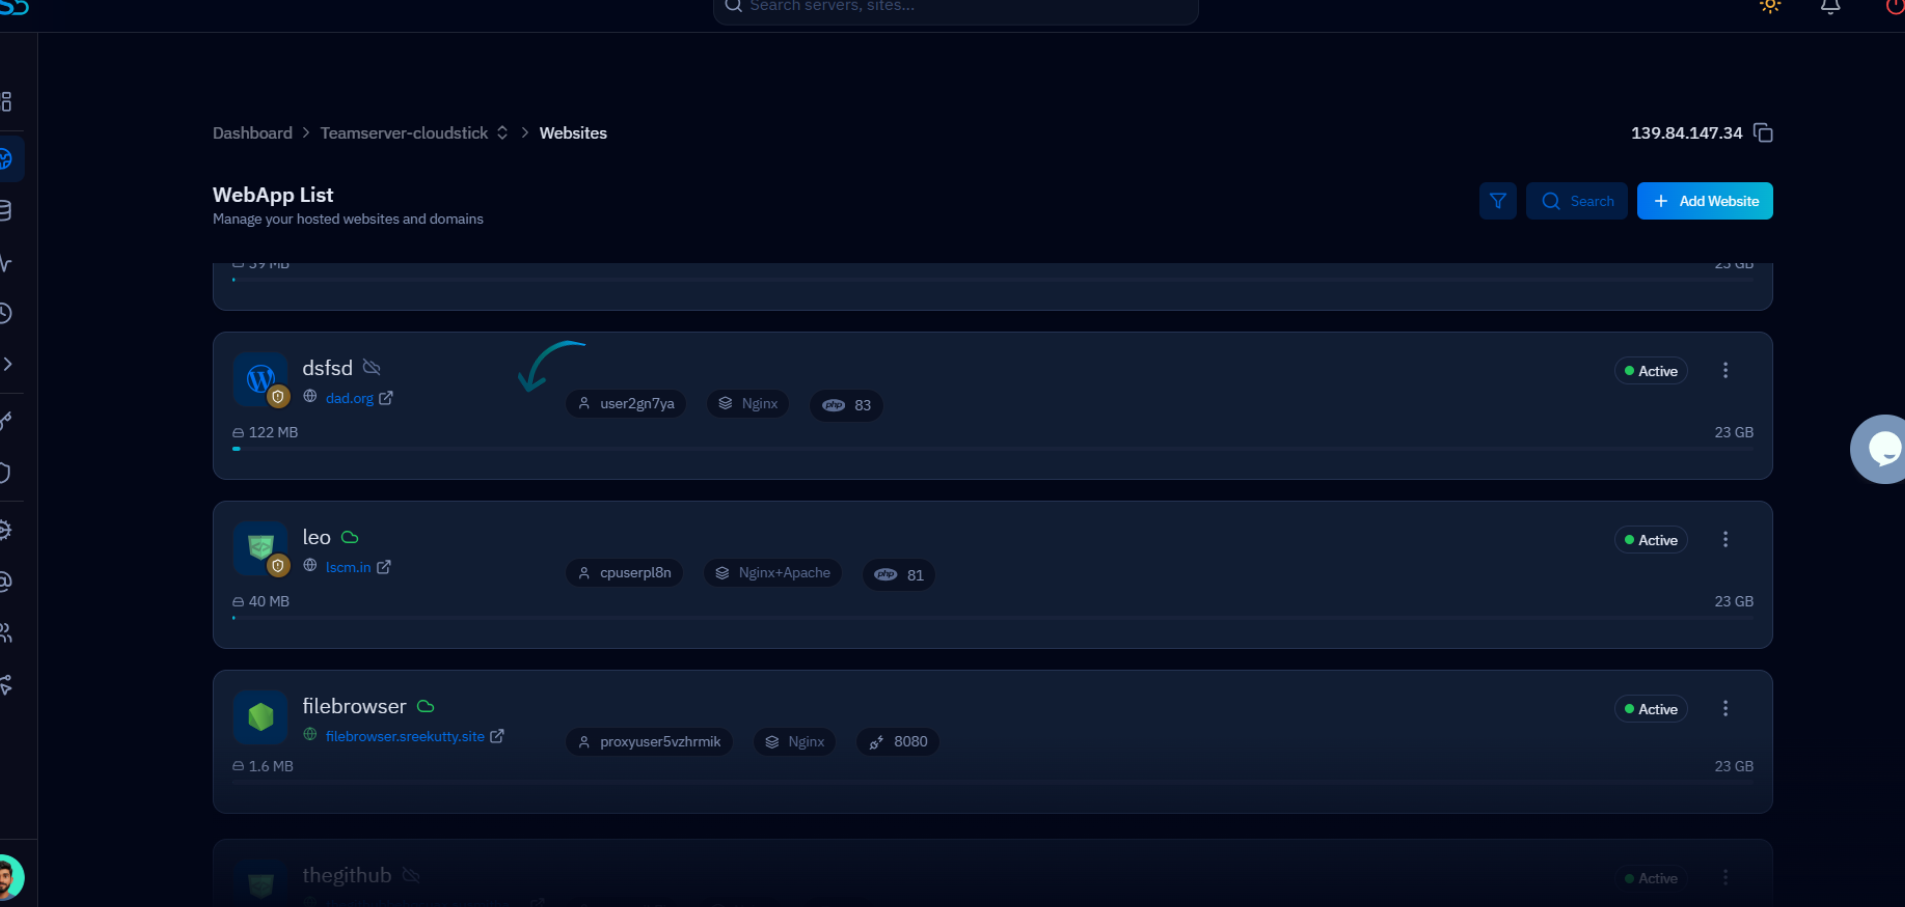
Fig. 02 — The WebApp List showing hosted websites; click the WordPress website you want to update.
Step 4: Open the WordPress Manager
The website view opens on the Website Summary, showing your domain, PHP version, and disk usage. The WordPress-specific controls live in the WordPress Manager.
Click the WordPress Manager tab: Select WordPress Manager from the tab bar at the top of the website view to open the management panel for your WordPress installation.
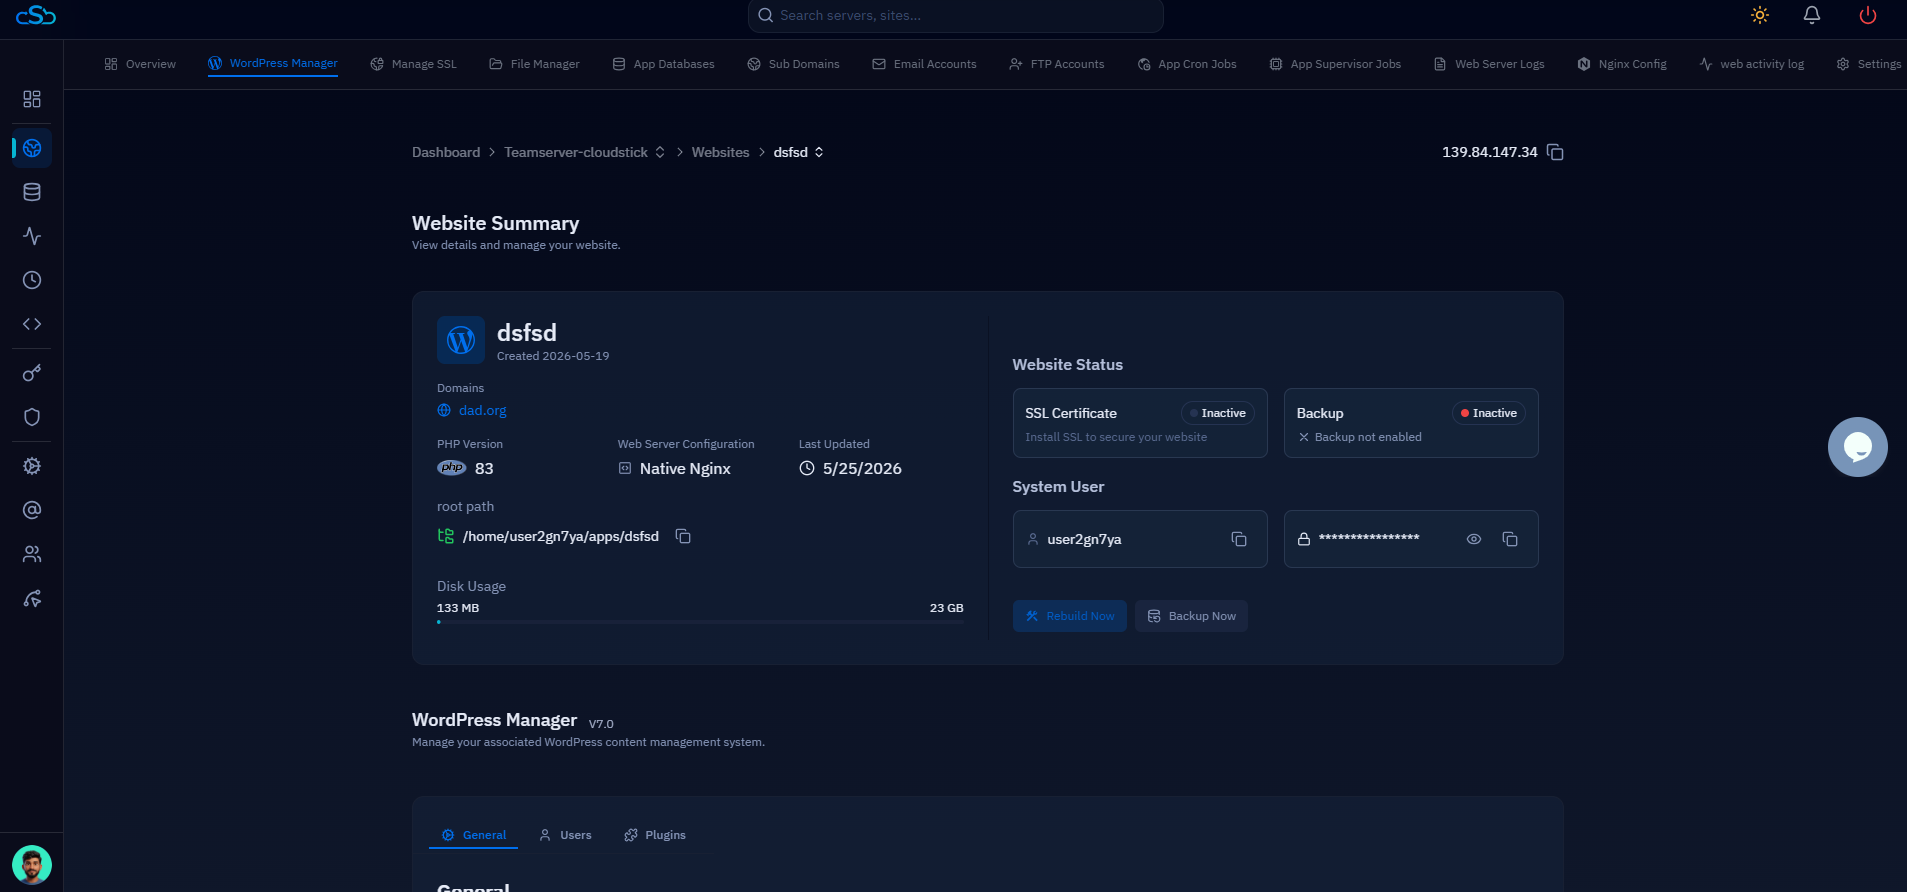
Fig. 03 — The Website Summary with the WordPress Manager tab selected, showing the WordPress management panel.
Step 5: Go to General Settings
The WordPress Manager is organized into General, Users, and Plugins tabs. The site addresses live under General.
Open the General section: Click the General tab to view core site details, including the WordPress core version, Site URL, and Home URL.
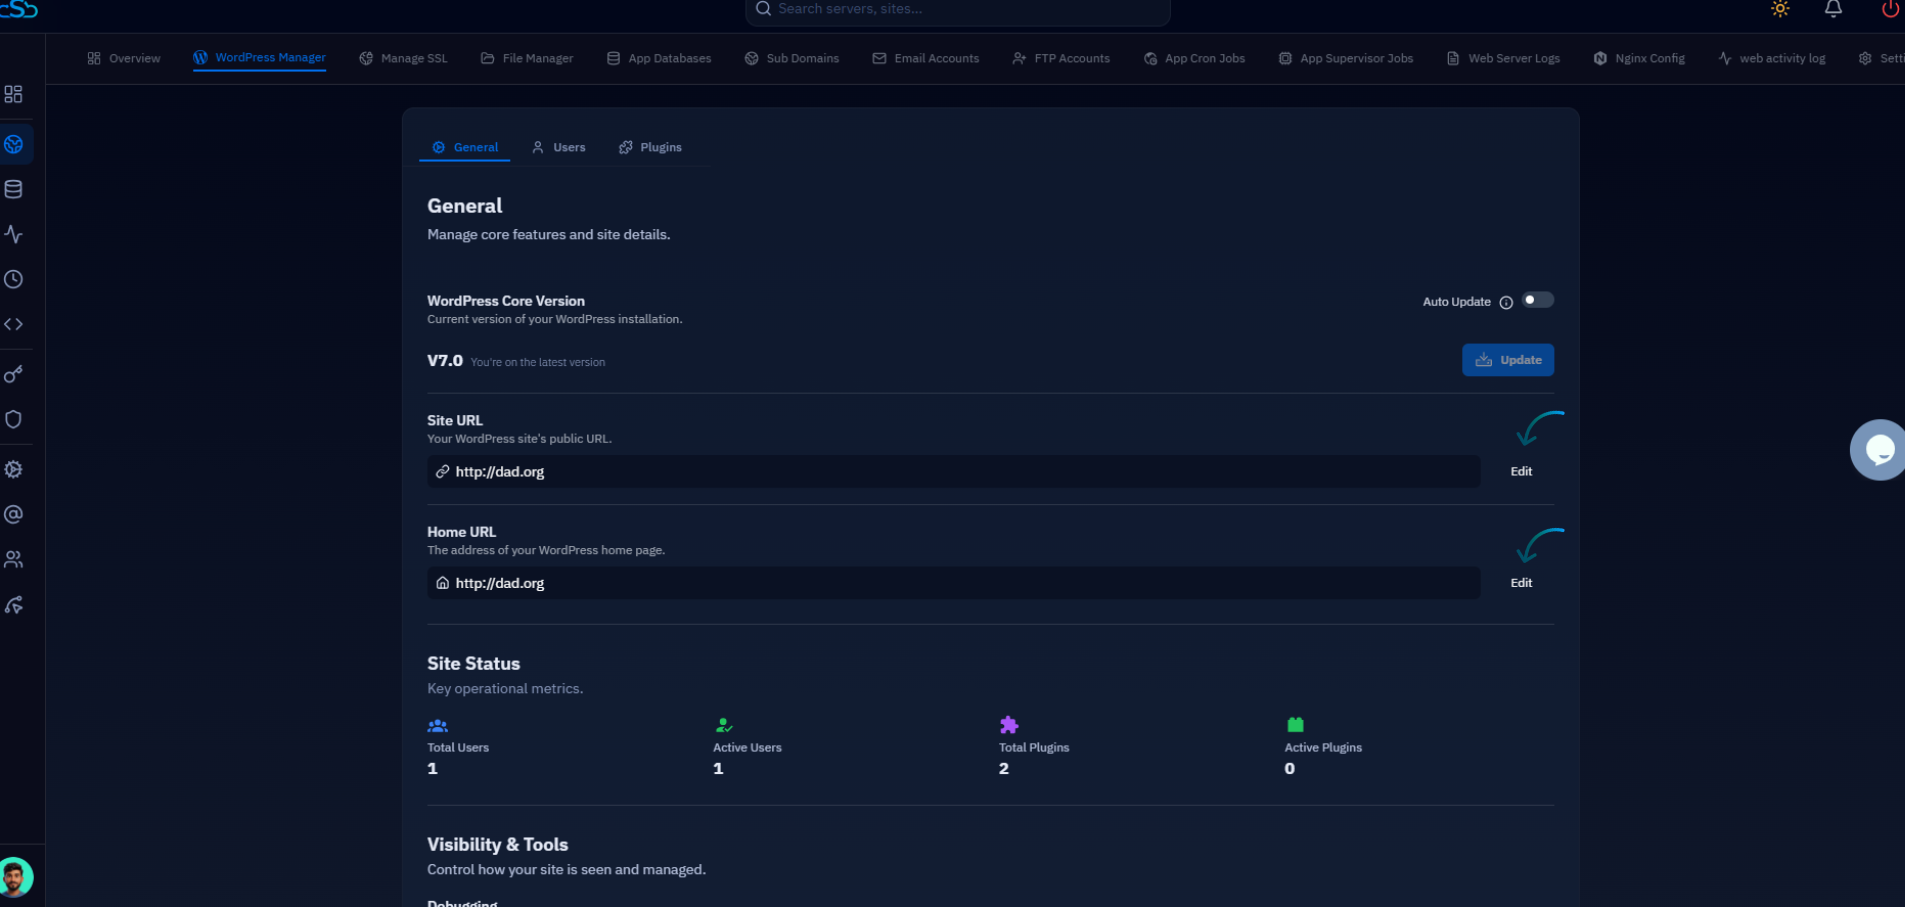
Fig. 04 — The General settings section showing the Site URL and Home URL fields, each with its own Edit action.
Step 6: Edit the Site URL
The Site URL is your WordPress site's public address — the location where WordPress core files are installed. Update it if your domain or protocol has changed.
Click Edit next to Site URL: The field becomes editable so you can enter the new address.
Enter the new website address: Type the full URL, including the protocol — for example https://example.com.
Step 7: Edit the Home URL
The Home URL is the address of your WordPress home page — the URL visitors type into their browser. In most setups it should match the Site URL.
Click Edit next to Home URL: Just like the Site URL, the field becomes editable.
Enter the new homepage address: Update the address if needed, keeping the protocol consistent with your Site URL.
Step 8: Save Your Changes
Saving applies the new addresses to your WordPress installation immediately — CloudStick updates the values for you, with no manual database edits required.
Save the changes: Confirm the edited URL fields to update your website addresses.
Verify your site: Visit your website and the WordPress admin area to confirm both load correctly at the new address.
If you switched your site from http to https, make sure a valid SSL certificate is installed first — see How to install Let's Encrypt SSL. You can also enable an automatic redirect with HTTP to HTTPS redirection.