WordPress Manager in CloudStick
Overview
Once a WordPress site is live on your CloudStick server, day-to-day management typically means bouncing between the CloudStick dashboard and the WordPress admin panel. The WordPress Manager changes that. It brings the most common WordPress operations — updating the core, editing site URLs, toggling maintenance mode, managing users, and controlling plugins — directly into the CloudStick interface, so you rarely need to open a separate WordPress login.
This guide walks through each section of the WordPress Manager: how to access it, what the General, Users, and Plugins tabs contain, and how to use each feature to keep your WordPress installation healthy and well-managed.
The WordPress Manager is available for websites installed with the WordPress stack on CloudStick. It appears as a tab on the Website Summary page of any WordPress site. Make sure WordPress has been installed on the target site before following this guide.
Step 1: Access the WordPress Manager
The WordPress Manager lives inside the Website Summary page of your WordPress site on CloudStick — it is not a separate screen.
1. Log in to your CloudStick account: Navigate to your CloudStick dashboard.
2. Go to Servers: Select the server that hosts your WordPress website.
3. Select your WordPress website: Click on the website name to open its Website Summary page.
4. Click the WordPress Manager tab: Find it in the top navigation bar of the Website Summary page, alongside Overview, Manage SSL, File Manager, App Databases, and other tabs.
The WordPress Manager opens on the General tab by default. The three tabs — General, Users, and Plugins — are accessible from the top of the panel.
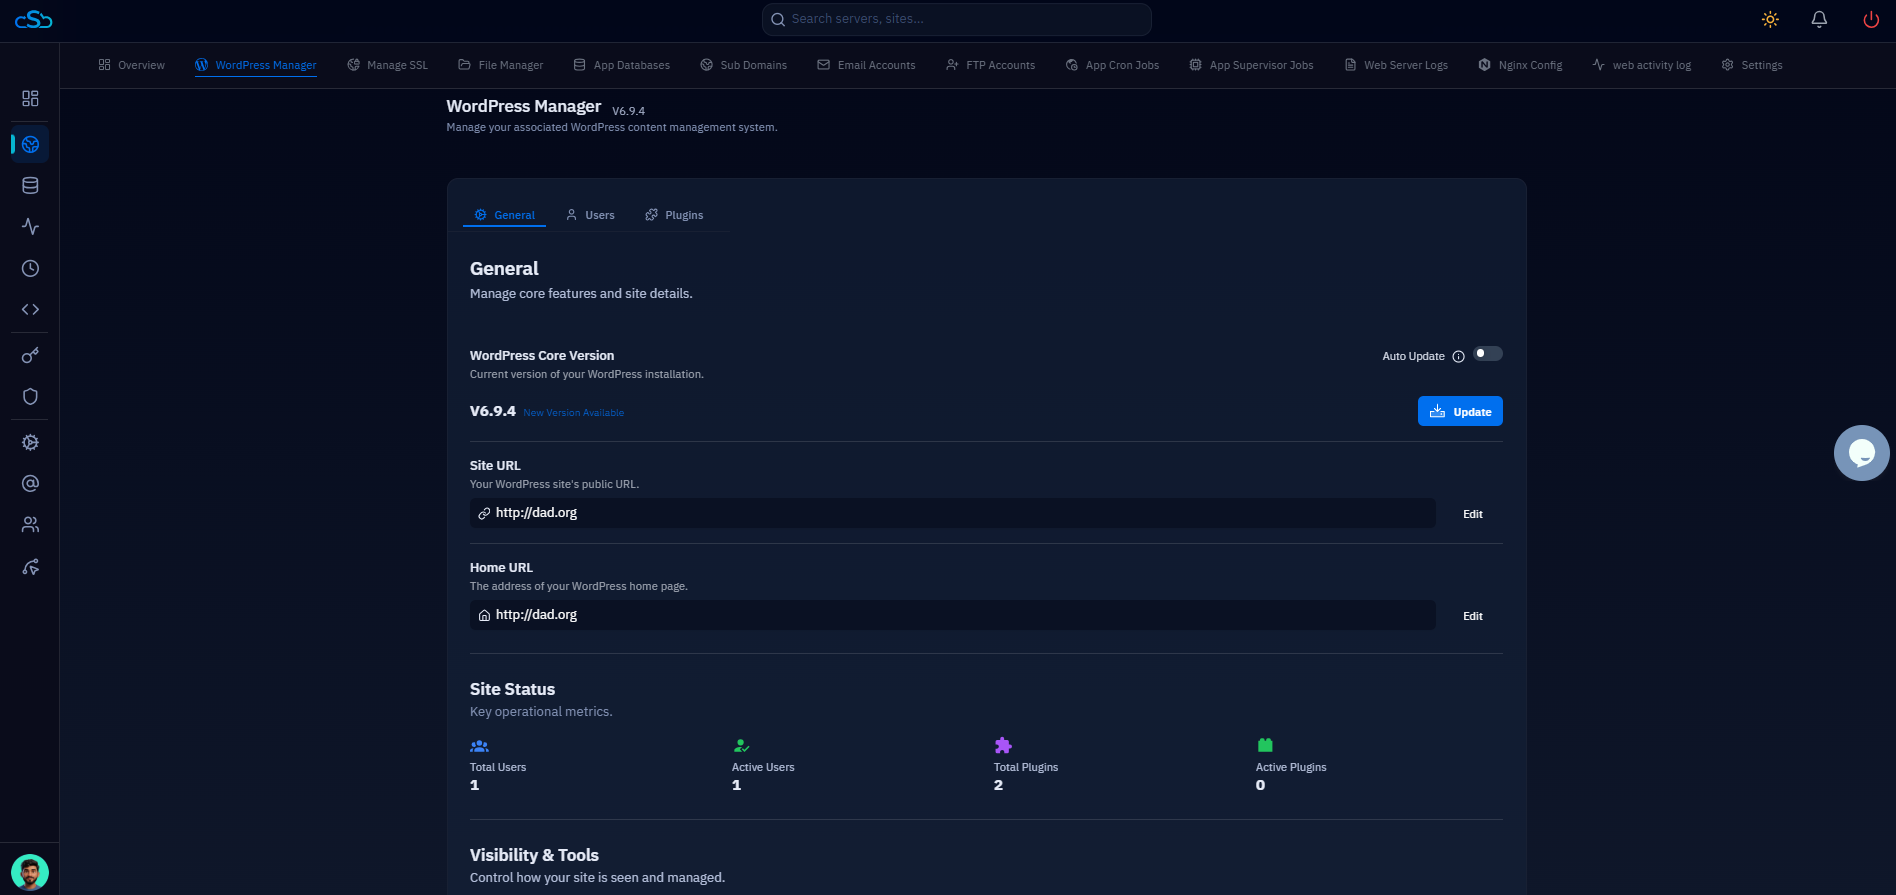
Fig. 01 — WordPress Manager open on the General tab, showing WordPress Core Version, Site URL, Home URL, Site Status metrics, and Visibility & Tools section.
Step 2: General Settings
The General tab gives you control over the WordPress core installation and how the site presents itself to users and search engines.
WordPress Core Version
Current version: Displays the installed WordPress version (e.g., V6.9.4).
Update notice: A "New Version Available" notice appears automatically when a newer WordPress release is published.
Update button: Click Update to upgrade WordPress to the latest version with a single click — no FTP or SSH required.
Auto Update toggle: Enable this to let CloudStick automatically apply future WordPress core updates as they are released, keeping your site current without manual intervention.
Site URL and Home URL
Site URL: The public-facing URL of your WordPress installation. This must match the address configured inside WordPress settings.
Home URL: The address visitors are sent to when they reach your site. In most setups this matches the Site URL.
Edit button: Click Edit next to either URL field to update it directly from CloudStick — useful after migrating a site or switching from HTTP to HTTPS.
Site Status
The Site Status panel gives you a snapshot of your WordPress installation at a glance:
Total Users and Active Users
Total Plugins and Active Plugins
Visibility & Tools
Three toggles let you control how the site behaves without touching the WordPress admin:
Debugging: Enable WordPress debug logging to capture PHP errors and warnings — useful when troubleshooting theme or plugin issues.
Maintenance Mode: Restrict public access to the site while you perform updates or changes. Visitors see a maintenance notice instead of the site.
Search Engine Visibility: Discourage search engines from indexing the site. Enable this on staging or development environments to prevent unfinished content from appearing in search results.
Changes to Site URL and Home URL take effect immediately. If you update these fields and the site breaks, the values may not match what is stored in your WordPress database. Double-check both the CloudStick fields and the Settings → General screen inside your WordPress admin.
Step 3: User Management
The Users tab gives you full visibility and control over every WordPress user account on the site — without logging into WordPress.
Viewing and Filtering Users
User table: Displays all WordPress users with their First Name, Last Name, Email, and Role columns.
Filter by role: Use the Filter dropdown to show only users with a specific role — All, Administrator, Subscriber, Contributor, Editor, or Author.
Search: Use the search bar to locate a specific user by name or email.
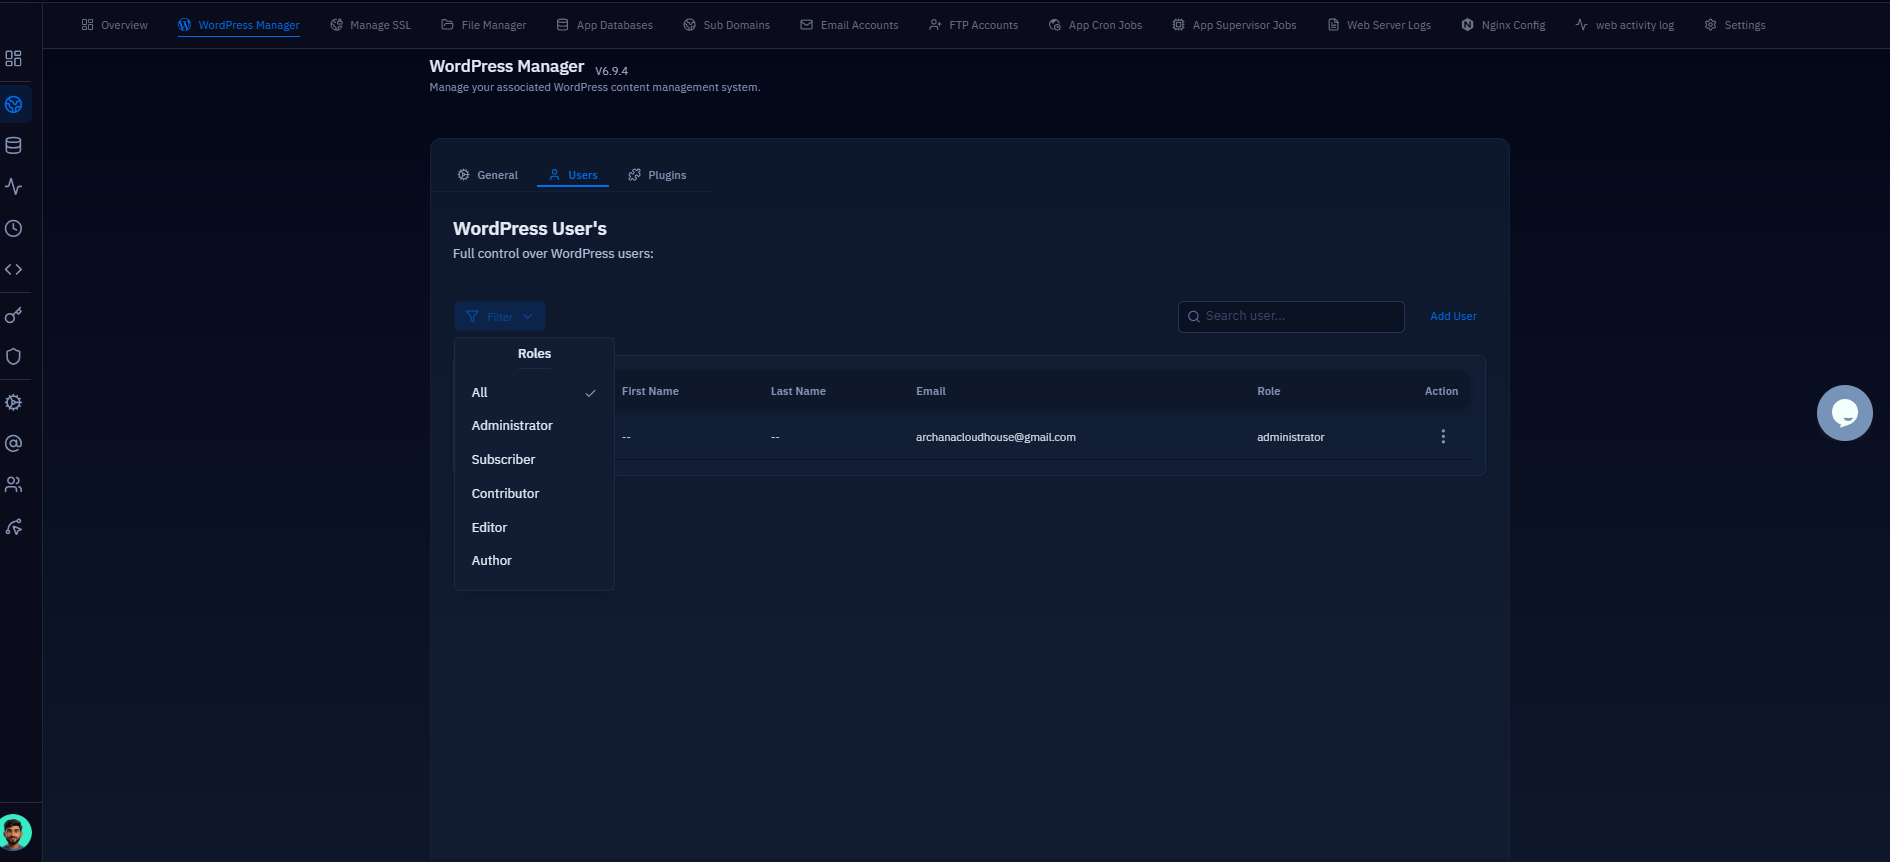
Fig. 02 — WordPress Users tab showing the user table with the role filter dropdown expanded.
Adding a New User
To create a new WordPress user account directly from CloudStick:
1. Click Add User: The button is located in the top-right corner of the Users tab.
2. Enter a Username: This is required and will be the login identifier for the new user.
3. Optionally enter First Name and Last Name: These appear in the WordPress admin and on published content.
4. Enter an Email Address: Required. WordPress will send login credentials and notifications to this address.
5. Select a User Role: Choose from Administrator, Subscriber, Contributor, Editor, or Author depending on the level of access the user requires.
6. Save the new user: The user will appear in the table immediately and receive a welcome email from WordPress.
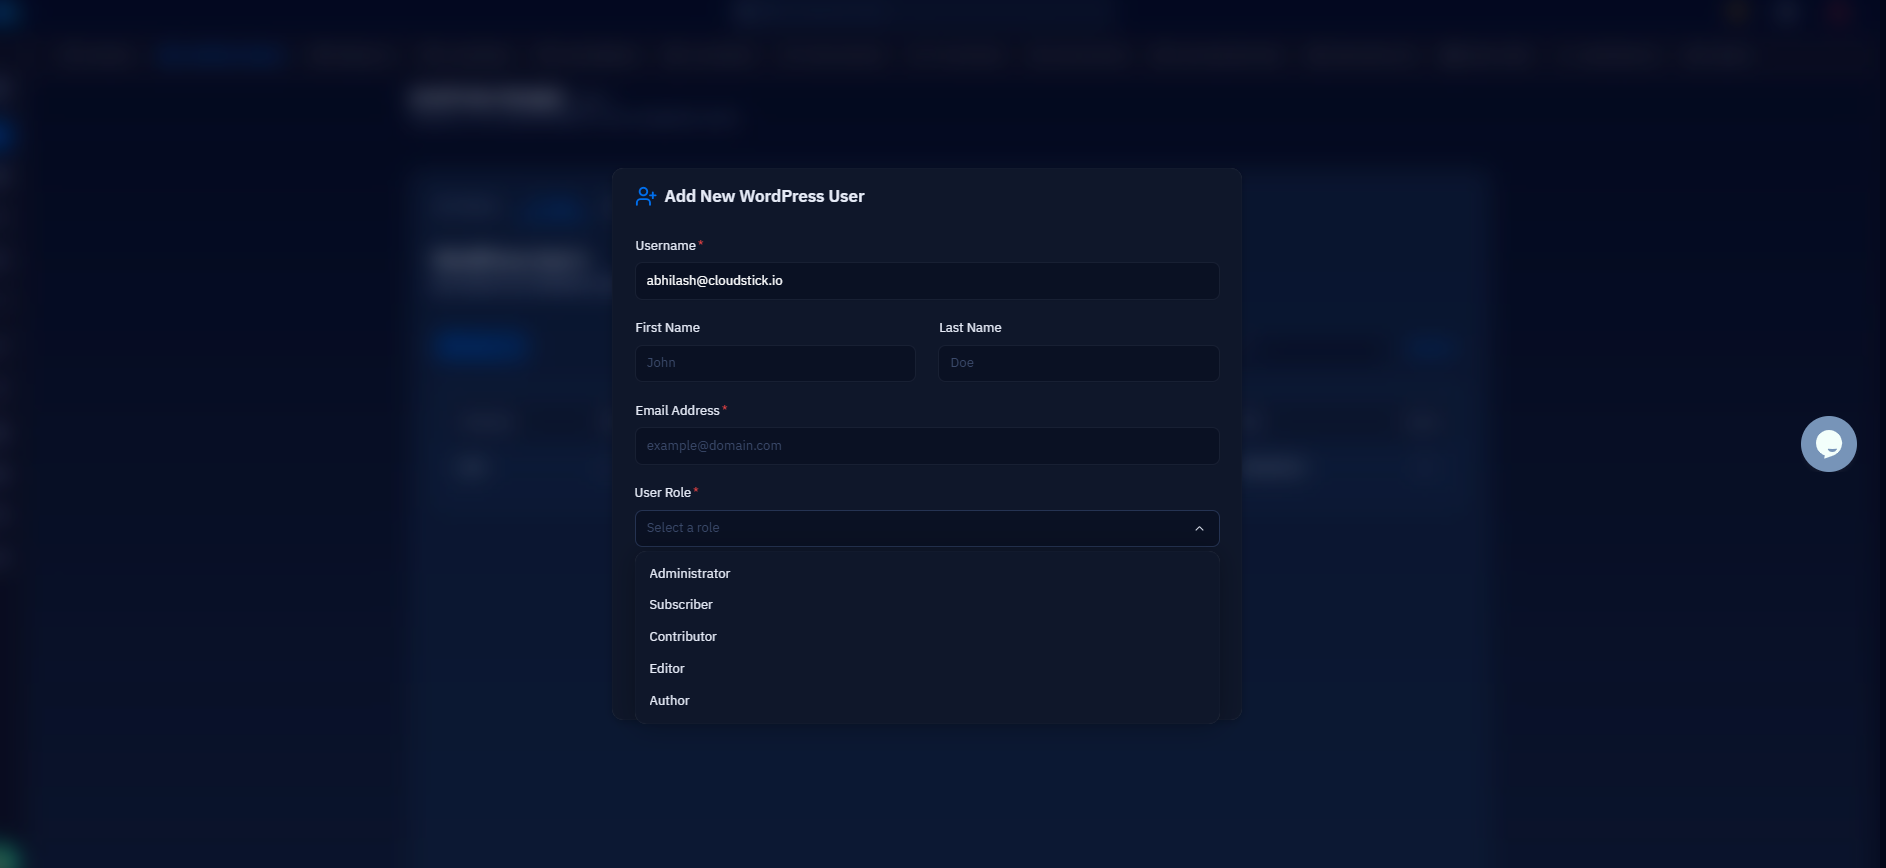
Fig. 03 — Add New WordPress User modal showing Username, First Name, Last Name, Email Address, and User Role fields.
Managing Existing Users
Action menu: Click the three-dot menu next to any user to edit their details, change their role, or remove them from the site.
Removing a user from this panel removes their WordPress account entirely. Assign their content to another user if you need to preserve their posts or pages before deletion.
Step 4: Plugin Management
The Plugins tab lets you manage every installed WordPress plugin from the CloudStick panel — no WordPress admin login needed for routine tasks.
View installed plugins: All plugins appear as cards showing the plugin name, current version, and active/inactive status.
Activate or deactivate: Click Activate Plugin on any inactive plugin card to enable it, or use the three-dot action menu to deactivate an active plugin.
Update plugins: If a newer version is available, an "Update available" notice appears on the plugin card. Click it to update to the latest version immediately.
Remove unused plugins: Use the Delete option in the action menu to uninstall plugins you no longer need, keeping the installation lean and reducing potential attack surface.
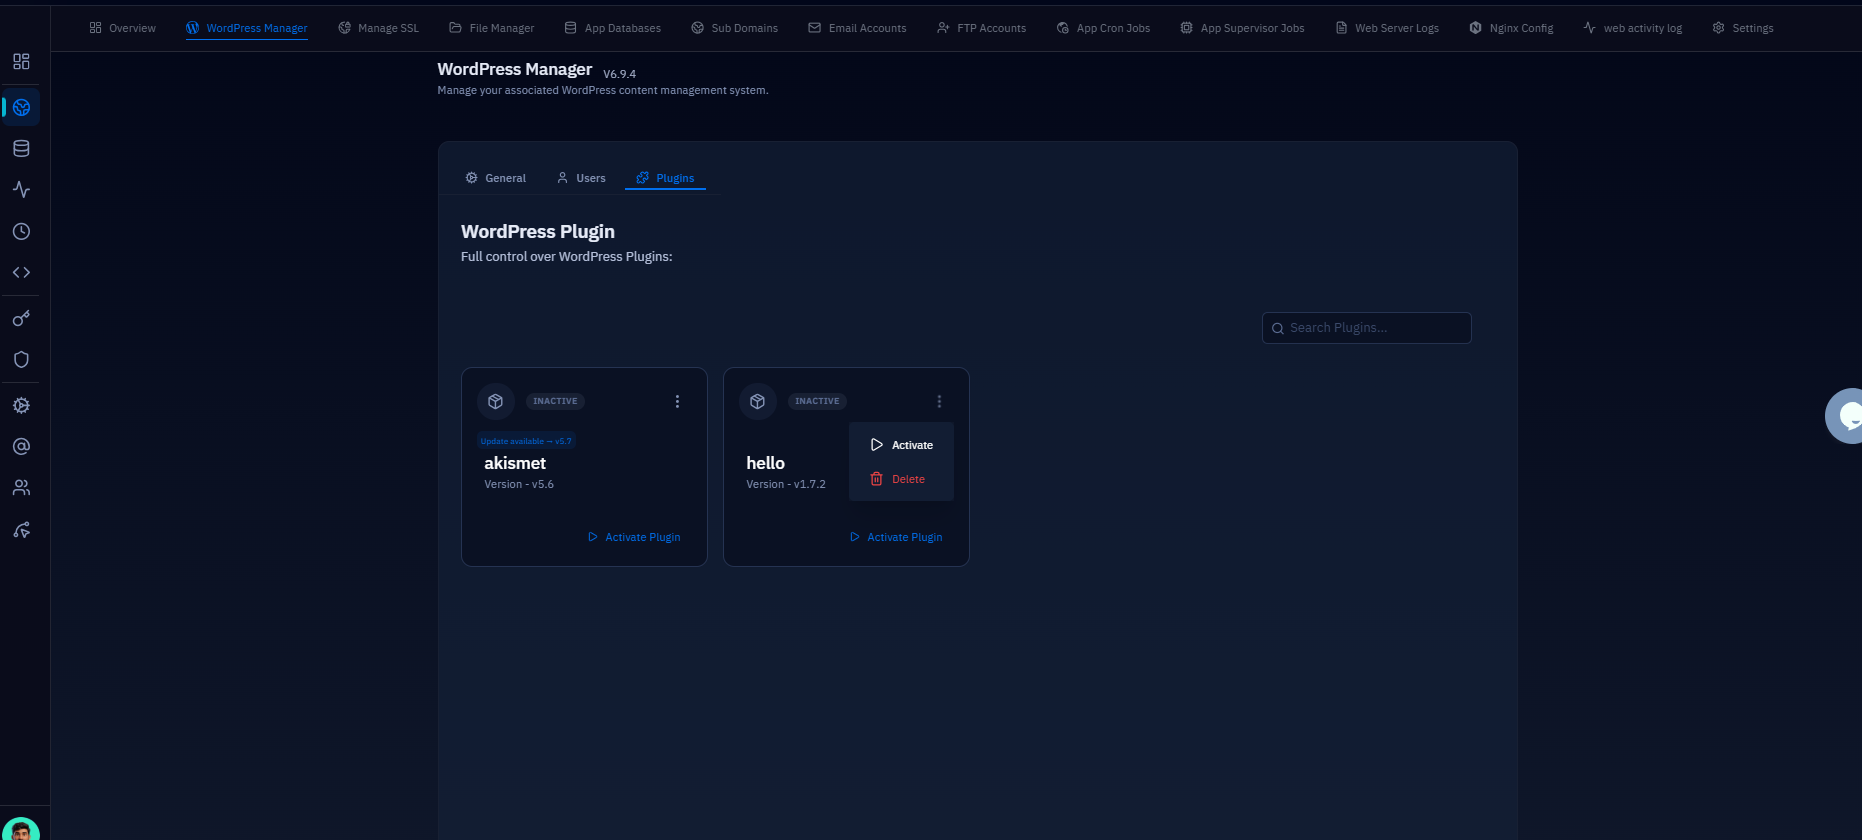
Fig. 04 — WordPress Plugins tab showing installed plugins with inactive status badges and the action menu open with Activate and Delete options.
Deactivating a plugin from this panel is the same as deactivating it from within WordPress admin. The plugin files remain on the server — only the Delete action removes them permanently.