How to Change PHP Version (Web Application)
Overview
CloudStick supports multiple PHP versions simultaneously on the same server, letting you run each web application on the PHP version it requires — without touching the command line. Whether you need to upgrade to PHP 8.3 for performance improvements or pin an older application to PHP 8.1 for compatibility, you can switch versions in seconds directly from the App Settings panel.
This guide walks you through locating your web application, navigating to the PHP Version Management section, and selecting the exact version you need. Changes take effect immediately across all services once the PHP-FPM configuration is reloaded.
This guide covers the PHP version used to run your web application (PHP-FPM). To change the PHP version used by command-line scripts, see the PHP-CLI Version setting available on BASIC and higher plans.
Step 1: Open Websites and Select Your Web Application
All PHP version changes are scoped to an individual web application, so the first step is to locate the specific site you want to configure.
Log in to your CloudStick Dashboard: Go to app.cloudstick.io and sign in to your account.
Open the Websites section: In the left-hand navigation of your server panel, click Websites to open the WebApp List.
Select your web application: Find the application you want to manage and click on its name to open the application management view.
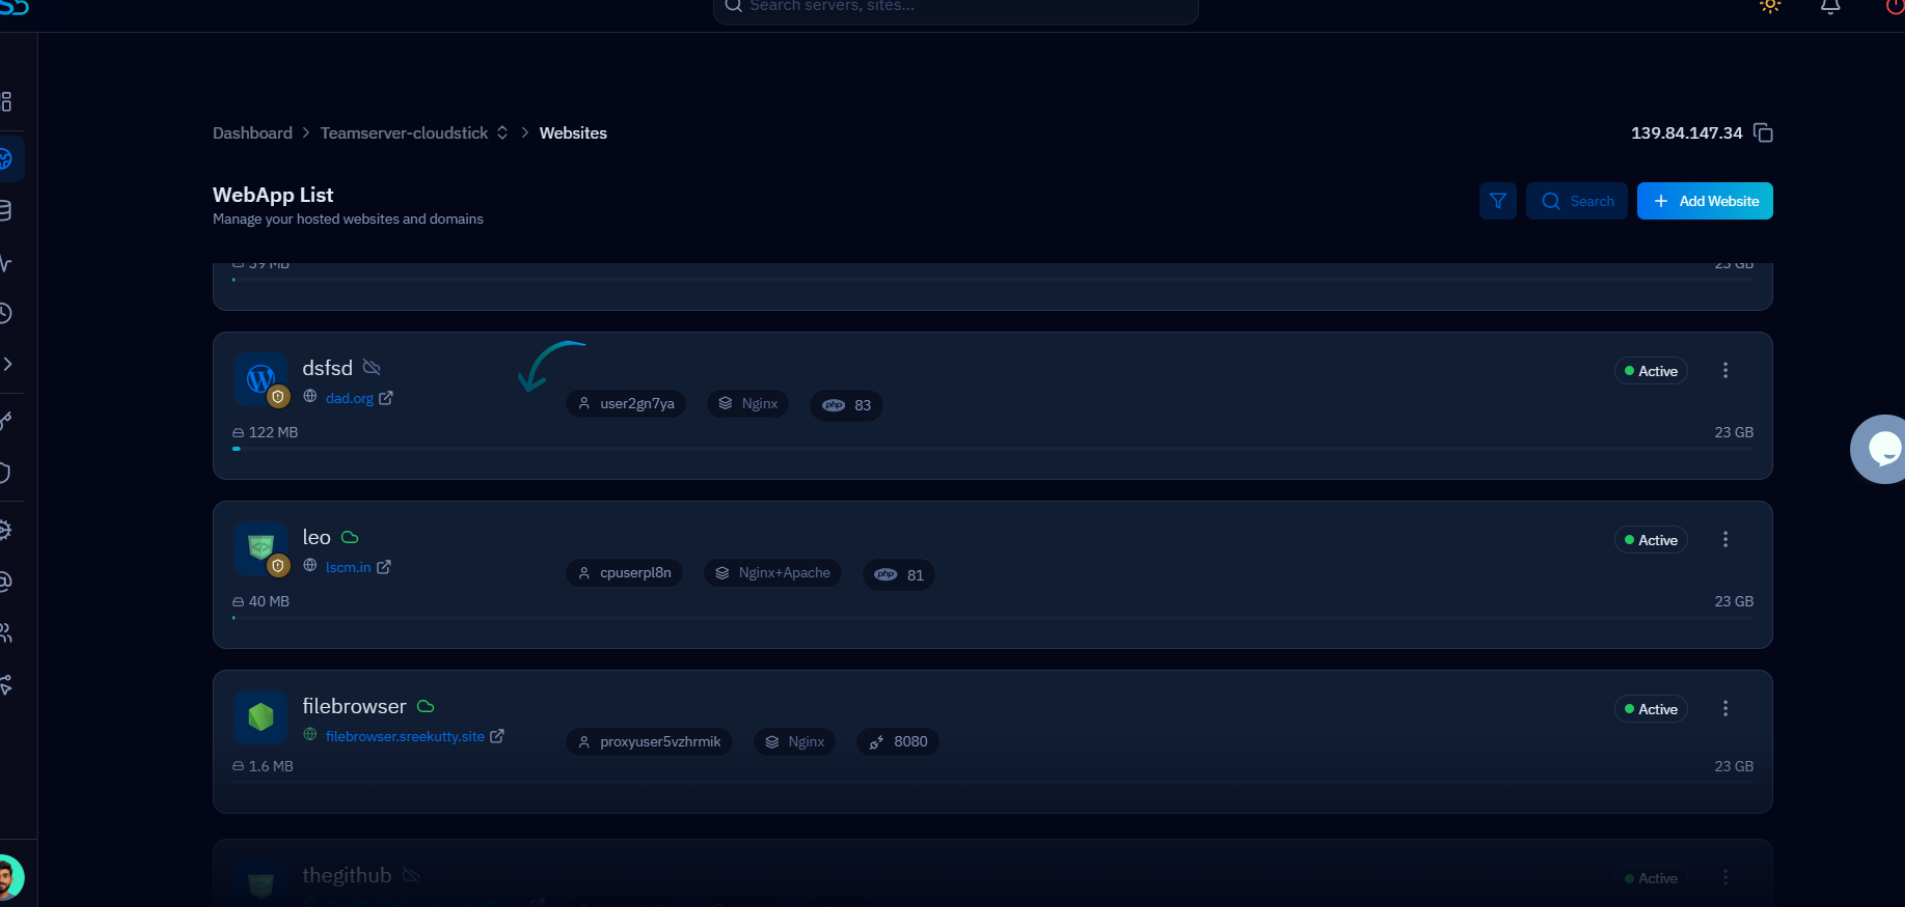
Fig. 01 — WebApp List showing all hosted websites on the server.
Step 2: Open App Settings
The App Settings panel consolidates all per-application configuration — including PHP version, web stack, domains, public path, and NGINX settings — in one place.
Click the Settings tab: In the top navigation bar of your web application, click Settings. This opens the App Settings page.
Locate PHP Version Management: The first card on the App Settings page is PHP Version Management. It displays the message "Configure the active PHP environment for your application. Changes take effect immediately across all services."
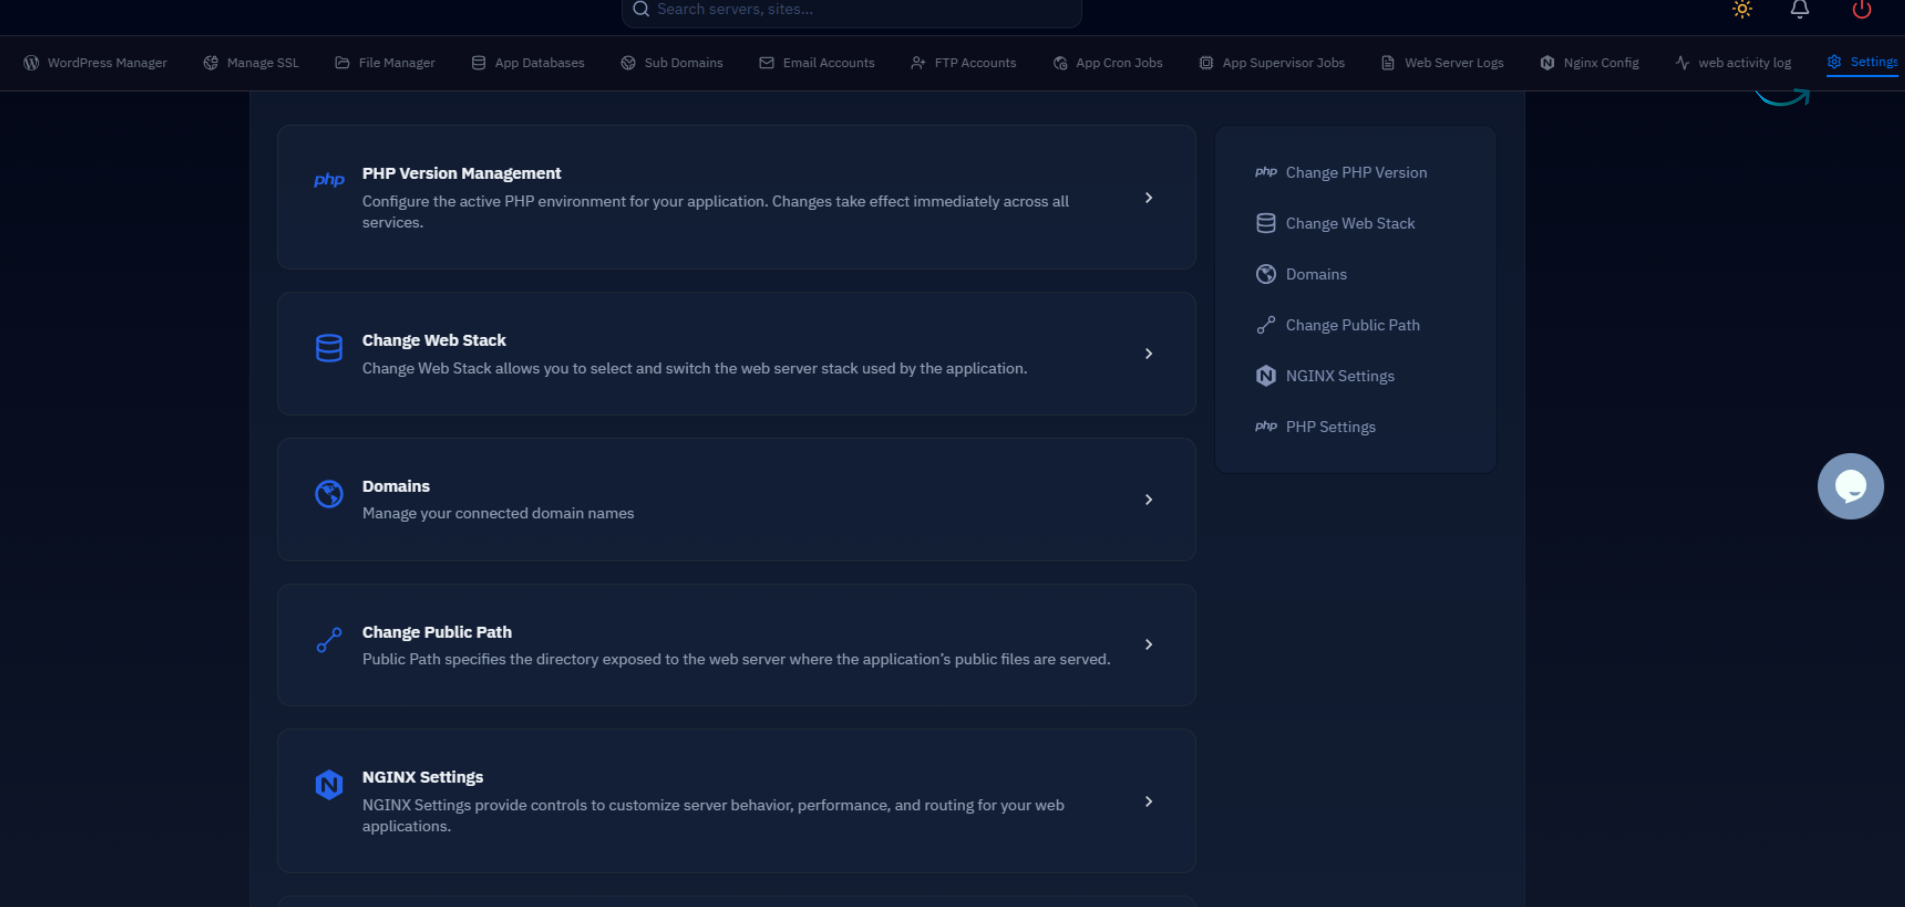
Fig. 02 — App Settings page showing PHP Version Management and other configuration options.
Step 3: Select the PHP Version
CloudStick displays all PHP versions installed on your server in a dropdown. Simply pick the version your application requires and save the change.
Click the PHP Version dropdown: Under the PHP Version Management card, click the dropdown field that shows the currently active version (e.g. PHP 8.3).
Choose the required version: The dropdown lists all available versions — for example PHP 8.1, PHP 8.2, PHP 8.3, PHP 8.4, PHP 8.5. Select the version your application needs.
Save the changes: Click the Save / Apply Changes button to confirm. CloudStick will reload the PHP-FPM configuration and the new version will take effect immediately.
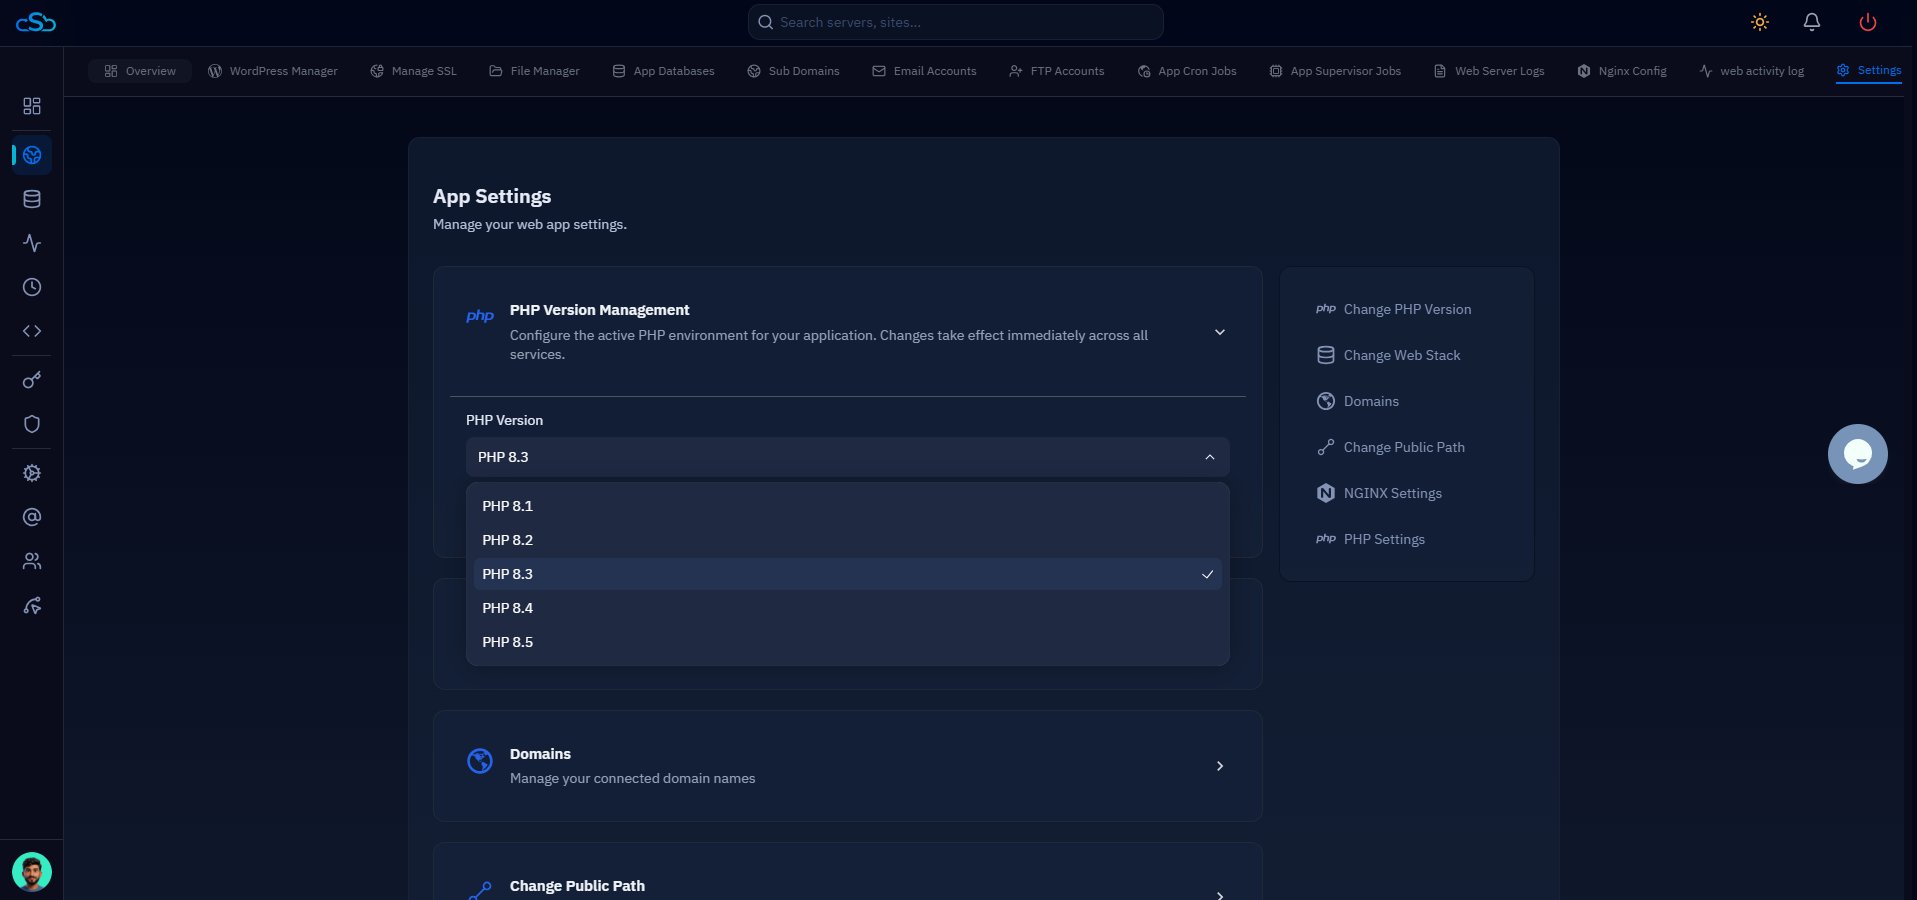
Fig. 03 — PHP Version dropdown open with available versions listed for selection.
The change takes effect after a short PHP-FPM restart. Your website will remain online during this process — there is no downtime.