How to Install WordPress on OpenLiteSpeed Server
Overview
WordPress is the world's most popular Content Management System, powering over 40% of all websites on the internet. When combined with OpenLiteSpeed — a high-performance, open-source web server — you get a stack that delivers exceptional page speed with lower resource usage compared to Nginx or Apache alone. CloudStick makes this combination effortless: you can install a fully configured WordPress site on your OpenLiteSpeed server in minutes, without touching the command line.
This guide walks you through the complete process — from selecting your OpenLiteSpeed server on the CloudStick dashboard, through configuring your WordPress site details and database, to monitoring the automated installation and securing your site with a free SSL certificate so it goes live on HTTPS from day one.
You must have an OpenLiteSpeed server already connected to CloudStick before following this guide. If you haven't added a server yet, see How to Install OpenLiteSpeed Server in CloudStick first. The Magic Link feature — which lets you log into the WordPress admin dashboard without a password — is available on the Business plan only.
Step 1: Log In and Select Your Server
Start from the main CloudStick dashboard and identify the OpenLiteSpeed server where you want to install WordPress.
1. Sign in to CloudStick: Go to dash.cloudstick.io and log in to your account.
2. Locate your OpenLiteSpeed server: The dashboard displays all connected servers as cards, each showing CPU usage, RAM, disk space, and uptime at a glance.
3. Click Manage: On the server card you want to use, click the Manage button to open its management panel.
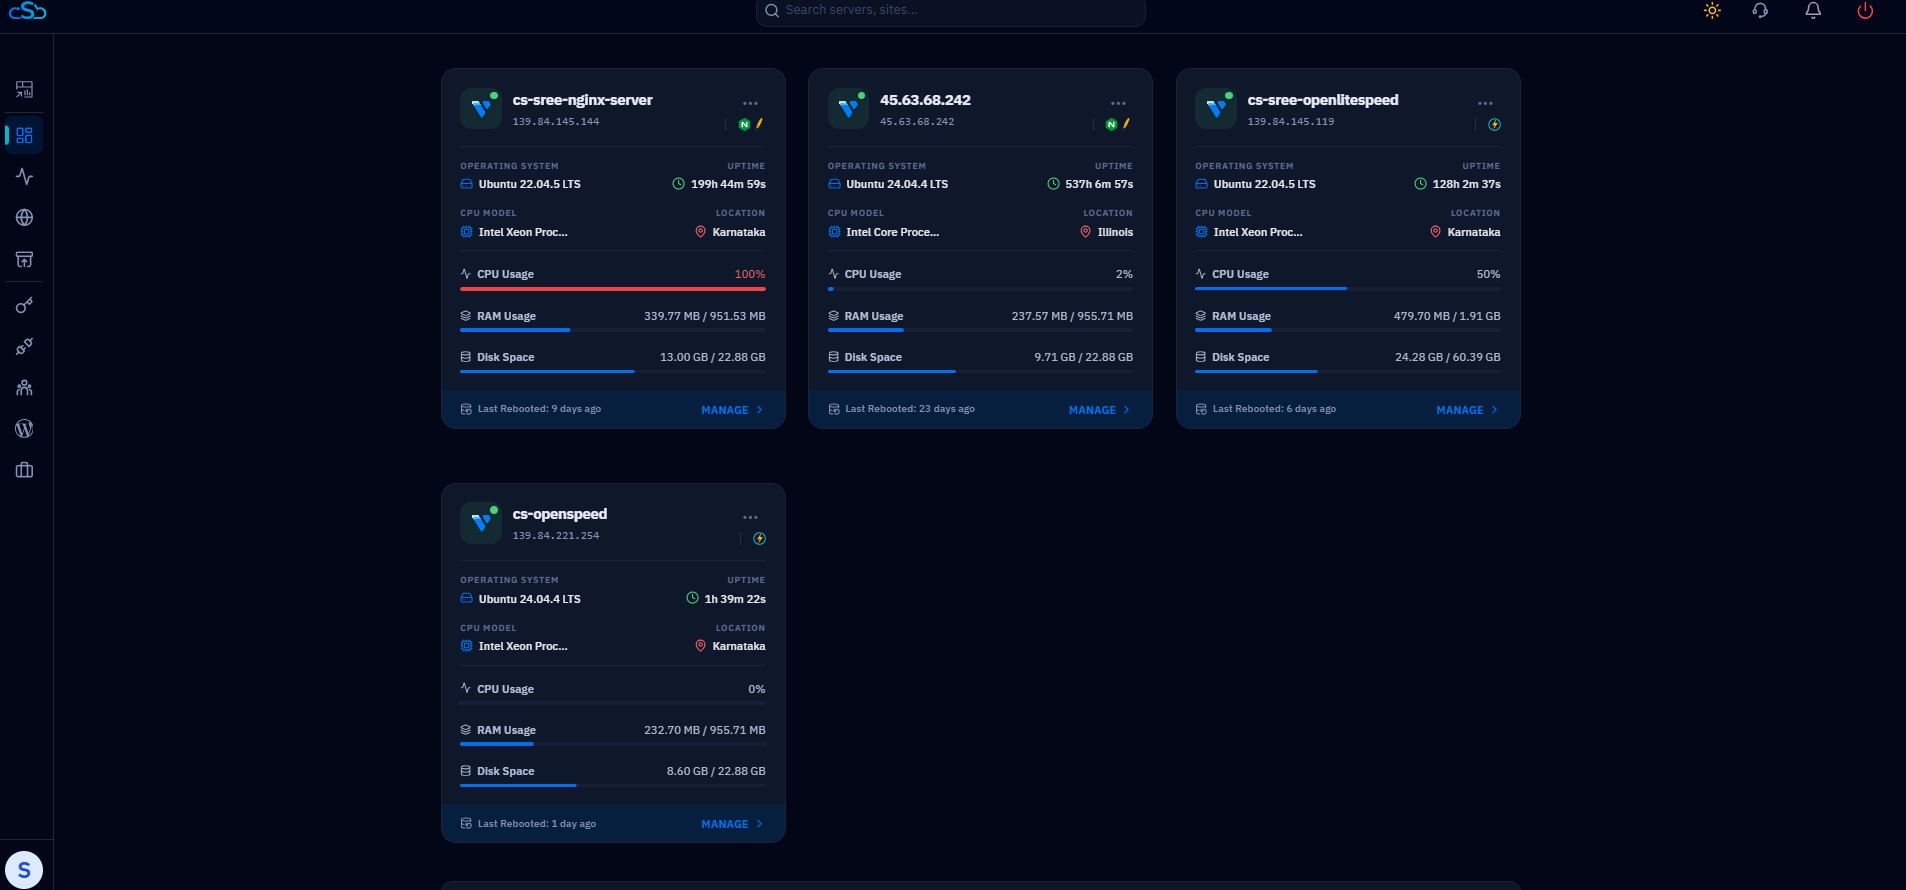
Fig. 01 — CloudStick dashboard showing all connected servers. Click Manage on the OpenLiteSpeed server to proceed.
Step 2: Open the Server Panel
The server panel gives you a complete overview of your OpenLiteSpeed server — including uptime, CPU, memory, disk space, and quick access to all management sections.
1. Review system overview: Confirm you are on the correct server by checking the server name, IP address, and the OpenLiteSpeed badge displayed at the top.
2. Locate the Websites card: Under Server Resources, find the Websites card. It shows the current count of hosted sites and a quick-access icon.
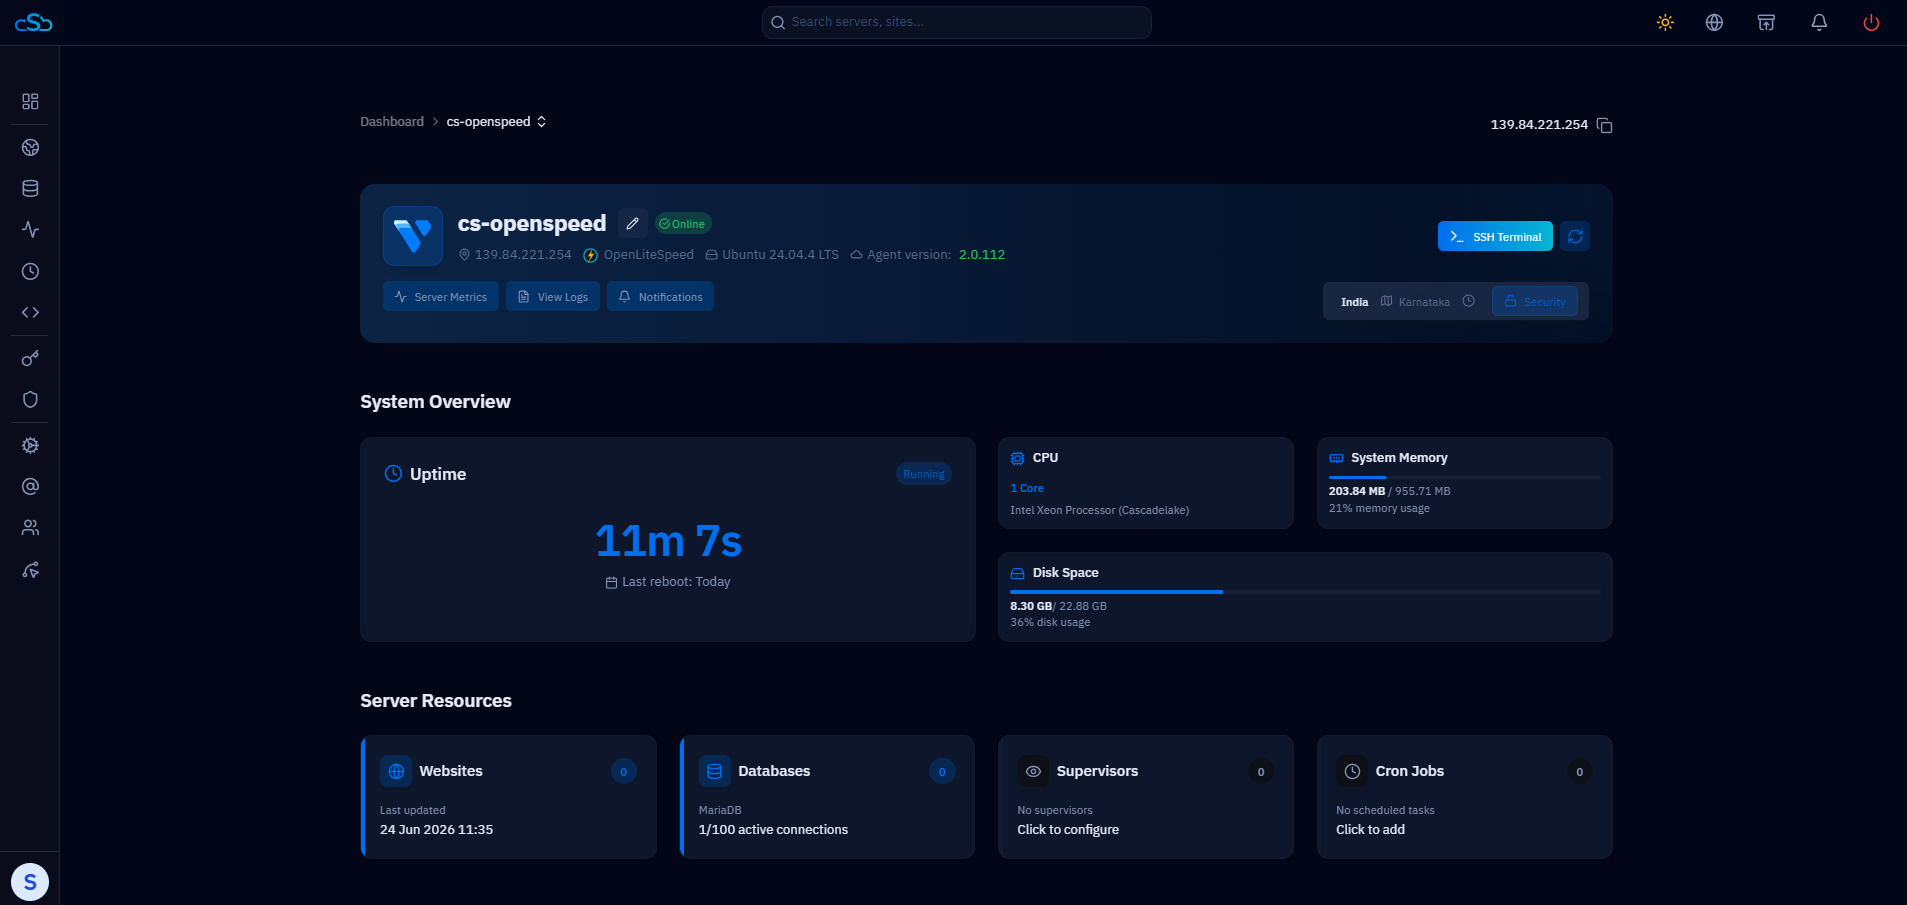
Fig. 02 — Server panel for the OpenLiteSpeed server showing system overview, resource metrics, and the Websites card under Server Resources.
Step 3: Navigate to the Websites Section
Open the Websites section to see all sites currently hosted on this server and access the option to create a new one.
1. Click Websites: Click the Websites card in the Server Resources section, or click Websites in the left-hand navigation menu.
2. Review the Websites List: The Websites List page shows all web applications hosted on this server. If no sites have been created yet, it displays a No webapp placeholder.
3. Click + Add Website: Click the + Add Website button in the top-right corner to begin creating a new WordPress site.
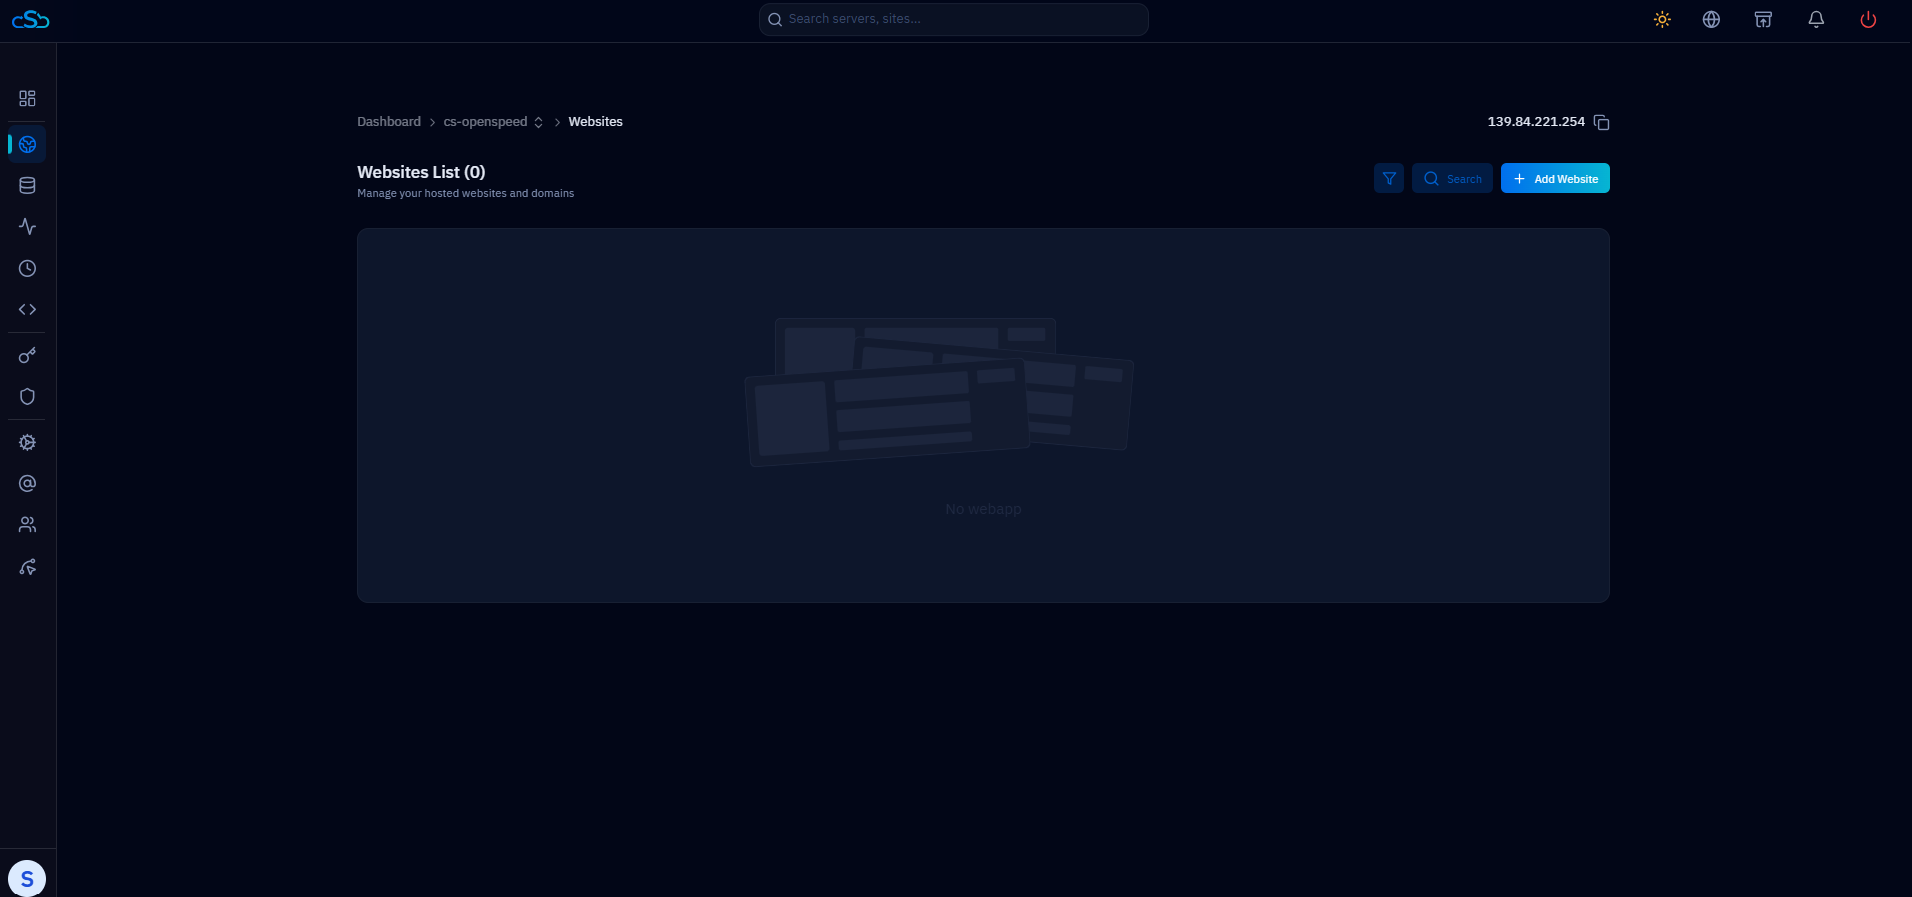
Fig. 03 — Websites List page with no sites installed yet. Click + Add Website to start the WordPress installation.
Step 4: Select WordPress as the Website Type
CloudStick supports multiple application stacks. Select WordPress to proceed with the WordPress-specific installation form.
1. Open the Create New Website modal: After clicking + Add Website, a modal appears presenting the available application types — including WordPress, Custom PHP, Proxy App, Laravel, WooCommerce, and more.
2. Choose WordPress: Click the WordPress card — described as the popular CMS for blogs and websites — then click Select → to proceed.
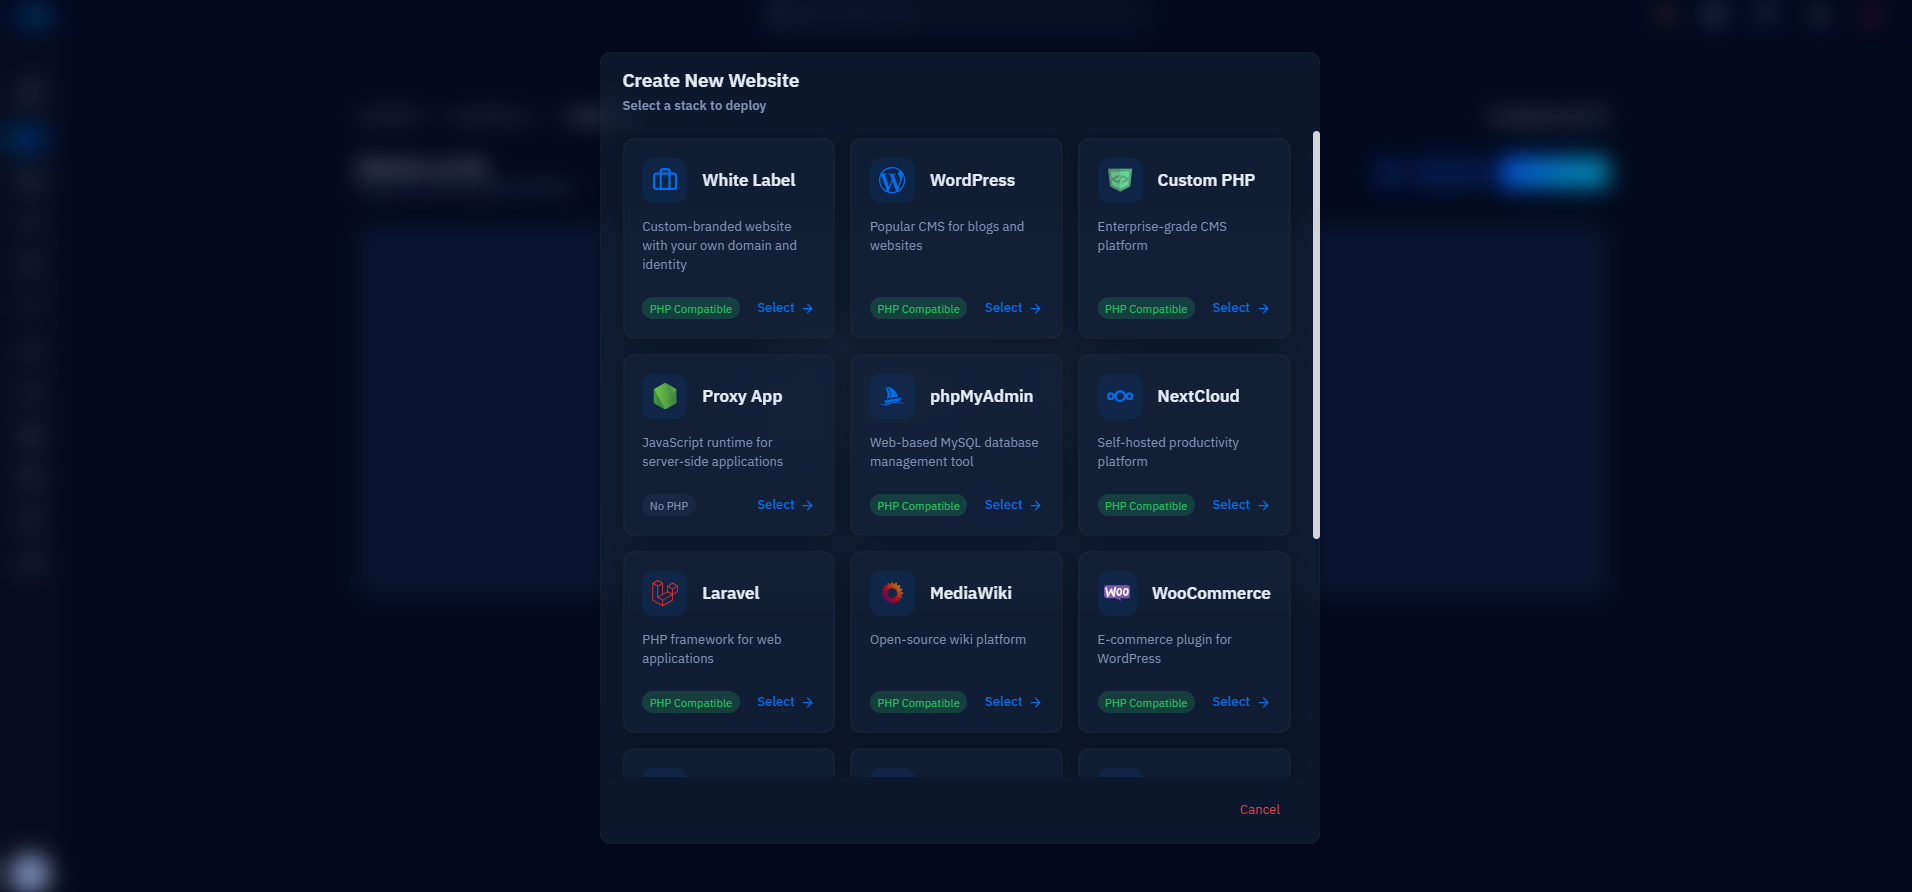
Fig. 04 — Create New Website modal showing available stacks. Select the WordPress card to continue with WordPress installation.
Step 5: Enter Website and Database Settings
Fill in the WordPress installation form with your site details. CloudStick uses these settings to configure the web server, create the database, and set up the WordPress admin account — all automatically.
Email Address: The admin email address for your WordPress account and site notifications.
Website Name: A label to identify this site within the CloudStick dashboard.
Domain Type: Choose Use My Own Domain if your domain is already pointed to this server, or Use Temporary Domain to test the site before DNS is configured.
Domain Name(s): Enter your domain name, e.g. yourdomain.com. Comma-separate multiple domains if needed.
Site Title: The public-facing title of your WordPress site, displayed in the browser tab and site header.
Admin Username / Admin Password: The login credentials for your WordPress admin dashboard. Use the Generate button to create a strong random password.
Admin Email: The email address linked to the WordPress admin account.
PHP Version: Select the PHP version to run this WordPress site on. PHP 8.4 is recommended for best performance.
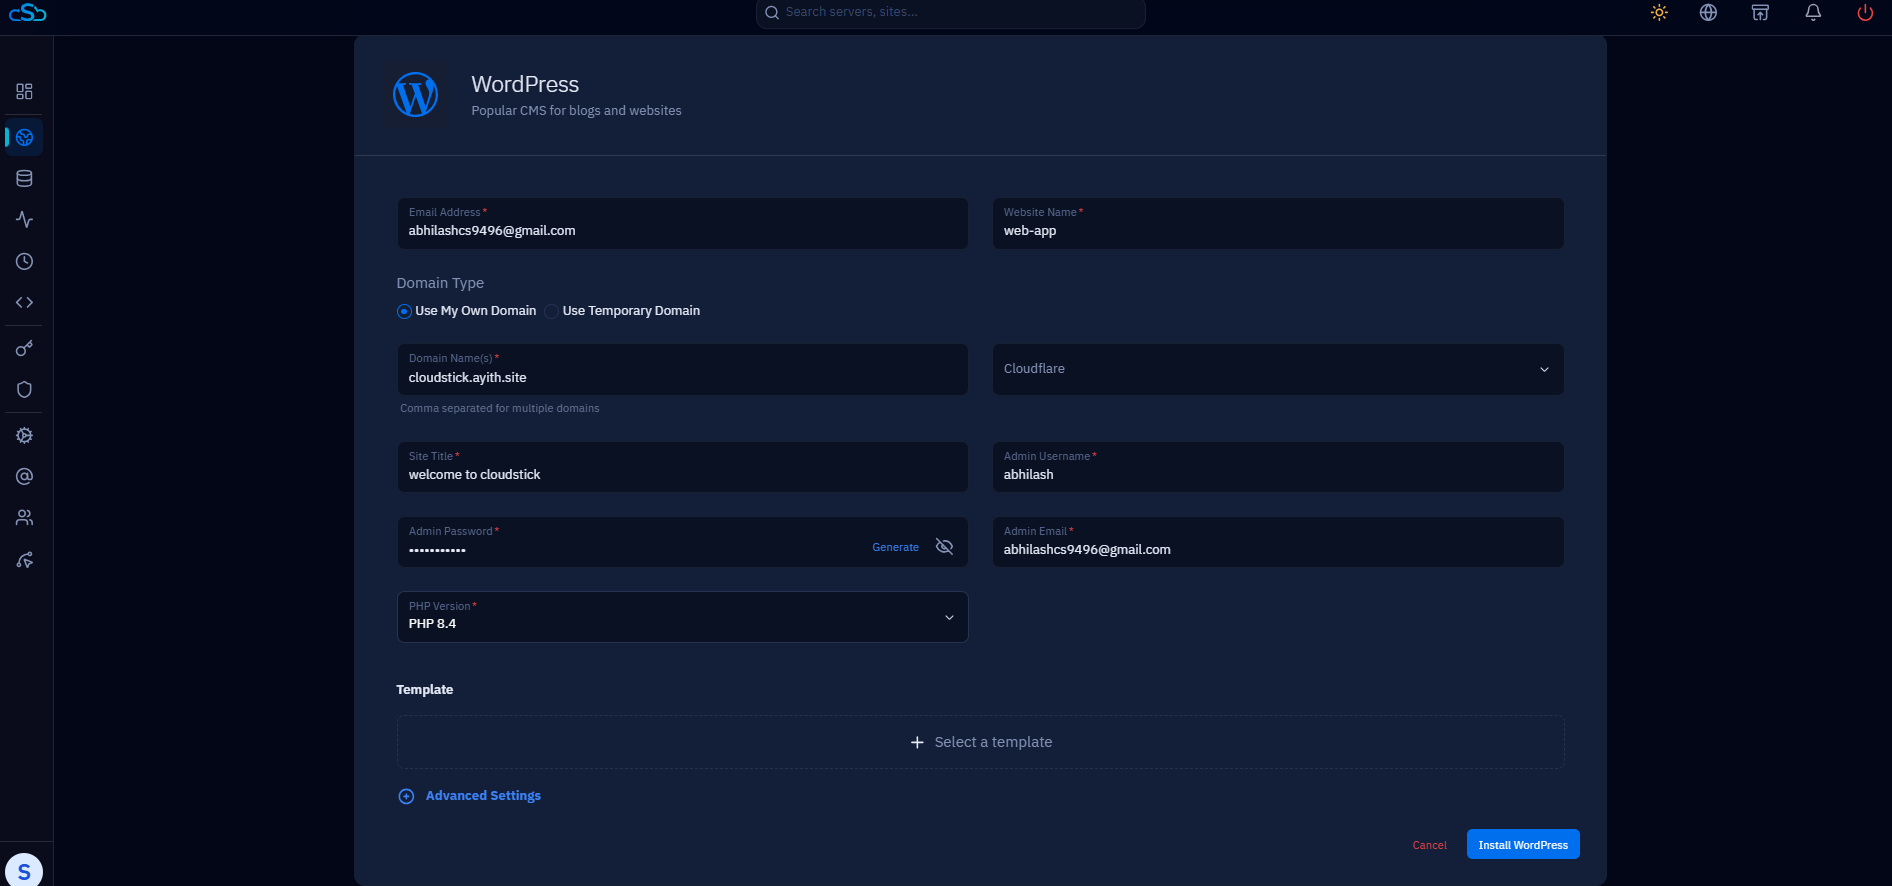
Fig. 05 — WordPress installation form showing site details, domain configuration, admin credentials, and PHP version selection.
Click Advanced Settings to expand the database configuration section. You can customise the Database Name, Database Username, and Database Password — or leave them as CloudStick auto-generates secure values for all fields by default.
Step 6: Install WordPress and Monitor Progress
Once all details are filled in, trigger the installation and watch CloudStick automate the entire setup — from creating the database to writing the WordPress configuration file.
1. Click Install WordPress: Review the information you entered, then click the Install WordPress button at the bottom right of the form.
2. Monitor the installation log: CloudStick displays a live log as it works through each step — creating the system user, setting file permissions, configuring the web server, generating DKIM keys, and installing WordPress core files.
3. Installation Successful modal: When the process completes, an Installation Successful popup appears confirming your Website name, Domain, System User, PHP Version, and Public Path.
4. Proceed to website details: Click See Website Details to open the Website Summary page, or click Back to List to return to the Websites List.
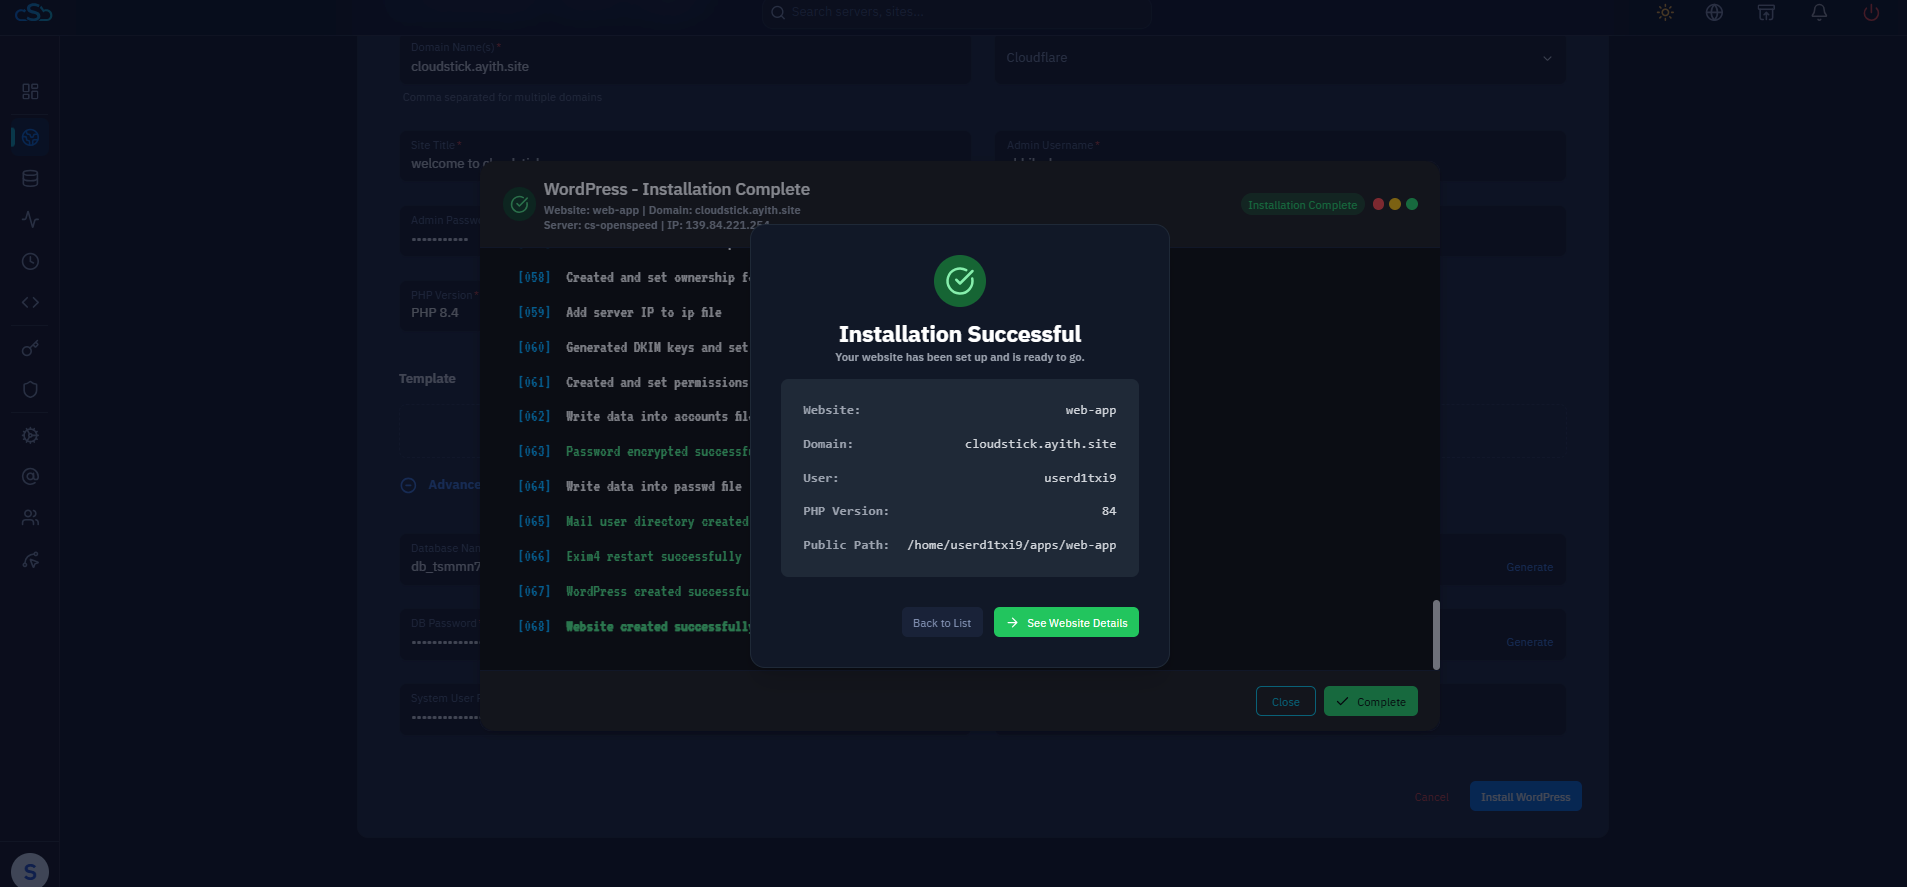
Fig. 06 — Installation log showing completed steps alongside the Installation Successful modal confirming the site is ready.
If the installation log shows any errors, verify that the domain name is correctly pointed to your server's IP address and that no other site on this server is already using the same domain.
Step 7: Deploy SSL and Access Your Live Site
With WordPress installed, secure your site with a free Let's Encrypt SSL certificate and confirm it is live and accessible in the browser.
1. Open SSL Management: From the Website Summary page, scroll down and click the Manage SSL tab to open the SSL management section.
2. Click Deploy SSL: The SSL Management page will show no certificate installed. Click Deploy SSL to begin the Let's Encrypt certificate issuance process.
3. Save SSL Configuration: Once the certificate is issued, click Save SSL Configuration to apply HTTPS to your site. Select HTTPS Only to redirect all HTTP traffic to HTTPS automatically.
4. Return to Website Summary: Go back to the Website Summary page and confirm your domain is listed and marked as active.
5. Open your website: Click your domain name on the Website Summary page. Your WordPress site should open in the browser, secured with HTTPS and ready to use.
Your WordPress site is now live and secured with SSL. Log in to the WordPress admin dashboard at yourdomain.com/wp-admin using the admin username and password you configured during installation. From there you can install themes, add plugins, and start publishing content.