How to Manage, Filter, and Update WordPress Users in CloudStick WordPress Manager
Overview
CloudStick's WordPress Manager gives you full control over WordPress user accounts without ever leaving your server control panel. From the Users tab, you can browse all registered users, filter them by role, update their profile details, change passwords, or delete accounts — all without logging into the WordPress admin dashboard.
This guide walks you through navigating to the WordPress Manager Users tab, filtering users by role, and performing user management actions such as updating user details, changing a password, and deleting a user.
Prerequisite: Your website must already have WordPress installed and connected in CloudStick. If you haven't installed WordPress yet, see the How to install WordPress in CloudStick guide first.
Step 1: Navigate to Your Server
Start from the CloudStick Dashboard, where all your connected servers are listed.
Log in to your CloudStick account and open the Dashboard.
Locate your server from the server list on the Dashboard.
Click the "MANAGE" button next to your server to open its management panel.
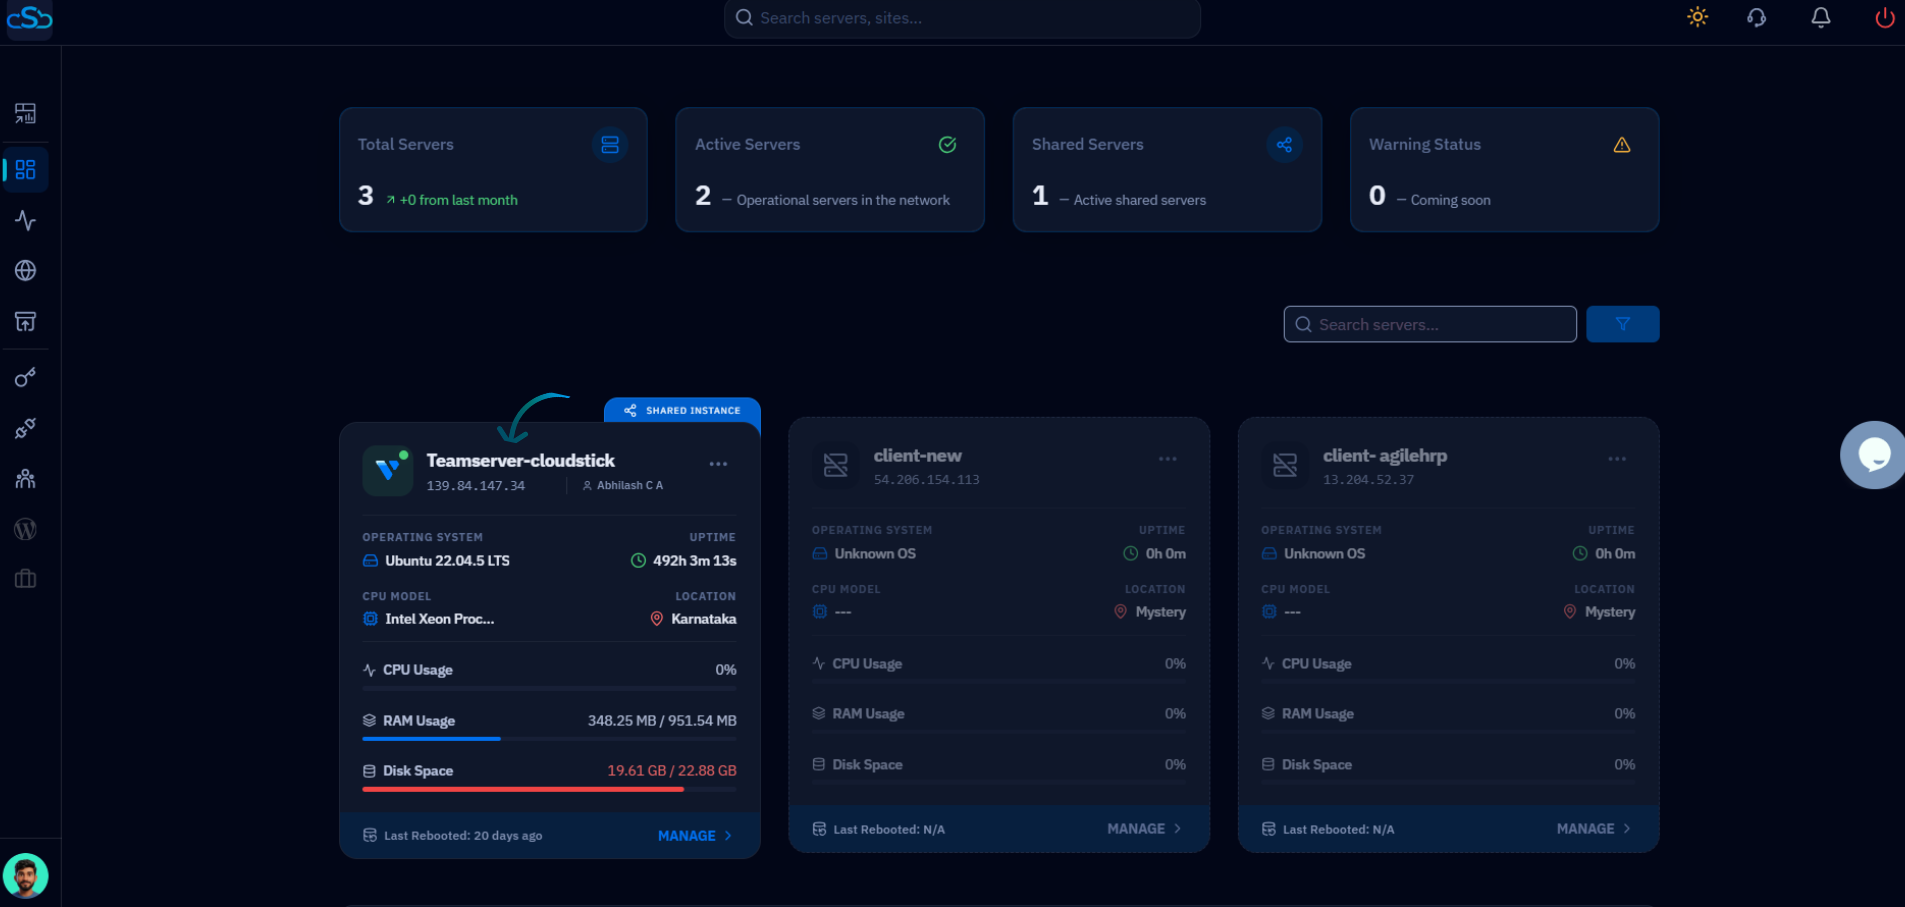
Fig. 01 — CloudStick Dashboard showing the server list with the MANAGE button.
Step 2: Select Your WordPress Website
After entering the server panel, you'll see all web applications hosted on that server. Select the WordPress site you want to manage users for.
Open the WebApps section from the left-hand navigation inside the server panel.
Find your WordPress website in the list of web applications.
Click on the website to open its management options.
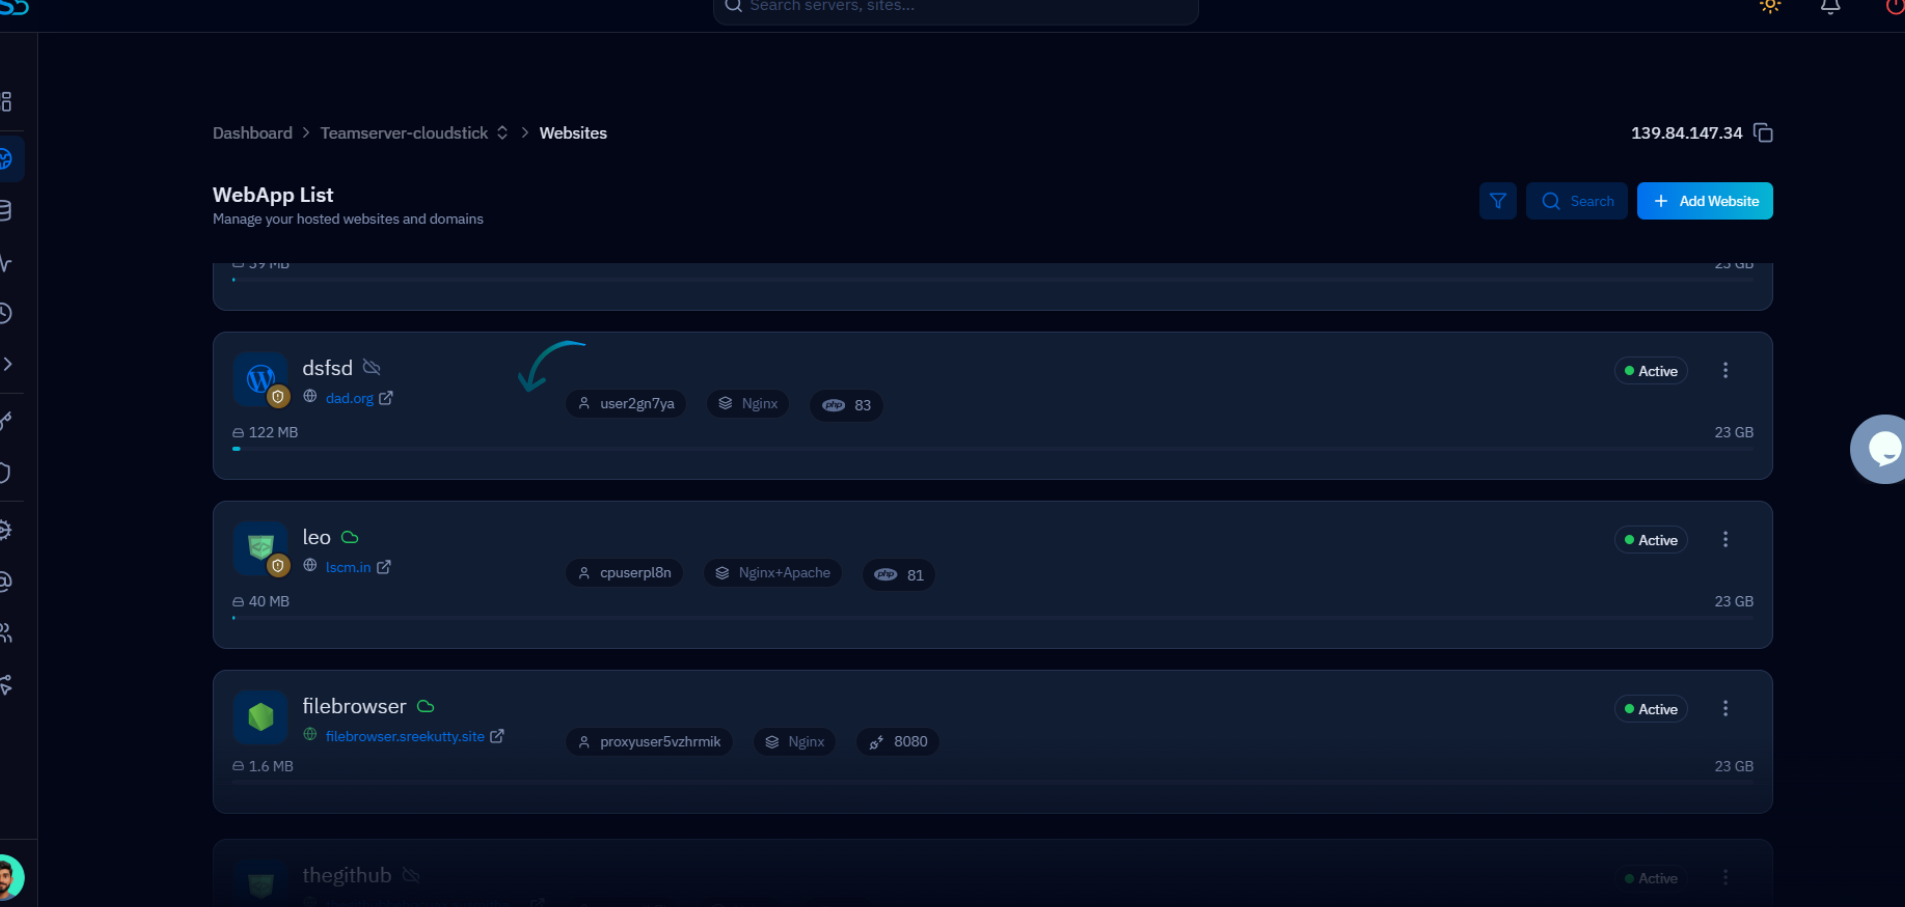
Fig. 02 — WebApp list showing WordPress sites on the server.
Step 3: Open WordPress Manager and Go to Users
Inside the website panel, navigate to the WordPress Manager to access the Users tab, which lists all registered WordPress users.
Click "WordPress Manager" from the website's navigation menu.
Select the "Users" tab at the top of the WordPress Manager.
Review the user table — it displays Username, First Name, Last Name, Email, Role, and an Action column for each user.
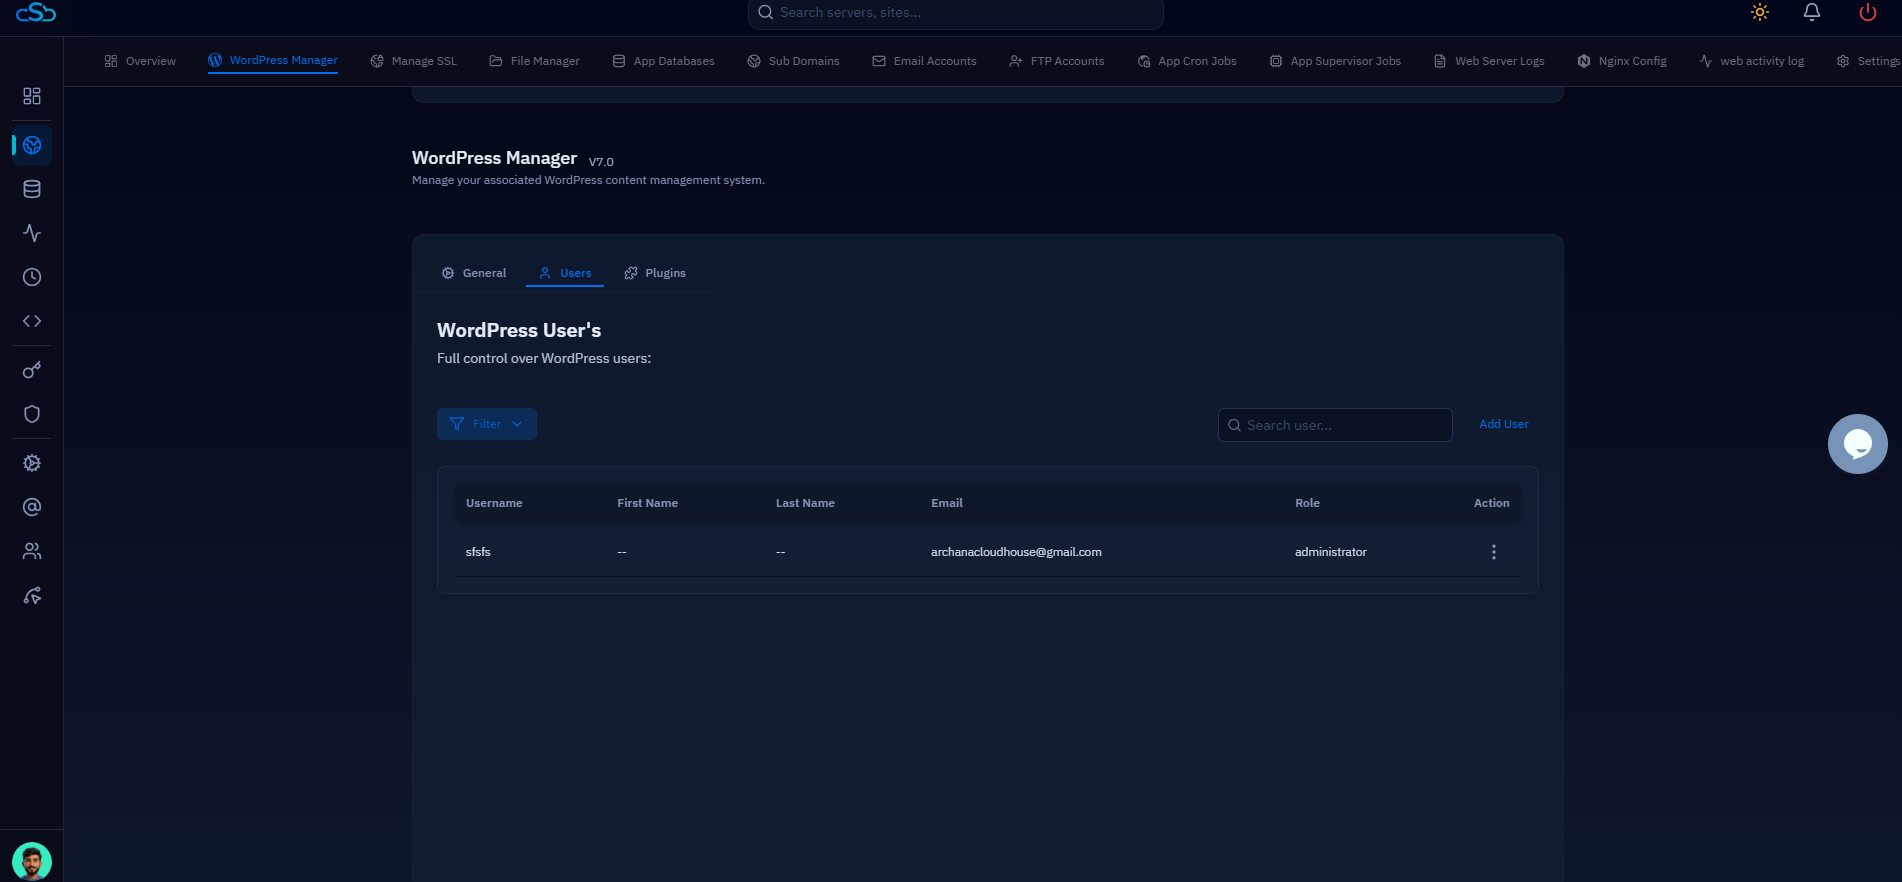
Fig. 03 — WordPress Manager Users tab showing the full user list with columns for Username, First Name, Last Name, Email, Role, and Action.
Step 4: Filter or Search Users
When managing sites with many users, use the filter dropdown to narrow the list by role, making it easier to find the specific user you need.
Click the Filter dropdown above the user table.
Select a role to filter by: All, Administrator, Subscriber, Contributor, Editor, or Author.
The user list updates instantly to show only users matching the selected role.
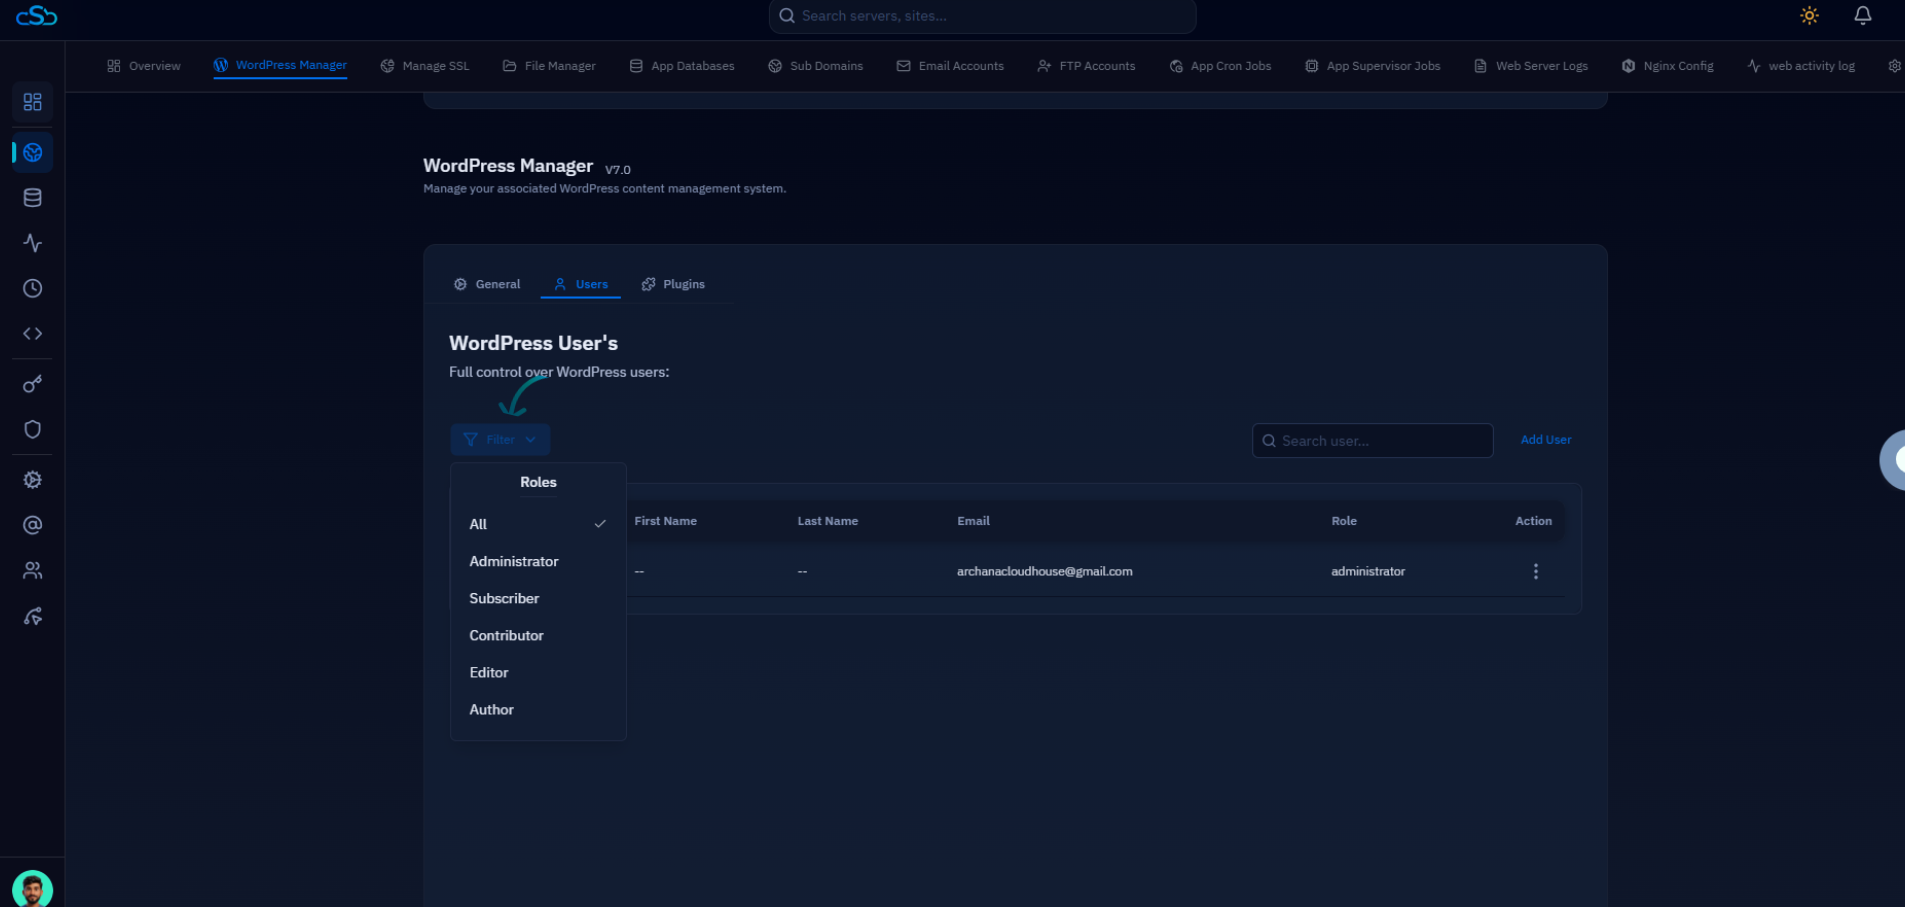
Fig. 04 — Users tab with the Filter dropdown open, showing role options: All, Administrator, Subscriber, Contributor, Editor, Author.
You can also use the search field to find a specific user by username or email address without changing the role filter.
Step 5: Update User Details or Change Password
Each user row has a three-dot action menu that gives you quick access to user management operations — all without navigating to the WordPress admin dashboard.
Click the three-dot menu (⋮) in the Action column next to the user you want to manage.
Choose "Update UserDetails" to edit the user's first name, last name, email address, or role.
Choose "Change Password" to set a new password for the selected user.
Choose "Delete User" to permanently remove the user from WordPress.
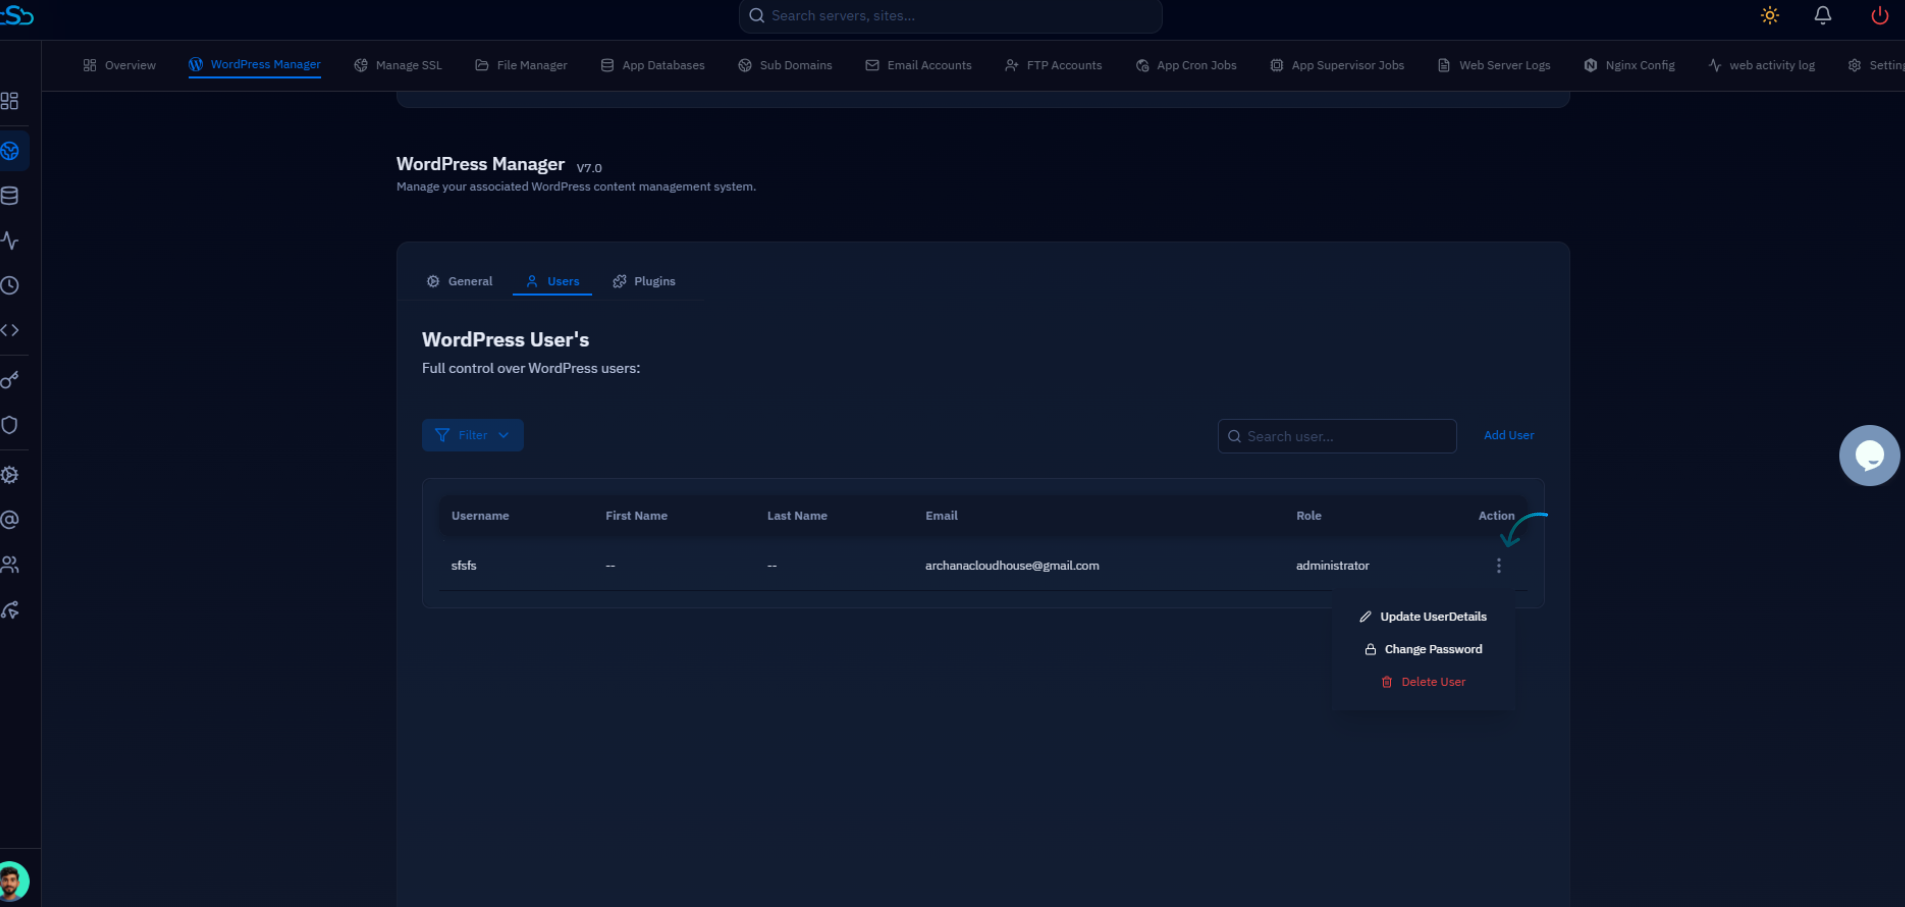
Fig. 05 — Three-dot action menu for a user showing options: Update UserDetails, Change Password, Delete User.
Deleting a user is permanent and cannot be undone from CloudStick. Make sure you have selected the correct user before confirming deletion.