How to manage plugins in CloudStick WordPress Manager
Overview
WordPress plugins extend your site's functionality — from SEO tools and contact forms to eCommerce and security. Managing them typically means logging into the WordPress admin panel, but with CloudStick's WordPress Manager, you have full control over your plugins directly from the CloudStick dashboard. No extra login required.
From the Plugins tab in WordPress Manager, you can view all installed plugins, activate or deactivate them, apply available updates, and remove unused plugins — all in one place. Keeping plugins up to date and removing unused ones is one of the most effective ways to improve site performance and reduce security risk.
Your server must be connected to CloudStick and the website must be a WordPress installation. Plugin management via WordPress Manager is available on all paid CloudStick plans.
Step 1: Navigate to Your Server
Start from the CloudStick Dashboard, which lists all connected servers with real-time resource usage and status.
1. Log in to CloudStick: Go to app.cloudstick.io and sign in with your credentials.
2. Open your server: Find the server hosting your WordPress website on the Dashboard. Click the Manage button on its card to open the server panel.
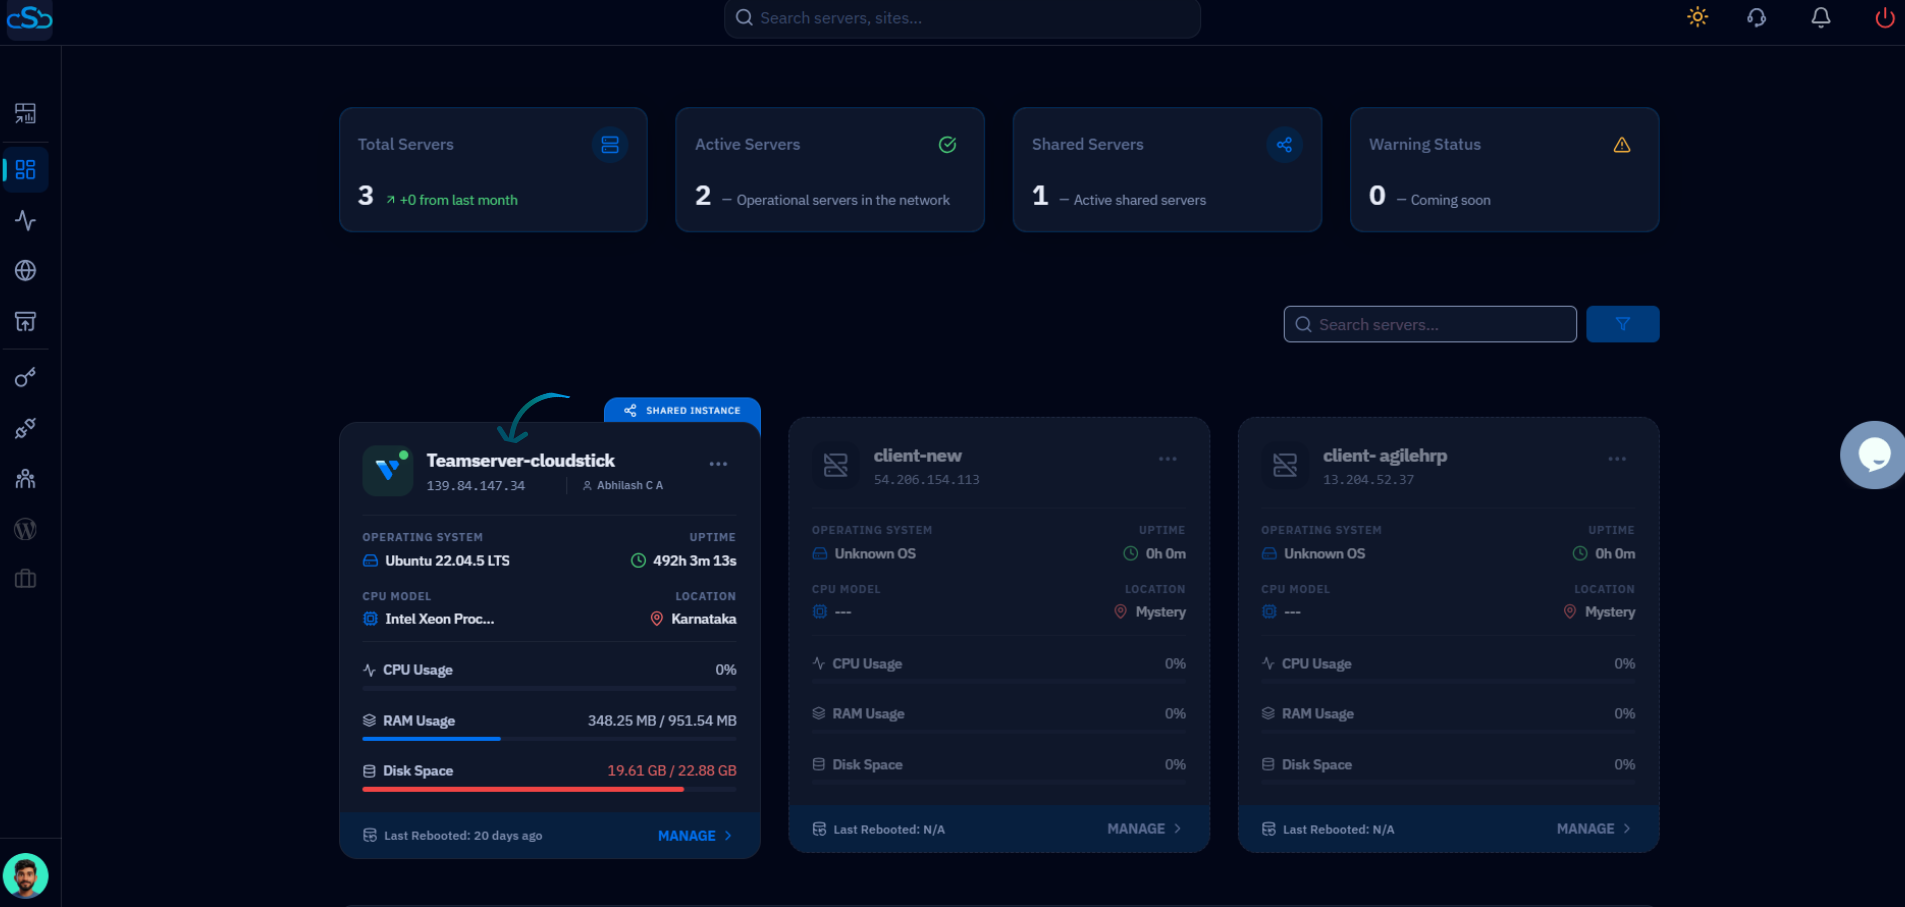
Fig. 01 — CloudStick Dashboard showing connected servers with CPU, memory, and disk usage. Click Manage to enter the server panel.
Step 2: Select Your WordPress Website
Inside the server panel, navigate to your Websites list to find the WordPress site whose plugins you want to manage.
1. Open Websites: In the left-hand navigation of the server panel, click the Websites icon to open the WebApp List.
2. Select your WordPress site: Find your WordPress website in the list and click on it to open the site management view.
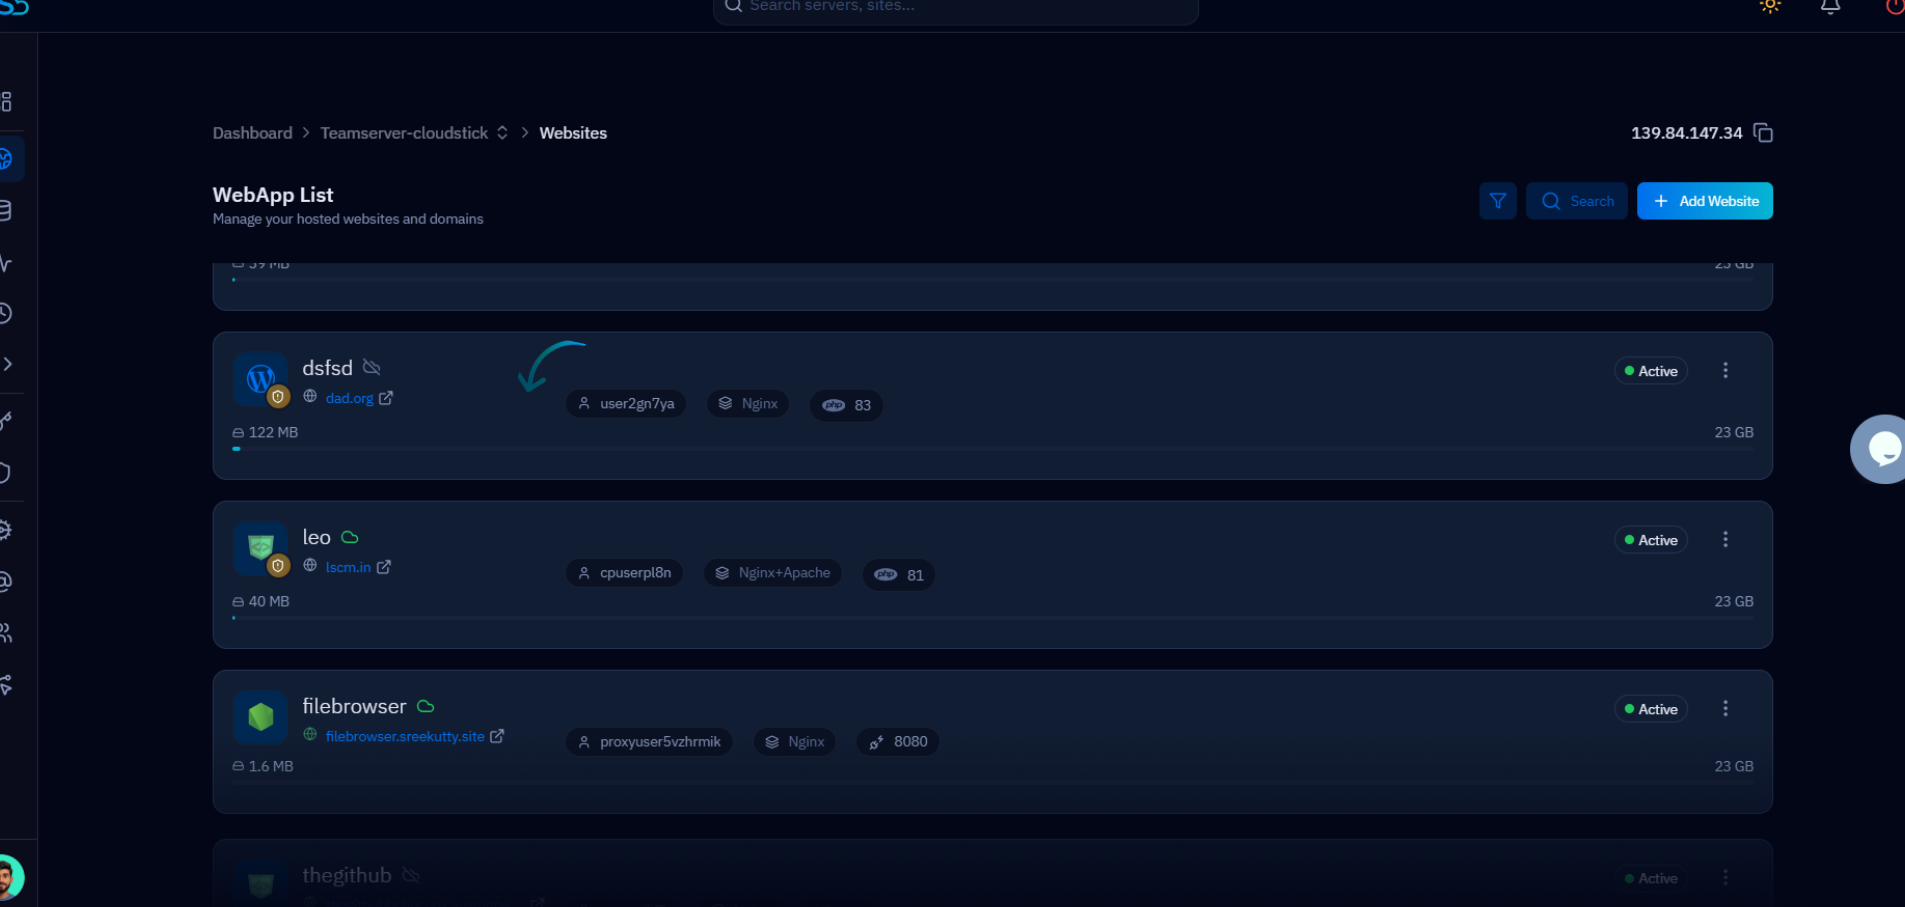
Fig. 02 — WebApp List showing all websites hosted on the server. Click your WordPress site to open its management view.
Step 3: Manage Plugins in WordPress Manager
Open WordPress Manager and navigate to the Plugins tab to view and manage all installed plugins on your site.
1. Open WordPress Manager: Click the WordPress Manager tab at the top of the site management page to enter the WordPress Manager.
2. Click the Plugins tab: Inside WordPress Manager, click the Plugins tab (next to General and Users) to open the WordPress Plugin section.
3. View installed plugins: All installed plugins are displayed as cards showing their name, version, status (Active / Inactive), and available updates. Use the Search Plugins field to quickly find a specific plugin.
4. Activate or deactivate a plugin: Click the three-dot menu (⋮) on a plugin card to reveal actions, then click Activate to enable the plugin, or click the Activate Plugin button at the bottom of an inactive card. To deactivate an active plugin, use the same menu.
5. Update a plugin: If an "Update available" badge appears on a plugin card (shown in orange), click it to apply the latest version. Keeping plugins updated ensures you receive security patches and performance improvements.
6. Delete a plugin: Click the three-dot menu (⋮) on a plugin card and select Delete to permanently remove the plugin from your WordPress site. Only delete plugins you no longer need — unused plugins can slow down your site even when inactive.
Deactivating a plugin keeps its data intact but stops it from running. Deleting a plugin removes it and its files permanently. If unsure, deactivate first and delete only after confirming the site works as expected.
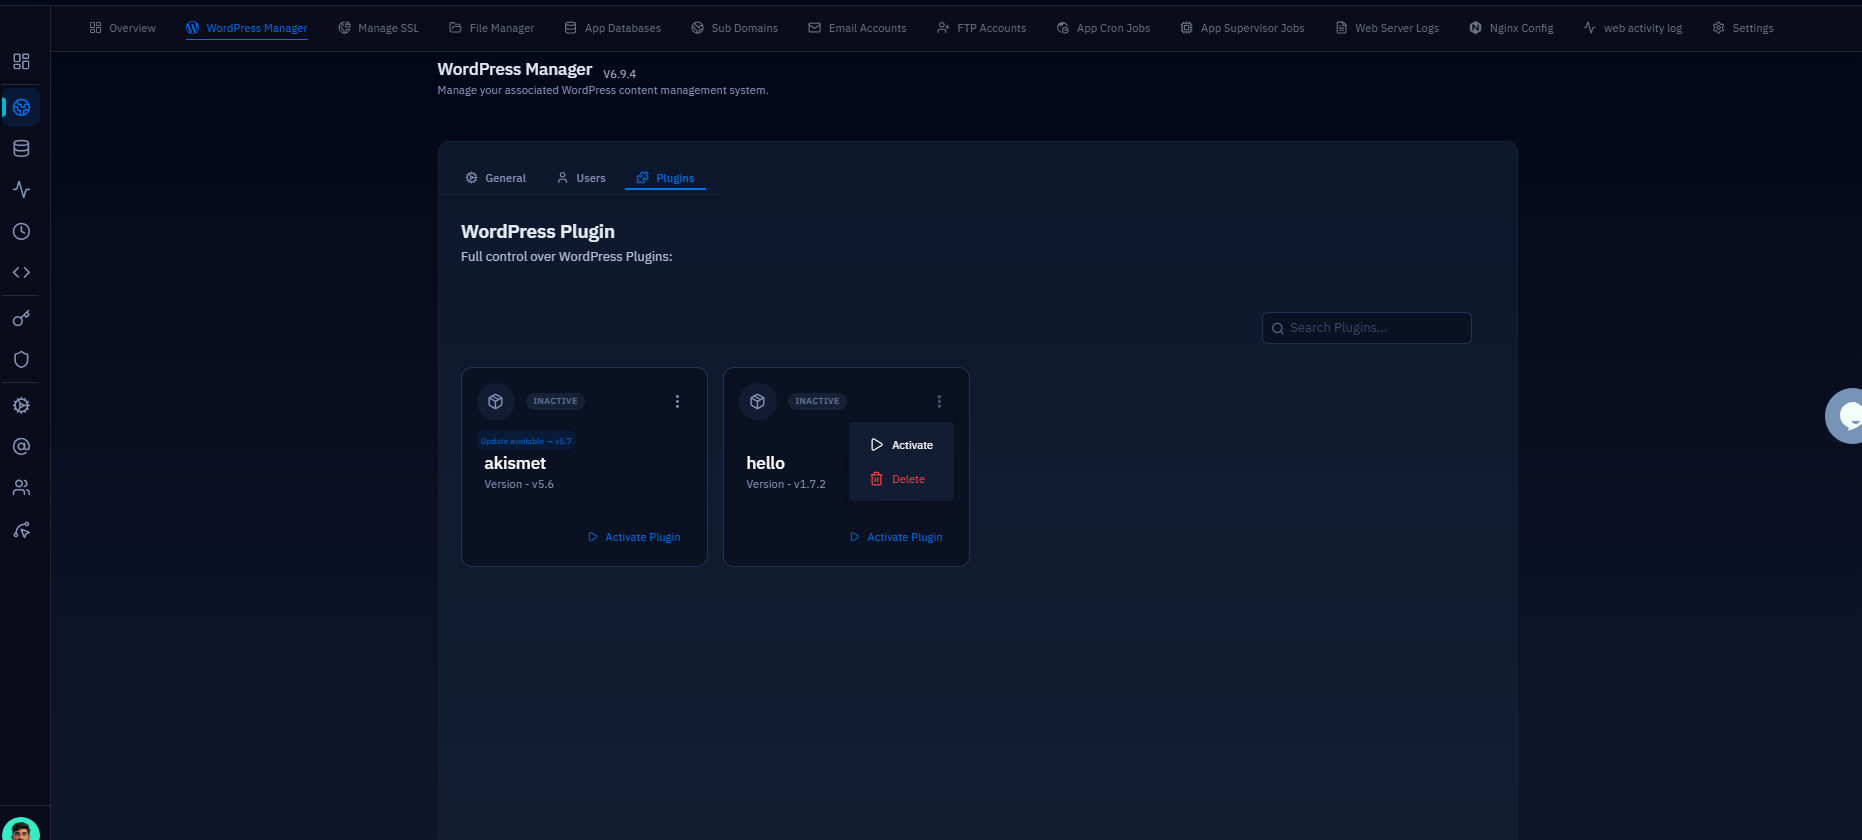
Fig. 03 — WordPress Manager Plugins tab showing installed plugin cards with Activate, Delete, and Update available actions.