How to Access File Manager for Your Website in CloudStick
Overview
Managing website files typically requires SSH access and command-line knowledge — but CloudStick eliminates that barrier entirely. The built-in File Manager gives you a visual, browser-based interface to browse, upload, edit, compress, and control permissions for all files on your web application, directly from the CloudStick dashboard.
This guide walks you through accessing the File Manager for any website on your server and covers the full range of file operations available — from basic uploads and edits to compressing archives and adjusting file permissions.
The Advanced File Manager is available on the Basic plan and above. Ensure your server is connected and the target website is active before following these steps.
Step 1: Log In and Select Your Server
Every file management action in CloudStick starts from the correct server context. Begin by navigating to the right server on your dashboard.
Log in to your CloudStick account: Visit app.cloudstick.io and sign in with your credentials.
Select your server: From the main dashboard, locate the server card that hosts the website you want to manage, then click Manage to open its server panel.
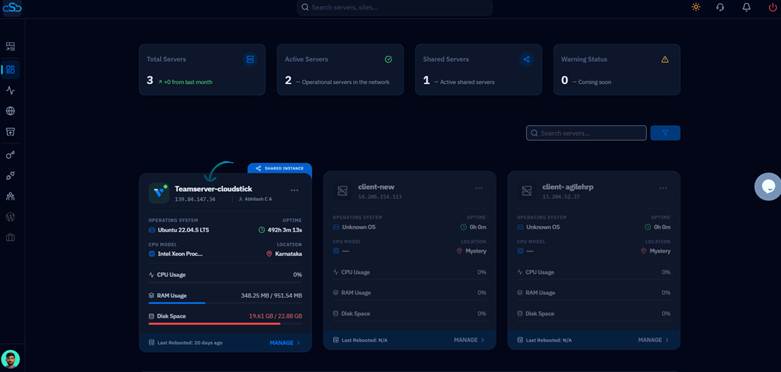
Fig. 01 — CloudStick dashboard showing connected servers. Click Manage on the server that hosts your website.
Step 2: Navigate to the Websites Section
Once inside the server panel, you need to open the Websites section to see all web applications hosted on that server.
Click on Websites: In the Server Resources area of the server panel, click the Websites card. This opens the WebApp List showing all sites hosted on this server.
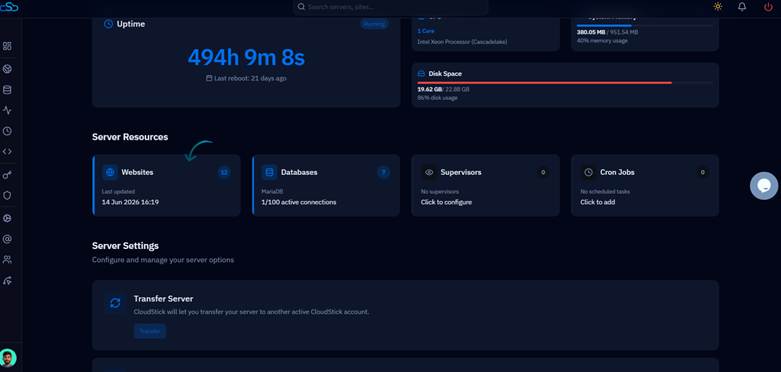
Fig. 02 — Server panel showing the Websites card under Server Resources. Click it to view all hosted web applications.
Step 3: Select Your Website
The WebApp List displays all websites on the server. Select the specific website whose files you want to manage.
Find your website: Browse the list of web applications displayed. Each entry shows the site name, domain, web stack (Nginx or OpenLiteSpeed), and current status.
Click the website name: Click on the name of the website you want to manage to open its individual management view.
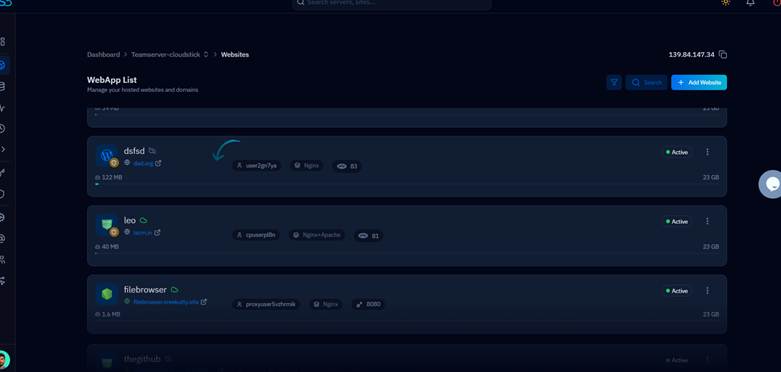
Fig. 03 — WebApp List showing all hosted websites on the server. Click the website name to open its management view.
Step 4: Open the File Manager Tab
Inside the website management view, a set of tabs is displayed at the top. The File Manager is one of these tabs and provides direct access to the website's file system.
Click the File Manager tab: In the top navigation bar of the website management view, locate and click the File Manager tab.
Browse your files: The File Manager loads and displays the root directory of your website. You can navigate into folders, view file sizes, permissions, and modification dates at a glance.
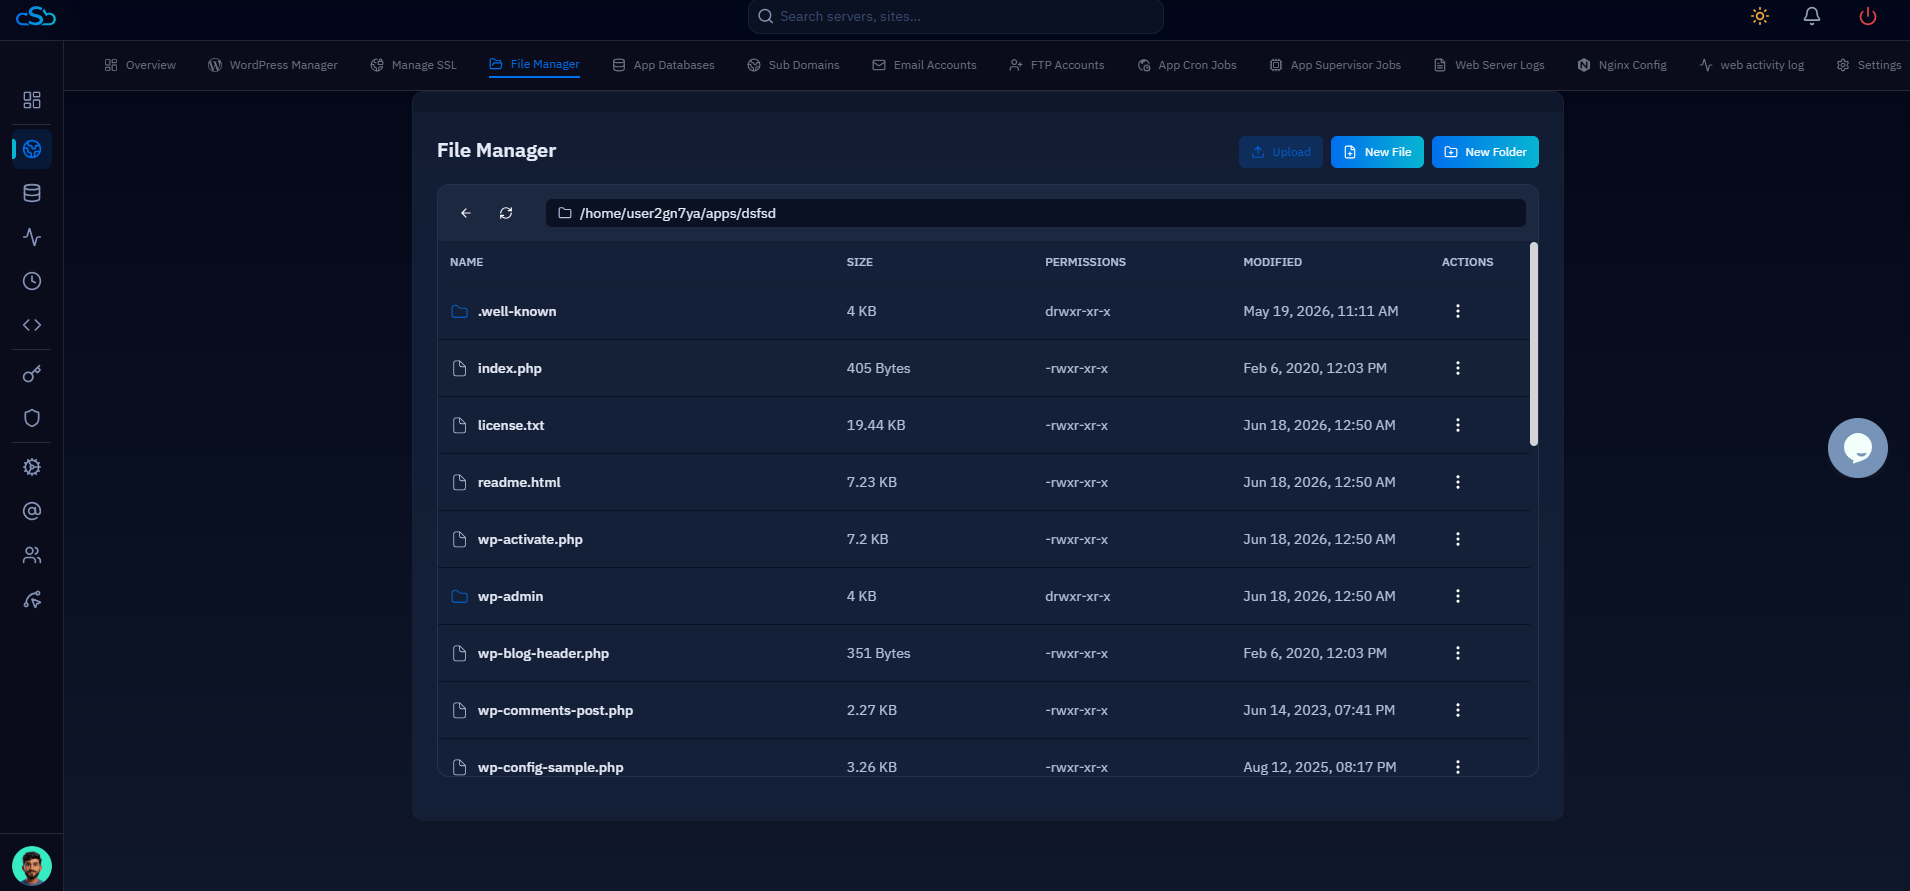
Fig. 04 — File Manager open and displaying the website's root directory with file names, sizes, permissions, and modification dates.
The current path is shown in the address bar at the top of the File Manager. Use the back arrow or click any folder to navigate.
Step 5: Explore File Manager Capabilities
The CloudStick File Manager supports a comprehensive set of file operations — all available without needing to use SSH or the command line.
File Operations via Context Menu
Right-click (or click the three-dot menu icon) on any file or folder to reveal the full set of available actions:
Rename: Change the name of any file or folder in place.
Open In File Editor: Open the file directly in CloudStick's built-in code editor for inline editing.
Copy / Cut / Move: Duplicate or relocate files and folders within your file system.
Compress: Archive the selected file or folder into a ZIP, TAR, or TAR.GZ archive.
Download File: Download the file directly to your local machine without SSH or FTP.
Change Permission: Adjust read, write, and execute permissions for Owner, Group, and Others.
Delete File: Permanently remove the file or folder from the server.
Fig. 05 — File Manager context menu showing all available file operations including Rename, Open In File Editor, Copy, Cut, Compress, Download File, Change Permission, and Delete.
Compressing Files and Folders
To compress a file or folder, select Compress from the context menu. A dialog will appear where you can configure the archive:
Enter an Archive Name for the output file.
Select the Archive Format — choose from .zip, .tar, or .tar.gz.
The destination path is shown below the format selector. Click Compress to create the archive.
Fig. 06 — Compress Item dialog showing archive name input, format selection (ZIP, TAR, TAR.GZ), and destination path.
Changing File Permissions
To change the permissions of a file, select Change Permission from the context menu. The permissions dialog provides a visual grid where you can toggle read, write, and execute access for each user class:
Owner — the system user who owns the file (typically your site's system user).
Group — the user group associated with the file.
Others — all other users on the system.
The current permissions are shown on the left; the new permissions update in real time on the right. Click Save Permissions to apply the changes.
Fig. 07 — Change File Permissions dialog showing read/write/execute checkboxes for Owner, Group, and Others, with current and new permission values displayed.
Use caution when modifying file permissions. Incorrect settings (e.g., making PHP files world-writable) can introduce security vulnerabilities on your server.