How to Add a Server to a Team in CloudStick
Overview
CloudStick's Team feature lets you collaborate with colleagues and clients by giving them managed access to specific servers — without sharing credentials. Assigning a server to a team is the key step that makes those servers visible and actionable to team members, with access scoped precisely to the permissions their role allows.
This guide walks you through adding a server to an existing team: navigating to the Teams section, opening your team's management panel, selecting the server you want to assign, and confirming the change. Once assigned, the server appears in the team's resource list and team members can manage it immediately.
You must already have a team created and at least one server connected to your CloudStick account before following this guide. Only servers you own or have permission to manage can be assigned to a team. Team seats are available on Basic (2 seats), Pro (4 seats), and Business (10 seats) plans.
Step 1: Log In and Open the Teams Section
Start from your CloudStick dashboard. The Teams section is accessible from the left-hand navigation and is available on all paid plans that include team seats.
1. Log in to your CloudStick account at dash.cloudstick.io using your credentials.
2. From the left-hand navigation, click the Teams icon to open the Teams management area.
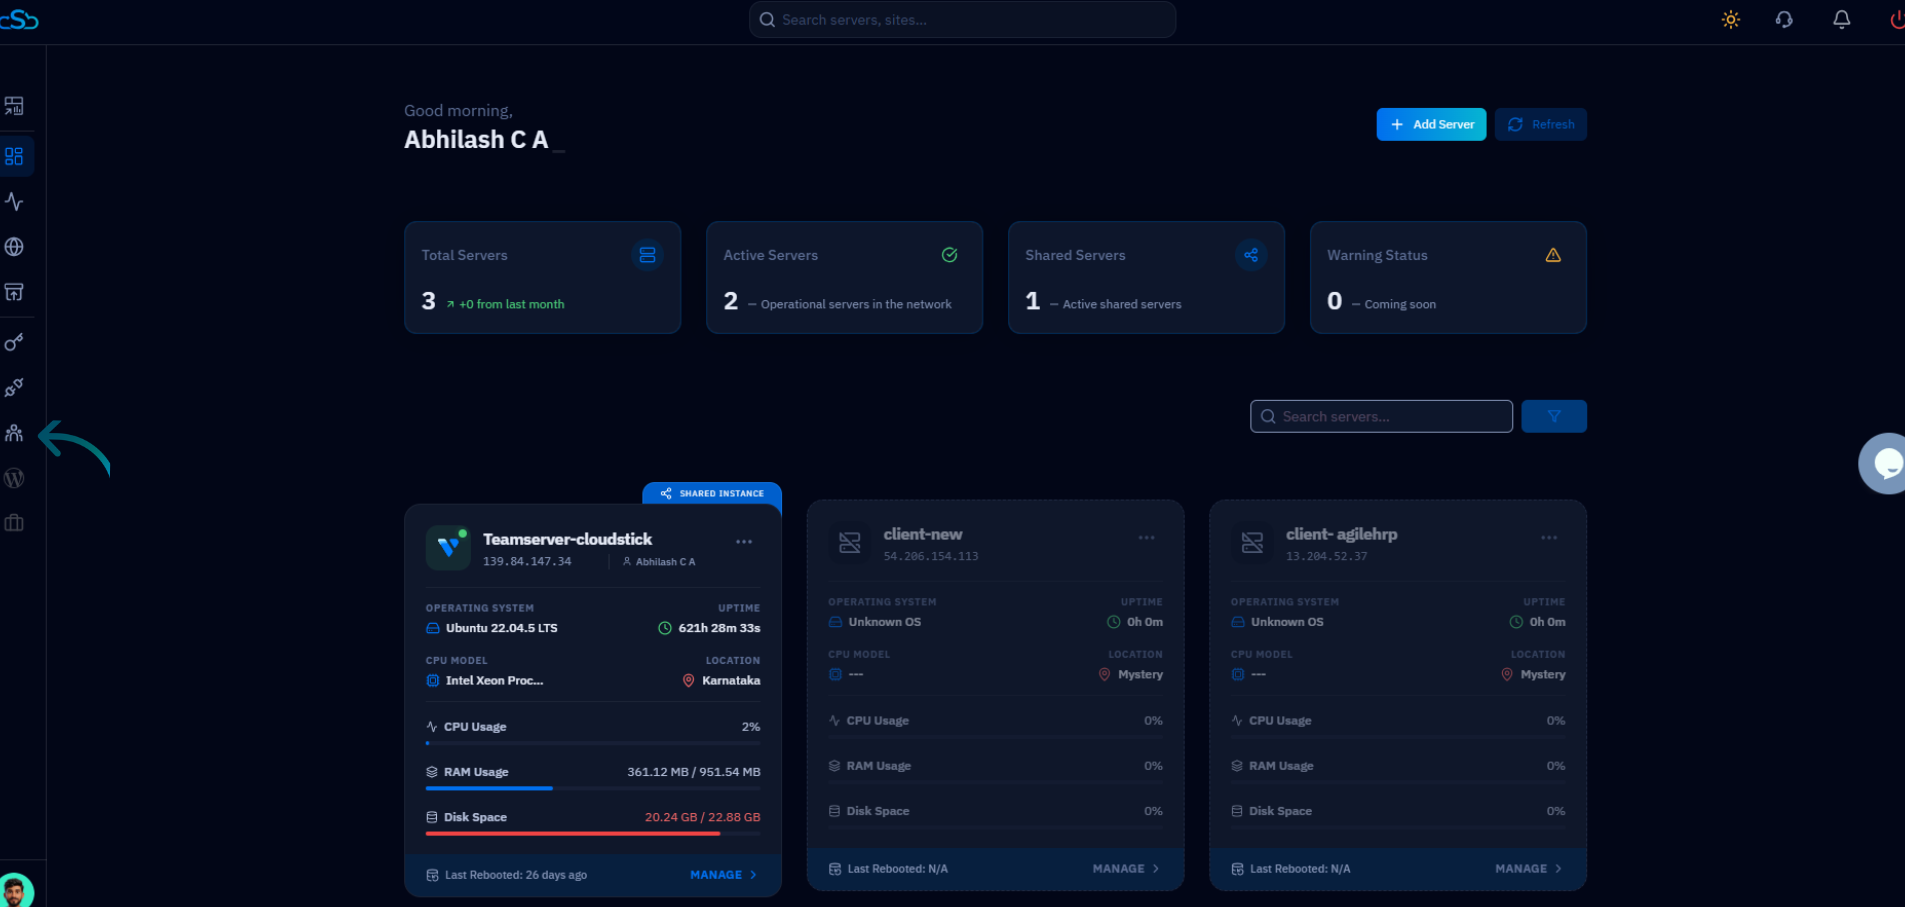
Fig. 01 — CloudStick dashboard showing the main server overview and the left-hand navigation with the Teams icon.
Step 2: Select Your Team
The Team List page displays all teams you have created, including the number of active servers assigned to each and current member avatars. Locate the team you want to assign a server to and open its management panel.
1. Review the Team List to find the team you want to assign a server to.
2. Click Manage Team on the relevant team card to open its management panel.
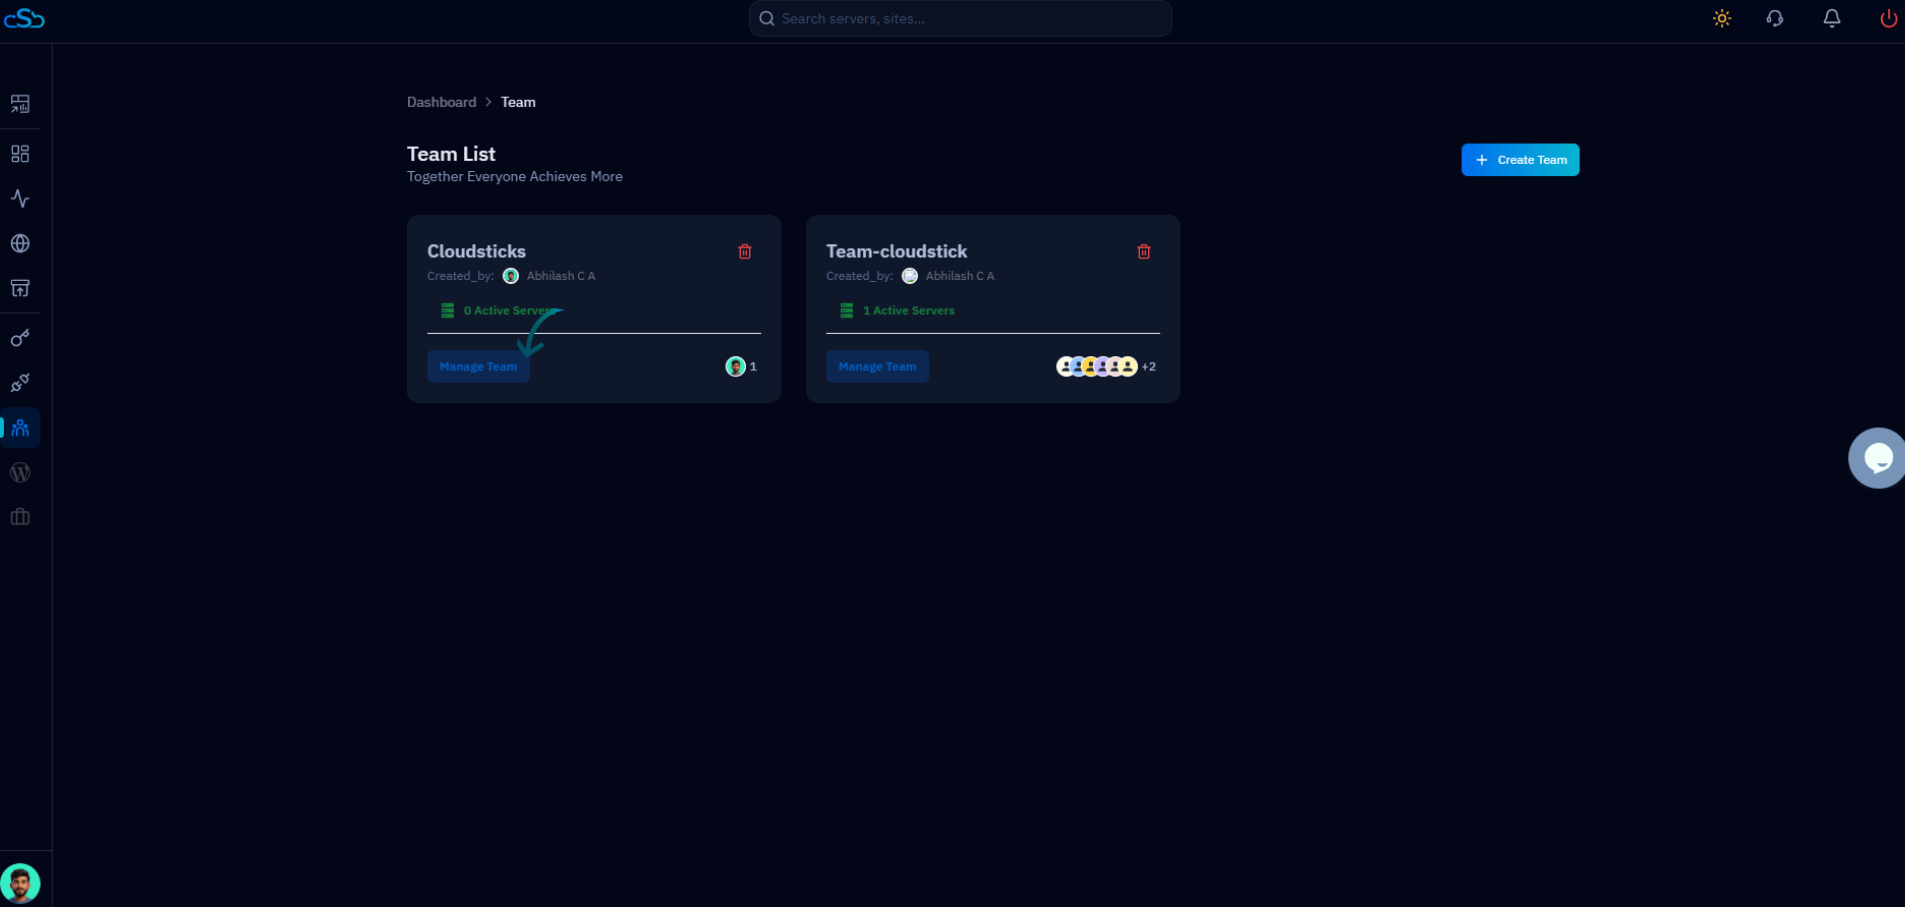
Fig. 02 — Team List page showing existing teams with their active server counts and the Manage Team button.
Step 3: Add a Server to the Team
The Manage Team panel gives you full control over the team's members and assigned servers. Use the ServerList section to view currently assigned servers and the Add Server button to assign a new one.
1. In the Manage Team panel, scroll to the ServerList section which shows all servers currently assigned to this team.
2. Click Add Server to open the server selection list.
3. From the server list, select the checkbox next to the server you want to assign to the team.
4. Click Add to confirm and assign the selected server to the team.
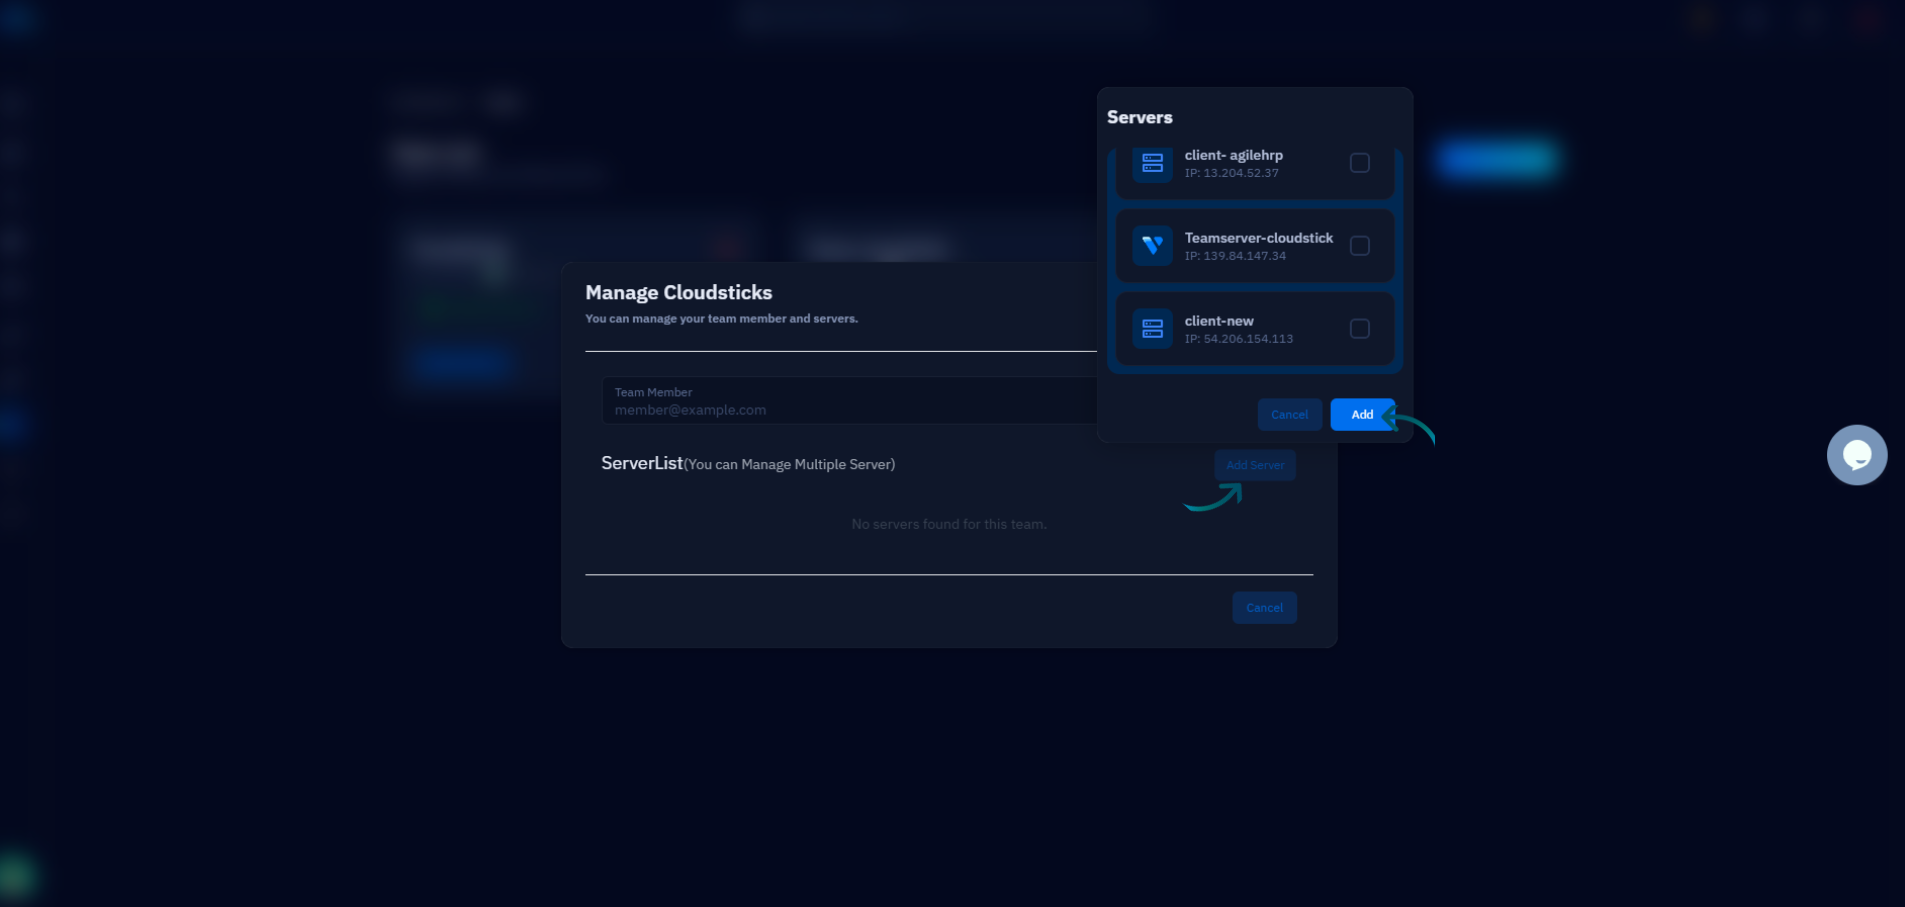
Fig. 03 — Manage Team panel showing the ServerList section, the Add Server button, and the server selection overlay with available servers.
You can assign multiple servers to the same team by selecting more than one checkbox before clicking Add. The panel also lets you invite team members by entering their email address in the Team Member field.
Step 4: Verify Access
Once the server is added, it appears immediately in the team's server list. Team members can now access and manage it according to the permissions granted by their assigned role.
The assigned server appears in the team's ServerList within the Manage Team panel.
Team members can access the server from their own CloudStick dashboard under the shared servers view.
Access is scoped by role — team members can only perform actions permitted by their assigned permissions.
Only servers that you own or have permission to manage can be assigned to a team. To remove a server from the team later, return to Manage Team from the Team List and remove it from the ServerList.