How to Change an Email Account Password in CloudStick
Overview
Email account passwords in CloudStick are managed directly from the website's Email Accounts section — not inside the Roundcube webmail interface itself. This means that if a user forgets their password, or you want to rotate credentials for security reasons, the reset must be performed from the CloudStick control panel.
This guide covers the four steps required to locate an email account, access its actions menu, and update its password. The change takes effect immediately — no server restart is needed.
Prerequisites: A website must already exist in CloudStick and have at least one email account created under it. If you have not yet set up an email account, refer to the How to Install Roundcube Webmail guide first.
Step 1: Go to Email Accounts
Email account management lives inside each individual website — navigate there first rather than searching the main server dashboard.
Open your website: From the CloudStick dashboard, go to your server and click on the website name to open its management view.
Click Email Accounts: In the top navigation bar of the website view, click Email Accounts. You will see a list of all email accounts created under this website.
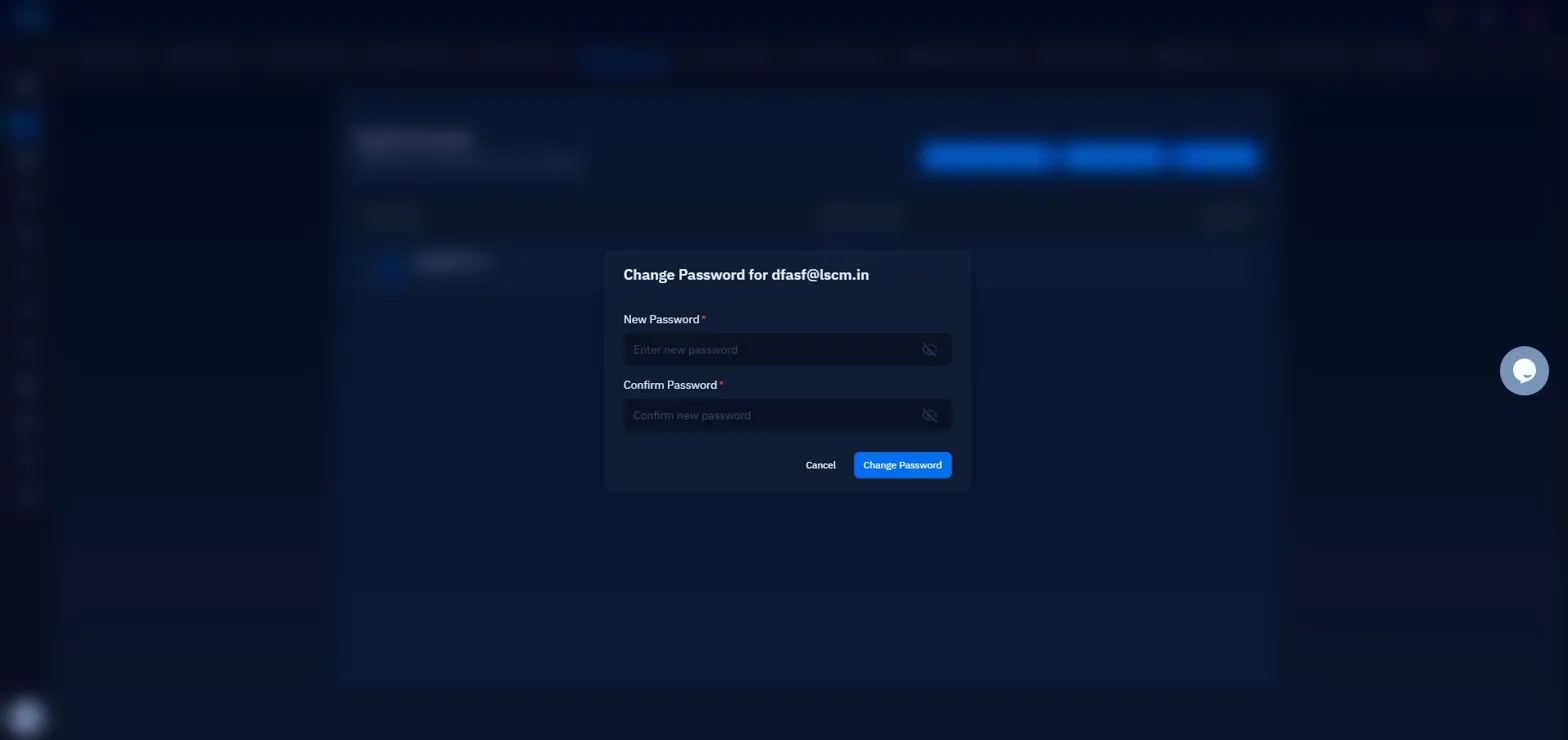
Fig. 01 — Website management view with the Email Accounts tab selected, showing the list of existing accounts.
Step 2: Open the Actions Menu
Each email account row has a context menu that gives you access to account-level actions without opening a separate settings page.
Locate the account: Find the email account you want to update in the list.
Click the three-dot menu icon: On the right side of that account's row, click the three-dot (⋮) menu icon. A dropdown will appear with four options: Forward Email, Change Quota, Reset Password, and Delete Email.
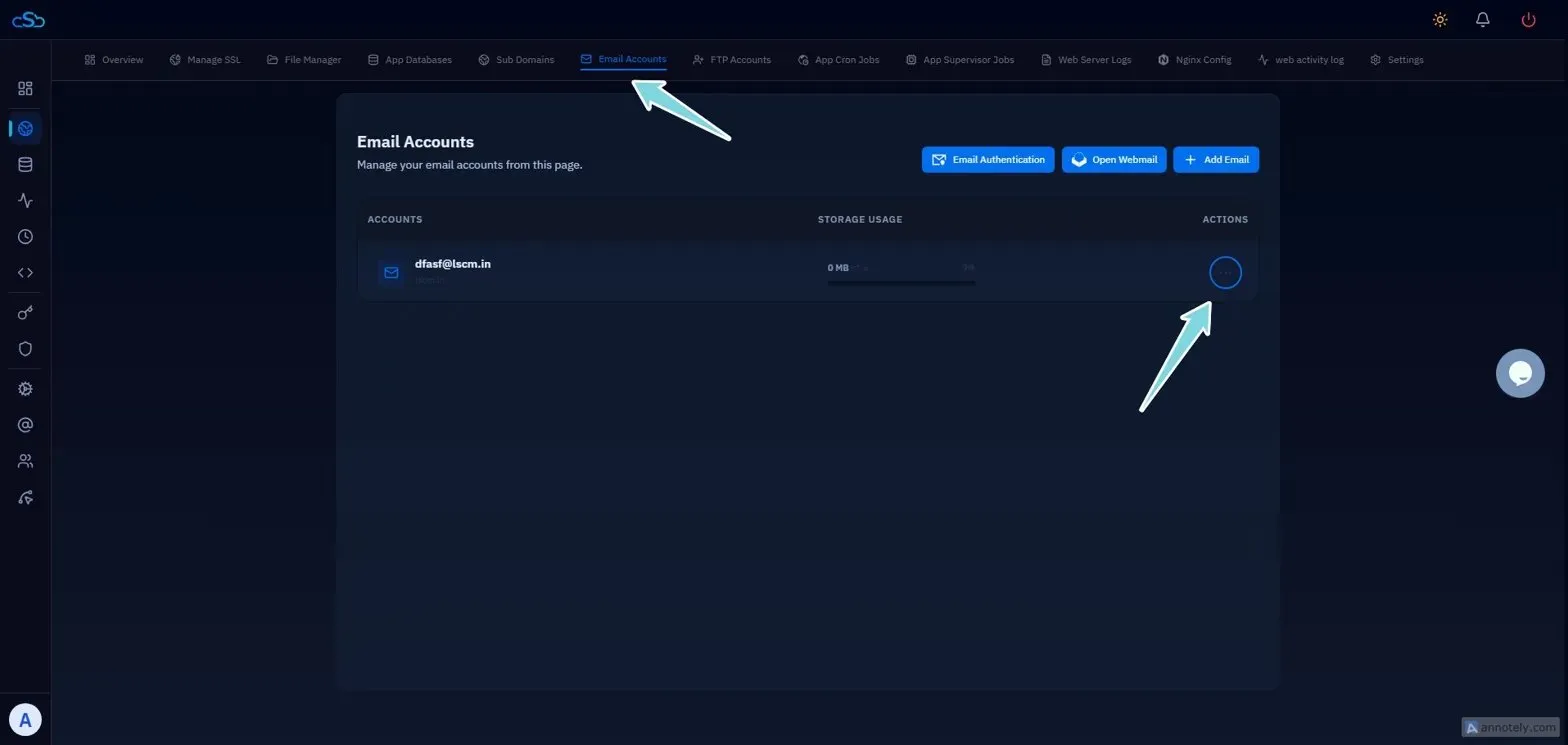
Fig. 02 — Email account row with the three-dot actions menu open, showing the Reset Password option.
Step 3: Click Reset Password
Selecting Reset Password from the dropdown opens the Change Password popup for that specific account.
Click Reset Password: Select it from the dropdown menu. The Change Password popup will appear immediately.
Step 4: Enter and Confirm the New Password
The Change Password popup requires you to enter the new password twice to prevent typos. The update is applied the moment you confirm.
New Password field: Type the new password. It must be at least 10 characters long.
Confirm Password field: Re-enter the exact same password. Both fields must match — the form will show an error if they differ.
Click Change Password: The password is updated immediately. The user can now log in to Roundcube or any connected mail client using the new credentials.
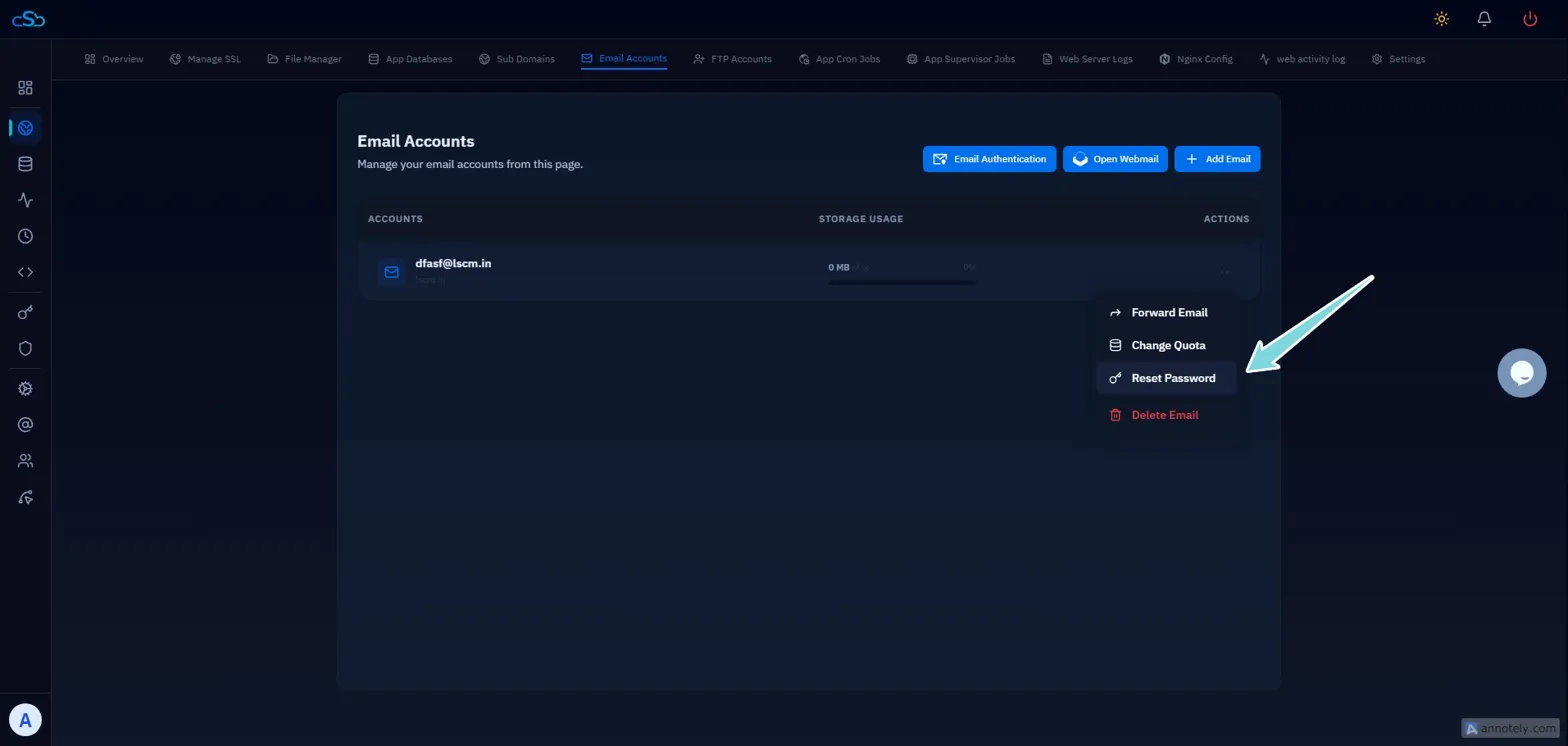
Fig. 03 — Change Password popup with the New Password and Confirm Password fields.
There is no password recovery option inside Roundcube itself — all password resets must be performed from the CloudStick control panel. After resetting, share the new password with the user through a secure channel.