How to Change PHP Settings for a Web Application in CloudStick
Overview
PHP settings control how your web applications use server resources — from how much memory a script can consume to the maximum file size it can accept for uploads. Default PHP values are often too conservative for production applications, especially WordPress sites with large media imports, WooCommerce stores, or custom PHP applications that handle complex operations.
CloudStick lets you adjust PHP configuration values per web application directly from the dashboard — no SSH or manual php.ini editing required. Changes are applied instantly and PHP-FPM restarts automatically to pick them up.
PHP settings are configured per web application, so changes only affect the selected site — not other applications on the same server. Make sure you are editing the correct website before saving.
Step 1: Navigate to the Websites Section
Start from the server panel to reach the list of web applications hosted on your server.
1. Log in to your CloudStick account at app.cloudstick.io and open the server panel for the server hosting your application.
2. In the server panel, locate the "Server Resources" section and click the "Websites" card to open the WebApp List.
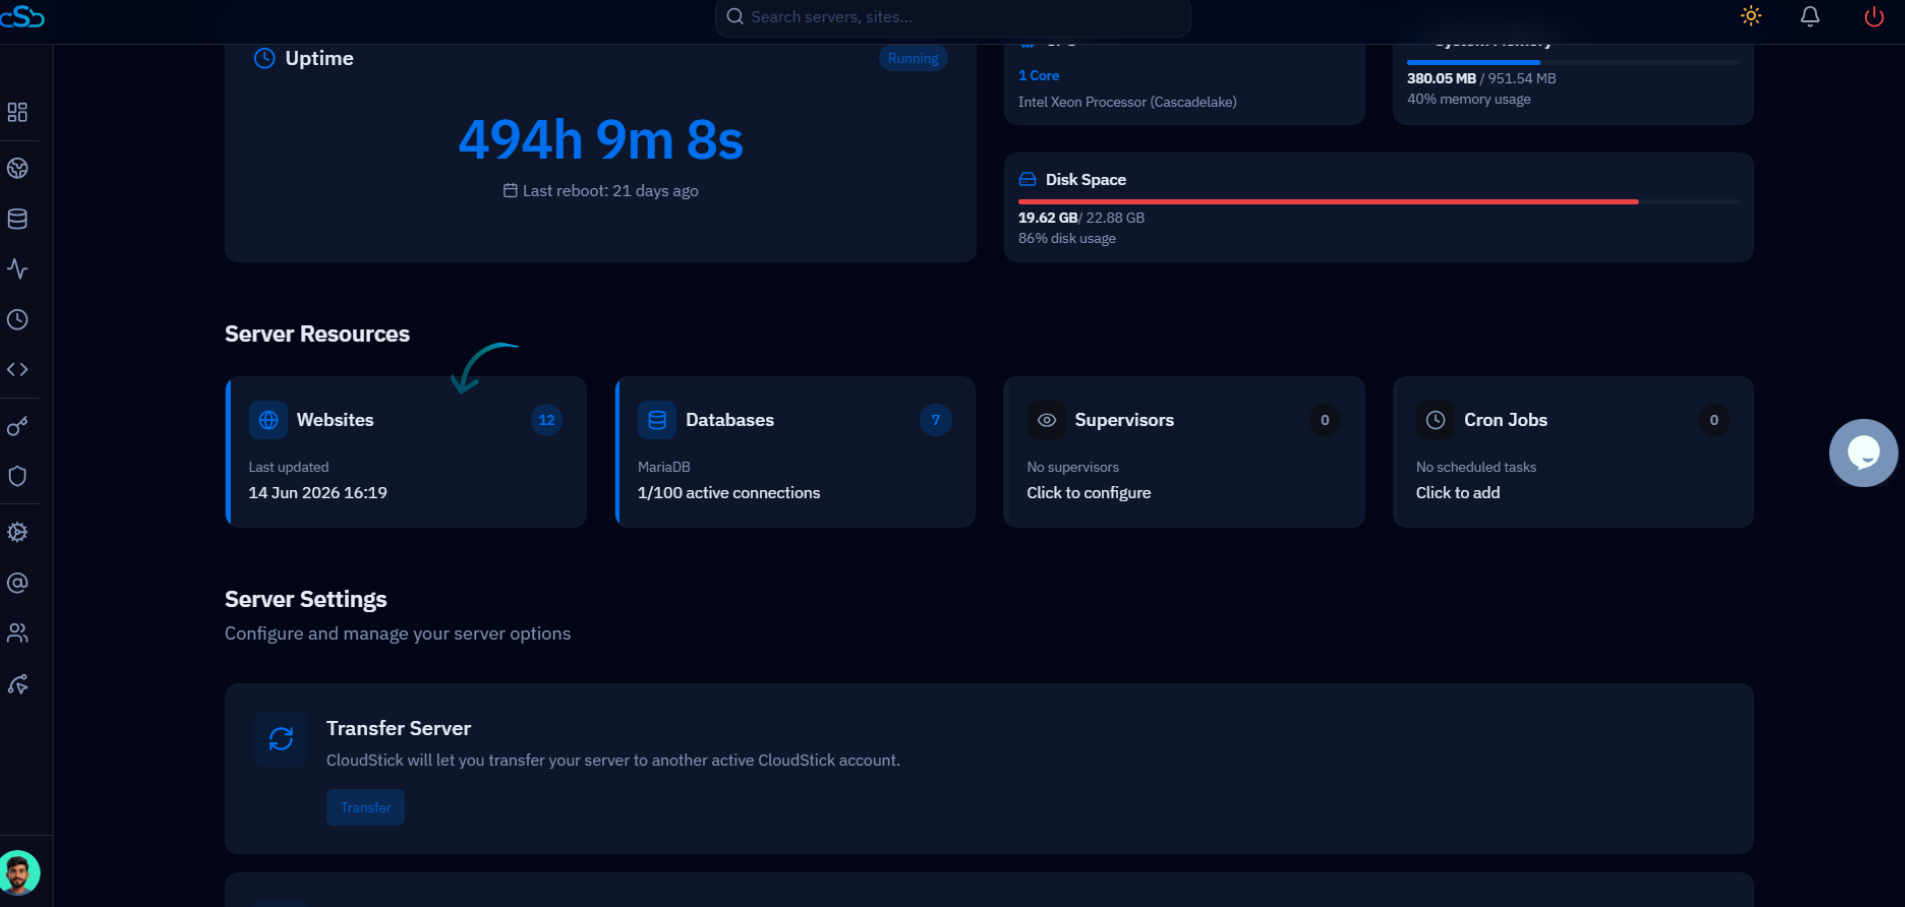
Fig. 01 — Server panel showing the Websites resource card under Server Resources.
Step 2: Select Your Web Application
The WebApp List shows all sites hosted on the server. Open the one whose PHP settings you want to adjust.
1. Browse the WebApp List to find your web application. Each entry shows the site name, domain, system user, web server type, and disk usage.
2. Click on the website name to open its management page.
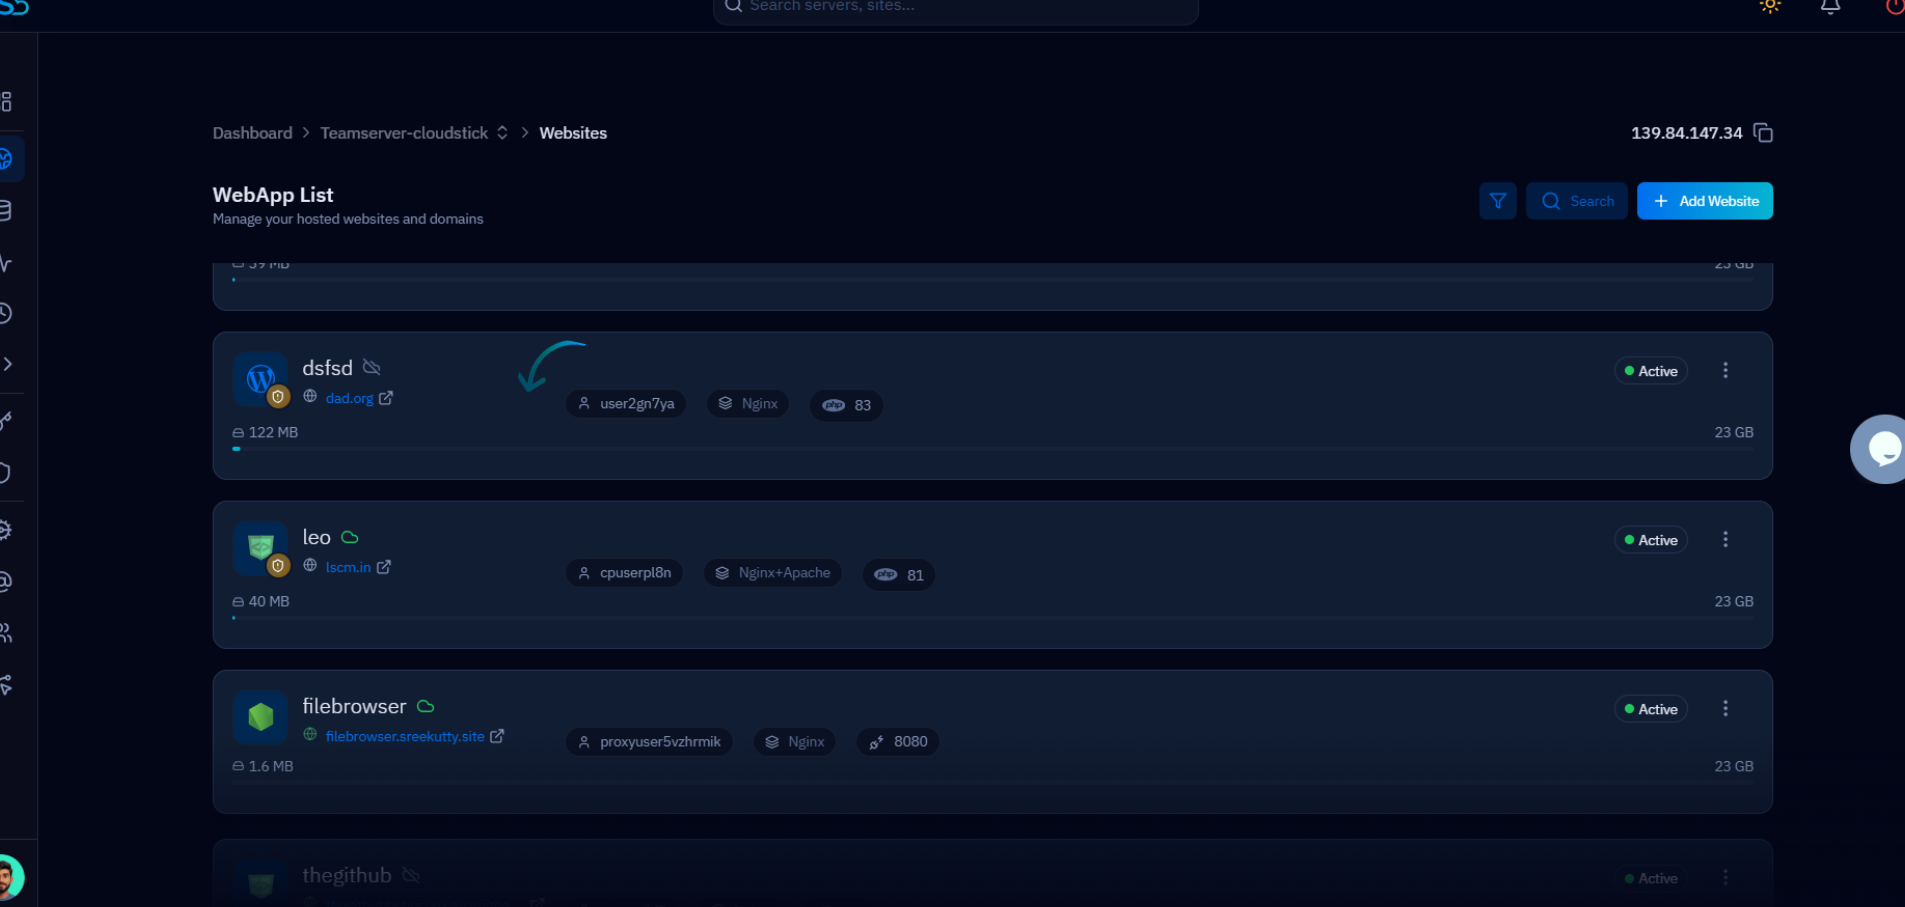
Fig. 02 — WebApp List showing all hosted websites. Click the site name to open its management page.
Step 3: Open the Settings Tab and PHP Settings
The web application management page has a Settings tab that groups all configuration options for that site, including PHP Settings.
1. In the top navigation bar of the website management page, click the "Settings" tab.
2. The Settings page lists all configurable sections: Change Web Stack, Domains, Change Public Path, NGINX Settings, and PHP Settings.
3. Click "PHP Settings" to expand the PHP configuration panel for this web application.
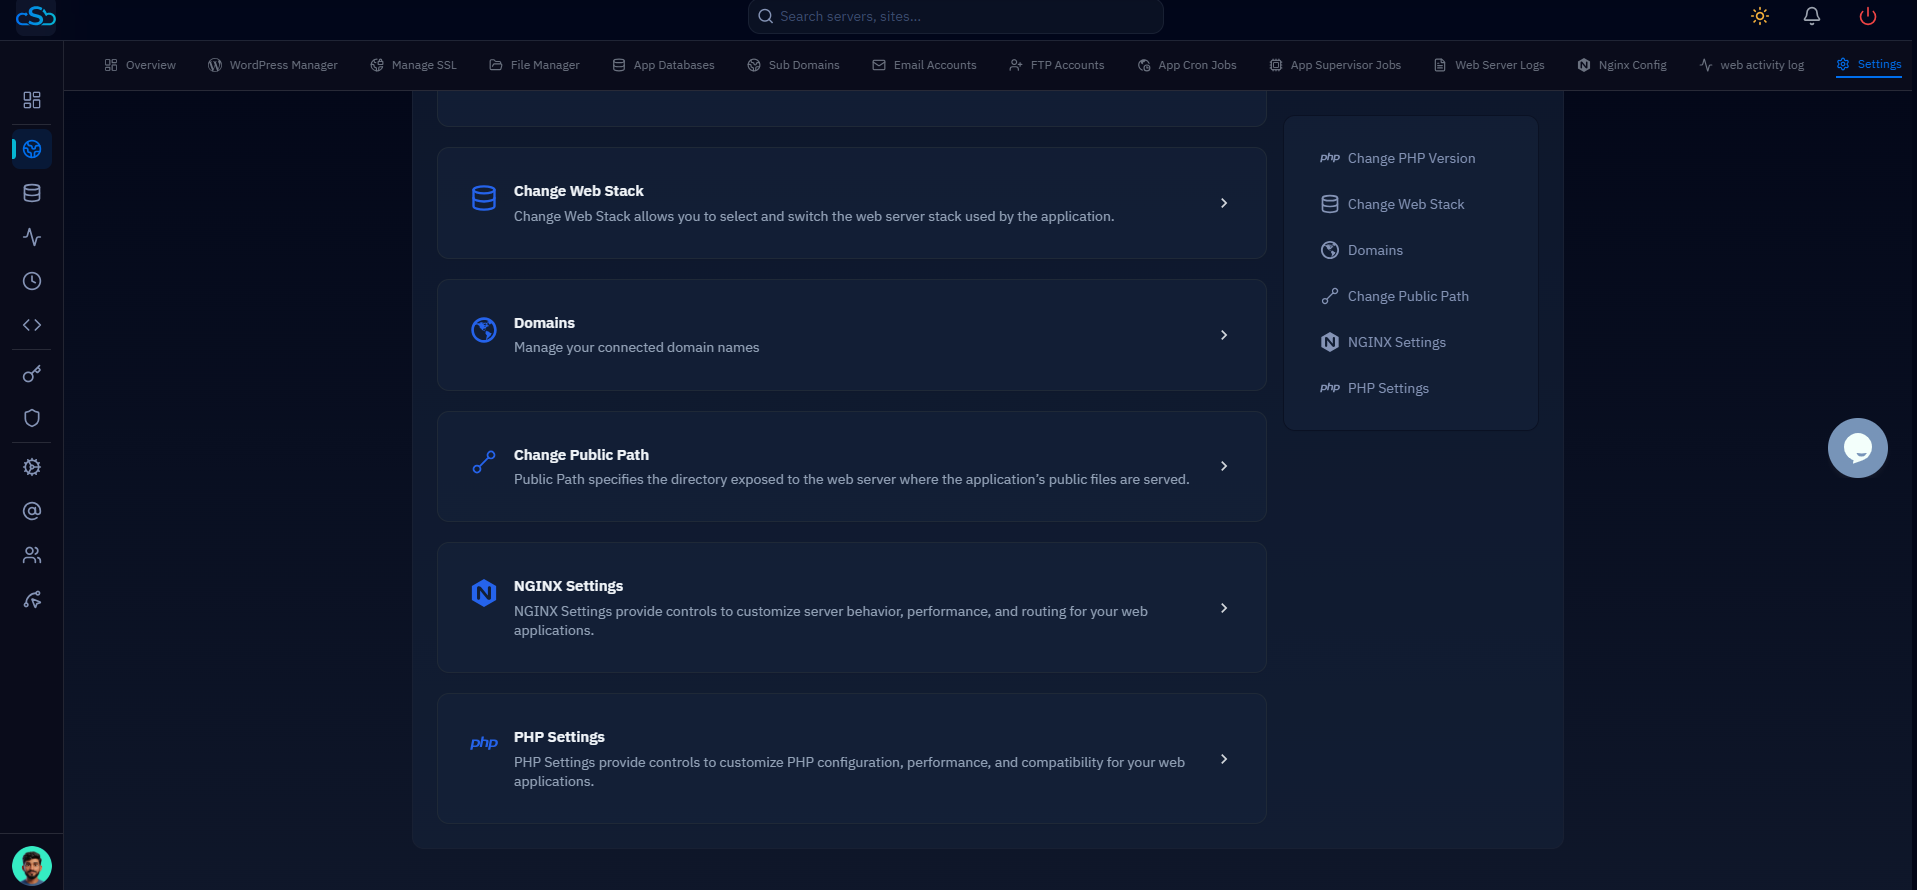
Fig. 03 — Website Settings page with PHP Settings visible in the section list on the right.
Step 4: Update PHP Values and Save
The PHP Settings panel exposes the most commonly adjusted PHP directives. Update any values that need to change for your application.
Common PHP Settings
memory_limit: Maximum memory a single PHP script can use. Increase this for memory-intensive applications like WooCommerce or page builders (e.g. 256M or 512M).
upload_max_filesize: Maximum size of a single uploaded file. Raise this if users need to upload large images, videos, or documents (e.g. 64M or 128M).
post_max_size: Maximum size of the entire POST request body. Must be equal to or larger than upload_max_filesize.
max_execution_time: Maximum seconds a PHP script is allowed to run before it times out. Increase this for long-running imports or batch operations (e.g. 120 or 300).
Applying the Changes
1. Enter the new values in the relevant fields within the PHP Settings panel.
2. Click the "Save" button at the bottom of the panel to apply your changes.
3. PHP-FPM will restart automatically — no manual service restart is needed. The new settings take effect immediately for all new PHP requests to this web application.
Changes are applied per-application only. Other websites on the same server keep their own PHP settings and are not affected.
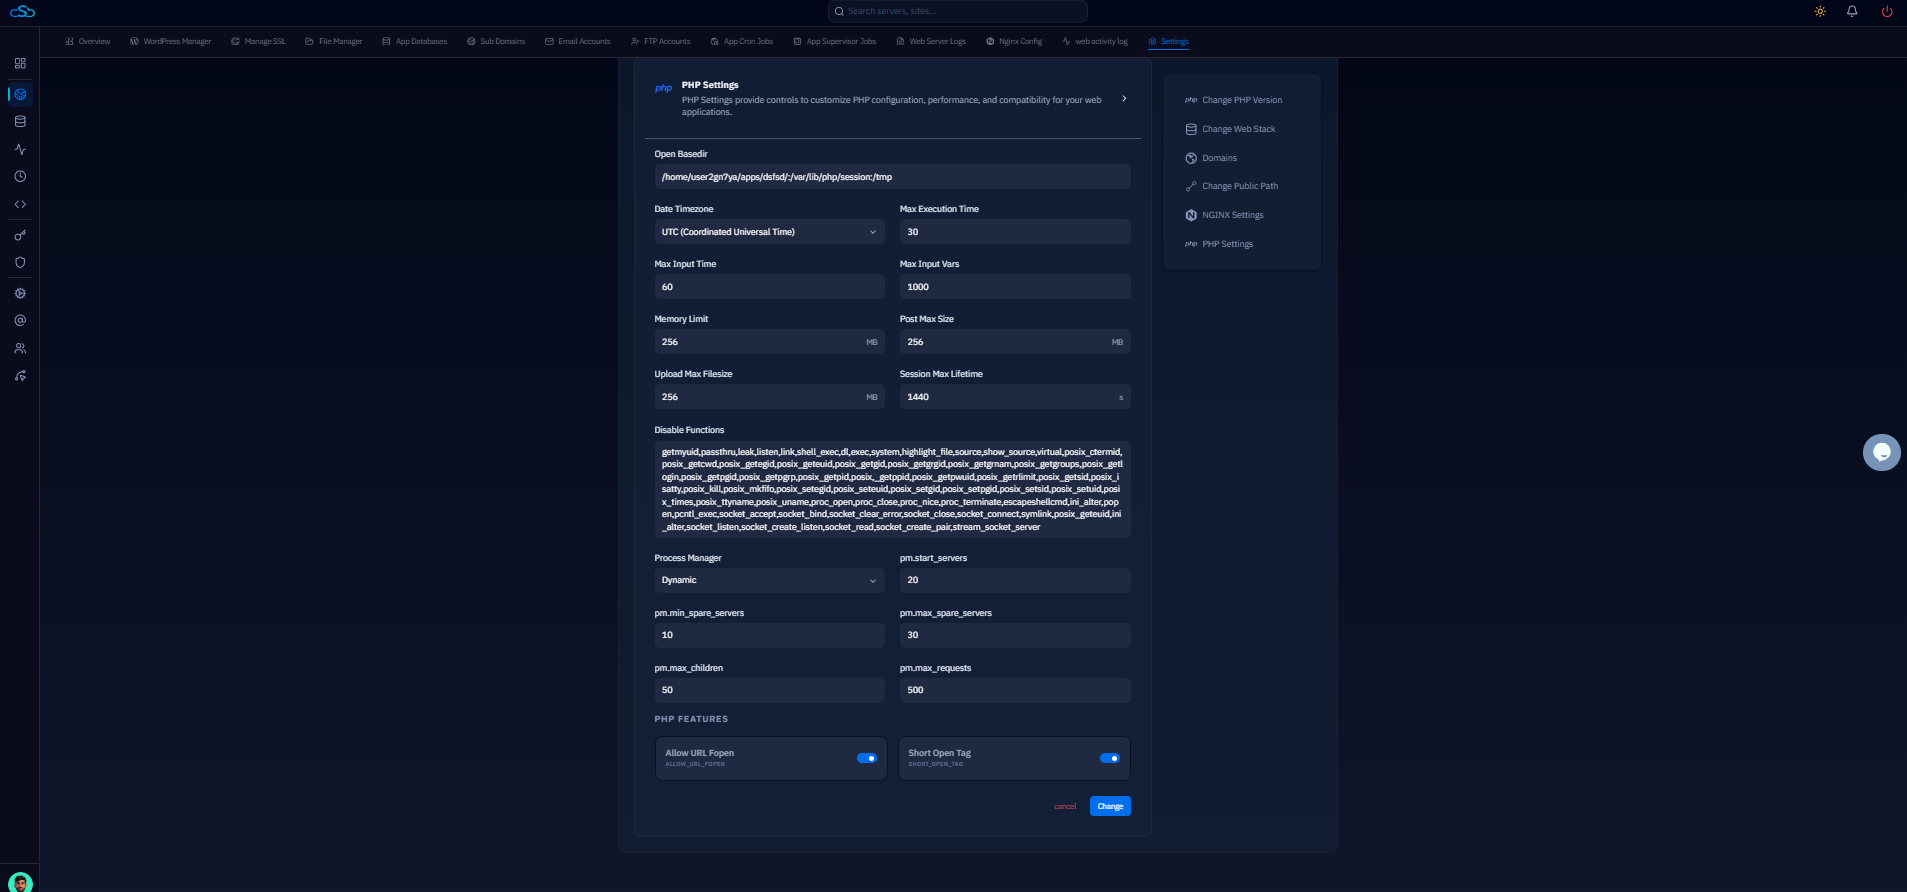
Fig. 04 — PHP Settings panel showing memory_limit, upload_max_filesize, post_max_size, max_execution_time, and other directives with the Save button.