How to Change Provider
Overview
When you connect a server to CloudStick, it is tagged with the cloud provider it runs on — such as Vultr, DigitalOcean, Hetzner, Contabo or AWS. That label keeps your dashboard organized and helps CloudStick present the right provider context for each server. If a server was added under the wrong provider, or you migrated its workload to a different cloud, the provider on record can end up out of date.
The Change Provider tool, found in the server's settings, lets you update the cloud provider associated with a server directly from the dashboard — no need to remove and re-add the server. This guide walks you through selecting your server, opening Server Settings, choosing the new provider, and saving the change.
Changing the provider only updates the provider details recorded in CloudStick. It does not move, migrate, or re-provision the server itself — make sure you select the provider that actually hosts the server.
Step 1: Select Server
Start from the CloudStick Dashboard, where all of your connected servers are listed.
1. Open the Dashboard: Sign in to your CloudStick account to view all connected servers.
2. Select the server: Click the server you want to update to open its server panel.
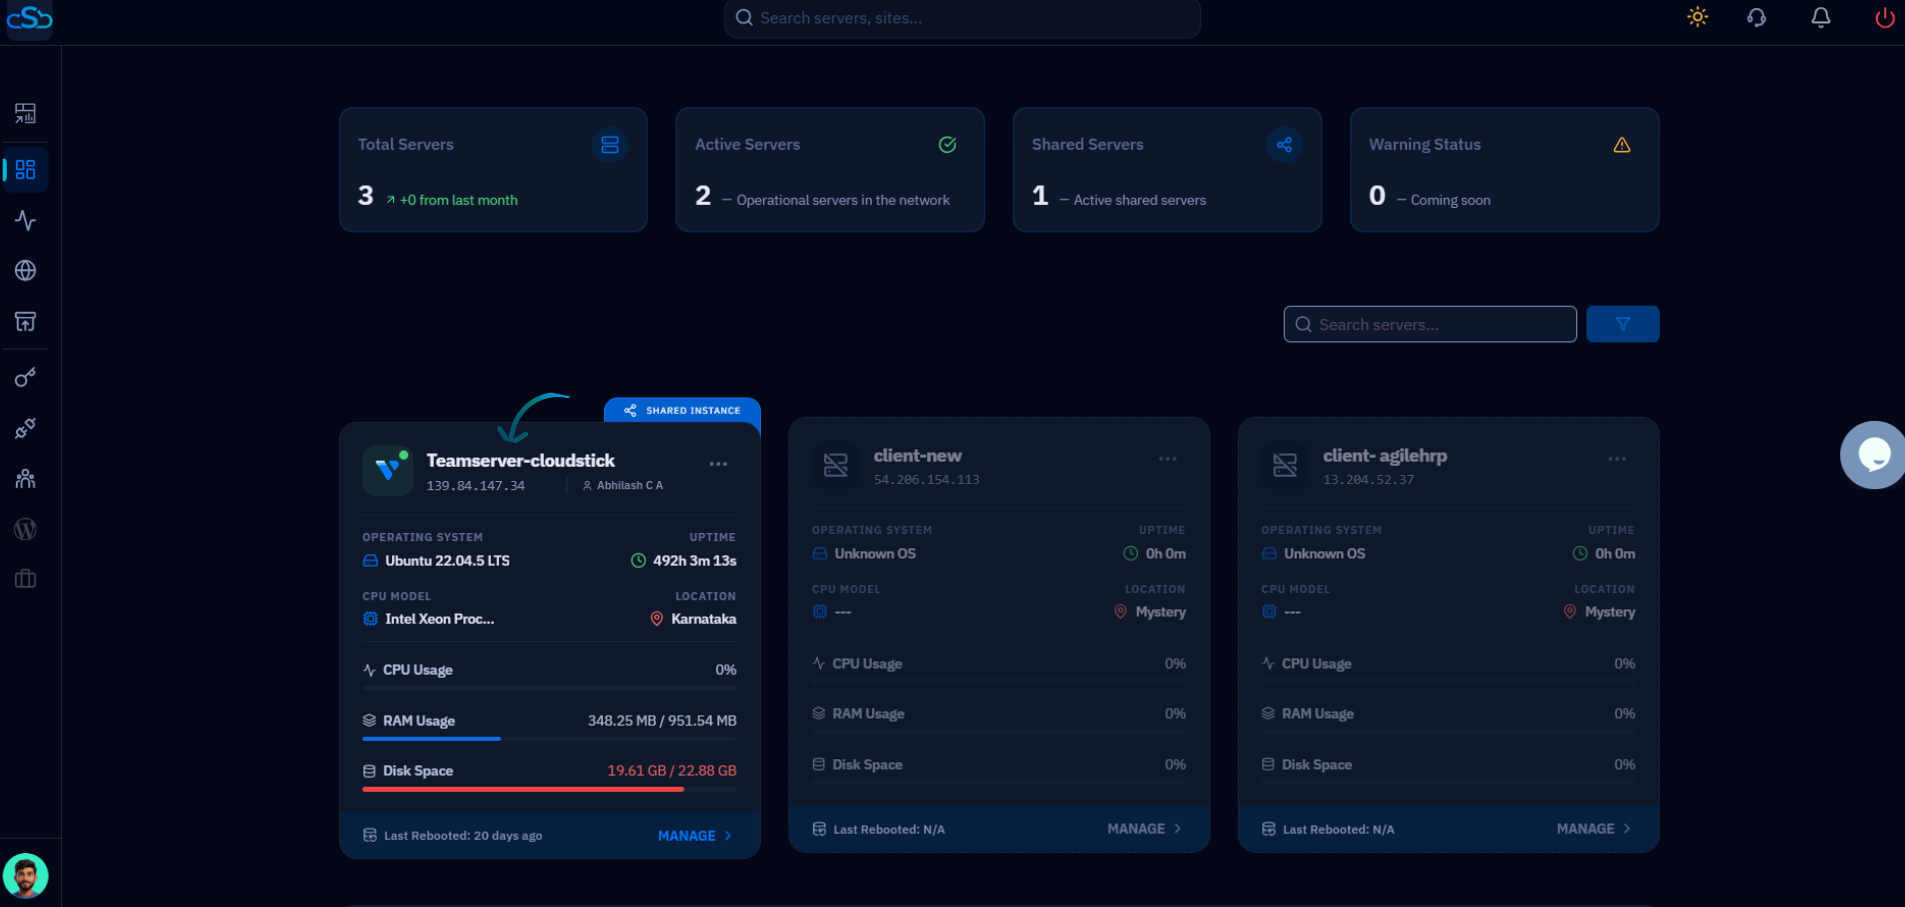
Fig. 01 — The CloudStick Dashboard listing connected servers; click the server card to open its management panel.
Step 2: Open Server Settings
The provider option lives in the server's settings area, alongside other server-level tools such as Change IP and Auto Update.
1. Scroll to Server Settings: Within the server panel, scroll down to the Server Settings section.
2. Open Change Provider: Locate the Change Provider card — which shows the current provider — and click the Change button to reveal the provider options.
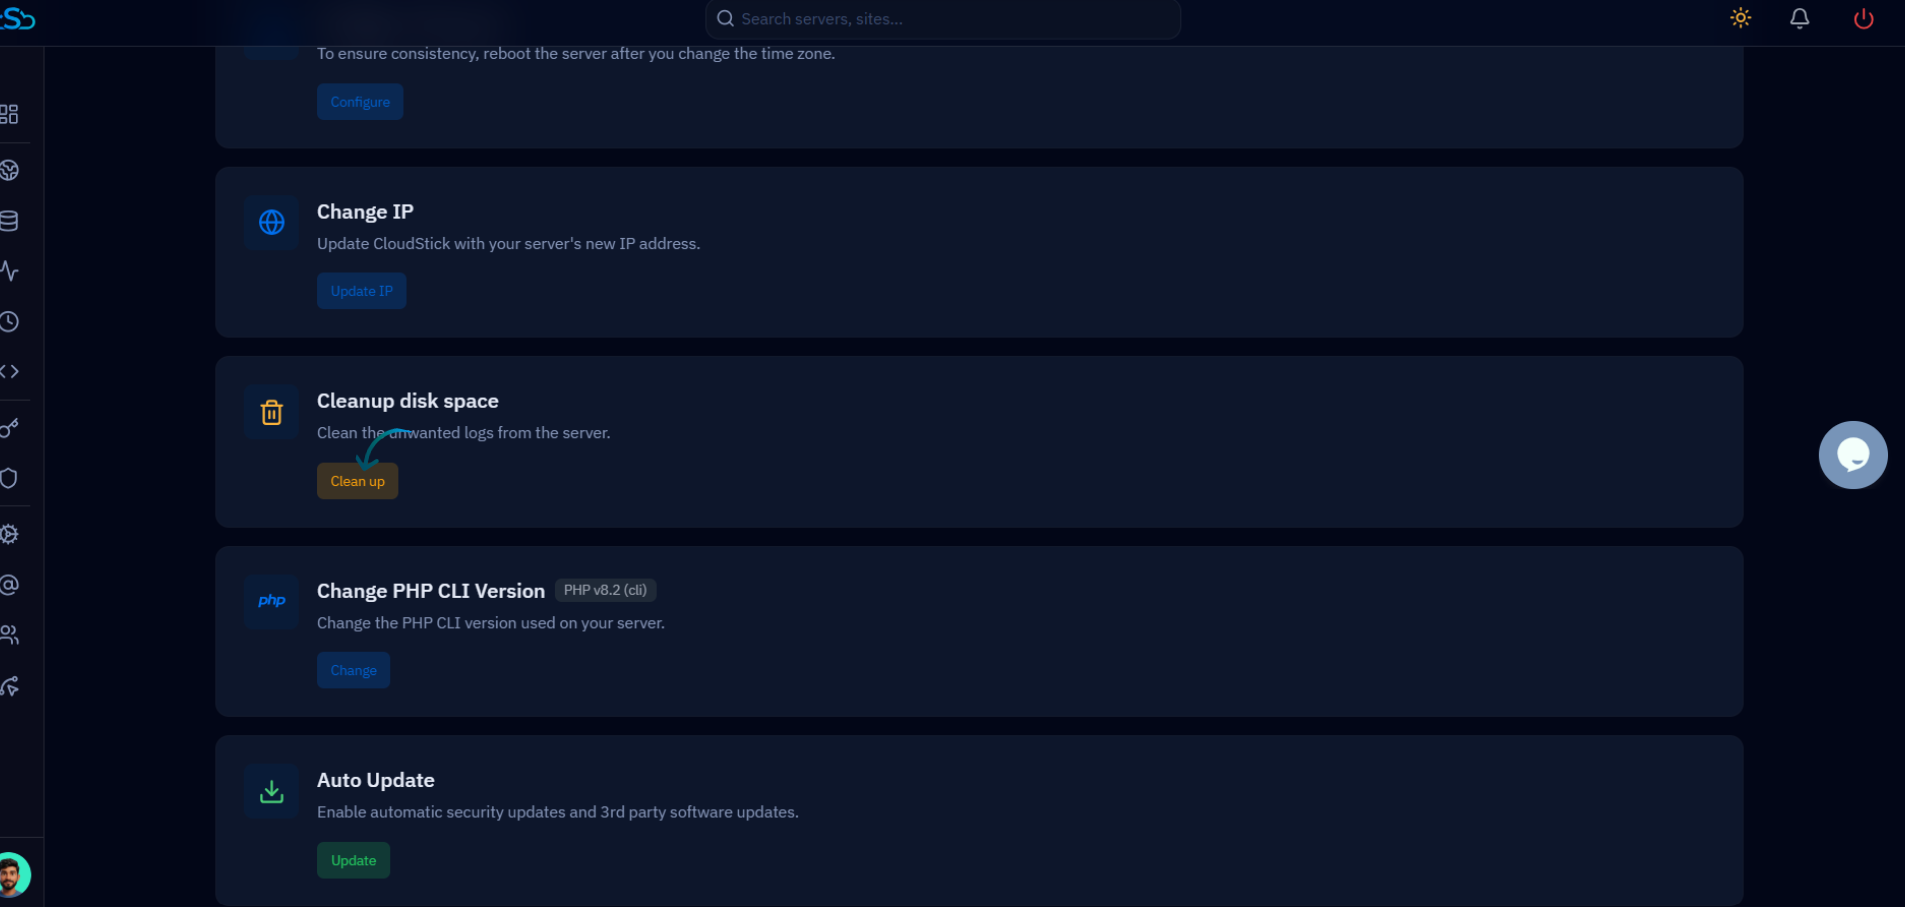
Fig. 02 — The Server Settings section, where server-level tools such as Change IP, Cleanup disk space and Change Provider are grouped.
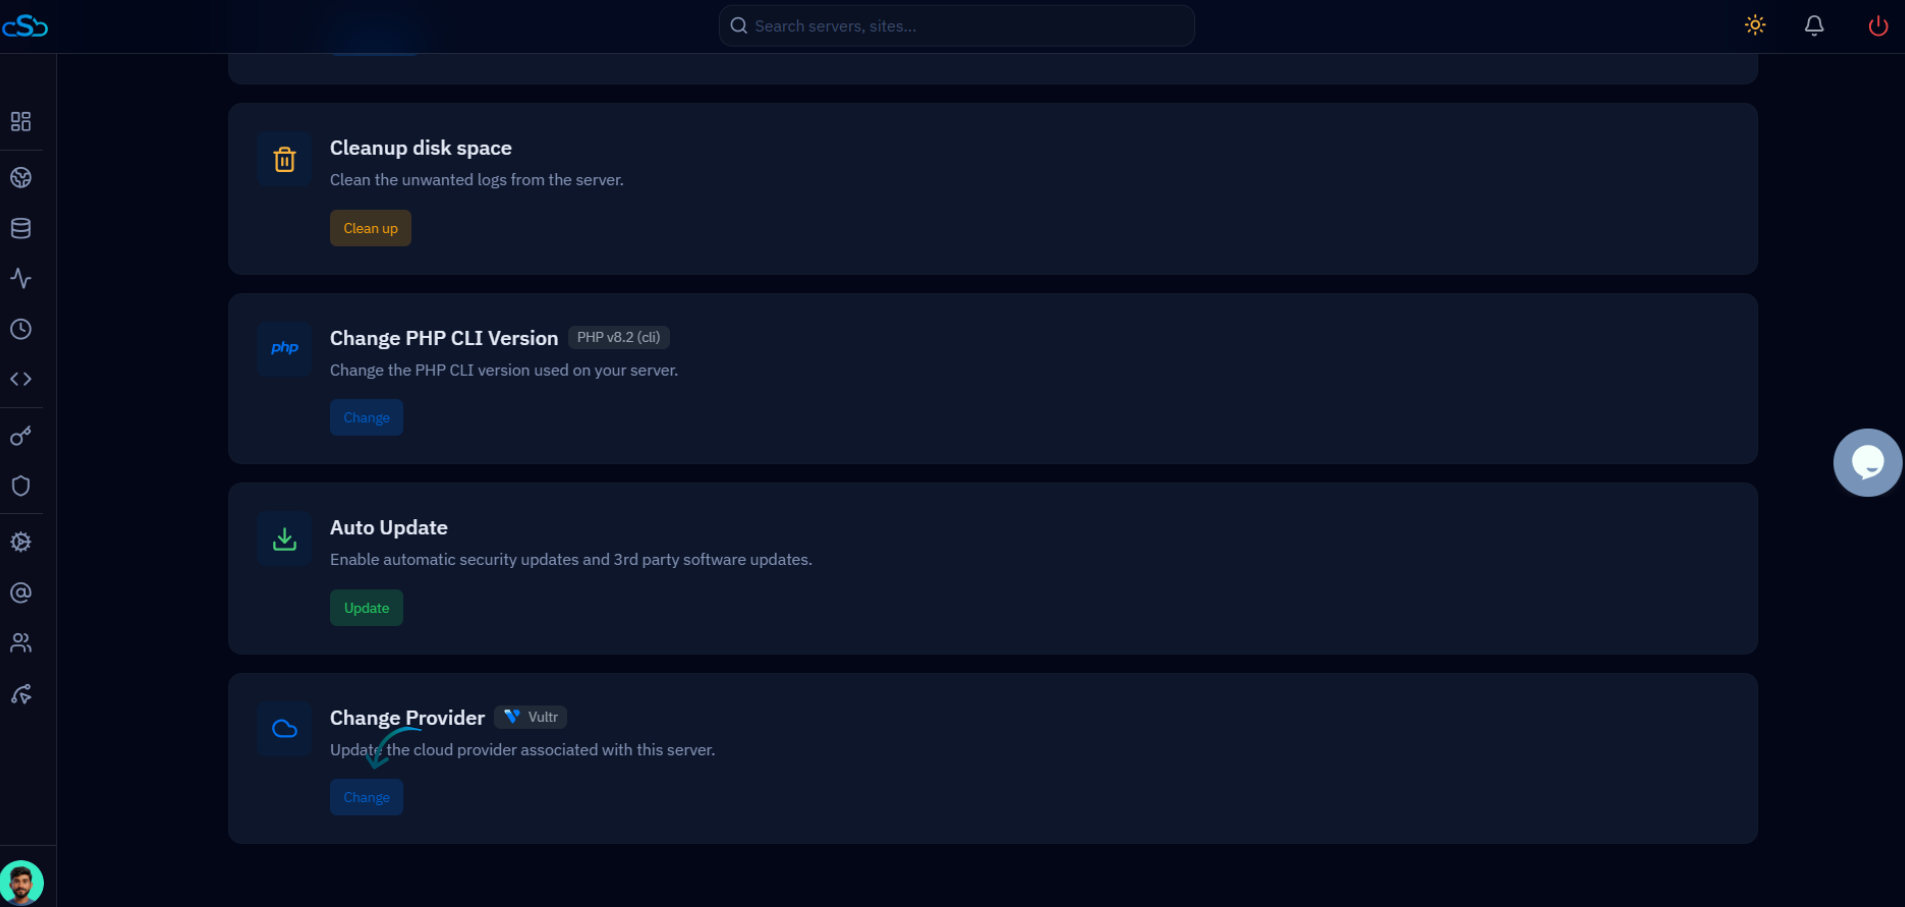
Fig. 03 — The Change Provider card showing the current provider; click Change to update it.
Step 3: Choose Provider
Pick the cloud provider that should be associated with this server from the list of supported providers.
1. Open the provider list: Click the Select Provider dropdown to expand the list of supported cloud providers.
2. Select the new provider: Choose the provider that hosts your server — for example Akamai, Vultr, DigitalOcean, Hetzner Cloud, Contabo, RackNerd or AWS Lightsail.
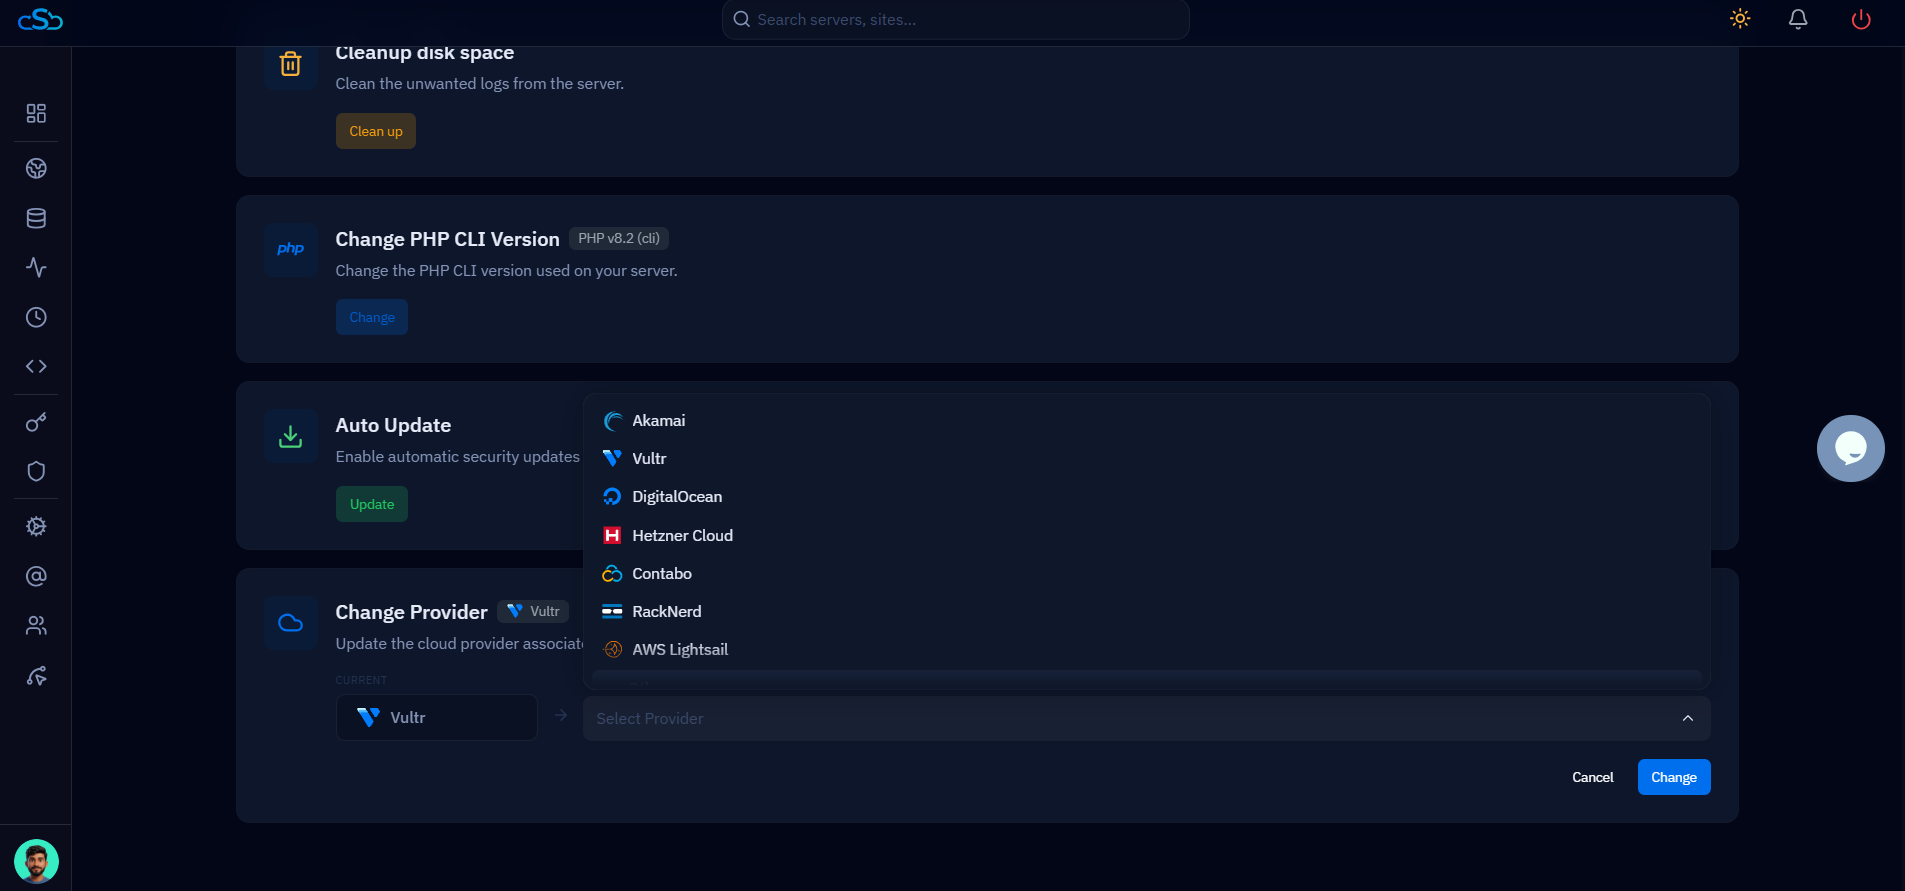
Fig. 04 — The Select Provider dropdown expanded, listing the supported cloud providers you can associate with the server.
Step 4: Save Changes
Confirm your selection so CloudStick records the new provider for the server.
1. Save the change: With the new provider selected, click Change to update the provider details for the server.
2. Cancel if needed: If you want to discard your selection without updating anything, click Cancel instead.
After changing the provider, ensure all server configurations are correct and the server is properly connected to the new cloud environment.