How to Change Server SSH Port?
Overview
By default, SSH listens on port 22 — a well-known port that automated scanners and bots target constantly. Changing your SSH port to a non-standard number is one of the simplest and most effective ways to reduce the volume of unauthorized login attempts against your server. CloudStick makes this change through a graphical interface, so no terminal access or command-line knowledge is required.
This guide walks you through the four steps to change your server's SSH port from the CloudStick dashboard: selecting your server, navigating to the SSH Keys section, opening SSH Configuration, and saving the new port. The change takes effect automatically — CloudStick updates the server configuration without any manual service restarts.
Before you change the SSH port, you must open the new port in your cloud provider's firewall or security group (e.g. AWS Security Group, DigitalOcean Firewall, Hetzner Firewall). If you do not open the port via TCP protocol first, you will lose SSH access to your server after saving the change. You can also open the port in CloudStick's CSF Firewall — see the How to open a port in CloudStick server guide.
Step 1: Log In and Select Your Server
Start by signing in to your CloudStick account. The main dashboard displays all servers connected to your account, each showing real-time CPU, RAM, and disk stats. Identify the server whose SSH port you want to change and click MANAGE on its card to open the server panel.
1. Sign in: Go to dash.cloudstick.io and log in with your CloudStick credentials.
2. Locate your server: Find the server card on the dashboard. Each card shows the server name, IP address, OS, and live resource usage.
3. Click MANAGE: Click the MANAGE button at the bottom-right of the server card to open the server's management panel.
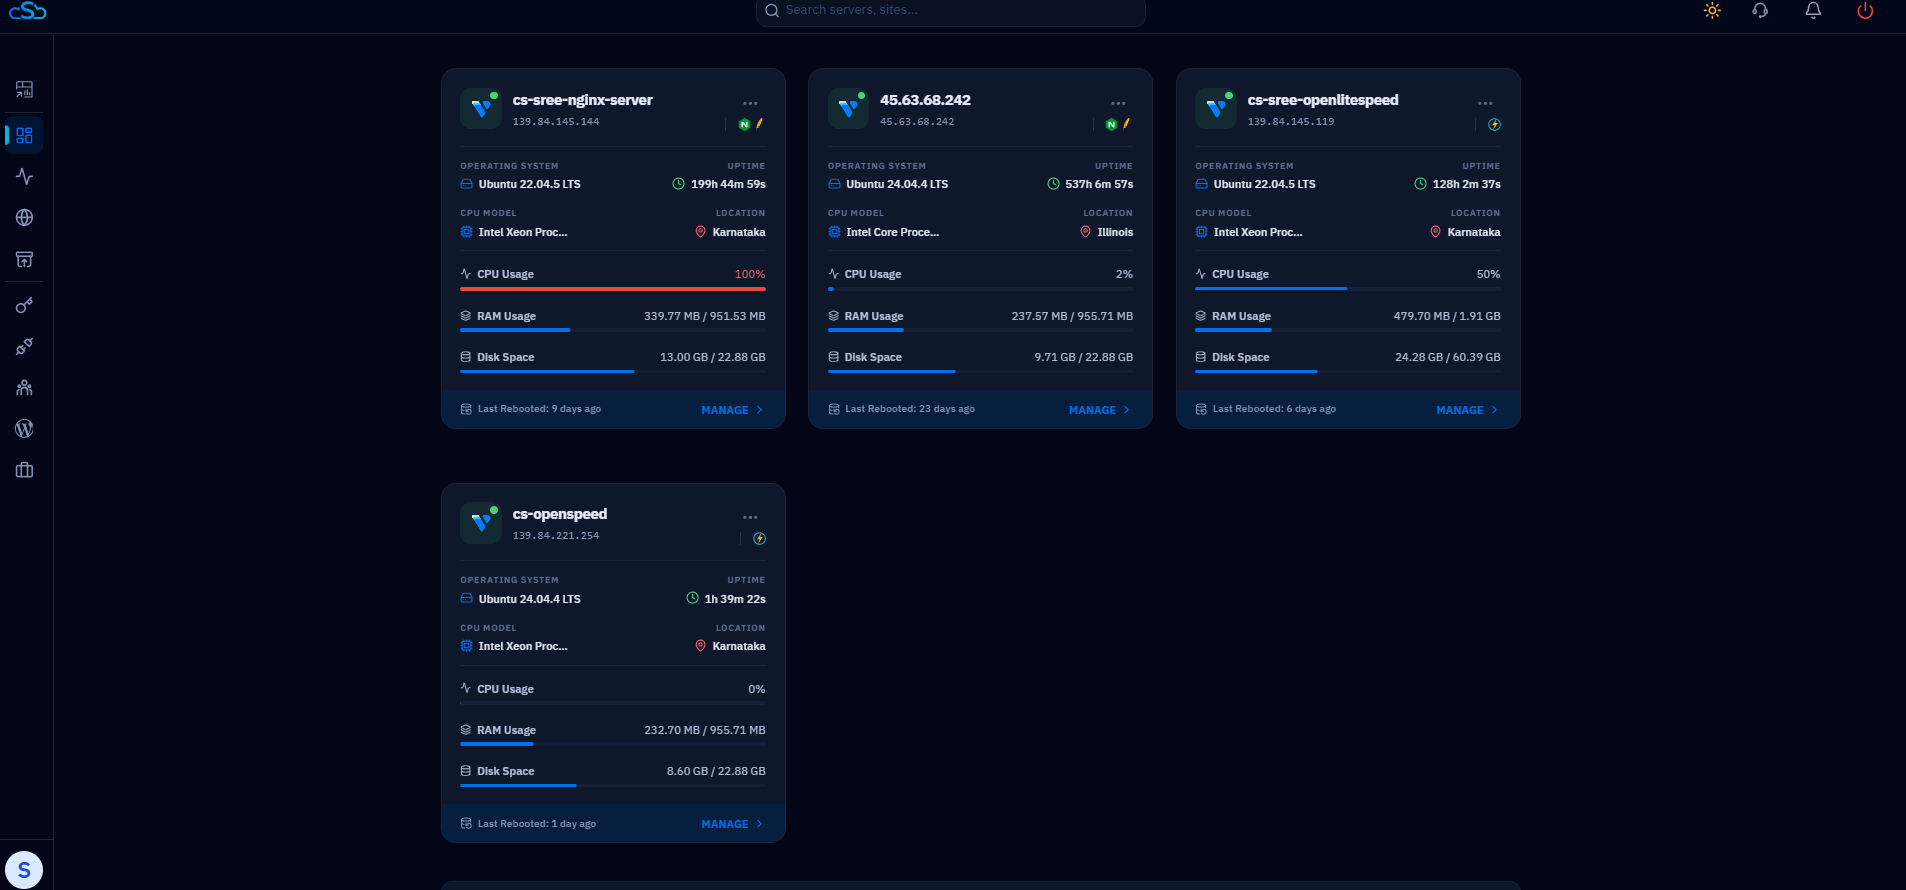
Fig. 01 — CloudStick dashboard showing connected servers. Click MANAGE on the target server card.
Step 2: Open the Server Panel
After clicking MANAGE, you are taken to the server's overview page. This page shows system information, uptime, resource usage, and quick-access cards for Websites, Databases, Supervisors, and Cron Jobs. From here you will use the left-hand navigation to reach the SSH Keys section.
1. Review the server overview: Confirm you are on the correct server by checking the server name and IP address displayed at the top of the panel.
2. Locate the left-hand navigation: The icon-based sidebar on the left side of the panel gives access to all server management sections including Websites, Databases, SSH Keys, Security, and more.
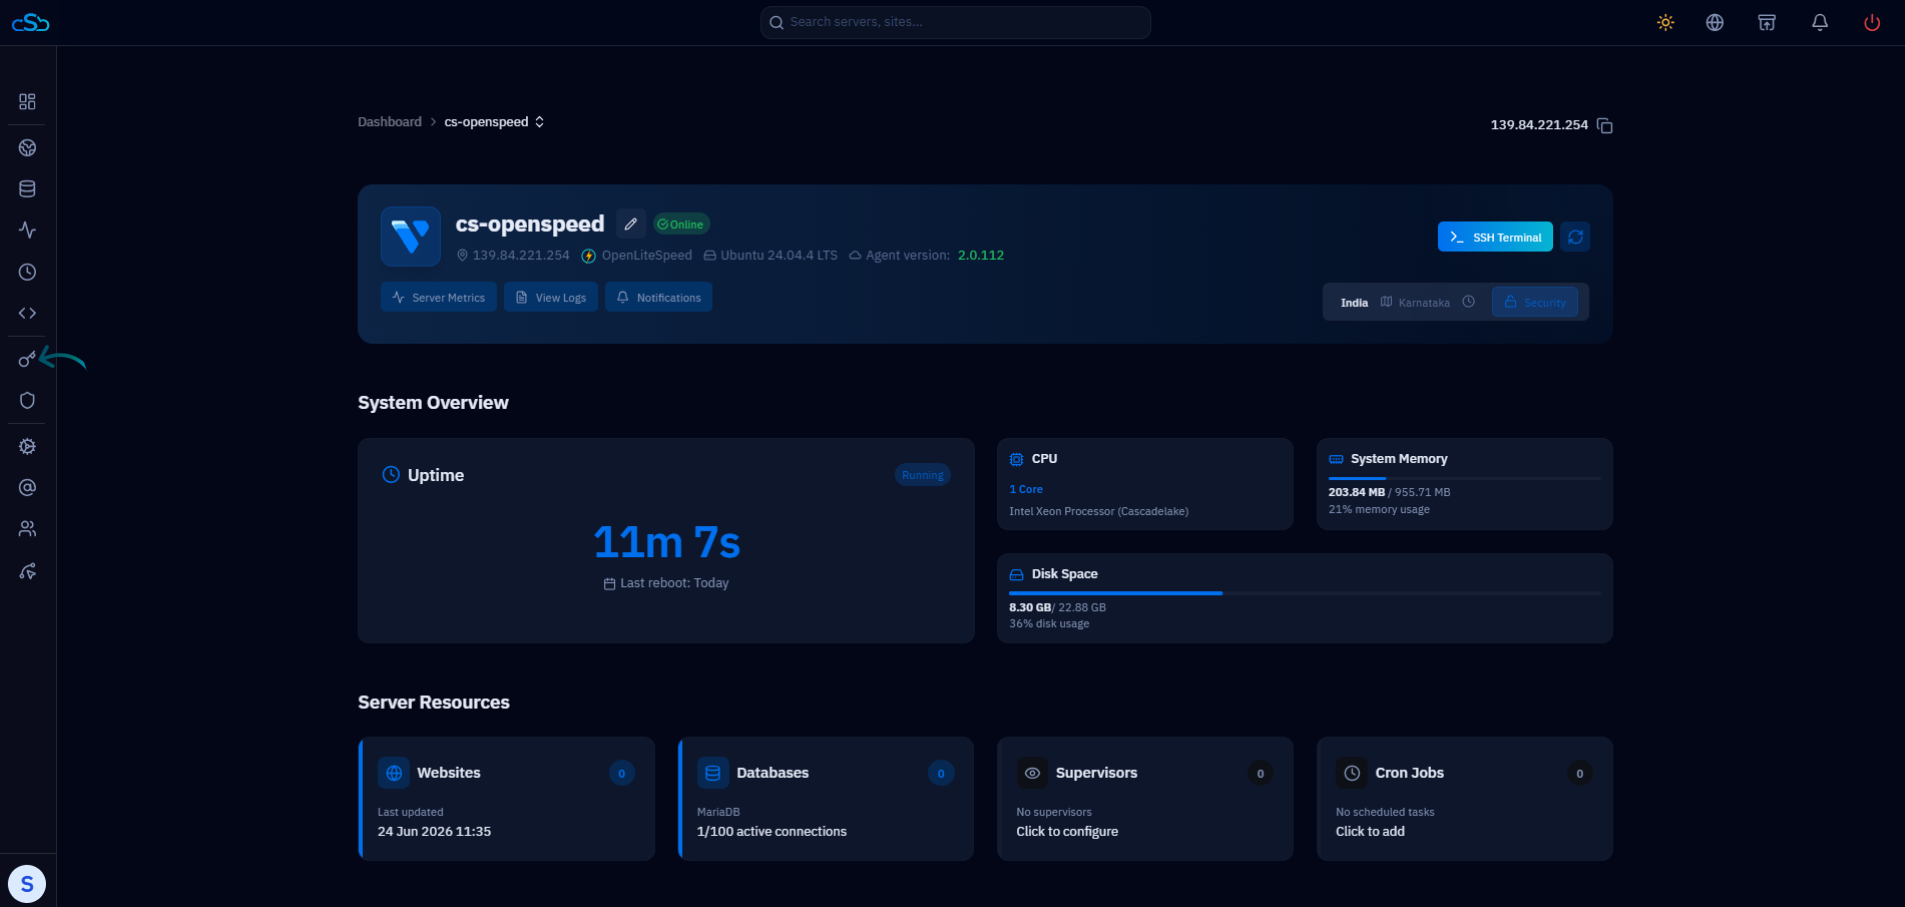
Fig. 02 — Server overview panel showing system metrics and the left-hand navigation sidebar.
Step 3: Navigate to SSH Keys and Open SSH Configuration
The SSH port setting is housed inside the SSH Configuration panel, which is accessible from the SSH Keys page. This is also where you manage public key authentication, root login permissions, and DNS lookup behavior for SSH connections.
1. Click the SSH Keys icon: In the left-hand navigation, click the key icon to open the SSH Keys page. The page heading reads 'SSH Keys — Here you can manage public keys used for SSH access to this server.'
2. Click SSH Configuration: In the top-right corner of the SSH Keys page, click the SSH Configuration button (shown with an arrow indicator). A configuration panel slides open on the right side.
The SSH Configuration panel also lets you toggle Password Authentication, Permit Root Login, Use DNS, and Pubkey Authentication. These settings apply globally to the server's SSH daemon.
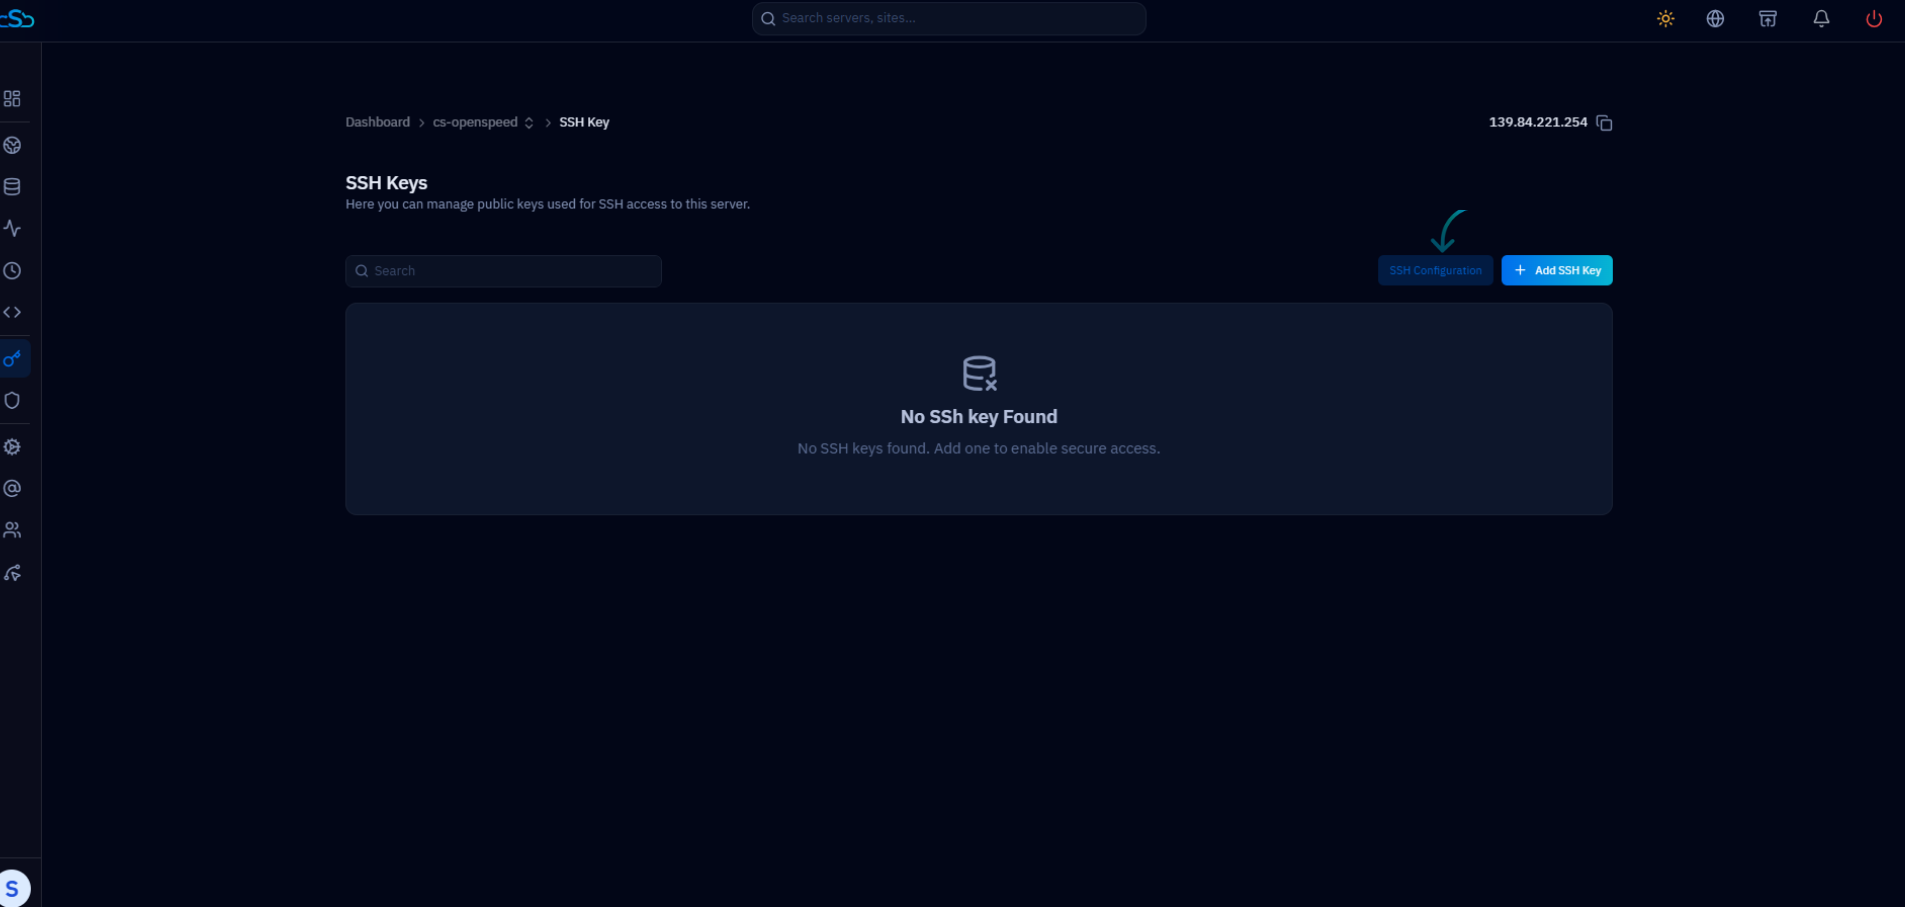
Fig. 03 — SSH Keys page with the SSH Configuration button highlighted in the top-right corner.
Step 4: Change the SSH Port and Save
With the SSH Configuration panel open, you can see the current SSH port number and enter a new one. CloudStick applies the change to the server's SSH daemon configuration automatically when you save — no manual service restart is needed.
1. Find the SSH Port field: Scroll to the bottom of the SSH Configuration panel. You will see an 'SSH Port' section showing the current port number (default is 22).
2. Enter the new port number: Clear the existing value in the input field and type your new port number. Choose a port above 1024 that is not already in use on your server (e.g. 2222, 2244, 8822).
3. Click Save: Click the Save button next to the port input field. CloudStick will update the SSH daemon configuration on your server and activate the new port.
After saving, reconnect to your server using the new port number. For example: ssh user@your-server-ip -p NEW_PORT. Your new SSH port is now active and the change is complete.
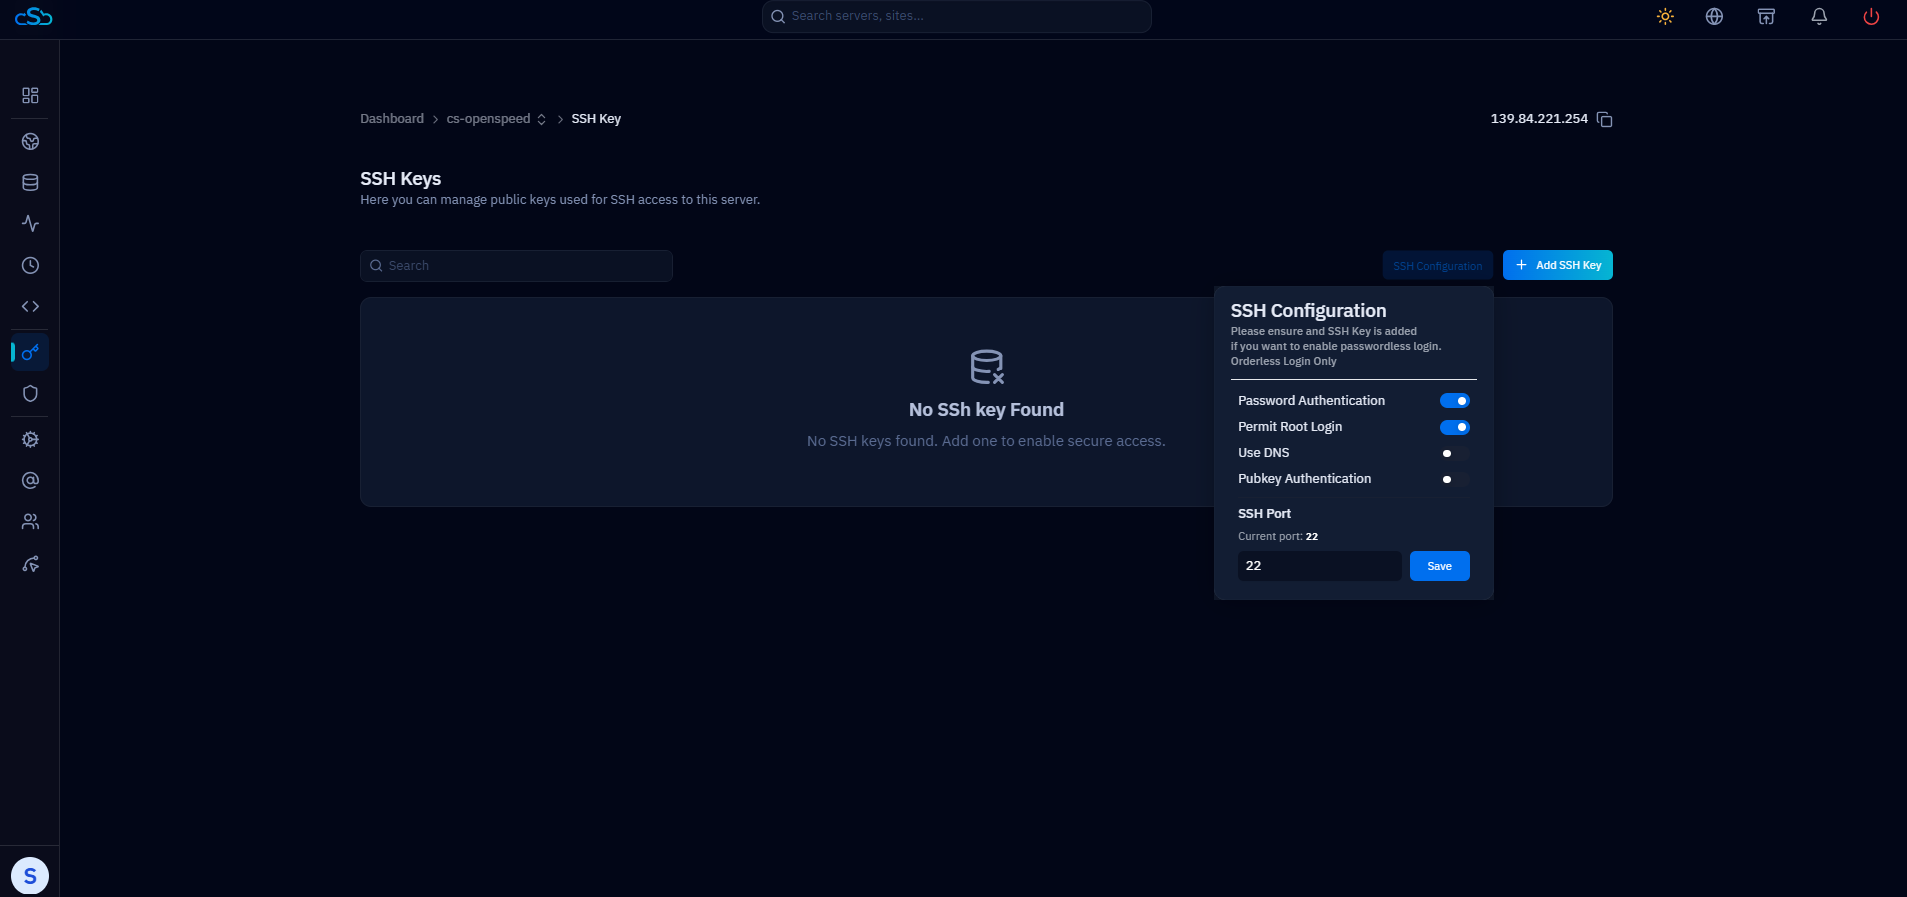
Fig. 04 — SSH Configuration panel showing the SSH Port field with the current port 22 and the Save button.