How to Change the Server IP Address
Overview
CloudStick manages your server by communicating with the management agent installed on it, and that connection depends on the server's IP address being correct. If your server's IP changes — for example after migrating to a new provider, switching to a static IP, or being reassigned a new address by your host — CloudStick needs to know the new address so it can continue managing websites, databases, backups, and every other service without interruption.
Rather than reconnecting the server from scratch, CloudStick lets you update the stored IP address directly from the dashboard. This guide walks you through selecting your server, opening Server Settings, entering the new IP in the Change IP card, and saving so CloudStick reconnects to your server at its new address.
Make sure the new IP address is active and properly configured on the server before applying the change. Entering an incorrect or unreachable IP can break CloudStick's connection to the server and affect management of your sites.
Step 1: Select Your Server
Start from the CloudStick Dashboard, where all of your connected servers are listed.
1. Open the Dashboard: Sign in to your CloudStick account to view all connected servers.
2. Select the server: Click the server whose IP address you want to update to open its server panel.

Fig. 01 — The CloudStick Dashboard listing connected servers; click the server card to open its management panel.
Step 2: Open Server Settings
The IP control lives in the server's settings area, alongside other server-level options such as Transfer Server and Configure Timezone.
1. Scroll to Server Settings: Within the server panel, scroll down to the Server Settings section.
2. Locate the Change IP card: Find the Change IP card, which is used to update CloudStick with your server's new IP address.
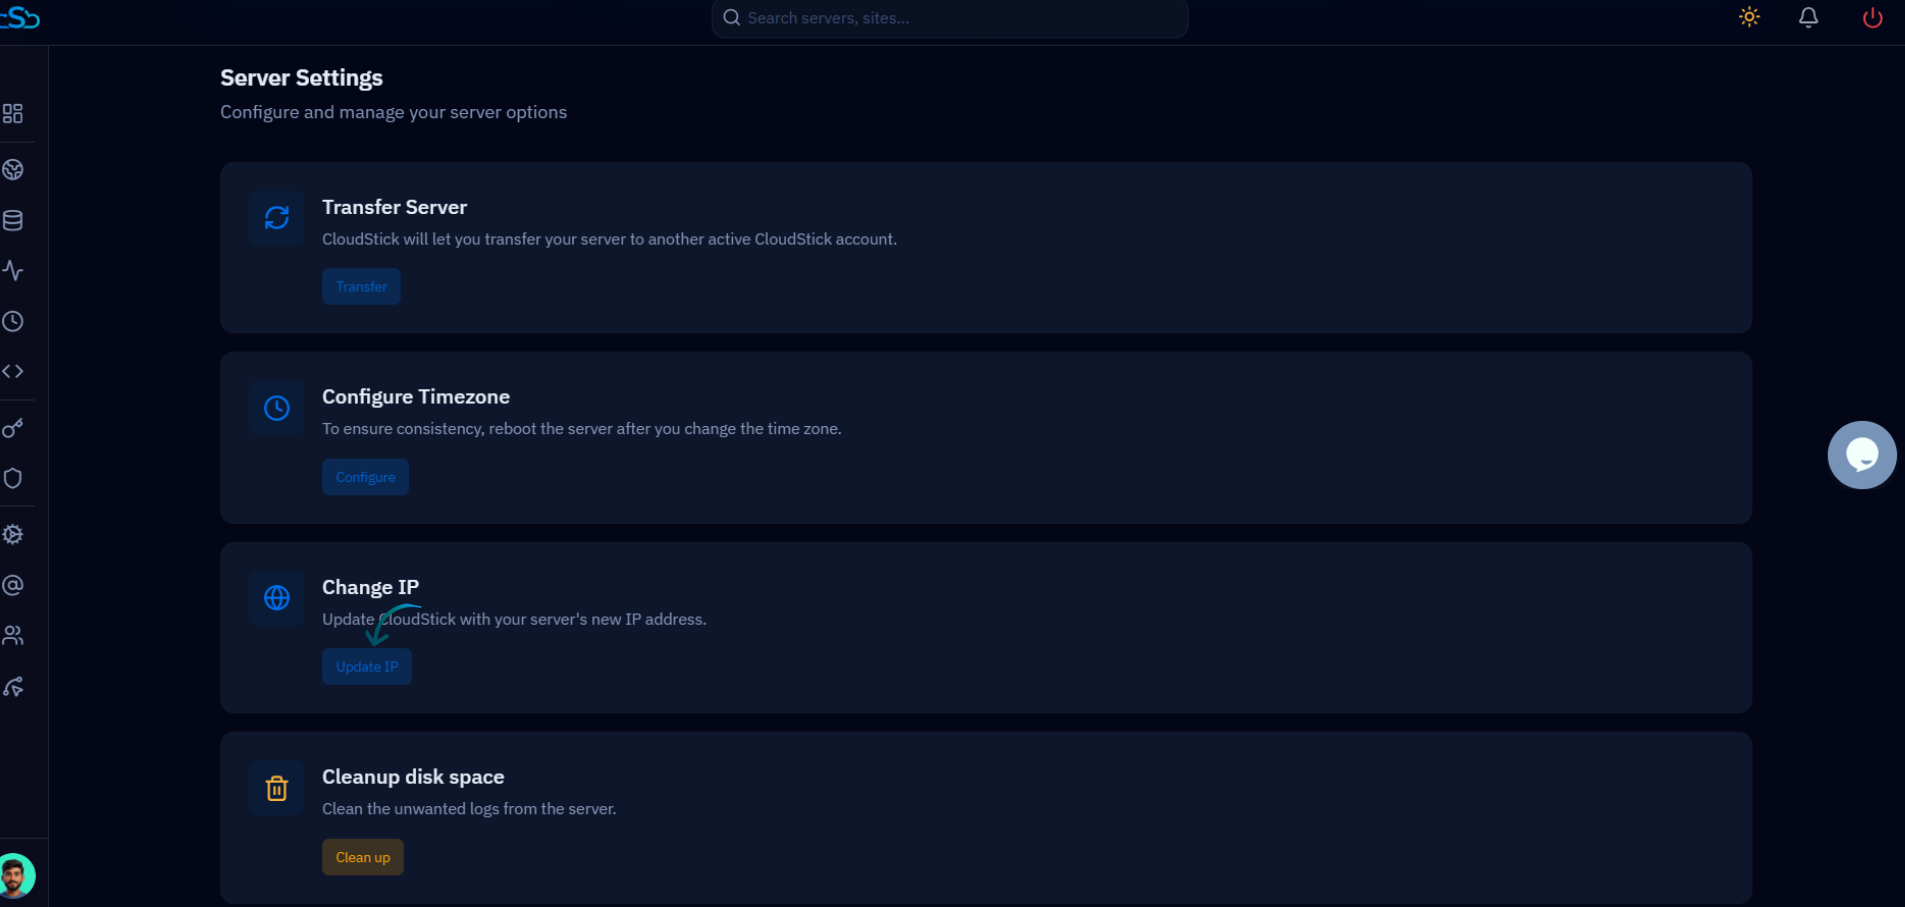
Fig. 02 — The Server Settings section showing the Change IP card and its Update IP button.
Step 3: Enter the New IP Address
Provide the new address that CloudStick should use to reach your server.
1. Enter the new IP: Type the server's new IP address into the provided IP field in the Change IP card.
2. Double-check the value: Confirm the address is typed correctly, as an incorrect IP will prevent CloudStick from connecting to the server.

Fig. 03 — Entering the new server IP address in the Change IP field, with Cancel and Update options below.
Step 4: Save Changes
Confirm your entry so CloudStick can store the new IP for this server.
1. Click Update: With the new IP entered, click the Update button to save the new server IP configuration.
If you entered the wrong value or no longer want to make the change, click Cancel instead of Update to discard your entry.
Step 5: Apply Configuration
Once saved, CloudStick takes care of pointing its management connection to the new address.
1. CloudStick applies the change: CloudStick automatically updates the server settings to use the new IP address and reconnects to your server.
2. Verify the connection: Confirm the server still reports as connected and its stats continue to update, indicating the new IP is working.
After the IP change is applied, all of CloudStick's management features — websites, databases, backups, and monitoring — continue to operate using the server's new address.